How to – Use the new command designer to customize the command bar – Dynamics 365 / Power Apps


Using the modern app designer either open an existing model-driven app or create a new model-driven app in https://make.powerapps.com/

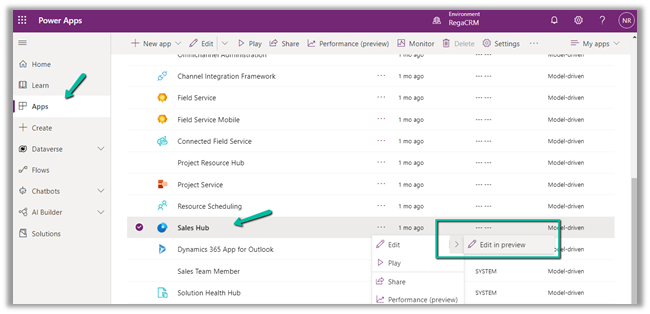
Select Edit >> Edit in preview
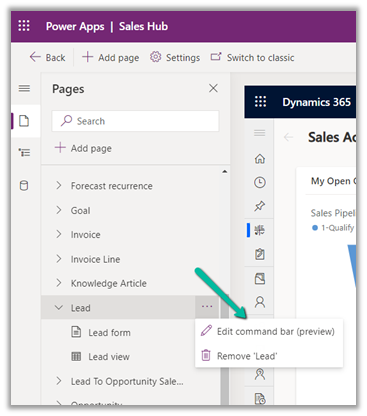
Select any entity/table and select the Edit command bar (preview)
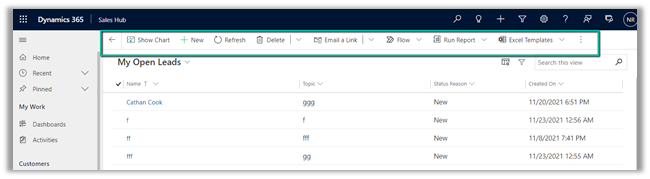
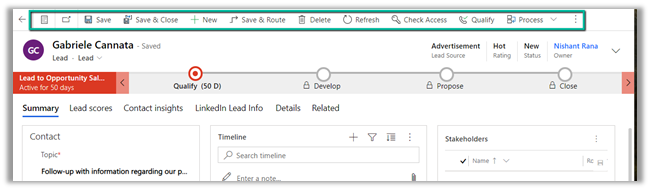
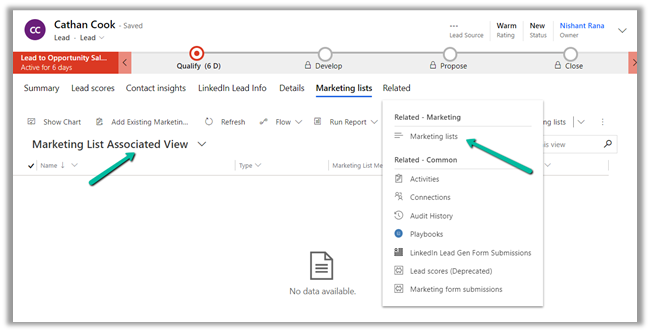
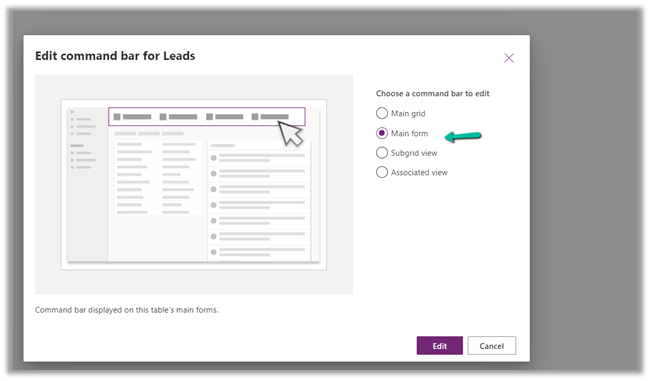
The different command bars that can be edited are the Main grid, main form, subgrid view, and the associated view.
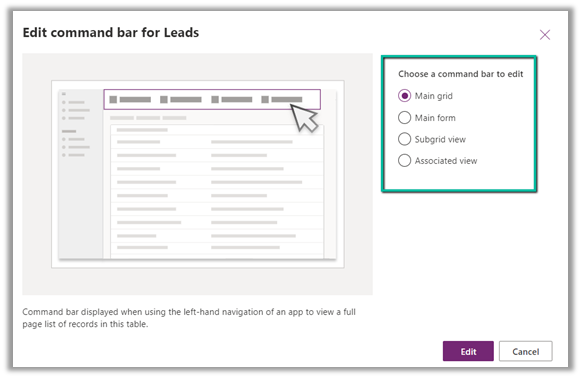
  • Main Grid view–

  • Main Form view –

  • Subgrid view–

  • Associated view –

The legacy / classic button is not supported currently.
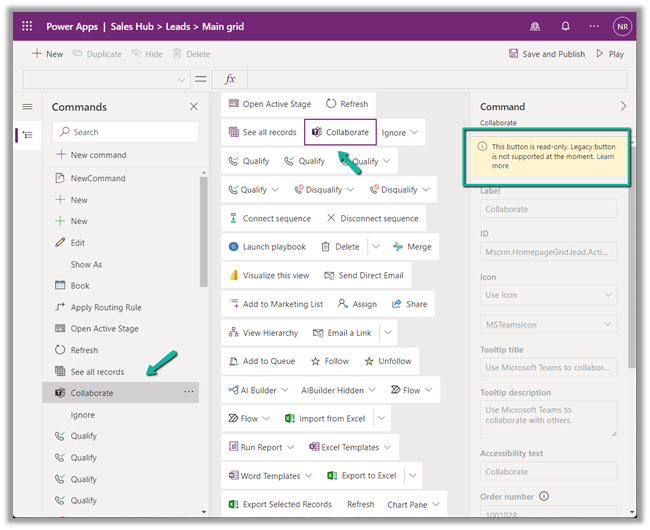
Check out all the known limitations

https://docs.microsoft.com/en-gb/powerapps/maker/model-driven-apps/command-designer-limitations

limi

Let us try adding a new command/button in the Main Form, and see what options do we get there.
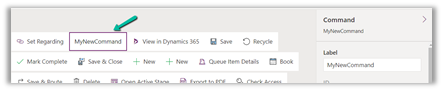
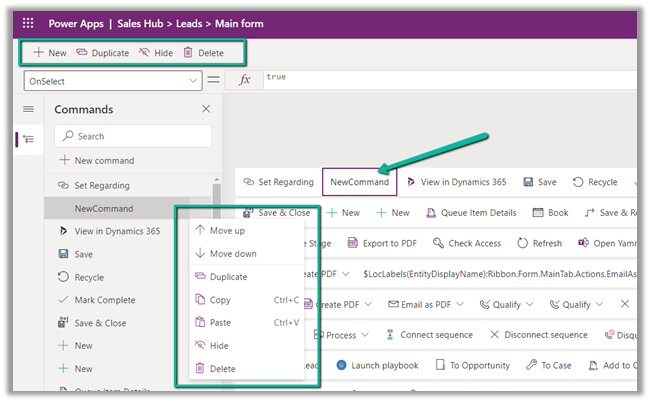
Select + New command or the + New option
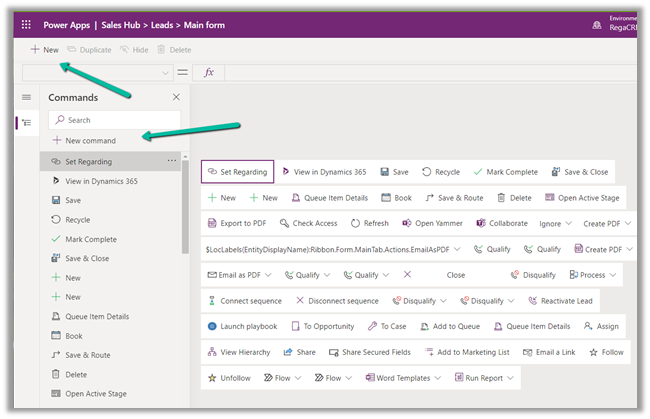
It adds a new button with the label NewCommand with options to duplicate, hide, move up and down, etc.
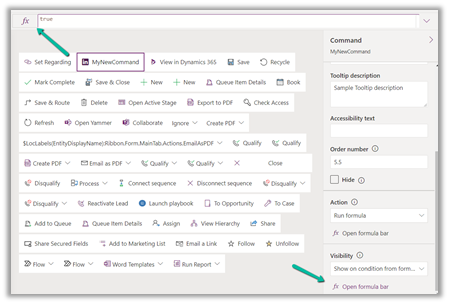
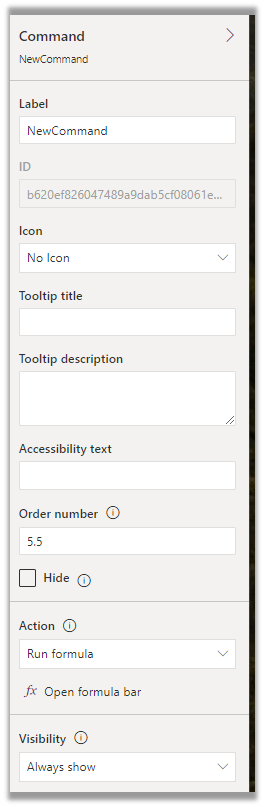
The different properties that can be configured for the new command –
Property

Description


Label

To set the label

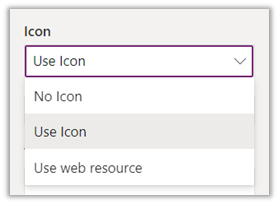
Icon

To set the icon either using icon or web resource

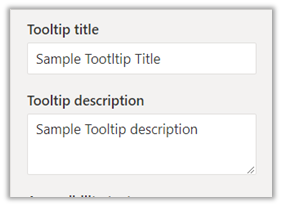
Tooltip

Set tooltip title and its description.

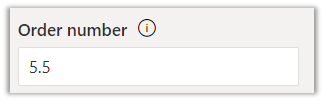
Order Number

Customize the Order of the command

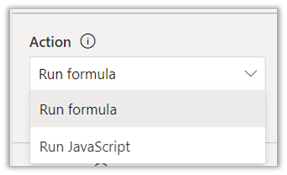
Action

Either run formula or run javascript


Open Formula Bar


Library for Run JavaScript

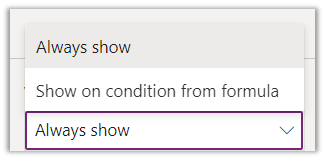
Visibility


Open Formula Bar for Show on Condition

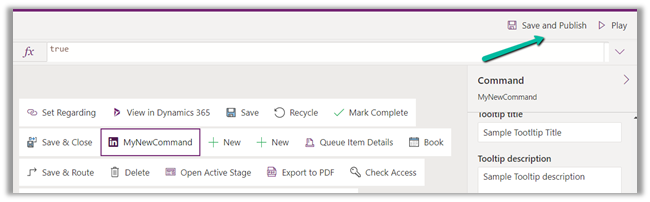
Let us Save and Publish

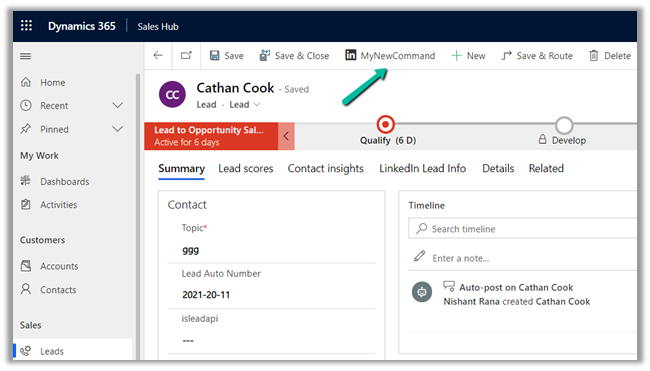
Click on Play and open a lead form.

We can see the new command added.
Get all the details here –

https://docs.microsoft.com/en-gb/powerapps/maker/model-driven-apps/command-designer-overview

Hope it helps..

Advertisements

Fixed – You do not have a license to use Microsoft Dynamics 365


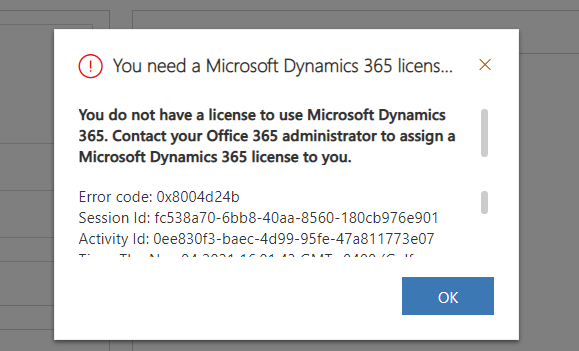
Recently we started getting the below error  suddenly in one of our environments for all the users.

“You need a Microsoft Dynamics 365 license to continue. You do not have a license to use Microsoft Dynamics 365. Contact your Office 365 administrator to assign a Microsoft Dynamics 365 license to you.”

The users had the required CRM licenses and this error was only coming for the case entity.

Eventually, we realized that a Plugin / Workflow was running under the context (owner for Workflow) of a user who had recently left the organization and had his account disabled inside CRM.

Updating the context and owner of the workflow to run under the Service Account (with appropriate roles) fixed the issue.

Hope it helps..


Few key points – Auto Number field in Dataverse (Dynamics 365 CE / CRM)


  • Can we convert the existing text field to the Auto Number field?

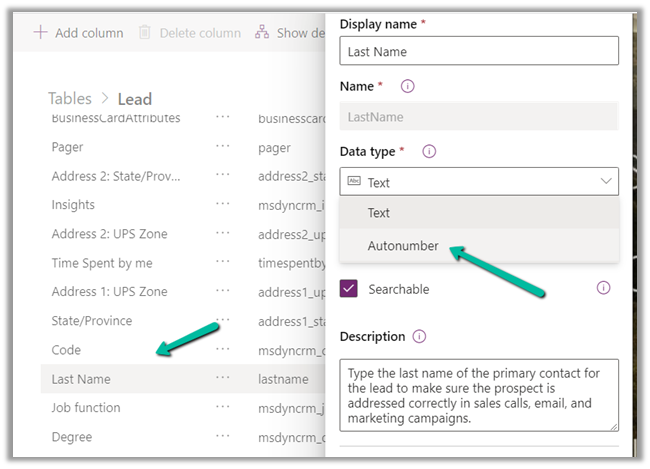
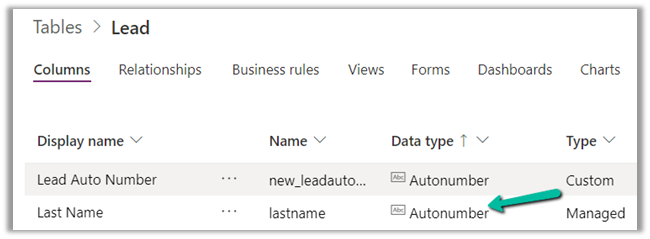
Yes, e.g. we can update the Last Name attribute of the lead’s data type to be of Auto number from Text.

  • Can we convert the auto number field back to the normal text field?

Yes


  • Can the auto number field have duplicate values?

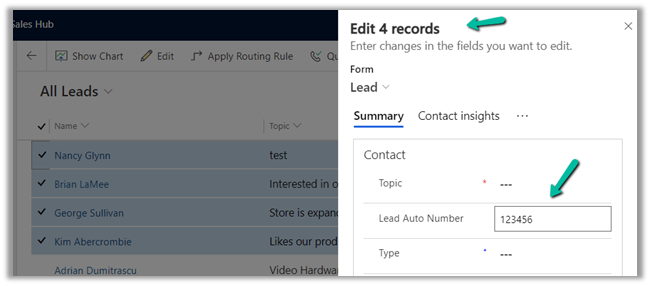
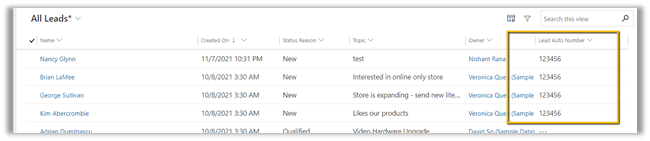
Yes, the platform allows having more than one record to have the same value. It doesn’t throw an error.

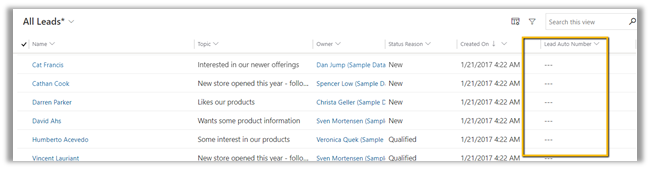
Multiple lead records have null values for the auto number field as shown below.

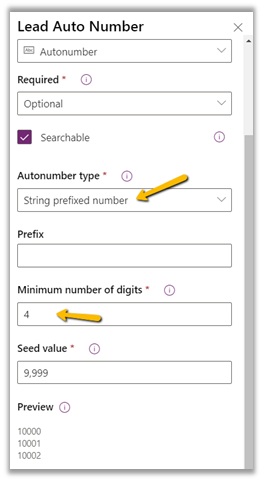
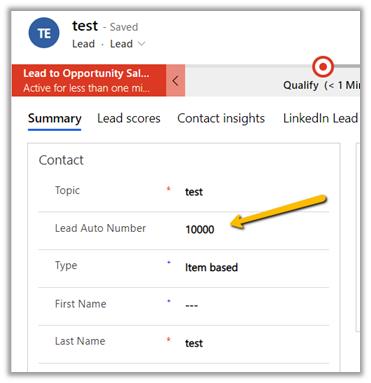
  • What if the Seed value increases than the digits specified?

The platform will assign the next value and will not throw an exception.

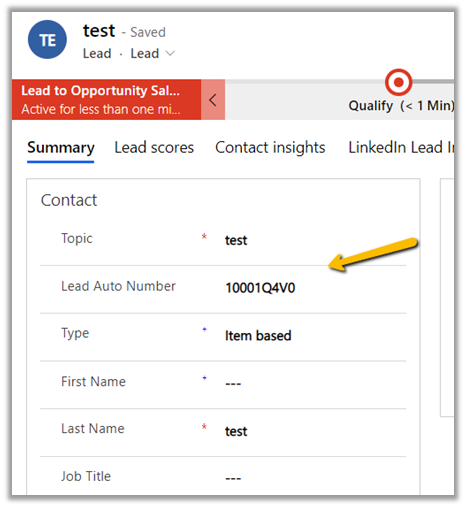
  • Can we change the format of the existing auto number field?

Yes

It will affect any new records created.

  • What other things we can do with the auto number fields?

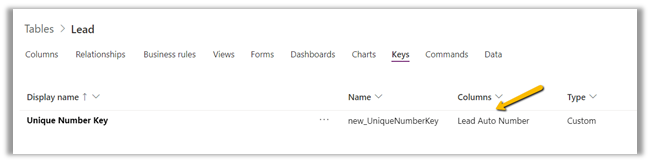
We can make the field read–only in the form so that users do enter the values manually, we make the field required and for uniqueness, we can enable alternate keys on it.


  • What is the min and max length of the RANDSTRING placeholders?

Between 1-6

  • What about maximum seed value?

The auto number field is similar to a text field, it is different in that it generates a unique number when there is no value specified for it.

Get all details here –

https://docs.microsoft.com/en-us/powerapps/developer/data-platform/create-auto-number-attributes

https://jonasr.app/2017/10/anm/

Hope it helps..
Advertisements

Route Case (routecase) attribute and msdyn_ApplyRoutingRuleEntityRecord Action in Dynamics 365 Customer Service


The case entity/table in Dynamics 365 CE has a Boolean type field named Route Case.

It has a default value as Yes.

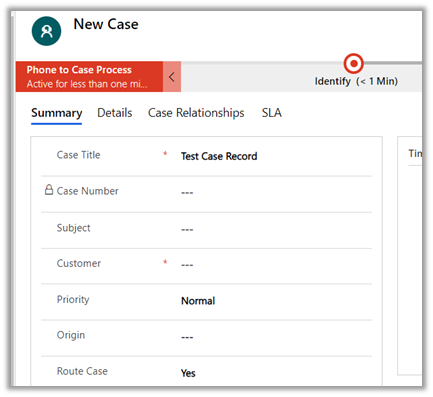
On manually creating the record from the user interface, although Route Case shows the default value as Yes

On saving the record, the value changes to No, the field is also locked.

So basically no routing rules are applied when a case record is created from the user interface.

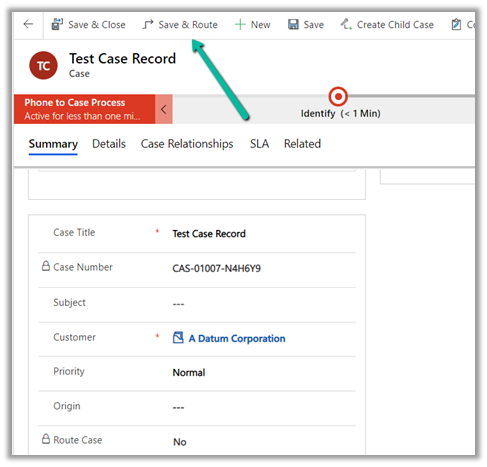
To apply routing rules, we need to use the “Save and Route” option

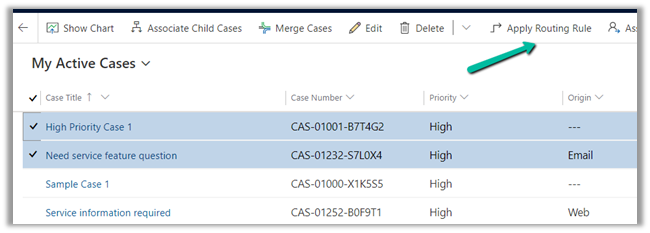
Or “Apply Routing Rule” command from the Grid

This also however will not update or set the Route Case field to Yes on the case record.

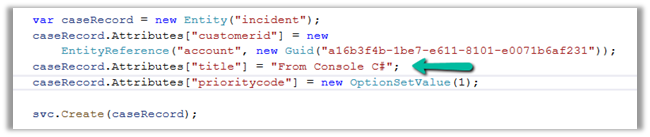
Now if we create the case record programmatically, the field would be set and saved with its default values as Yes.

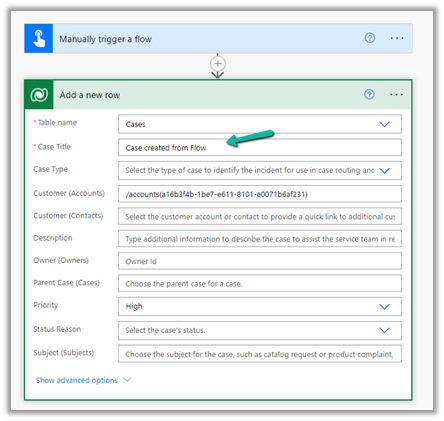
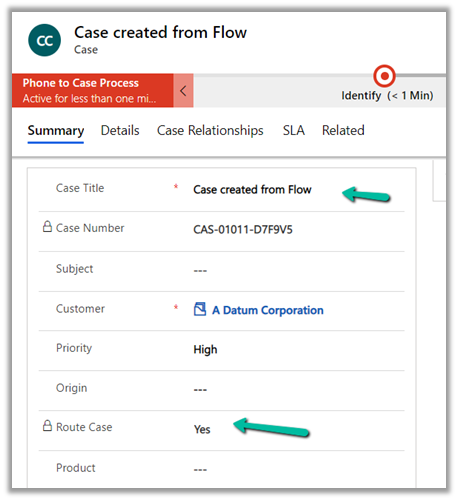
The same goes for cases created from Flow.

Route Case is set to Yes.

So basically routing rules will be triggered on the records created from outside the User Interface as Route Case will be set Yes for those records.

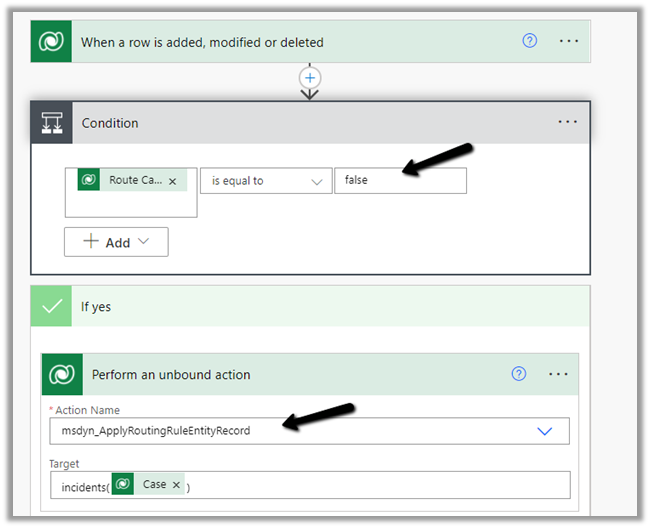
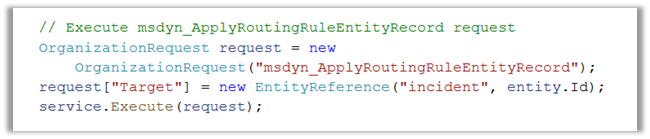
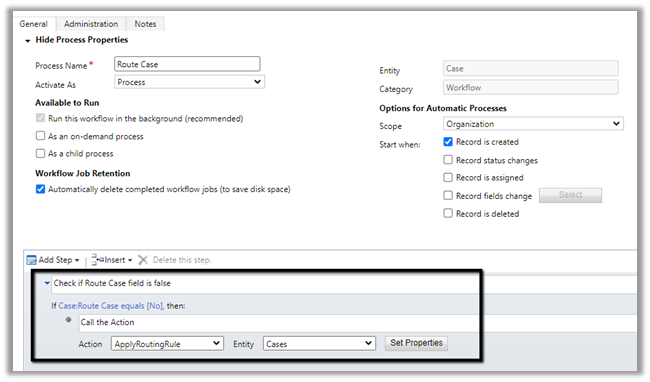
Now if we want to run the routing rules against the case record created from the user interface, we can make use of the following action –

msdyn_ApplyRoutingRuleEntityRecord

Within Flow –

Within Plugin or any custom code–

msdyn_ApplyRoutingRuleEntityRecord can be used for other entities apart from the case.

In the case of Case entity, we can also make use ApplyRoutingRule action also.


Hope it helps..
 

Advertisements

Using DataSourceInfo and RecordInfo function for checking permissions for a Dataverse table or record in Canvas App


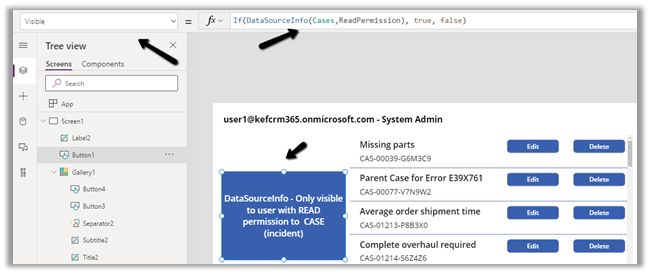
DataSourceInfo function can be used to check the Table / Entity level permission.

We can check for Create, Read, Edit, and Delete Permission and can disable, hide and show the corresponding create, edit and delete buttons for the users.

  • DataSourceInfo.CreatePermission
  • DataSourceInfo. DeletePermission
  • DataSourceInfo. EditPermission
  • DataSourceInfo. ReadPermission

DataSourceInfo function can also be used to obtain information about a particular column of the data source like Display Name, Max Length, Max Value, Min Length, Required.

https://www.inogic.com/blog/2020/11/how-to-use-datasourceinfo-in-canvas-app/

  • DataSourceInfo.DisplayName
  • DataSourceInfo.MaxLength
  • DataSourceInfo.MaxValue
  • DataSourceInfo.MinValue
  • DataSourceInfo.Required


Similarly, the RecordInfo function can be used to get the information about the record of a Dataverse data source.

We can check for the Read, Edit, and Delete Permission.

  • RecordInfo. ReadPermission
  • RecordInfo. EditPermission
  • RecordInfo.DeletePermission

Hide Show control based on Security Role in Canvas App

Here for our sample Canvas App we have a button and a Gallery  having Data source as Cases

1 

Visible    

Button

If(DataSourceInfo(Cases,DataSourceInfo.ReadPermission), true, false)

2 

Visible   

Edit

If(RecordInfo(Gallery1.Selected, RecordInfo.EditPermission),true, false)

3 

Visible    

Delete

If(RecordInfo(Gallery1.Selected, RecordInfo.DeletePermission),true, false)

Now to test it, we have assigned the below custom security role/rights to another user – Test User 1 (along with Basic User security role)

i.e. Read, Write and Delete permission at the User Level on Case.

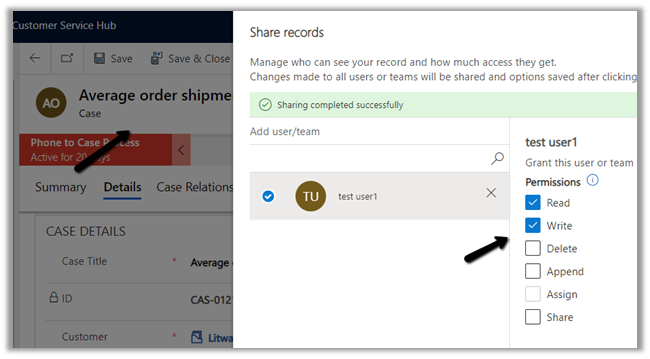
We have also shared the Average order shipment time record with Test User 1 assigning him the Write Permission.

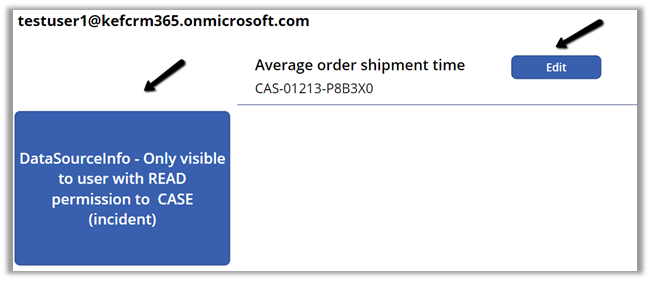
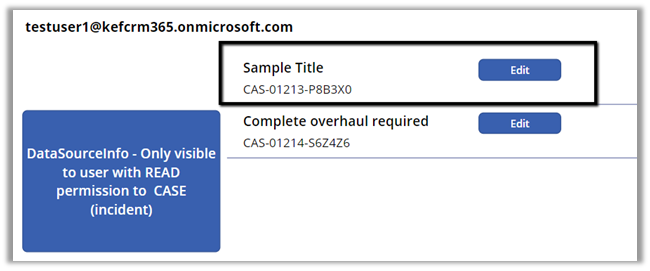
Now when Test User 1 will open the Canvas App, the first button will be visible as he has the Read permission on the Case table.

In the gallery only the one record shared will be visible along with the Edit button on the same.

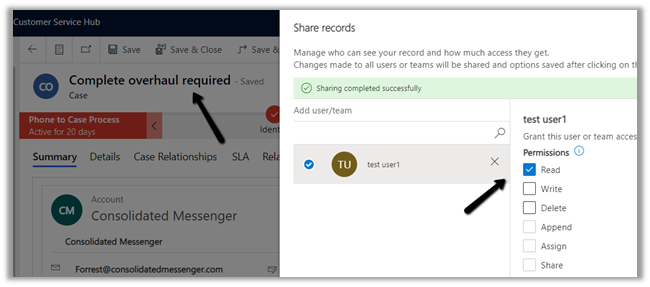
Let us just share one more case record with only Read permission to Test User 1.

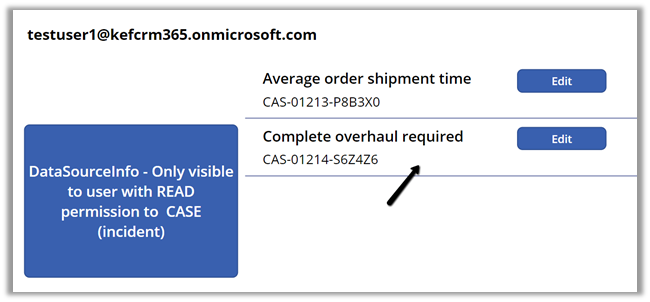
We can see the record displayed for Test User 1.

It shows the Edit button for the new record, although we shared the record with the Read permission.

We have the following formula for the Edit button’s OnSelect

Patch(Cases, LookUp(Cases,’Case Number’ = lblCaseNumber.Text), {‘Case Title’:”Sample Title”})

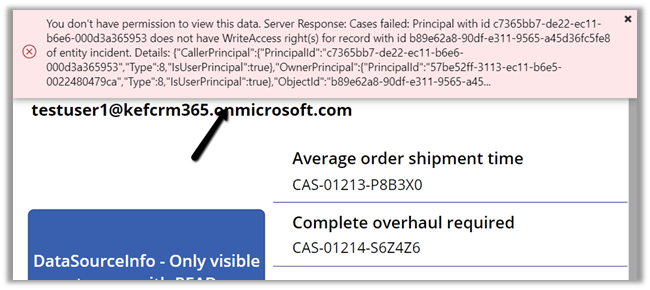
So clicking on Edit for the new record shared ‘Complete overhaul required‘ gives the below Permission error

Now pressing the same edit button for the ‘Average order shipment time’ record will update the record (set title as Sample Title) as it was shared with Write permission with Test User 1.

Get all the details here –

https://docs.microsoft.com/en-us/powerapps/maker/canvas-apps/functions/function-datasourceinfo

https://docs.microsoft.com/en-us/powerapps/maker/canvas-apps/functions/function-recordinfo

Hope it helps..
Advertisements

Delete the current (active) partition in Audit – Dynamics 365


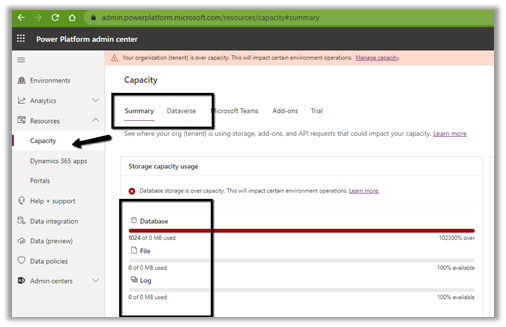
We recently exceeded log storage capacity for our Power Platform environment

We can check the same at Resources >> Capacity inside the Power Platform admin center.
One of the sandbox environments had the most Log Usage

https://docs.microsoft.com/en-gb/power-platform/admin/legacy-capacity-storage#capacity-page-details

We deleted the plugin trace logs and all the audit partitions (except the active/current one, which the system doesn’t allow)

If we try deleting the current active partition, we will get the below error –

Microsoft.Crm.CrmException: You cannot delete audit data in the partitions that are currently in use, or delete the partitions that are created for storing future audit data.

The partitions are created on quarterly basis each year –

1 Jan – April, 1 April – July, 1 July – October, 1 Oct – January

Even after deleting the plugin trace logs and the partitions, we didn’t see any change in the storage capacity usage. So we raised a Microsoft Support Ticket and were informed by the team that they can delete the active partition for us, and it could take around 3 days. As that was a sandbox environment and we had no use of Audit data we went ahead and the Support Team deleted the active partition for us. (Also there was some issue in our data center with regards to the recalculation of the storage and it took few more days for that change to reflect inside the Capacity page of Power Platform Admin Center).

This way we were able to reclaim some of the log storage.

So basically we just need to raise Microsoft Support Ticket and request the same.

More on Audit –

Also check the new process for deleting audit logs –

https://docs.microsoft.com/en-gb/power-platform/admin/free-storage-space#method-10-delete-audit-logs—new-process

Select audit logs to delete.

Hope it helps..