Accidental data deletion in Dataverse happens more often than we expect. A bulk delete job, an incorrect Power Automate flow, or incorrect manual delete can remove important records in seconds. Instead of restoring the environment, Dataverse provides a much better alternative: the Restore message, which allows us to recover deleted records programmatically.
Prerequisite: Recycle Bin Must Be Enabled
The Restore message works only if the Recycle Bin is enabled for the table before the record is deleted. If the recycle bin is disabled, deleted records are permanently removed and cannot be recovered using the SDK.
When a record is deleted, Dataverse moves it to the recycle bin. We can query these deleted records using RetrieveMultiple with DataSource = “bin” and then pass the deleted record’s ID to the Restore message. The restore operation recreates the record using the same record ID.
Sample Console App –
The following console app retrieves deleted Case (incident) records from the recycle bin and restores them using the Restore message.
static void Main(string[] args)
{
    Console.WriteLine("Restore Deleted Records started.");

    string connString = @"AuthType=OAuth;
Username=your.user@tenant.onmicrosoft.com;
Password=********;
Url=https://yourorg.crm.dynamics.com/;
AppId=00000000-0000-0000-0000-000000000000;
RedirectUri=app://58145b91-0c36-4500-8554-080854f2ac97/";

    var serviceClient = new CrmServiceClient(connString);
    var service = serviceClient.OrganizationWebProxyClient
        ?? throw new Exception("Organization service not available");

    // Retrieve deleted records from recycle bin
    QueryExpression query = new QueryExpression("incident")
    {
        ColumnSet = new ColumnSet("title"),
        DataSource = "bin",
        TopCount = 50
    };

    var deletedCases = service.RetrieveMultiple(query);

    if (deletedCases.Entities.Count == 0)
    {
        Console.WriteLine("No deleted records found.");
        return;
    }

    foreach (var deletedCase in deletedCases.Entities)
    {
        Guid caseId = deletedCase.Id;
        string title = deletedCase.GetAttributeValue<string>("title") ?? "Case";

        // Prepare entity for restore
        Entity caseToRestore = new Entity("incident", caseId);
        caseToRestore["title"] = title + " (Restored)";

        // Restore using Restore message
        OrganizationRequest restoreRequest = new OrganizationRequest("Restore");
        restoreRequest["Target"] = caseToRestore;

        service.Execute(restoreRequest);

        Console.WriteLine($"Restored record: {caseId}");
    }

    Console.WriteLine("Deleted records restored successfully.");
}
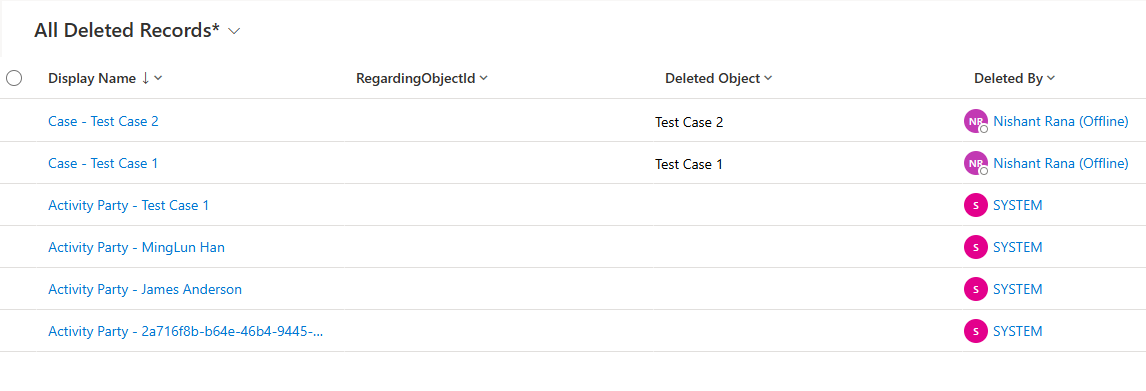
E.g., we have the following deleted case, and its related records in our recycle bin.
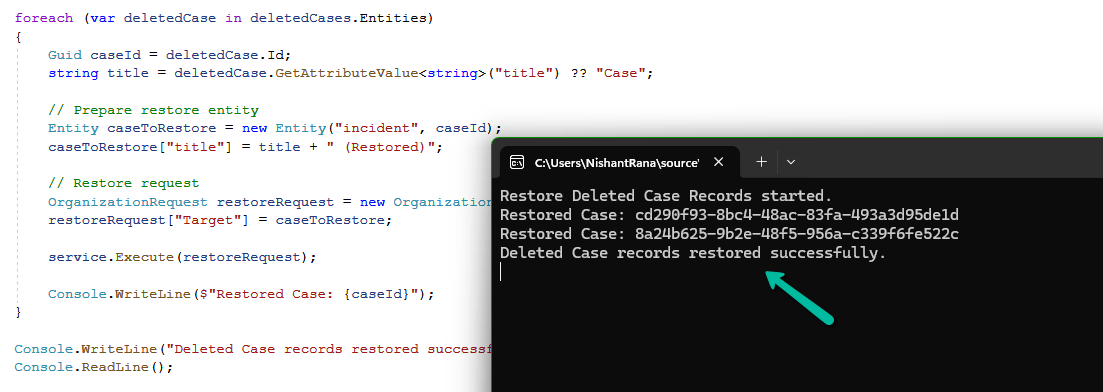
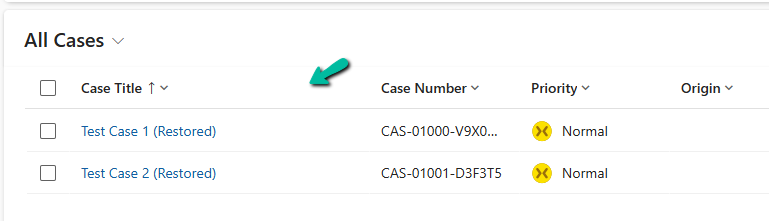
On running our console app, we can see our deleted case records restored.
Get all the details here.
Hope it helps..