How to – Use SetAutoNumberSeed Action to reset/update the seed for the Autonumber attribute – DataVerse (Dynamics 365 / CRM)


Suppose we have the following Autonumber field created with

Seed value – 1000 and Format – {SEQNUM:4}

Now based on a certain requirement, we want to dynamically / programmatically update / reset the seed value.

For this, we can make use SetAutoNumberSeed Action

Below we can see the auto number set as 1007 on creating a new contact record.

Now to set it back to 1000 we can run the following code –
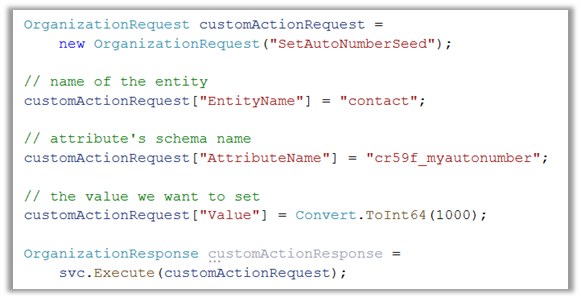
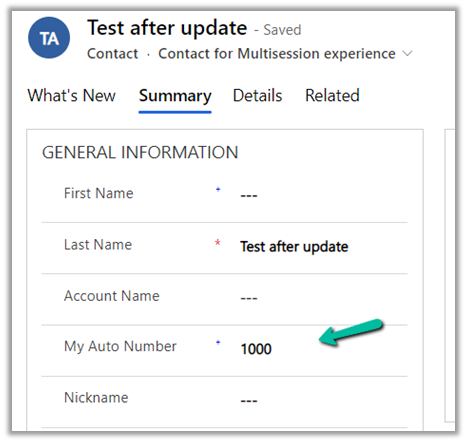
On executing the action, we can see the next contact record having autonumber field set as 1000.
Another example –

On updating the value to 888, and creating a new contact record

Sample code –

                OrganizationRequest customActionRequest =
                    new OrganizationRequest("SetAutoNumberSeed");

                // name of the entity
                customActionRequest["EntityName"] = "contact";

                // attribute's schema name
                customActionRequest["AttributeName"] = "cr59f_myautonumber";

                // the value we want to set
                customActionRequest["Value"] = Convert.ToInt64(888);

                OrganizationResponse customActionResponse = 
                    svc.Execute(customActionRequest);

Check other posts –

https://powerobjects.com/tips-and-tricks/auto-number-d365-version-9/

Hope it helps..

Advertisements

How to – Delete Audit data by entity / table, date, user access, and specify retention duration – updates in Dataverse (Dynamics 365 / CRM)


Recently we saw a new update in our sandbox environments with regards to Audits.

Login to Power Platform Admin Center, select an environment.

We can see a new section Auditing added.

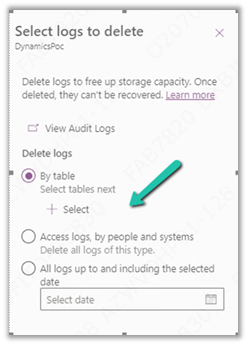
Click on Delete logs allows us to –

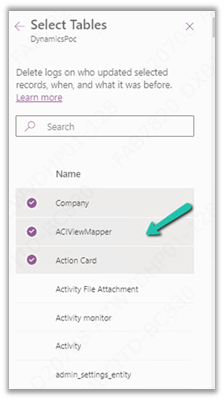
  • Delete logs by Table

We can select the tables there.

  • Delete only access logs data.
  • Delete logs up to the selected date.

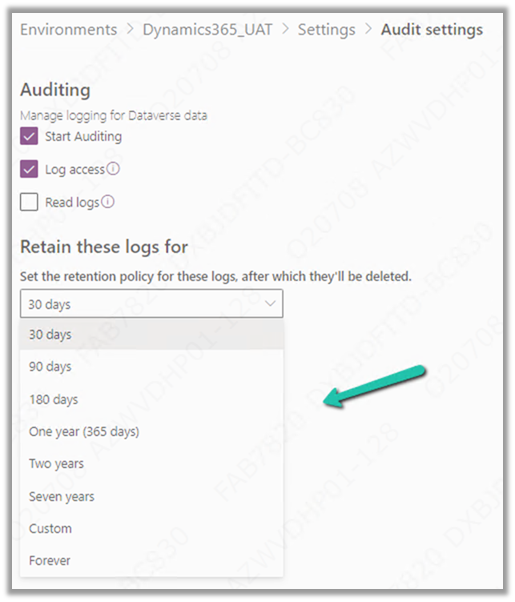
And now we can also manage or specify the retention duration for the audit log.

These are very useful updates to the Audit feature in the platform which more or less have been similar since CRM 3.0 days.

Check other posts on Audit – 

https://nishantrana.me/2021/08/31/audit-entity-table-few-key-points-dynamics-365-power-apps/

https://nishantrana.me/2021/05/17/how-to-export-the-audit-history-values-from-dynamics-365/

https://nishantrana.me/2018/10/08/using-kingswaysofts-cds-crm-source-component-to-get-audit-information-in-dynamics-365-ce-ssis/

How to – Use RetrieveAttributeChangeHistoryRequest to get audit data for an attribute (Dataverse/ Dynamics 365/ CRM) – Nishant Rana’s Weblog

Hope it helps..

Advertisements

How to – Use Do until and Delay in Power Automate


Let us take a simple example to understand the usage of the Do unit with Delay control in Power Automate.

“When a Case Record’s Priority is updated to High until the case is resolved we want to perform certain action e.g. send a notification email or call an action etc. every 2 minutes or so.”

This is how the final flow looks like –

First is the trigger, when the case record is modified, i.e. priority code field with value as 1.

Next, initialize a Boolean type variable as false, this will be used within the Do until loop condition.

  • Next, add the Do until control with the condition – ConditionMet i.e. the variable is equal to true.
  • Followed by Delay action, here we have specified a 2-minute delay.
  • Next, we are retrieving the same record to check the condition, this is required to get the updated value within the loop.
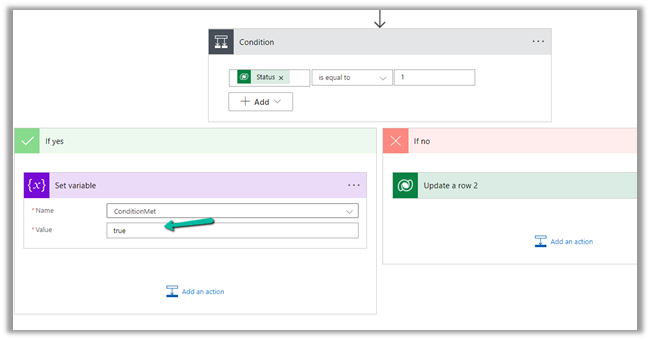
  • Condition is – is the case resolved? i.e. Status is equal to 1.
  • If Yes then we are setting the variable as true to come out of the do until loop.
  • If No then we perform any action, like send an email notification, reminder or call any action, etc.

The Current Iteration Index of Do unit holds the value of the current index starting from 0. Here we are updating the case title with the index just for testing.

To see it in action, let us Test the flow.

Updating the priority of the case to high triggers the flow.

After a delay of 6 minutes, we can see the Case Title updated with the current index i.e. 2 as it has iterated 3 times starting from 0.

Let us now resolve the case.

We can see our flow successfully completed after the 4th iteration after the case is resolved.

Also refer –

https://techwizard.cloud/2018/05/20/microsoft-flow-mystery-of-do-until-loop/

https://www.futurelearn.com/info/courses/cloudswyft-msft-dynamics-365-power-platform-auto/0/steps/208142

Hope it helps.

Advertisements

How to – manage who can create environments in Power Platform


Through the Power Platform admin center, the administrator can control who can create an environment in the Power Platform.

Click on Gear Icon >> Power Platform settings

There we can specify who can create production and sandbox environments & trial environments.

Let us set it as Only specific admins and save the settings.

With this particular setting now only the following admins will be able to create environments.

Global admin, Dynamics 365 Admin, and Power Platform admins.

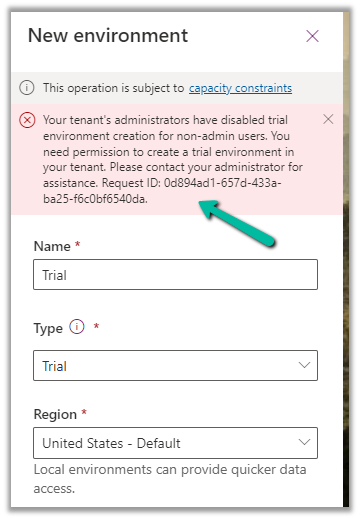
The non-admin user will get the below error

Your tenant’s administrators have disabled trial environment creation for non-admin users. You need permission to create a trial environment in your tenant

In case of Everyone, the below license determines who can create environments.

https://docs.microsoft.com/en-us/power-platform/admin/create-environment#who-can-create-environments

Hope it helps..

Advertisements

How to – Use AlwaysMoveRecordToOwnerBusinessUnit setting in Dynamics 365 / PowerApps/ Dataverse


The setting – AlwaysMoveRecordToOwnerBusinessUnit allows us to move a user to another business unit without moving all his owned records to that unit.

This makes sure that other users in the new business unit cannot access the user’s records from his previous business unit (unless they have organization-level access / or have a role in that unit / or records are shared)

Also Check –

EnableOwnershipAcrossBusinessUnits setting https://nishantrana.me/2022/01/05/how-to-change-users-business-unit-without-removing-the-security-roles-in-dynamics-365-powerapps-enableownershipacrossbusinessunits-setting/

Modernize Business Units –  https://nishantrana.me/2022/01/04/modernize-business-units-matrix-data-access-structure-record-ownership-across-business-units-preview-in-dynamics-365-dataverse/

By default this setting is true.

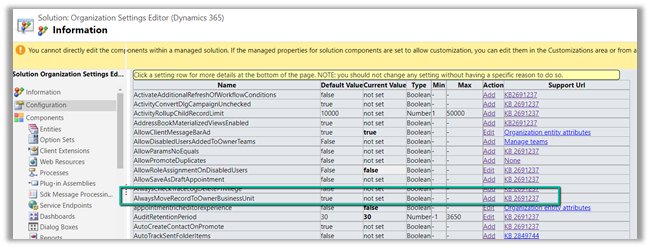
Get the Organization Settings Editor – https://github.com/seanmcne/OrgDbOrgSettings/releases

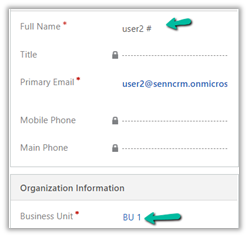
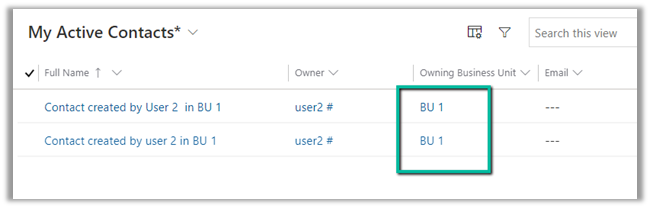
Let us see the default behavior first, below are the 2 contact records created by User 2 who belongs to BU 1.

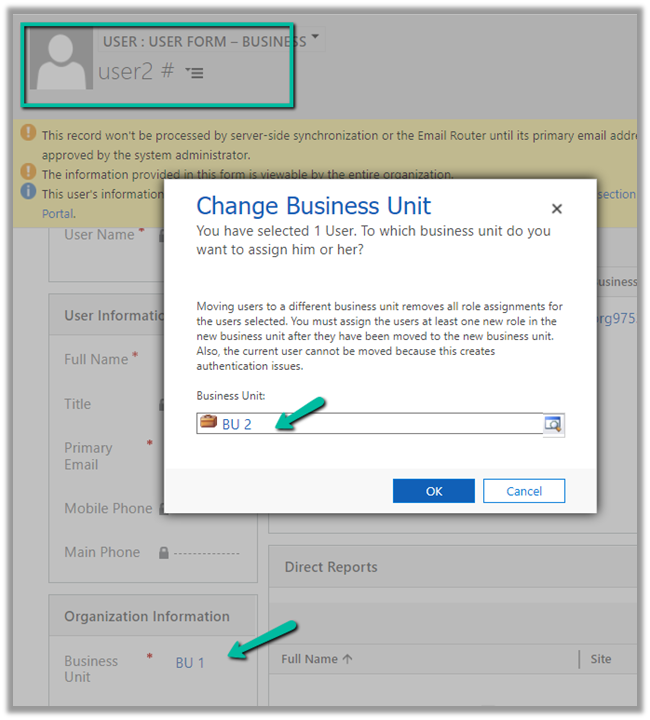
Now let us change the Business Unit of User 2 to BU 2.

After changing the BU of the user 2 we have assigned the same security role to the user which he has had in BU 1 that gave him BU level access on the Contact records.

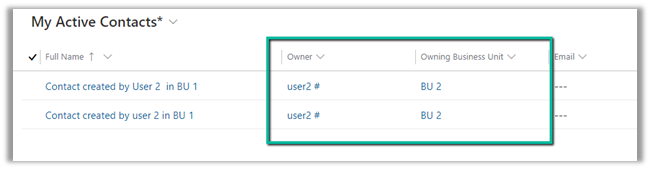
We can see both Owner and Owning Business Unit getting updated as expected.

Now we’d see what will happen if we update the setting AlwaysMoveRecordToOwnerBusinessUnit to False.

But before doing that let us change the business unit of User 2 back to BU 1.

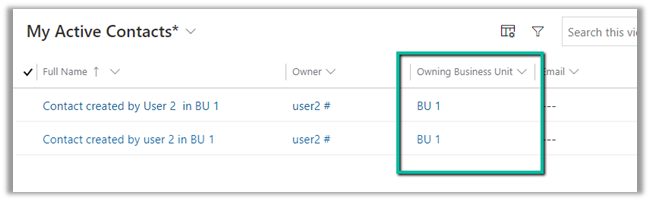
As expected Owning Business Unit is updated back to BU 1

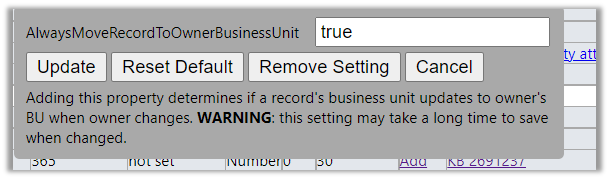
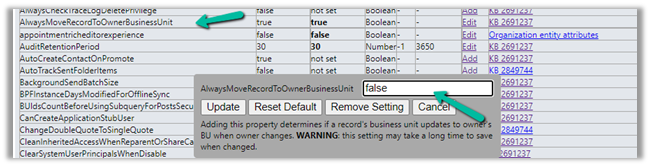
Now let us update the setting to false –

This time changing the business unit of User 2 to BU 2 should not update the Owning Business Unit of the contact records owned by User 2 to BU2.

As expected this time the Owning Business Unit remained BU 1.

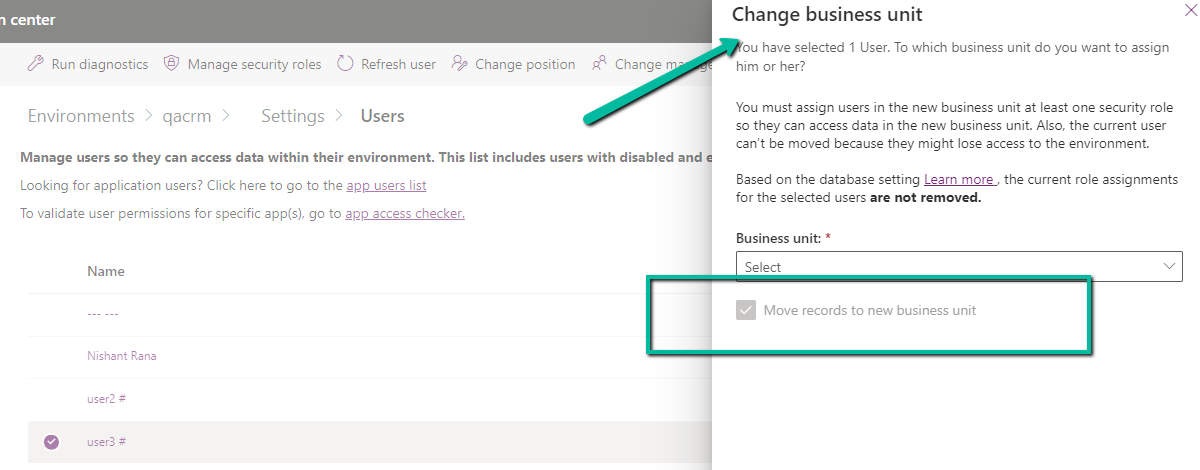
Based on the true or false value set for AlwaysMoveRecordToOwnerBusinessUnit , we can see the checkbox “Move records to new business unit” either checked or unchecked – but always DISABLED.

If AlwaysMoveRecordToOwnerBusinessUnit is true than – the disabled checkbox is checked – 

cbu

Get more details below –

https://docs.microsoft.com/en-us/powerapps/developer/data-platform/configure-entity-relationship-cascading-behavior#allowed-record-ownership-across-business-unites-is-enabled

Hope it helps..

Advertisements

How to – change user’s business unit without removing the security roles in Dynamics 365 / PowerApps (EnableOwnershipAcrossBusinessUnits setting)

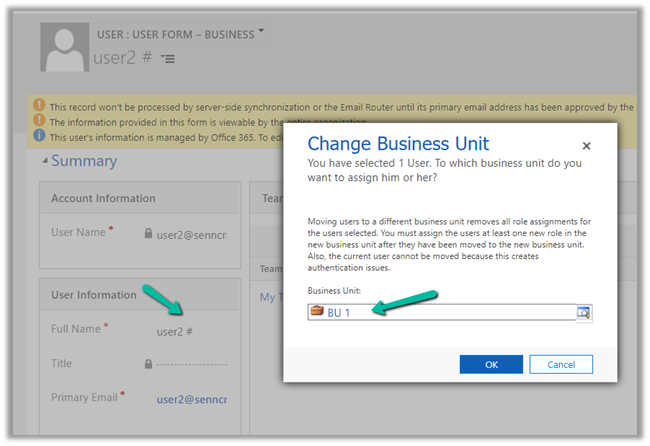
When we change the user’s business unit, all the current security roles of the users are removed and we need to assign the roles again to the user. This has always been the default behavior. 
Also check – Modernize Business Units –  https://nishantrana.me/2022/01/04/modernize-business-units-matrix-data-access-structure-record-ownership-across-business-units-preview-in-dynamics-365-dataverse/

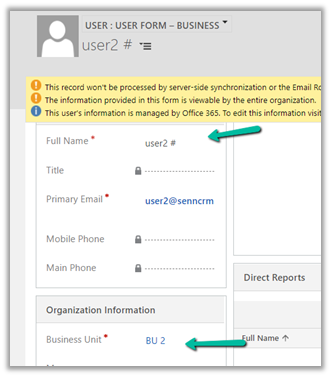
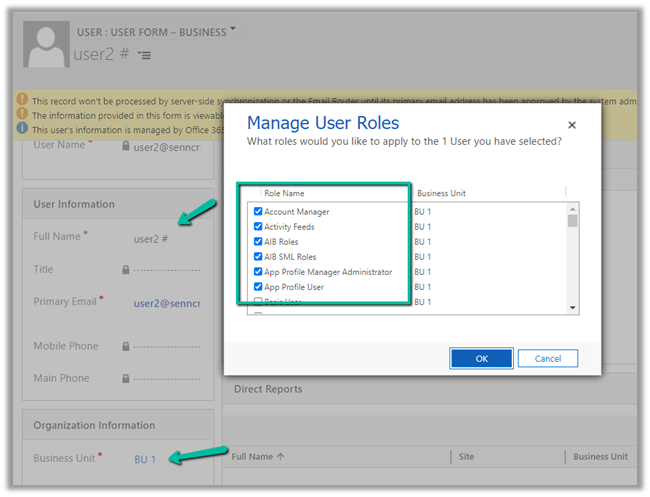
For E.g. below user User 2 belongs to Business Unit – BU 1 and has the following security roles assigned.

Now changing the user’s business unit to BU 2

will remove all his security roles assigned.

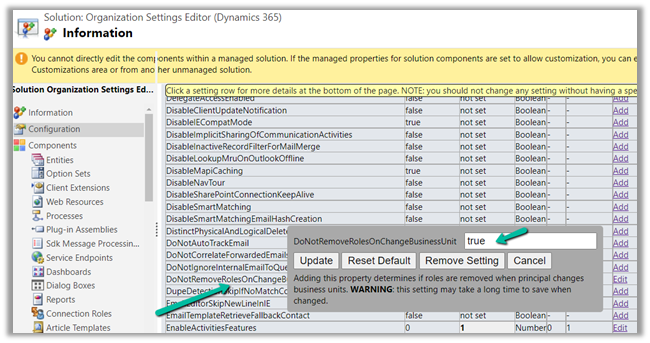
We can now override this behavior by updating the new option /setting added

DoNotRemoveRolesOnChangeBusinessUnit(this property determines if roles are removed when the principal changes business units) through the
Organization Settings Editor tool

After we have installed the managed solution, we can update the setting and set it as true

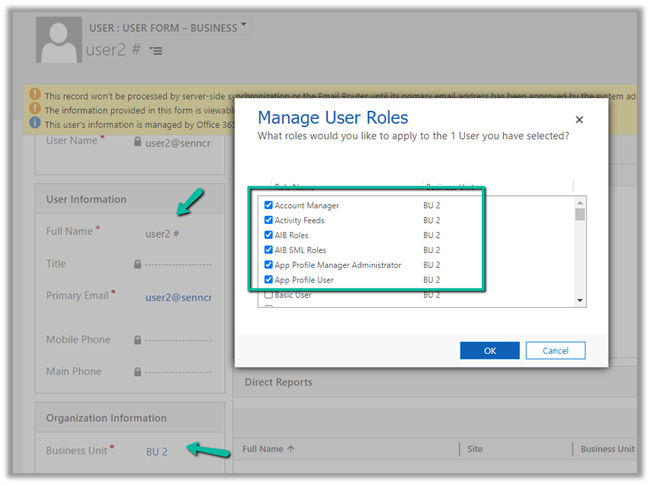
Let us assign the security roles to User 2 in BU 2.

Let us now change the BU of user 2 back to BU 1.
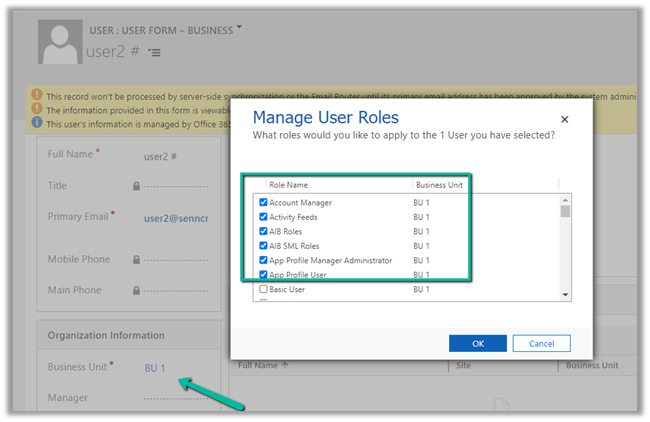

As expected after updating that setting – DoNotRemoveRolesOnChangeBusinessUnit– as true – we can see the security roles still intact, even on the change of Business Unit for the user.

What happens if user 2 is assigned a security role – BU2 Security Role, which is created in BU 2 Business unit and is not available in BU 1.

Let us change the business unit to BU 1.

As expected BU2 security role is not available in BU 1, so that role is not assigned, only the common security role coming from parent BU remains intact.

Hope it helps..

Advertisements