
Let us take a simple example to understand the usage of the Do unit with Delay control in Power Automate.
“When a Case Record’s Priority is updated to High until the case is resolved we want to perform certain action e.g. send a notification email or call an action etc. every 2 minutes or so.”
This is how the final flow looks like –

First is the trigger, when the case record is modified, i.e. priority code field with value as 1.

Next, initialize a Boolean type variable as false, this will be used within the Do until loop condition.

- Next, add the Do until control with the condition – ConditionMet i.e. the variable is equal to true.
- Followed by Delay action, here we have specified a 2-minute delay.
- Next, we are retrieving the same record to check the condition, this is required to get the updated value within the loop.
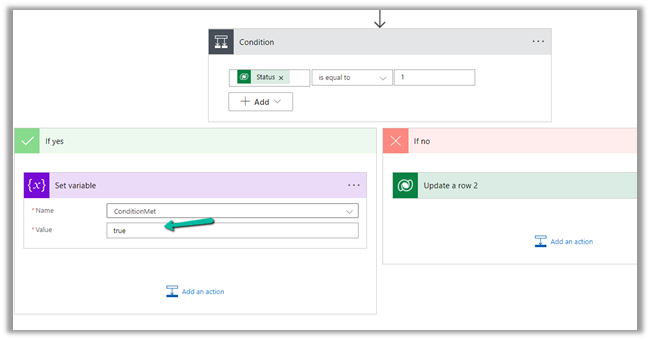
- Condition is – is the case resolved? i.e. Status is equal to 1.

- If Yes then we are setting the variable as true to come out of the do until loop.
- If No then we perform any action, like send an email notification, reminder or call any action, etc.
The Current Iteration Index of Do unit holds the value of the current index starting from 0. Here we are updating the case title with the index just for testing.

To see it in action, let us Test the flow.
Updating the priority of the case to high triggers the flow.

After a delay of 6 minutes, we can see the Case Title updated with the current index i.e. 2 as it has iterated 3 times starting from 0.

Let us now resolve the case.

We can see our flow successfully completed after the 4th iteration after the case is resolved.

Also refer –
https://techwizard.cloud/2018/05/20/microsoft-flow-mystery-of-do-until-loop/
Hope it helps.
Discover more from Nishant Rana's Weblog
Subscribe to get the latest posts sent to your email.


6 thoughts on “How to – Use Do until and Delay in Power Automate”