Fixed – We are having trouble loading your form preview. Check to make sure you have access error in Power Apps


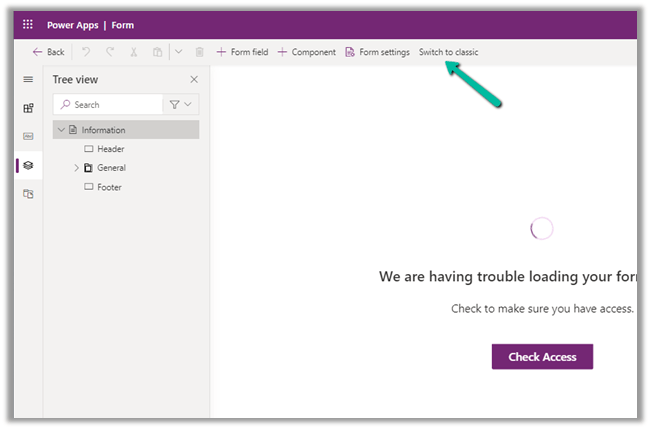
While trying to open a form for customization for a custom entity we were getting below error within the maker portal.

The user was an admin user.

The same was the case in both Chrome and Edge browsers.

The only way we could proceed was by switching to classic experience.

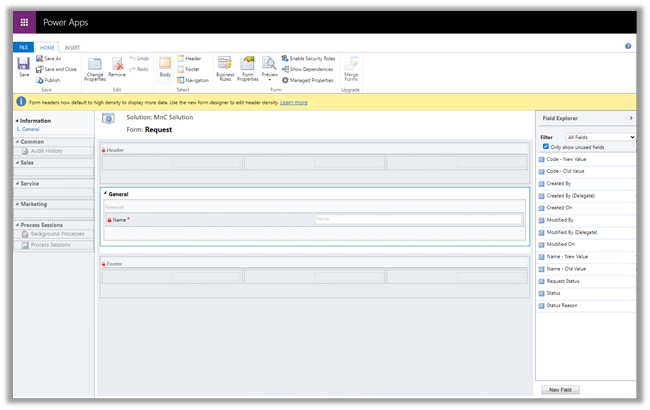
Switching to Classic worked

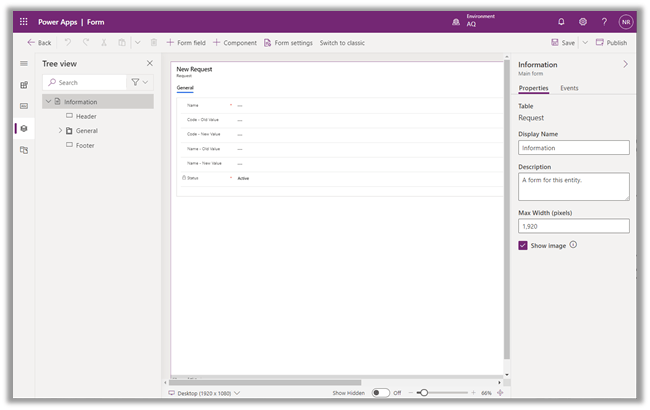
After updating the form in classic and publishing the changes, the form started working properly in the maker portal also.

We were able to customize the form in both Chrome and Edge.

Hope it helps..

How to – Use Advanced lookup in Model-driven Power Apps / Dynamics 365


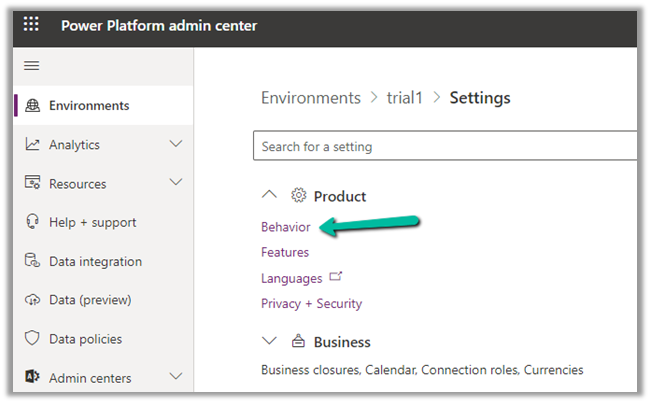
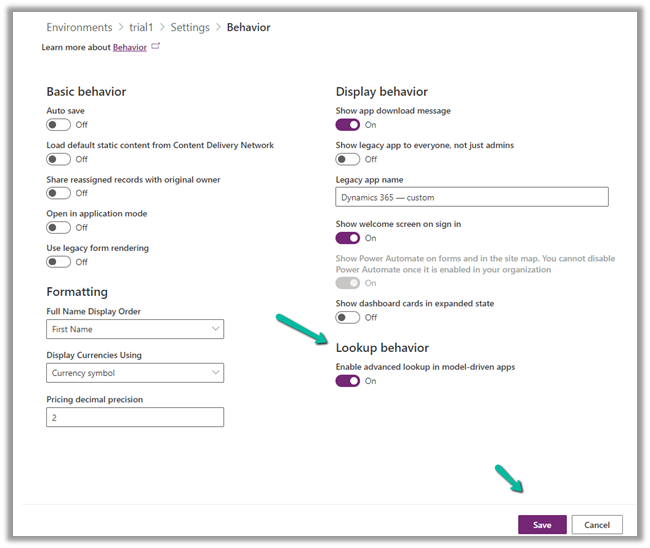
To enabled Advanced Lookup, log into to Power Platform Admin Center, navigate to

Environment >> [Select Environment] >> Settings >> Behavior

Enable the Lookup behavior and Save.

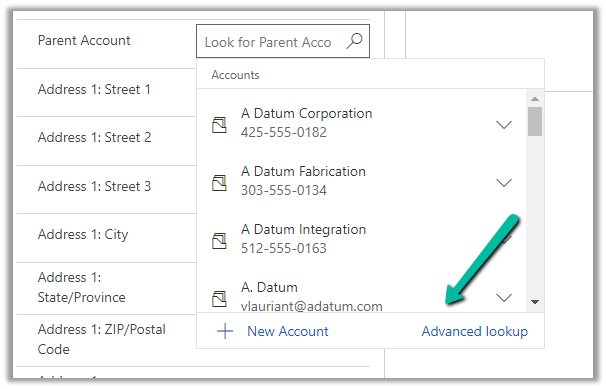
This adds the Advanced Lookup option in the Lookup dialog.


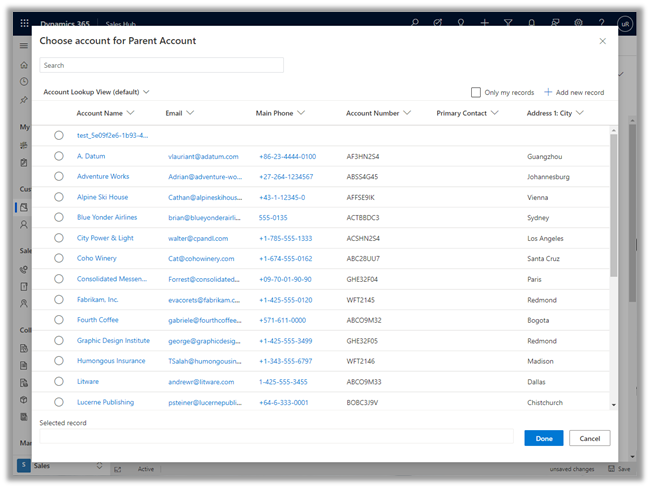
Clicking on it opens the Advanced Lookup Grid 


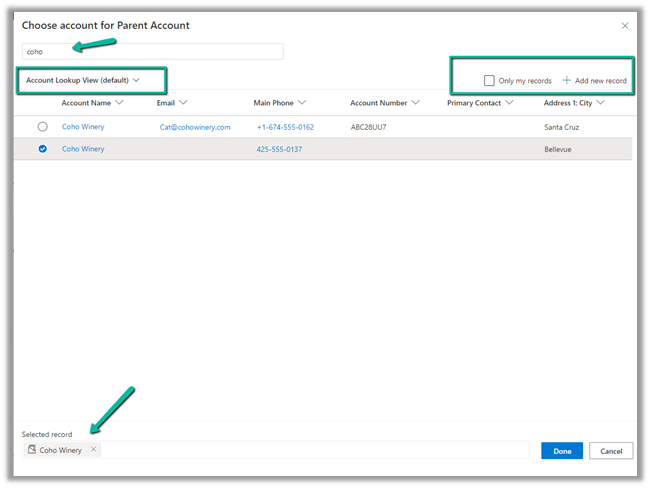
We can perform SEARCH within a selected View, CHANGE a view, can FILTER it the results further to show only records owned, ADD a new record, SORT the grid.


The best part is we can open/edit an existing record as well as add new ones without losing the existing context.

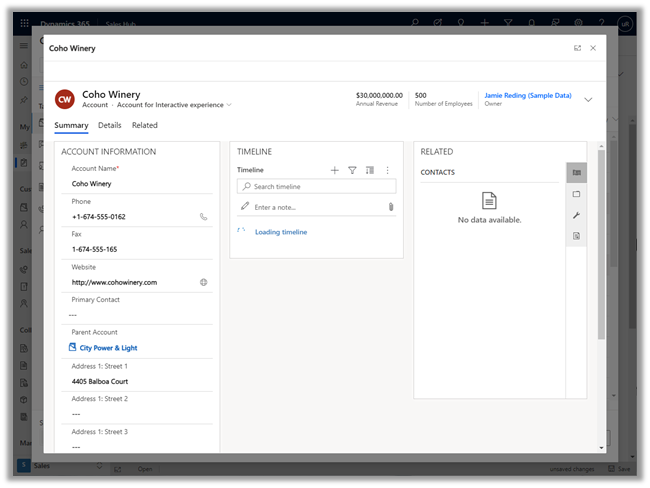
Opening an existing record from the result opens the record in the new pop-up window as shown below.

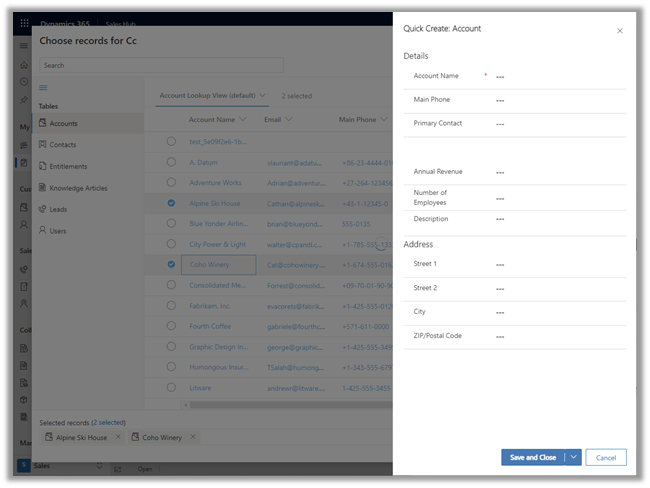
Similarly, the Add new option opens the Quick Create form.

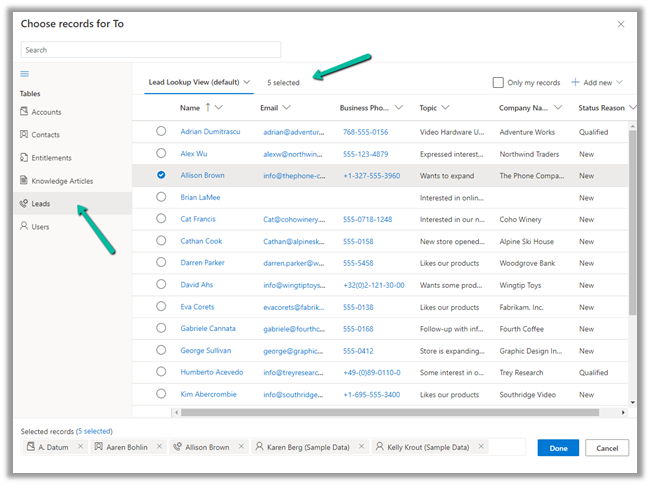
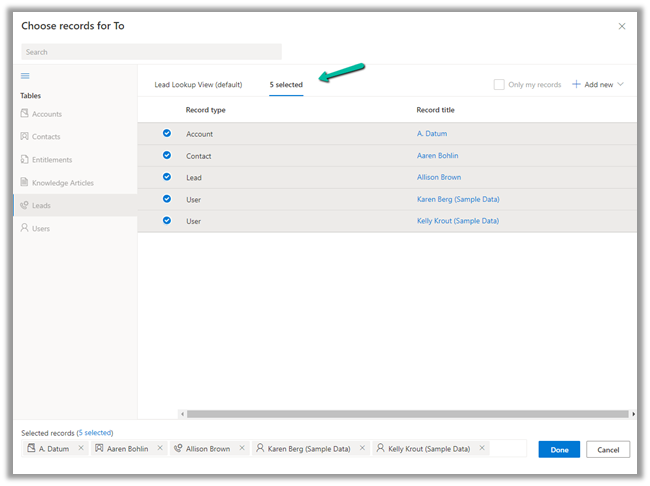
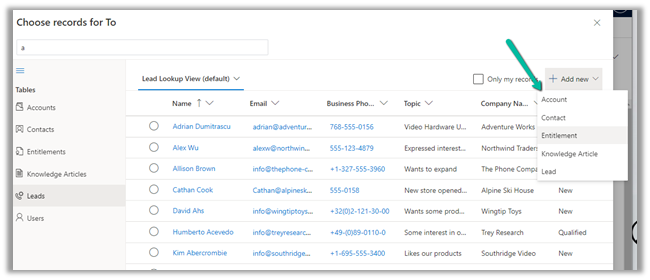
In case of special data type like Party List or Regarding, we can select multiple records of different entities we are presented with.

Similar the option to Add new records list all the tables/entities applicable to that lookup.

Thus the new advanced lookup makes working with Lookup much simpler and effective and we should start adapting / using it.

Blog posts on 2021 Release Wave 1 – Dynamics 365

Hope it helps..

Advertisements

How to setup – Azure Synapse Link – Microsoft Dataverse


Azure Synapse Link (earlier known as Export to Data Lake Service) provides seamless integration of DataVerse with Azure Synapse Analytics, thus making it easy for users to do ad-hoc analysis using the familiar T-SQL with Synapse Studio, build Power BI Reports using Azure Synapse Analytics Connector or use Azure Spark in Azure Synapse for analytics.

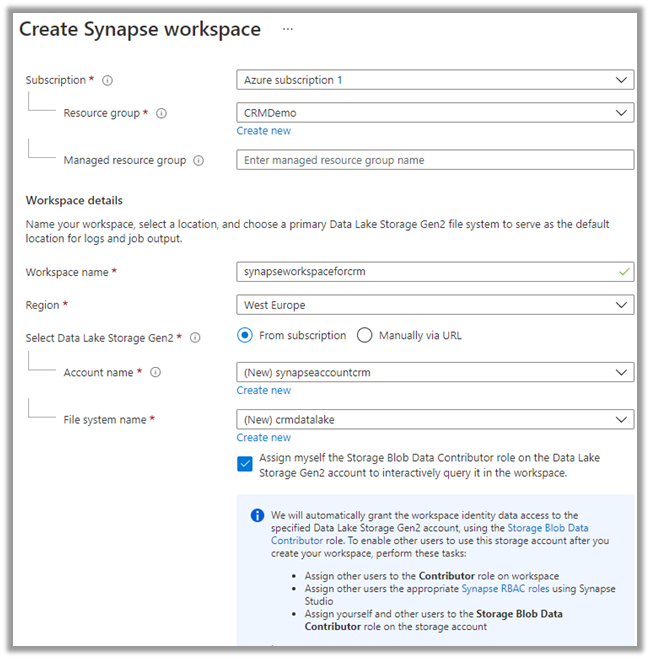
As a first step, we need to create the Azure Synapse Workspace.

Login to Azure Portal (https://portal.azure.com/ ) with appropriate roles and create a Synapse workspace.

https://docs.microsoft.com/en-us/azure/synapse-analytics/get-started-create-workspace

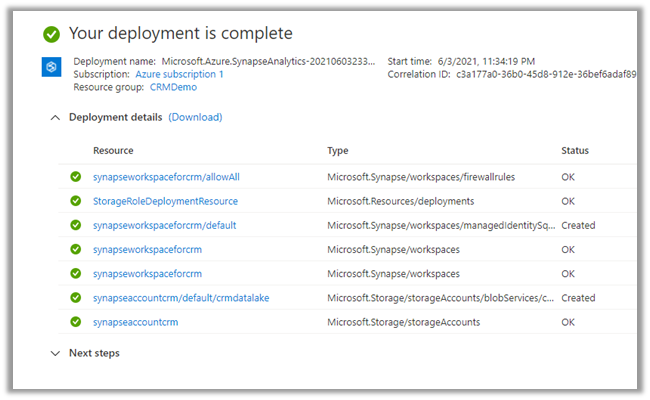
Wait for the deployment to be complete. Below are the resources created as part of the deployment.

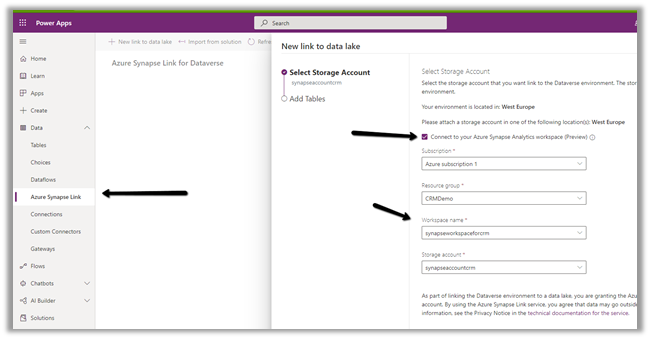
Login to the maker portal (https://make.powerapps.com/ ) and select the appropriate environment

Click on Azure Synapse Link and check the Connect to your Azure Synapse Analytics workspace (preview) and specify the storage account created in the previous step

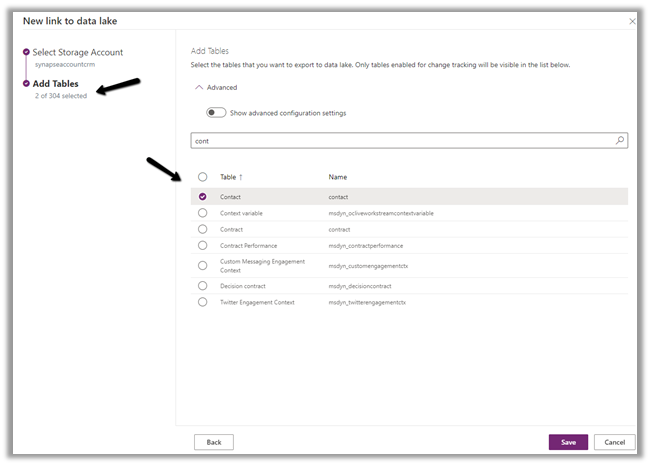
Here we have selected the Contact and System User table for export.

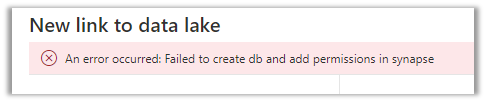
On clicking Save, we got this error couple of times, even though the account being used was Owner across the Azure resources. Trying save 3-4 times more, allowed the link to be created.

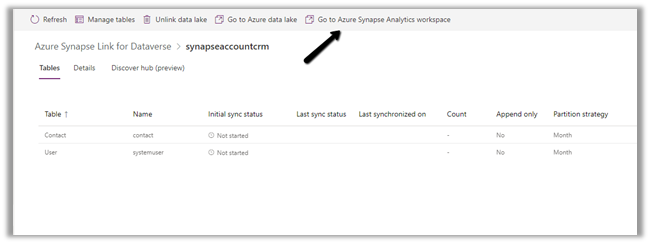
Click on Go to Azure Synapse Analytics workspace, opens the Azure Synapse Studio

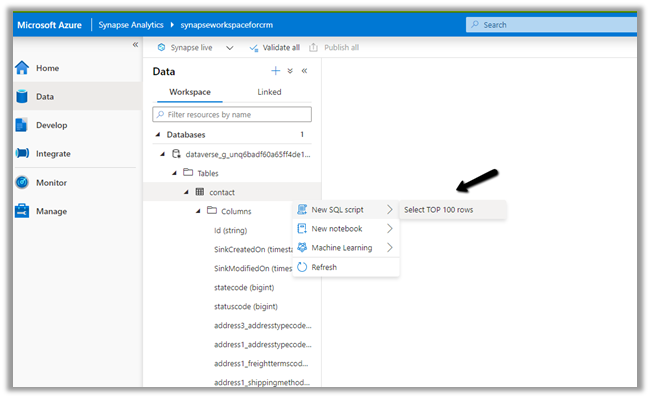
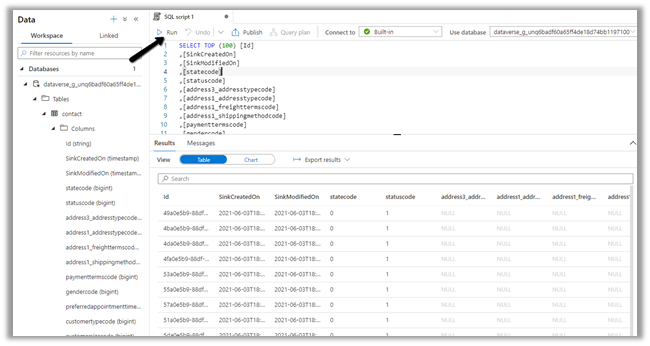
Within Synapse Studio we can see our Dataverse Database and run query.

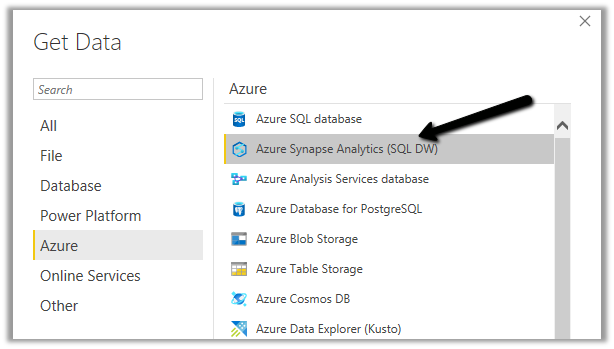
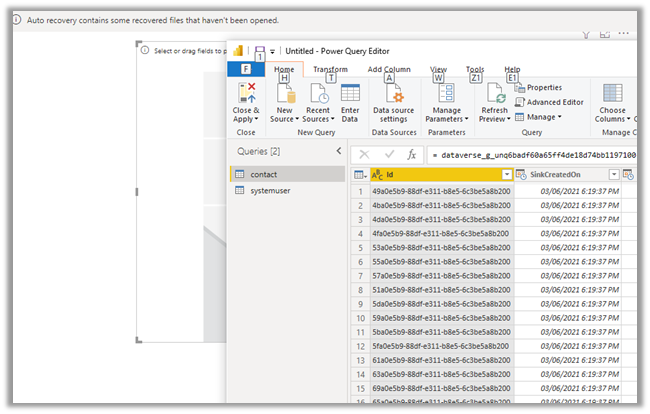
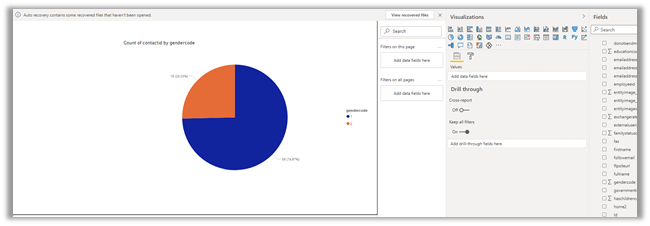
Similarly, we create a Power BI report with Azure Synapse Analytics (SQL DW) connector.

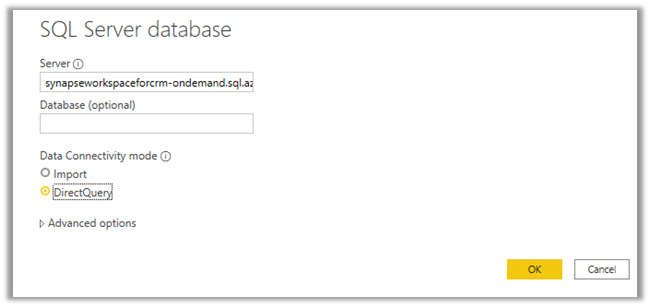
Copy the Serverless SQL endpoint of the Synapse workspace.

Select the Direct Query option.

https://azure.microsoft.com/en-gb/blog/power-your-business-applications-data-with-analytical-and-predictive-insights/

Hope it helps..

Advertisements

How to – improve data migration performance – SSIS & Azure Data Factory (Dataverse / Dynamics 365)


In one of our projects, we were executing SSIS Packages (KingswaySoft’s Dynamics 365 SSIS Integration Toolkit) under Azure-SSIS Integration Runtime in Azure Data Factory.

Check out –

Deploy and run SSIS Package in Azure Data Factory

Deploy and run SSIS Packages that use KingswaySoft’s SSIS Integration Toolkit on Azure Data Factory.

After trying out different combinations, we eventually settled with batch size as 10 and thread as 15.

https://nishantrana.me/2021/06/08/data-migration-optimum-batch-size-and-threads-for-maximum-throughput-microsoft-dataverse-dynamics-365/

Also, we used multiplexing – running the CRM Destination Component under different application users.

To be precise, 4 in our case and we can increase it get further  improvement in the throughput.

And also based on the recommendation of our Microsoft’s Fast Track Architect we raised a Microsoft ticket to increase the number of web servers allocated from 2 to 3.

Below were our findings,

the earlier run was using batch size as 100 and thread as 20 with the number of servers as 2.

On updating the batch size to 10 and thread as 15 and with the number of servers allocated increased to 3, there was a huge performance gain.

Check the table below – 

The above table is sample run in the sandbox environment, during the final run in production we got the number of servers allocated, increased to 6, gaining further improvement.

Also, check out the below blog post to understand about the affinity cookie and its affect on performance, in case if we doing migration using custom code –

https://markcarrington.dev/2021/05/26/improving-bulk-dataverse-performance-with-enableaffinitycookie/

Hope it helps..

Advertisements

Modern Model App designer (preview) – Dataverse (Dynamics 365)


A new Model App designer (preview) was added to the platform recently.

It follows a page-based authoring approach and resembles the new UCI.

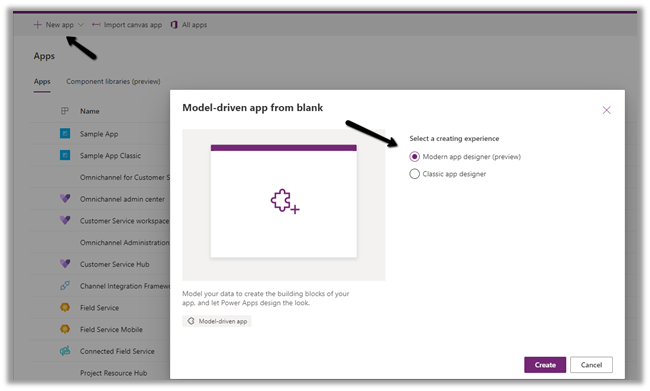
Within the Maker Portal, while create an new Model-Driven App, we can select Modern App designer (preview)
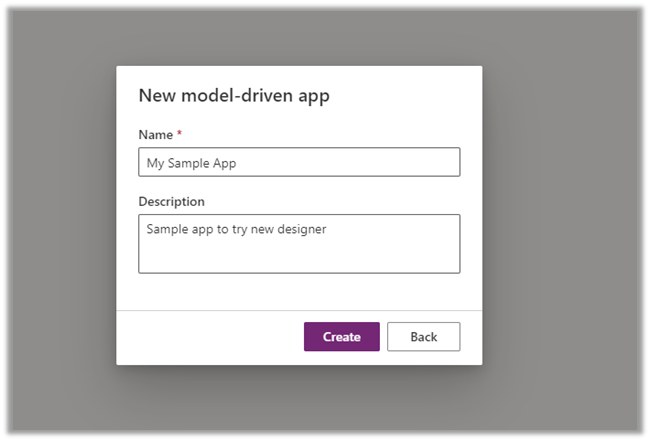
Provide the name and description to the app and click Create.
Click on Play to see how the default app looks like

Now let us add the lead and contact entity and some dashboards to it.

Click on New Page

Select Table based view and form. The other option is Dashboard.

Search and select Lead and Contact and leave it checked – Show in navigation option

This adds the form(s) and view(s) for the table selected.


We can click on form and view and can either let all the forms and views selected by default or can specify specific views and forms.

“No forms have been explicitly selected. All forms will be available by default.”

Similarly, we can add a Dashboard
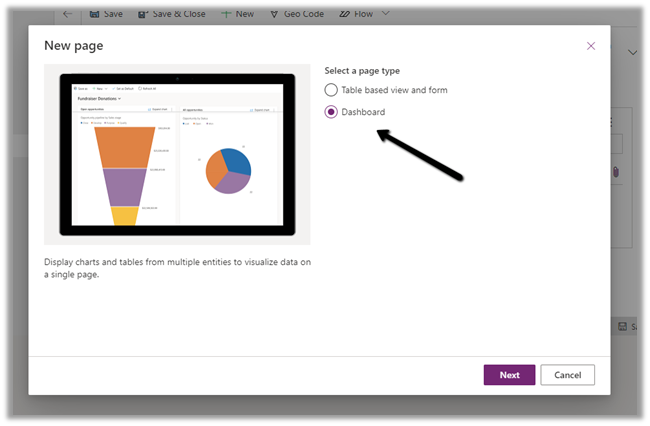
Here we have selected 2 dashboards and kept the option – Show in navigation checked.

We can update the title of the Dashboards added.

From the navigation menu, we can arrange the components added -i.e. move them up and down and as well remove them.
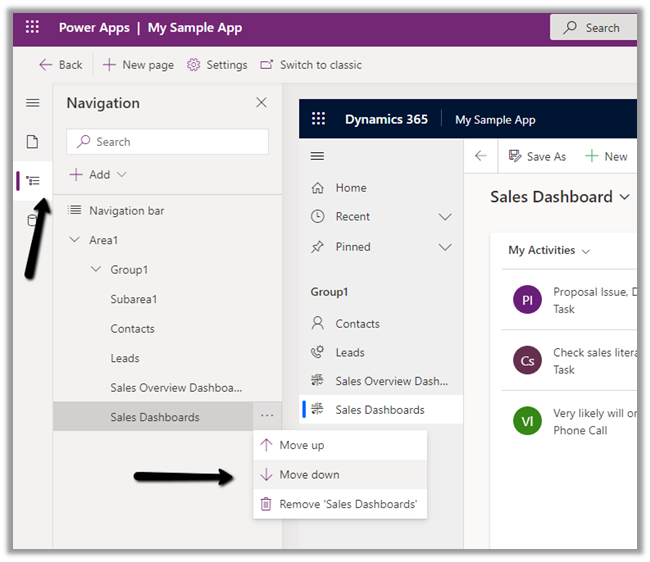
We can also add new Group and also the Subarea of type either Table or Dashboard.


Save and Publish the change and click on Play.

Our App is ready.

Similarly, we can edit an existing App in the new preview designer.

We can also Switch to classic 

Our Classic App Designer à
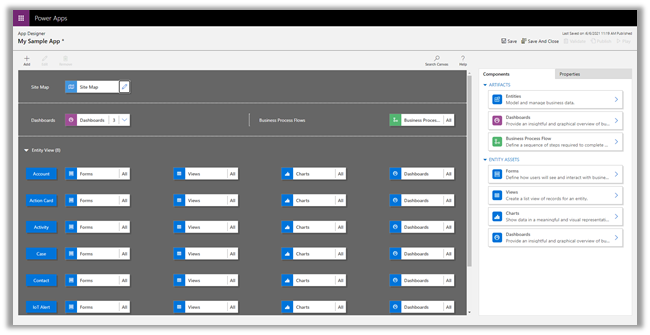
Lastly, the Data section in the new designer allows us to edit our entity/ table.

DataSection

Hope it helps..
Advertisements

How to – Show/ Hide header and ribbon menu dynamically on Dynamics 365/ Model Driven App forms


by Debajit Dutta (MVP – Business Solutions) https://debajmecrm.com/

Advertisements