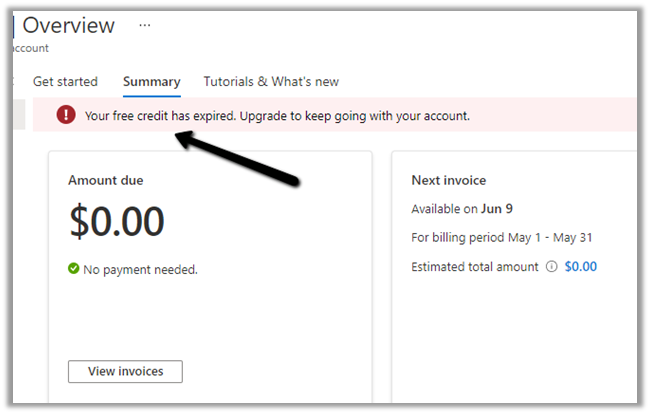
Recently our Azure Subscription using free credit had expired and we wanted to remove the card details associated with the billing.
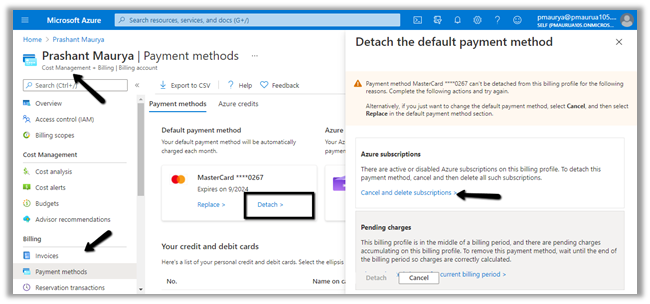
If we try to Detach it (and if the card is being used as the default payment), it will give us the below message
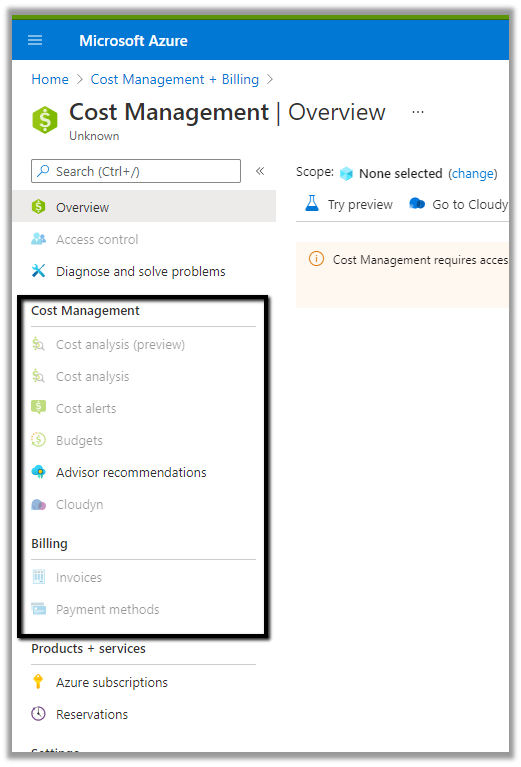
Cost Management >> Payment Methods > > Detach
“There are active or disabled Azure subscriptions on this billing profile. To detach this payment method, cancel and then delete all such subscriptions.”
And if we trying to delete the billing profile
Cost Management >> Billing profiles
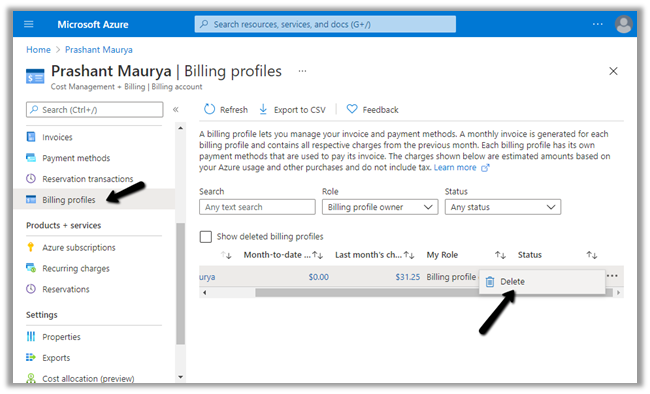
We would get the below message
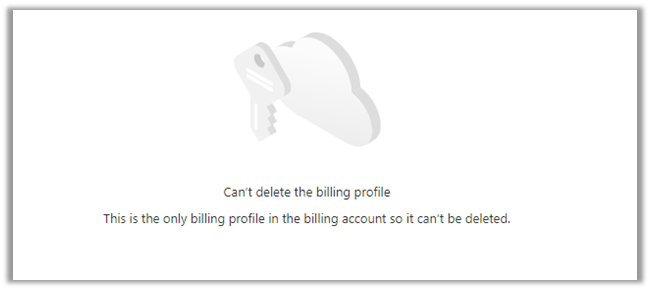
So first we need to delete the subscription here.
Now again we can only delete the free trial subscription after 3 days of canceling it. So we would have to try deleting the subscription after 3 days.
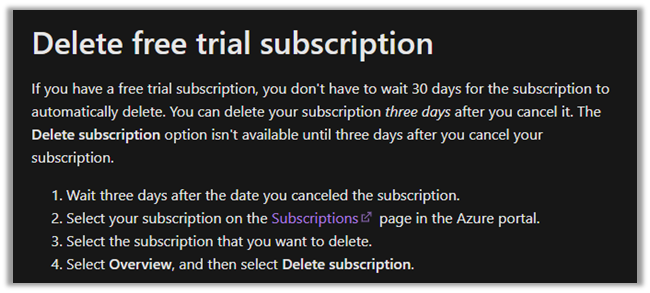
Trying after 3 days,

will give us the option to delete the subscription
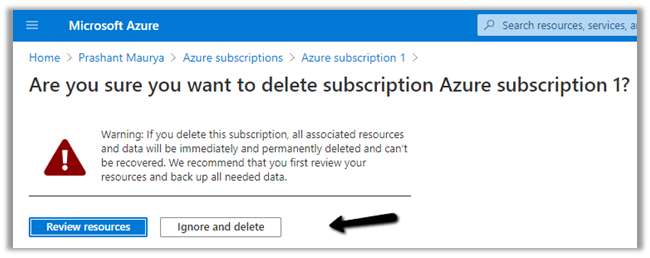
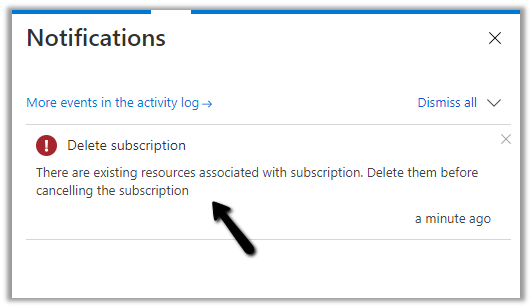
But as we have the resources associated we will have to delete the resources first.
Navigate to All resources and delete the resources first.
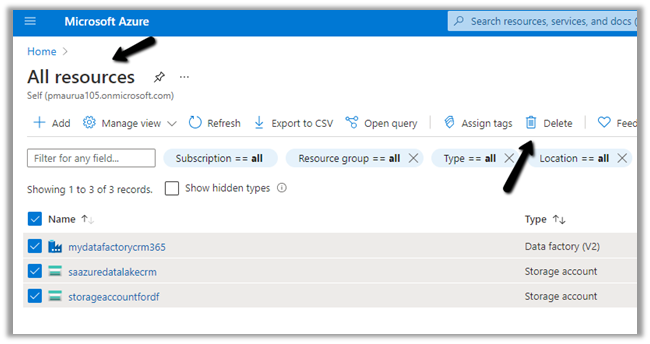
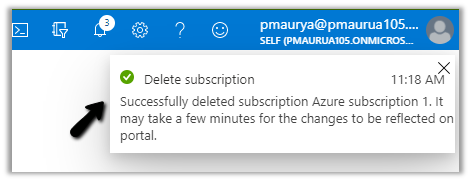
After deleting the resources, deleting the subscription will be successful
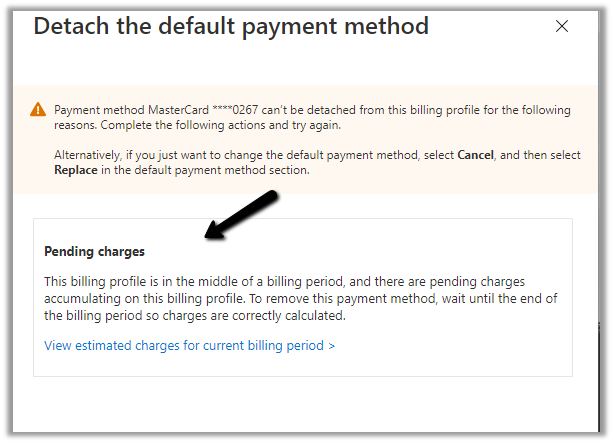
Let us now try to detach the card again.
This time the Azure Subscription existing message was gone as we had deleted it, however, we were still not able to detach and it was asking to wait until the end of the billing period.
Instead of waiting till the end of the billing period – next we tried the below option
https://docs.microsoft.com/en-us/azure/cost-management-billing/manage/cancel-azure-subscription#how-do-i-delete-my-azure-account
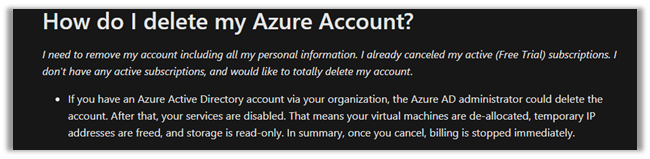
i.e. Deleting the Azure AD Account. (through another admin user’s account)

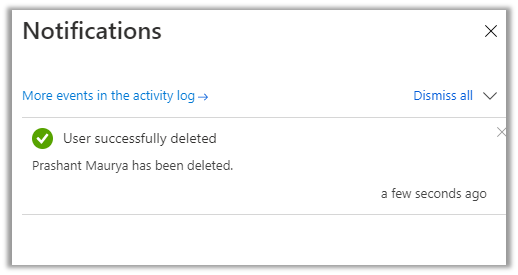
After successful delete, we can see all the options disabled.
So basically the fastest way to remove your personal information from the Azure Free Trial is to cancel the subscription, delete it and then DELETE the account/user.
Hope it helps..


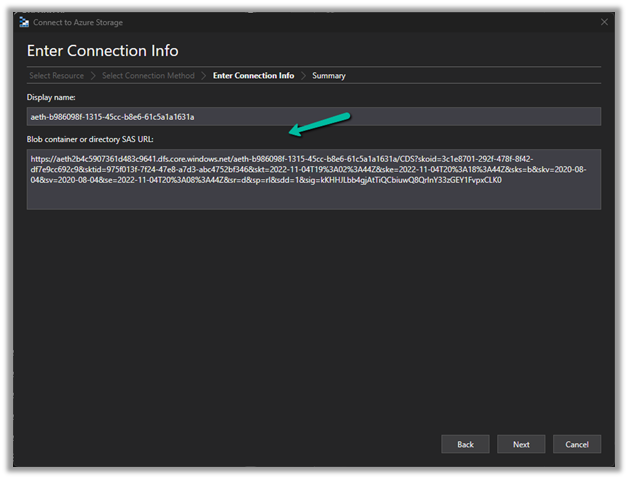 Now we have access to the storage