How to – change user’s business unit without removing the security roles in Dynamics 365 / PowerApps (EnableOwnershipAcrossBusinessUnits setting)


When we change the user’s business unit, all the current security roles of the users are removed and we need to assign the roles again to the user. This has always been the default behavior. 

Also check – Modernize Business Units –  https://nishantrana.me/2022/01/04/modernize-business-units-matrix-data-access-structure-record-ownership-across-business-units-preview-in-dynamics-365-dataverse/

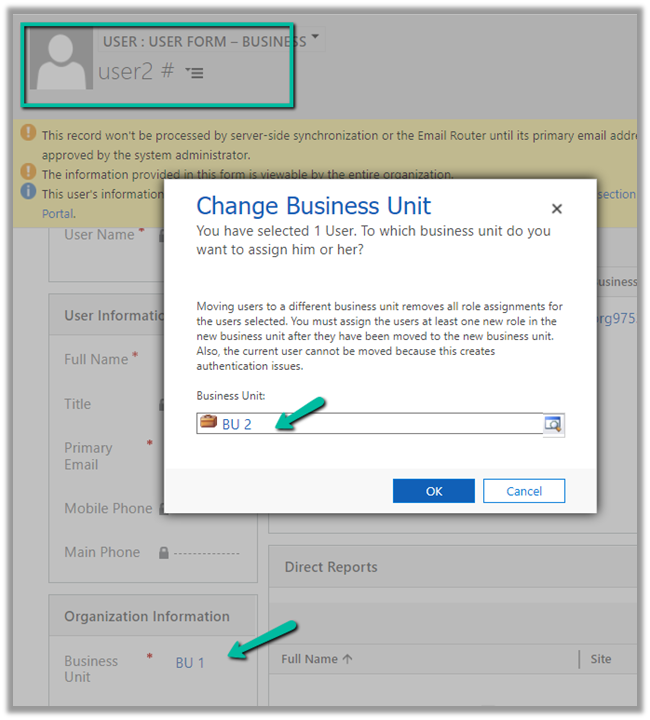
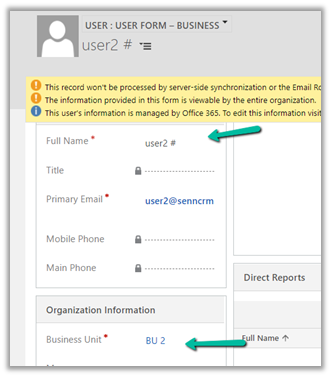
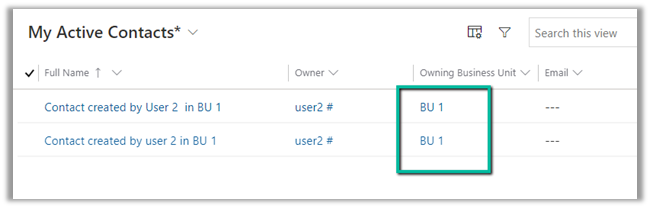
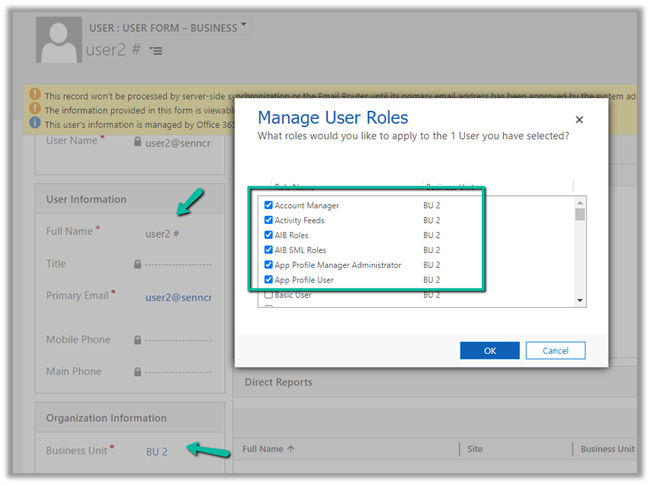
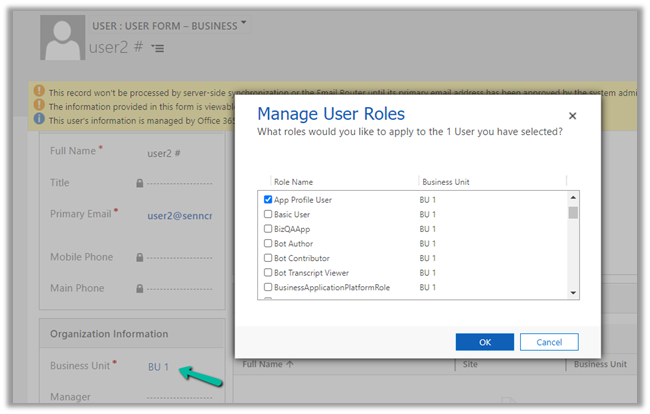
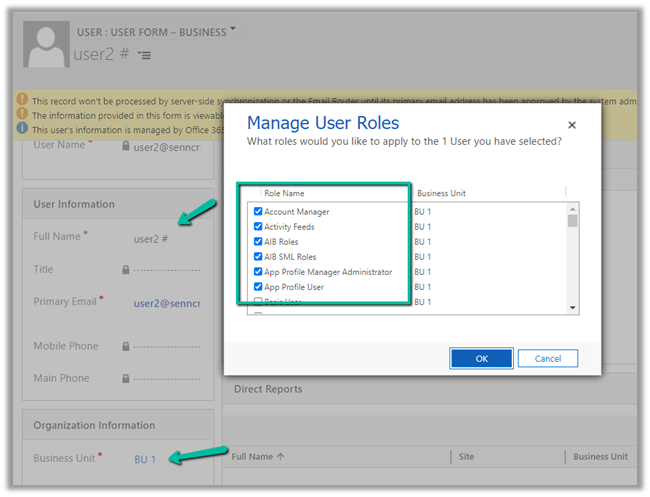
For E.g. below user User 2 belongs to Business Unit – BU 1 and has the following security roles assigned.

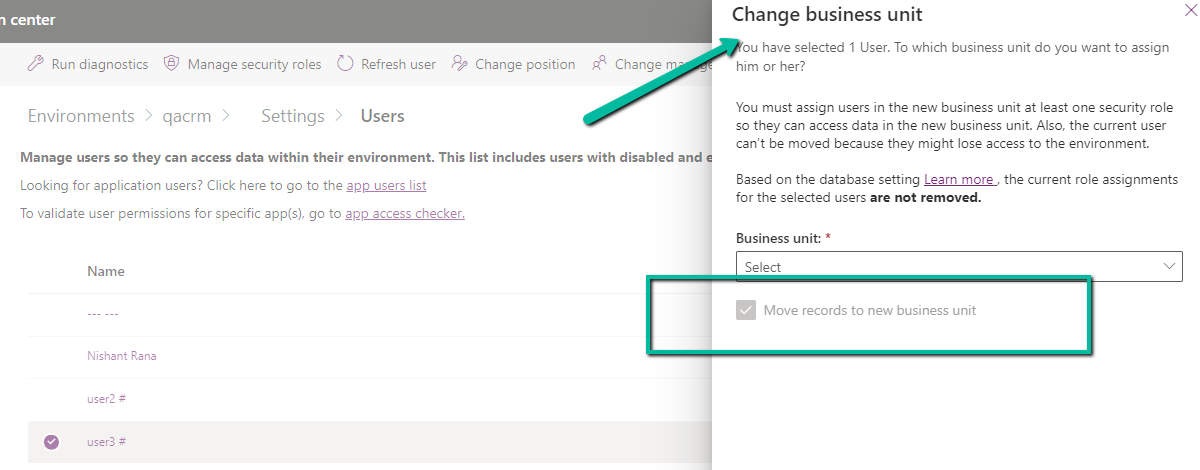
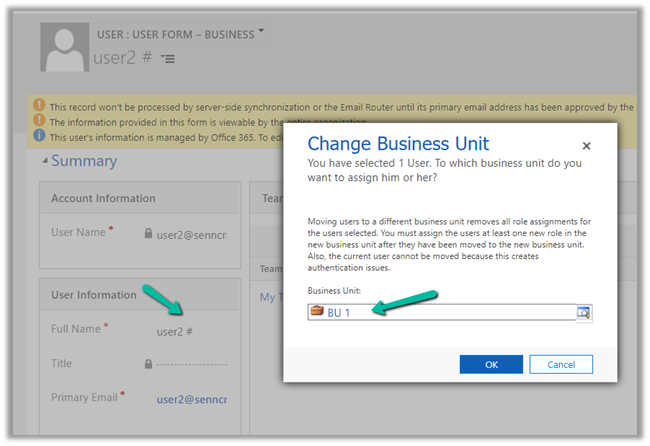
Now changing the user’s business unit to BU 2

will remove all his security roles assigned.

We can now override this behavior by updating the new option /setting added

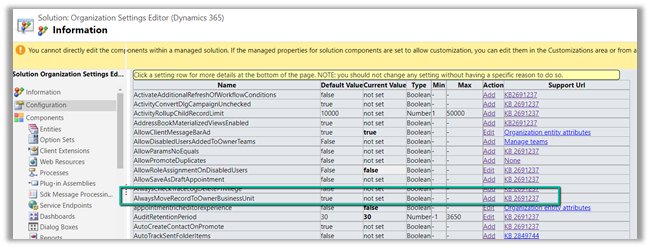
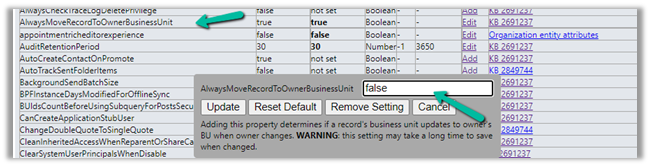
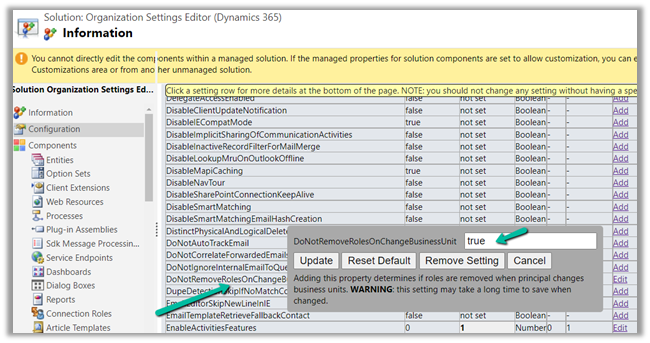
DoNotRemoveRolesOnChangeBusinessUnit(this property determines if roles are removed when the principal changes business units) through the
Organization Settings Editor tool

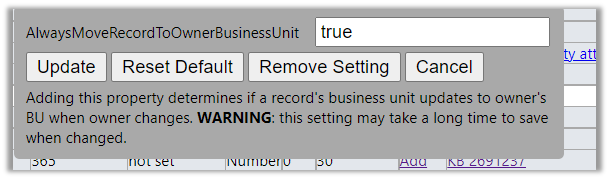
After we have installed the managed solution, we can update the setting and set it as true

Let us assign the security roles to User 2 in BU 2.

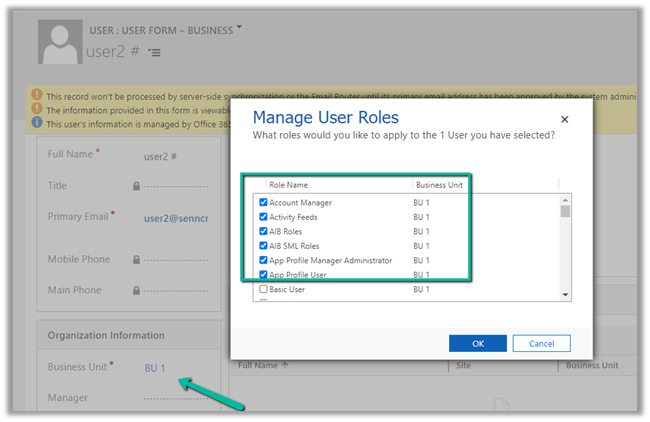
Let us now change the BU of user 2 back to BU 1.


As expected after updating that setting – DoNotRemoveRolesOnChangeBusinessUnit– as true – we can see the security roles still intact, even on the change of Business Unit for the user.

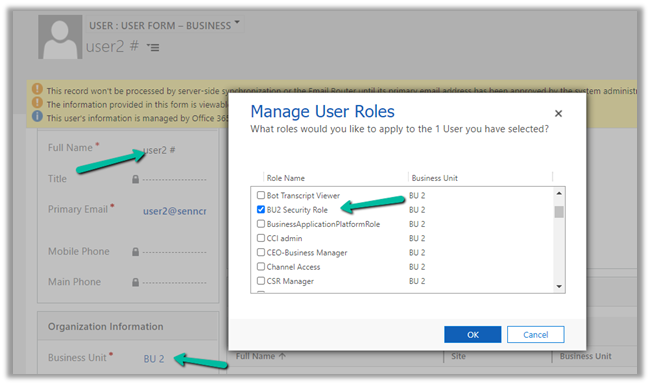
What happens if user 2 is assigned a security role – BU2 Security Role, which is created in BU 2 Business unit and is not available in BU 1.

Let us change the business unit to BU 1.

As expected BU2 security role is not available in BU 1, so that role is not assigned, only the common security role coming from parent BU remains intact.

Hope it helps..

Advertisements

Modernize Business Units / Matrix data access structure -Record ownership across business units (Preview) in Dynamics 365 / Dataverse


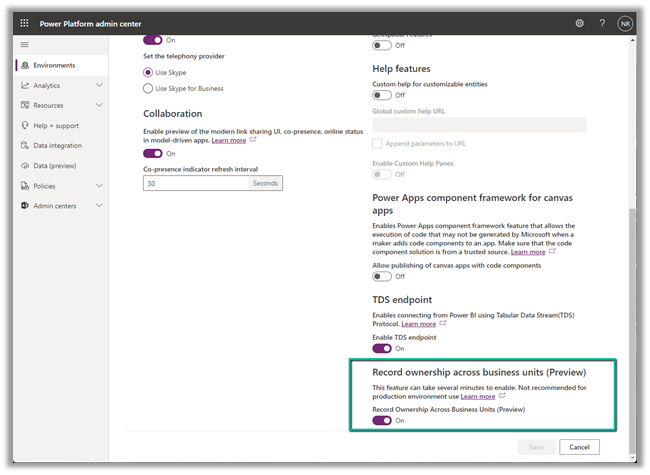
To enable this preview feature, log in to the Power Platform admin center, switch on the

Environment >> Settings >> Features >> Record ownership across business units (Preview)

It took around 5 minutes to enable.

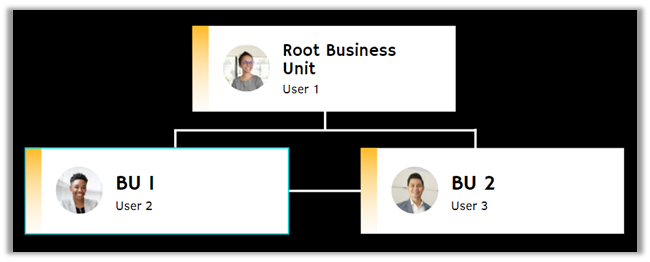
Now let us say we have a BU structure like below.

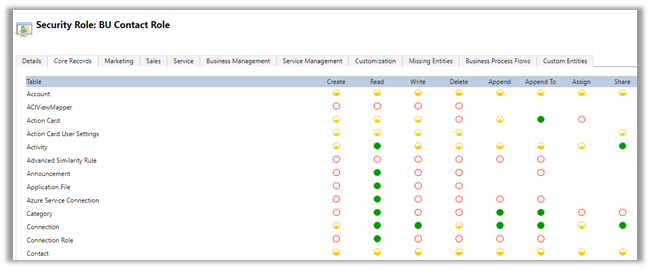
And custom security roles with BU level access to Contact – BU Contact Role.

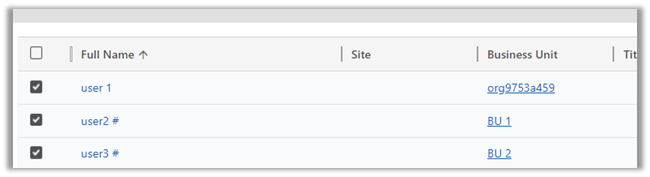
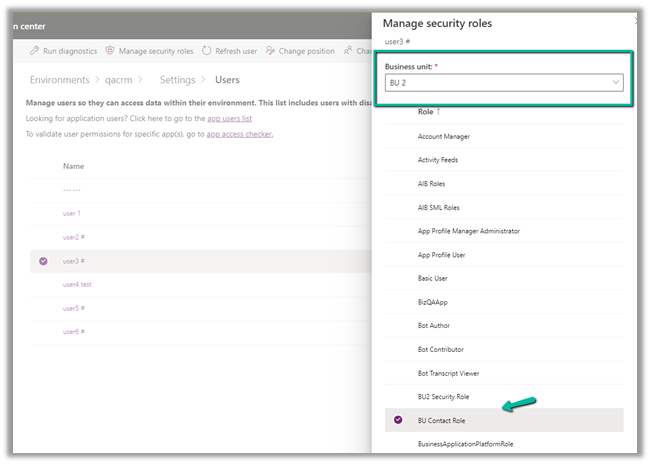
Both user 2 and user 3 have only the BU Contact Role of BU 1 and BU 2 business unit respectively assigned.

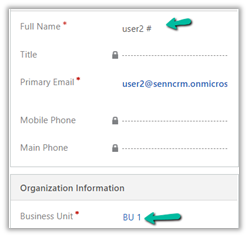
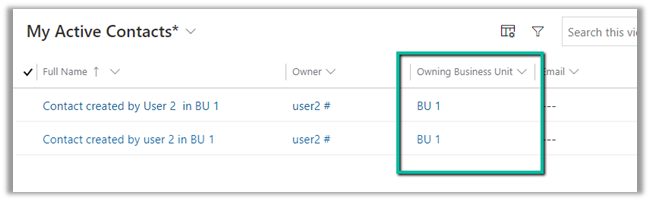
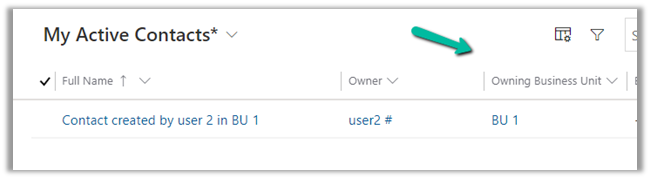
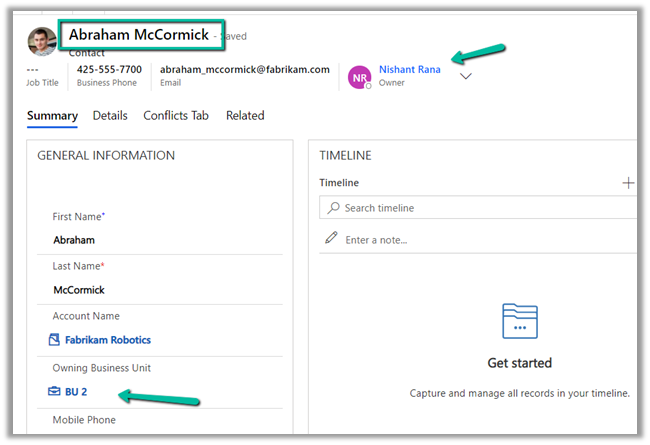
Below is the Contact record created by User 2.

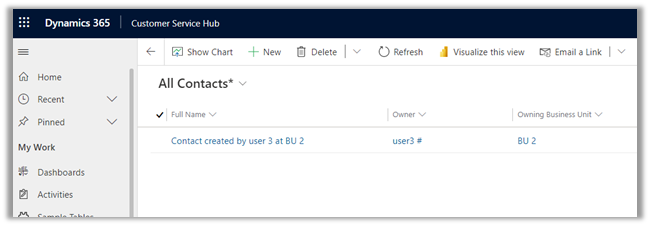
As expected User 3 does not have access to the above record.


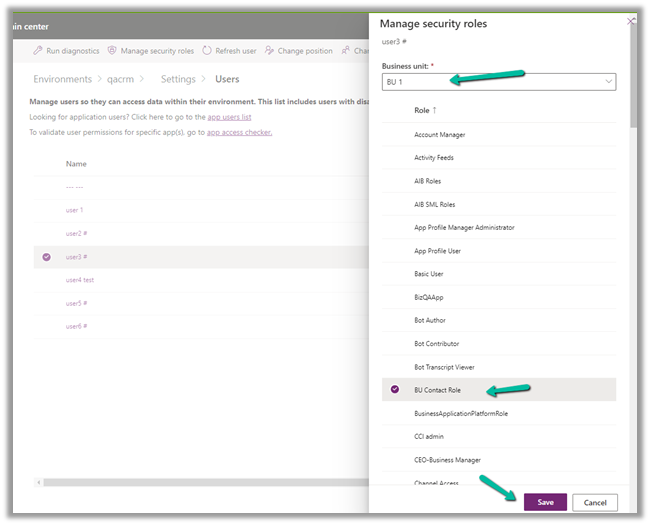
Now let us provide the same BU Contact role to User 3 but this time from BU 1.

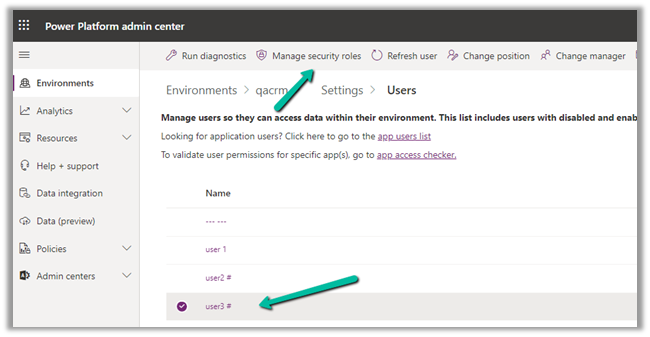
Select the User 3 in Settings >> Users >> Manage Security Roles

The user has already has BU Contact Role in BU 2. Let us change the Business Unit and assign the same role for BU 1.

Click on Save.

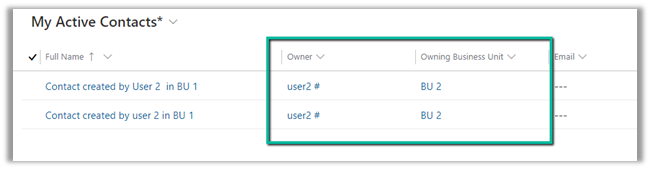
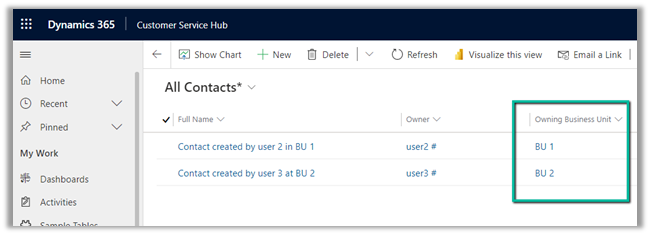
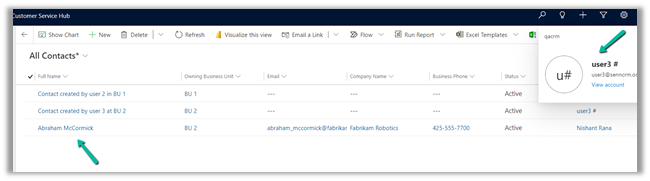
On refreshing the All Contacts view for user 3 now we can see both the records, showing the corresponding owner and the owning business unit the records belong to.

This makes it easy to provide required access to the users across the business unit, without the need of sharing the record or using team access or teams ownership concept here.

With this preview, we can also update the Owning Business Unit field.

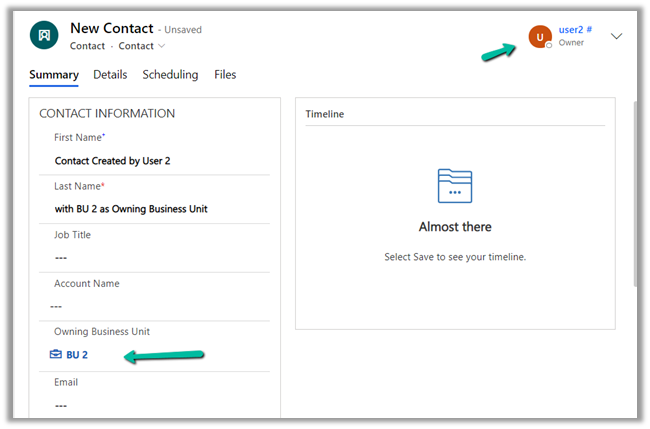
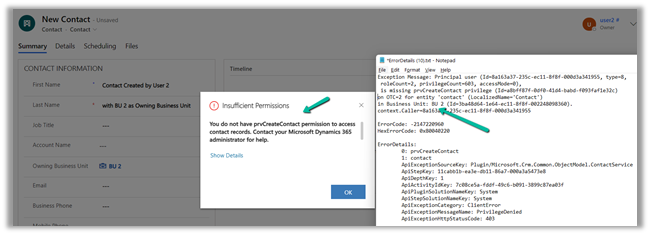
Below the User 2 is creating a new contact record and setting Business Unit as BU 2.

Here it fails because User 2 only has BU level access for Contact Create Rights, and he is trying to create at BU 2.

Let us update one of the existing contact records, by setting Owning Business Unit as BU 2, this time through System Administrator user which belongs to the root Business Unit.

As expected the record is available to User 3, as we have set BU 2 as the owing business unit.

Get all the details here –

https://docs.microsoft.com/en-gb/power-platform/admin/wp-security-cds#matrix-data-access-structure-modernize-business-units—preview

Hope it helps..

Advertisements

Quickly visualize the VIEW data using Power BI quick report (preview) in Dynamics 365 / Power Apps


With a recent update to the platform, now we can use Power BI quick report (preview) on the view page in a model-driven app, to visualize the data.

To enable the feature, open the model-driven app in the modern app designer.

Here we are opening the Customer Service Hub app in the modern app designer.

Click on Settings.

Navigate to Features and enable the Power BI quick report visualization on a table option.

Publish and Play the app.

We can see the Visualize this view option added in the command bar for all the views within the app.

It asks for getting a power bi license if we do not have one.

Click on Get a free license and set up the Power BI Account.

Now Visualize this view option will open the Power BI report.

The visuals will run under the context of the view selected – All Contacts in this case.

The visuals will use some of the fields and add additional fields to the table in the report.

Here we are running it against the My Cases view.

The Power BI quick report –

The report gets updated based on the fields selected in the data pane. Power BI adds or removes charts based on the selected fields as shown below.

We can also further Personalize the visual

Visualize this view doesn’t run on selected records for a view.

The option is also available for the Activities view.

The option also works on a Custom table/entity.

Get all the details here –

https://docs.microsoft.com/en-us/power-bi/create-reports/dynamics-quick-create-report

Hope it helps..

Advertisements

Fixed – The API version ” is not valid for provider ‘Microsoft.BusinessAppPlatform’ – Action ‘Force_Sync_user’ failed error – Power Automate


Recently while testing a flow we got the below error message

The API version ” is not valid for provider ‘Microsoft.BusinessAppPlatform’ The supported list of API versions are: ‘2016-02-01, 2016-11-01, 2018-01-01, 2018-10-01, 2019-05-01, 2019-10-01, 2020-04-01, 2020-05-01, 2020-06-01, 2020-08-01, 2020-09-01, 2020-10-01, 2021-03-01, 2021-04-01, 2021-07-01’.

API Version is as the name suggests is the version of the API, as there could be discrepancies in the different versions of API with regards to the input and the output parameters or some other changes.

We were using the below template

Force Sync Azure Active Directory Group members to specified CDS instance

The existing Force Sync user action in the template was having the API version as blank.

The way we fixed it was by adding a new Force Sync user action and deleting the existing one.

The new version of Force Sync User action was listing down the Environment in the drop-down and also had the version number mentioned in it.

After making the changes, this time it ran successfully.

Also, check

https://nishantrana.me/2021/12/14/the-trick-to-force-trigger-user-sync-power-platform-dynamics-365/

https://nishantrana.me/2021/12/13/using-force-sync-user-to-sync-powerapp-crm-users-power-platform-dynamics-365/

Hope it helps..
Advertisements

Using Custom Process Action with Code for integration – Dynamics 365 / Microsoft Dataverse


There are 2 ways to create a custom message in Dataverse, one is through action, and the other is through Custom API.

Check the post on Custom API

https://nishantrana.me/tag/custom-api/

https://nishantrana.me/2021/01/13/use-custom-api-to-create-custom-messages-in-dynamics-365/

Custom Process Action vs Custom API –

https://docs.microsoft.com/en-us/powerapps/developer/data-platform/custom-actions#compare-custom-process-action-and-custom-api

With custom process action we can define business logic using a workflow, and we can extend it using either custom workflow activities or registering the plugin.

If we are just defining action just for the custom message and then using plugin/custom workflow activity for defining all the logic (and not using workflow), it is recommended to use the Custom API feature instead.

Here however we will have a look at the way we had implemented global custom action for integration with the external system for any inbound call to CRM.

Below is our sample custom global action with one input and output parameter.

For the output parameter, we are setting the value in the step.

Next, we have 2 plugin steps registered one on the pre-validation stage and the other on post-operation.

Pre-validation because we want to run the logic outside the transaction, perform validation, log exceptions, etc.

Pre-validation example –

https://nishantrana.me/2018/11/05/plugin-on-pre-validation-stage-in-dynamics-365-ce/

https://community.dynamics.com/365/sales/b/crminogic/posts/plugin-pre-validation-operation-to-show-an-error-message-as-well-as-log-the-error

Post-operation because action’s output parameter would only be available in the post-operation and used Shared Variable to pass the custom response from pre-validation plugin to post-operation.

On executing the action

We get the following plugin trace logs as expected.

One for pre-validation

Post-operation

Hope it helps..

Advertisements

How to – Use the new command designer to customize the command bar – Dynamics 365 / Power Apps


Using the modern app designer either open an existing model-driven app or create a new model-driven app in https://make.powerapps.com/

Select Edit >> Edit in preview

Select any entity/table and select the Edit command bar (preview)

The different command bars that can be edited are the Main grid, main form, subgrid view, and the associated view.

  • Main Grid view–

  • Main Form view –

  • Subgrid view–

  • Associated view –

The legacy / classic button is not supported currently.

Check out all the known limitations

https://docs.microsoft.com/en-gb/powerapps/maker/model-driven-apps/command-designer-limitations

limi

Let us try adding a new command/button in the Main Form, and see what options do we get there.

Select + New command or the + New option

It adds a new button with the label NewCommand with options to duplicate, hide, move up and down, etc.

The different properties that can be configured for the new command –

Property

Description


Label

To set the label

Icon

To set the icon either using icon or web resource

Tooltip

Set tooltip title and its description.

Order Number

Customize the Order of the command

Action

Either run formula or run javascript


Open Formula Bar


Library for Run JavaScript

Visibility


Open Formula Bar for Show on Condition

Let us Save and Publish

Click on Play and open a lead form.

We can see the new command added.

Get all the details here –

https://docs.microsoft.com/en-gb/powerapps/maker/model-driven-apps/command-designer-overview

Hope it helps..

Advertisements