Page personalization uses cookies stored in the user’s browser for identifying the contact, and then fetches values for the contact record using JavaScript.
For page personalization to work –
- The domain should be authenticated
- It must use HTTPS
- Contact should have Prefilling enabled i.e. Prefill Marketing Form field in the Contact record should have the value Allow.
- Specify the contact fields to be made available.
Below is the marketing form (landing page) that we’d be using.
The form has a Remember Me element in it required for Personalized Pages. It gets automatically added to the form if we enable PreFill for the form.
https://nishantrana.me/2022/11/16/how-to-enable-prefill-for-marketing-forms/
We have only kept Pre Fill enabled for the City field. The other fields in the form have prefilled disabled. 
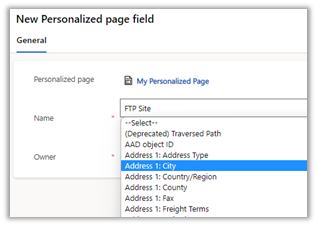
Create a new personalized page, navigate to Outbound marketing >> Marketing Content >> Personalized Pages and add
Personalized page fields to it
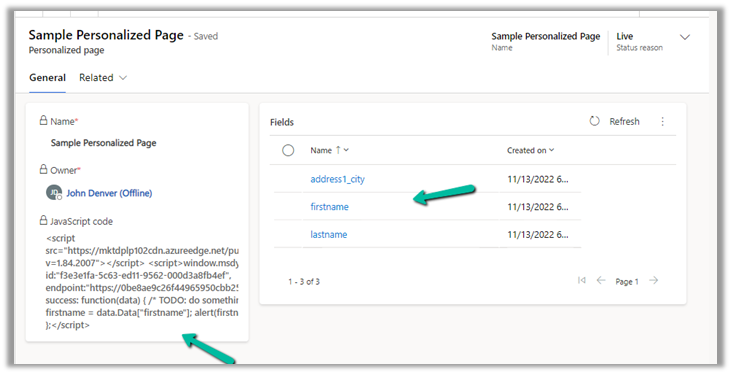
After adding the fields, Click on Go live.
Going live generates the JavaScript
code, that we’d paste into our page, in the <head> section of the HTML.
As we have added 3 Personalized page fields, we will have access to the value of only these 3 fields on the page where this script is used, even though our Marketing form can have multiple fields or even if the cookie has other values stored as part of another marketing form.
Below we have added the JavaScript code in the head section and modified it to fetch the value of 3 fields added and also we have the code for embedding the Marketing form.
Lastly, we have a Div element to show the personalized message to the user.

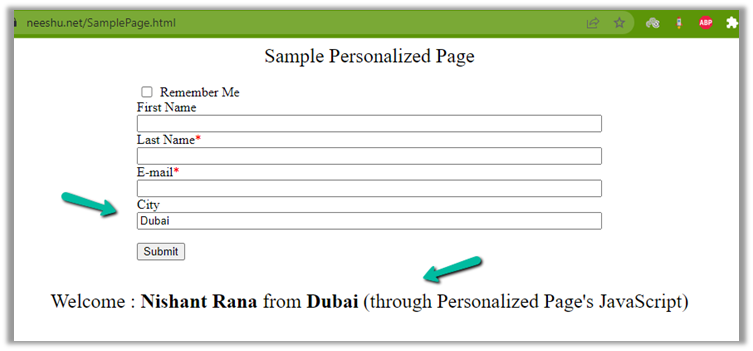
Below is our page

Let us populate the values and submit the details (with Remember me enabled)
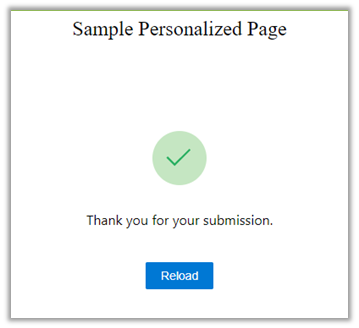
Let us refresh the page after a few seconds. This is because in the background we will have the lead/contact record either created or updated based on what we have specified in the Marketing form.
As expected, we have the div populated with First Name, Last Name, and City details using the Personalized Page’s JavaScript.
Also as we had Pre-fill enabled for only the City field, we can see the value automatically populated for it.
Please refer – https://meganvwalker.com/d365-marketing-personalised-pages-on-your-website/
Get more details – https://learn.microsoft.com/en-us/dynamics365/marketing/personalized-page-content
https://learn.microsoft.com/en-us/dynamics365/marketing/personalized-page-content#test-your-page-personalization

Hope it helps..

![[Exploration] Dynamics CRM Azure-aware plug-in + Azure Queue + Power Automate](https://nishantrana.me/wp-content/uploads/2022/11/demo-result.gif?w=1200)