Using the Write an email functionality of Copilot in Dynamics 365 Customer Service, the agents can quickly create responses, which they can use for their email.
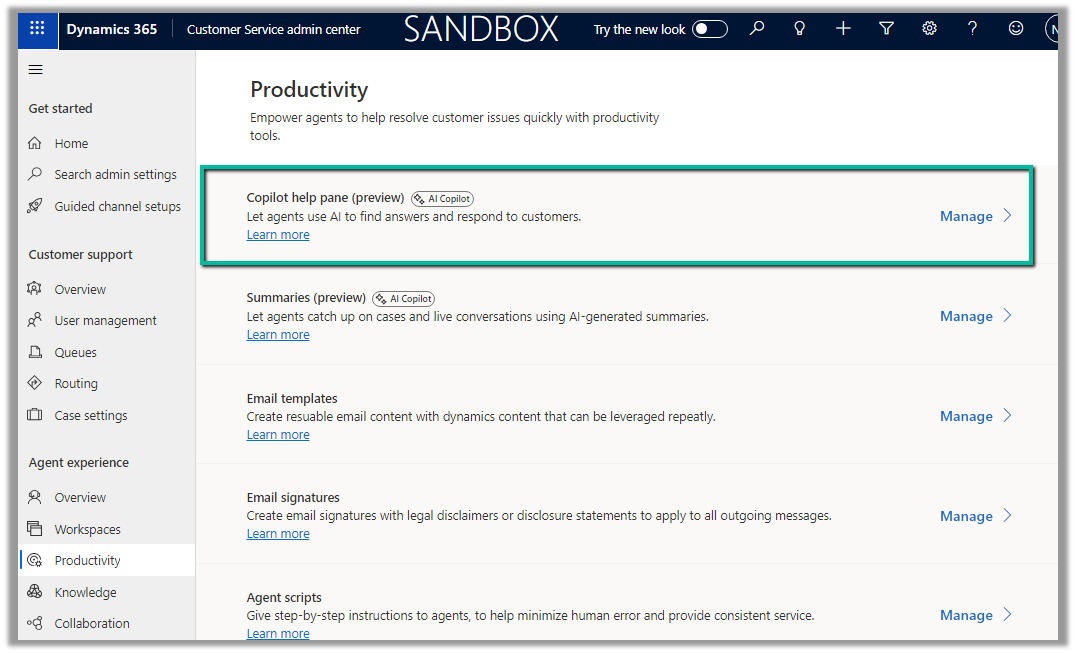
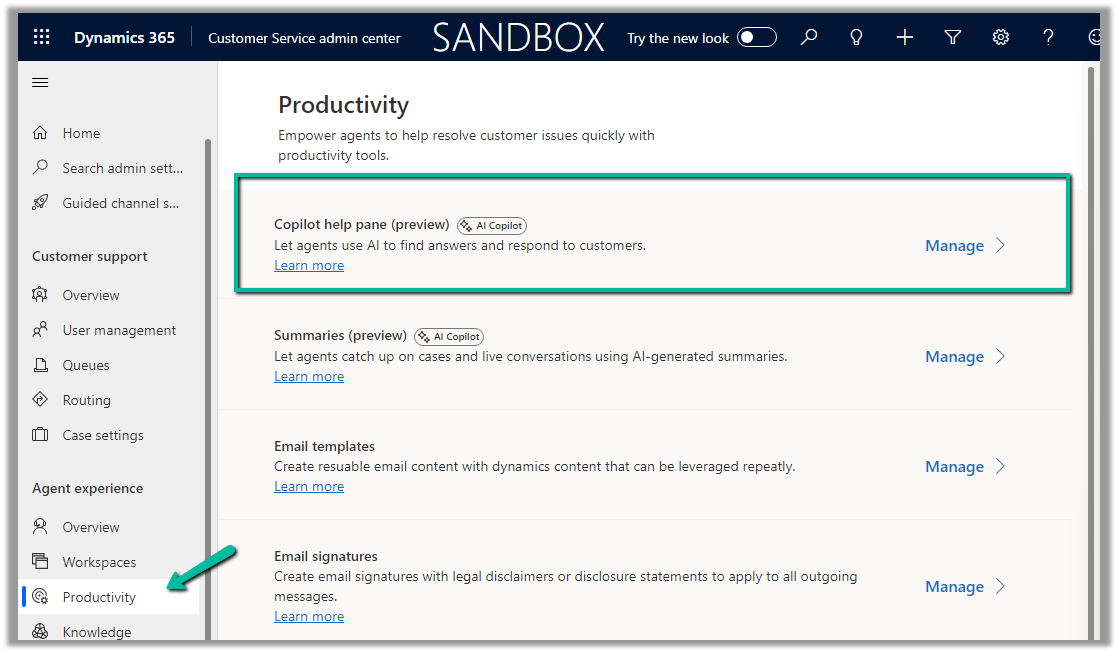
To enable it navigate to Customer Service admin center >> Agent experience >> Productivity >> Copilot help pane (Manage)
Check the For email option and save.
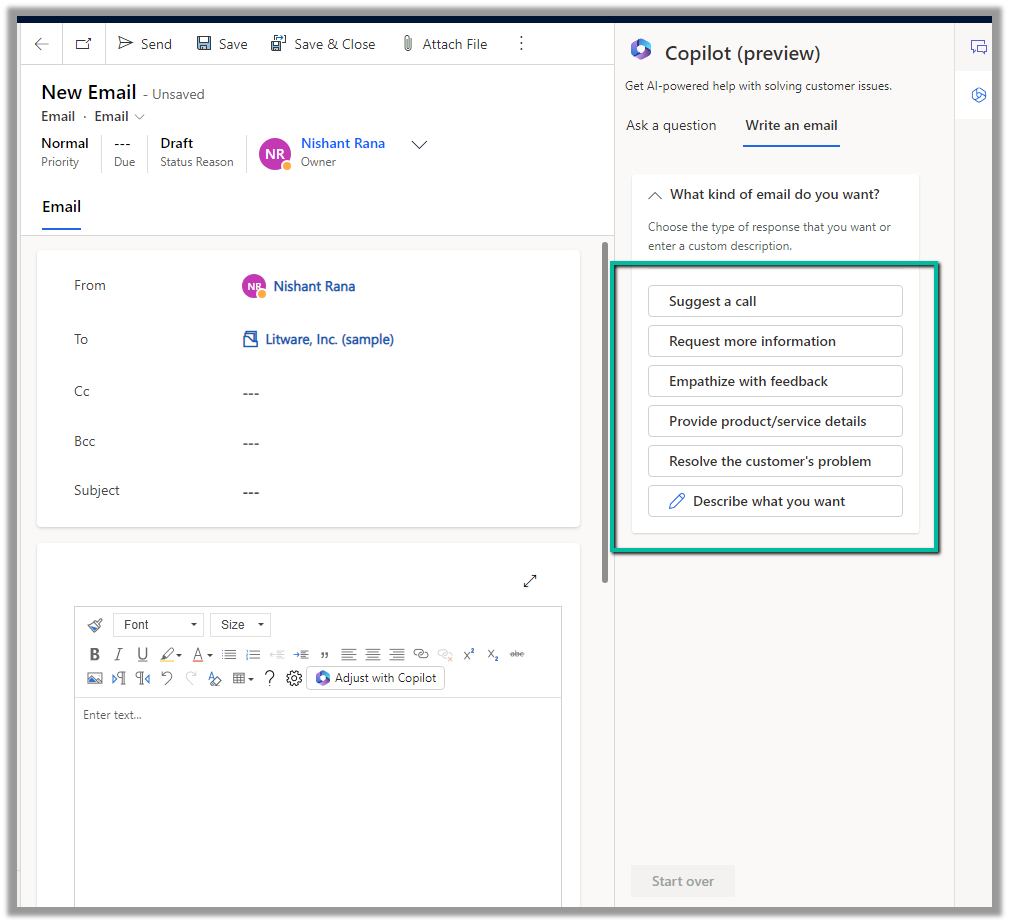
We can see the Write an email tab added to the Copilot help pane. It gets enabled in the context of an email record.
As soon as we open an email, we get predefined prompts like Suggest a call, Request more information along with the option to describe what exactly we are looking for.
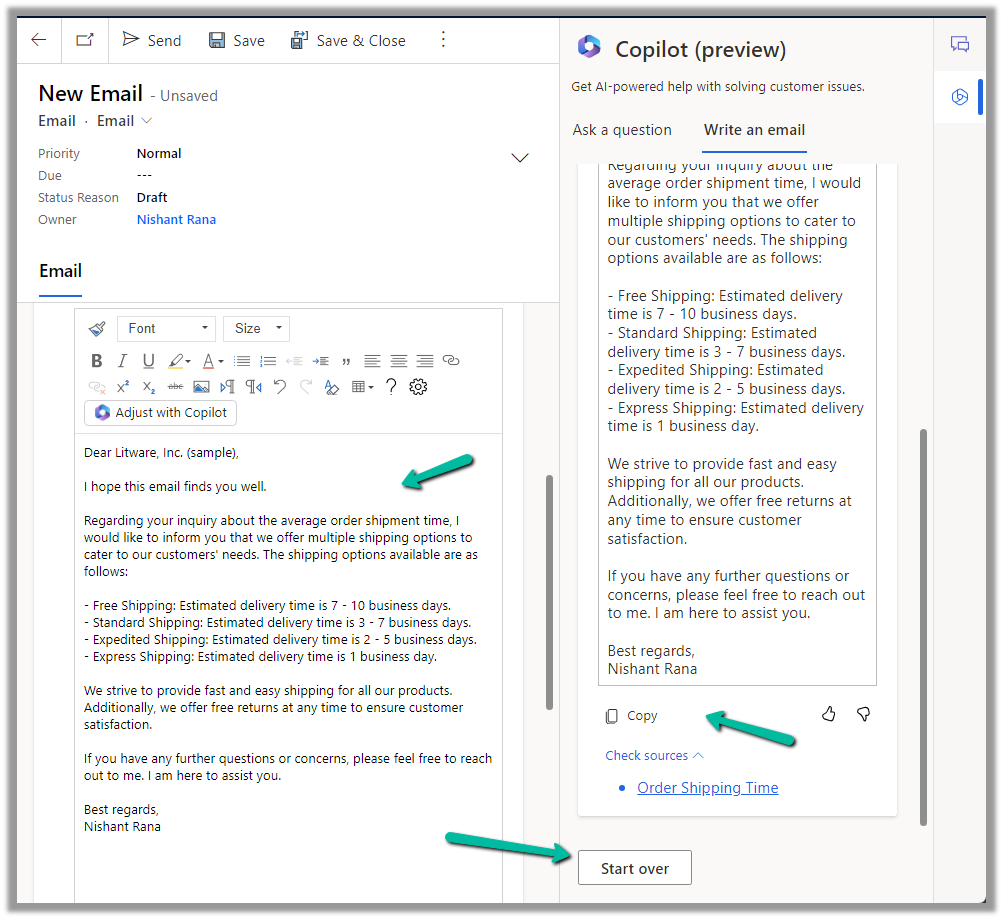
Here we have selected Resolve the customer’s problem prompt.
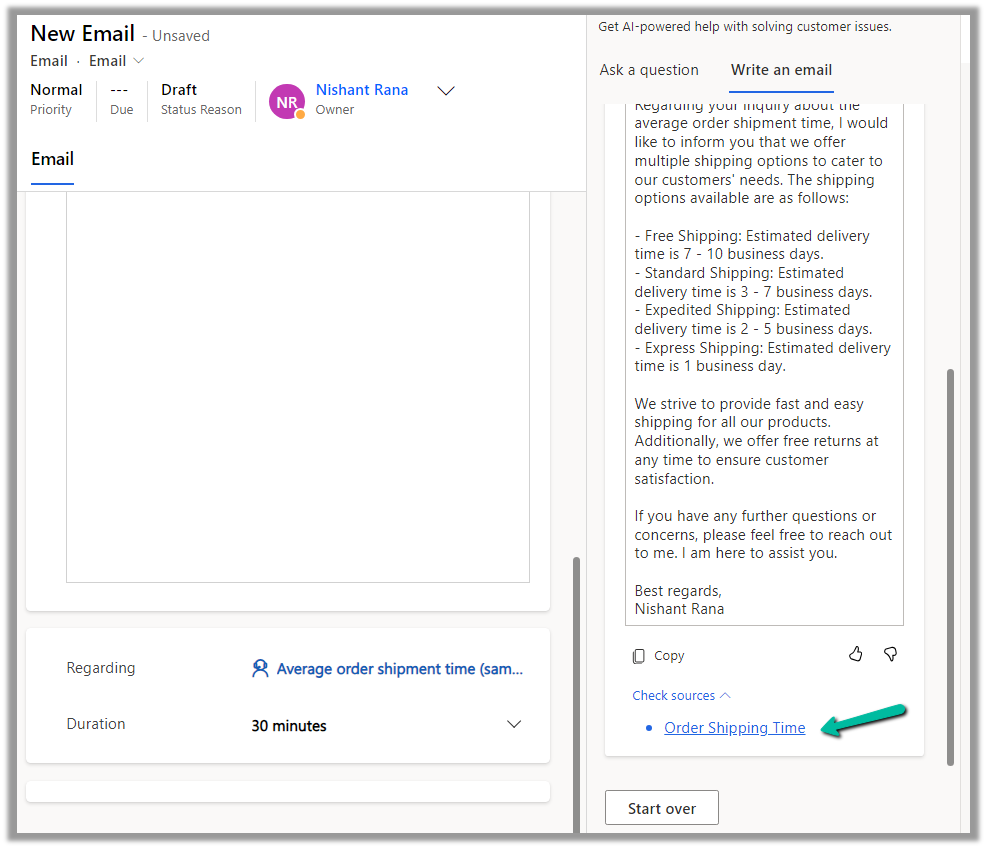
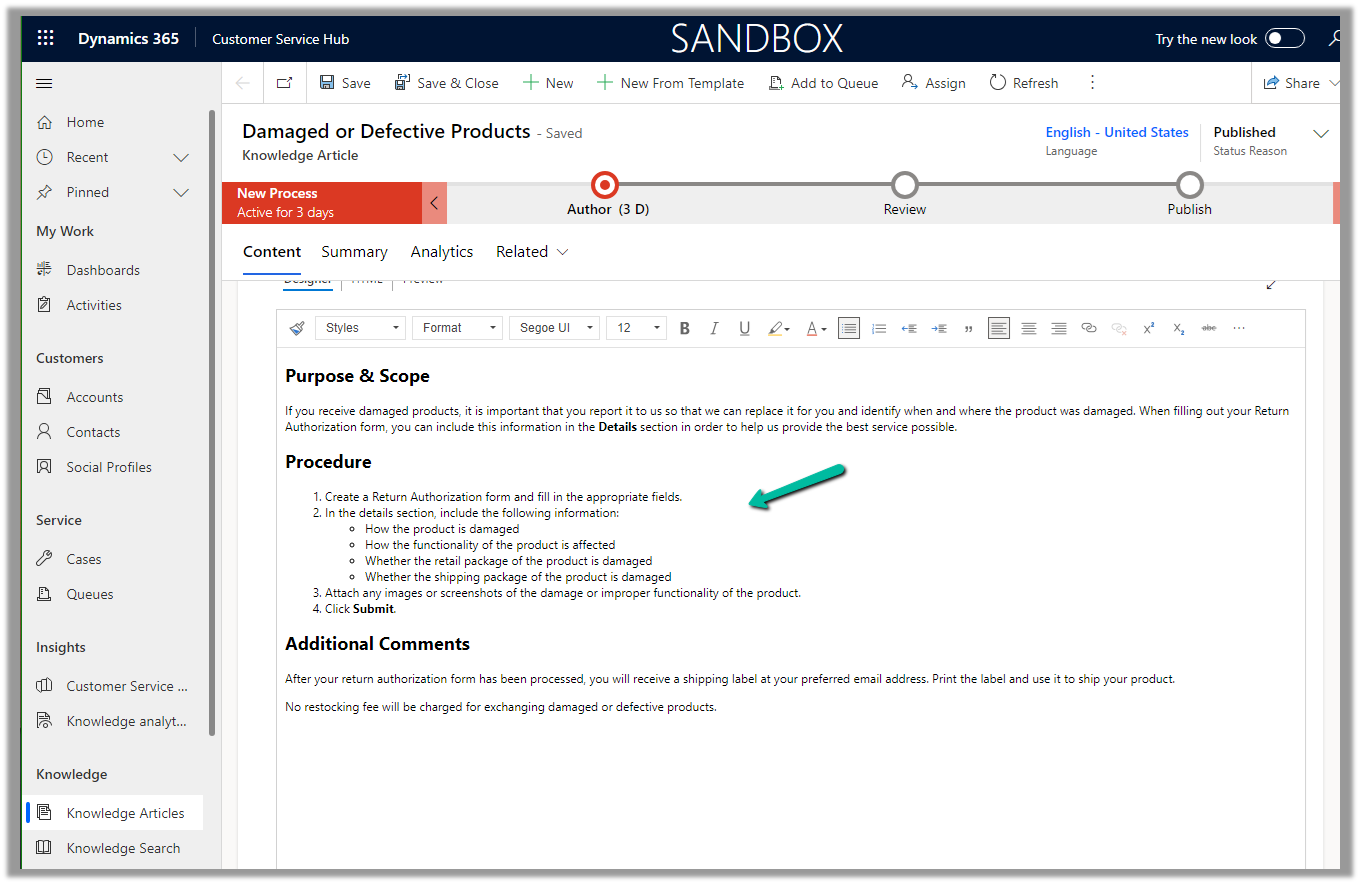
As we have an Average order shipment time case record associated with the email, the copilot refers to the existing published Knowledge base articles specific to shipment to generate the appropriate response.
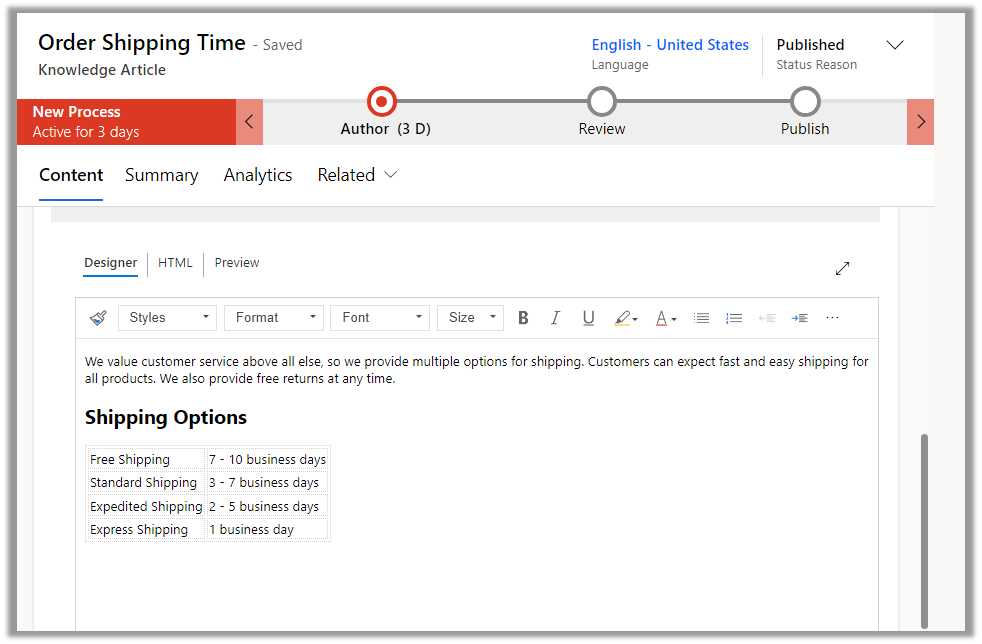
The corresponding knowledge article.
The agent can click on Copy to copy the response to an email, can review and edit it further (if required), or can start over and can select a different prompt to generate a different response.
Agents can use the “Ask a question” functionality from within the Copilot help pane, to ask questions for quick resolution of the case.
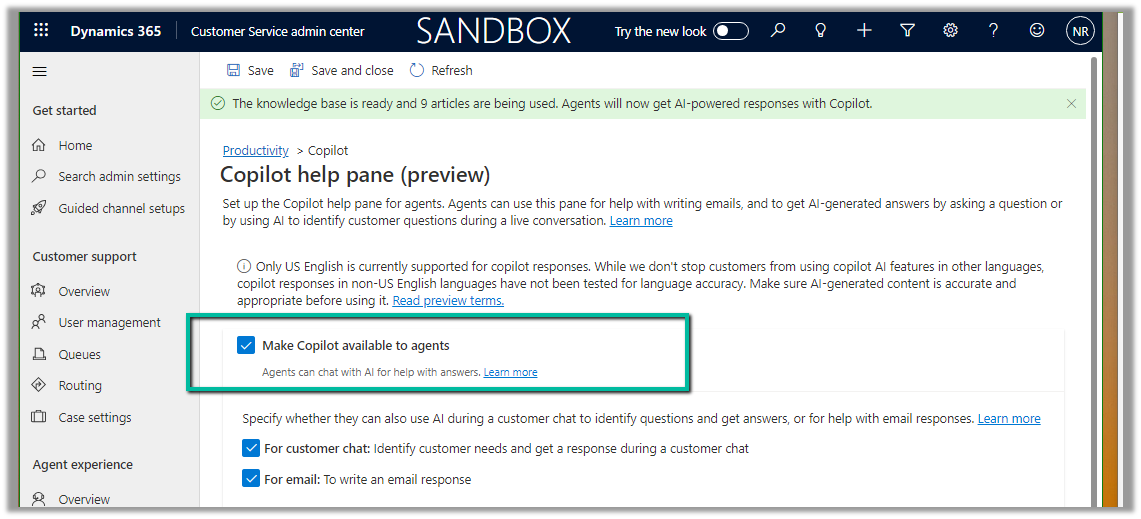
To enable it navigate to Customer Service admin center >> Agent Experience >> Productivity >> Copilot help pane (preview) (Manage)
Check Make Copilot available to agents option and save the settings.
Back in Customer Service Hub (or any other apps where we have Copilot enabled), we can see the Ask a Question tab in the Copilot help pane.
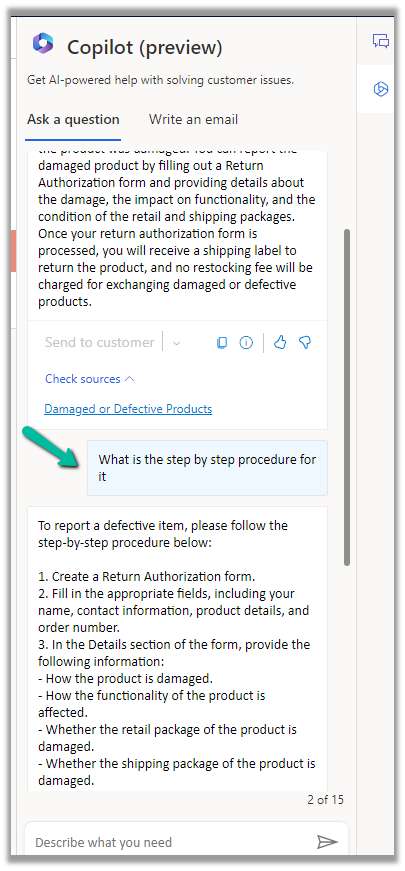
We can then post our questions, specific to the case in hand.
Below we can see we have asked for any policy about defective items and the response we received.
It also mentions the source from which it got the response.
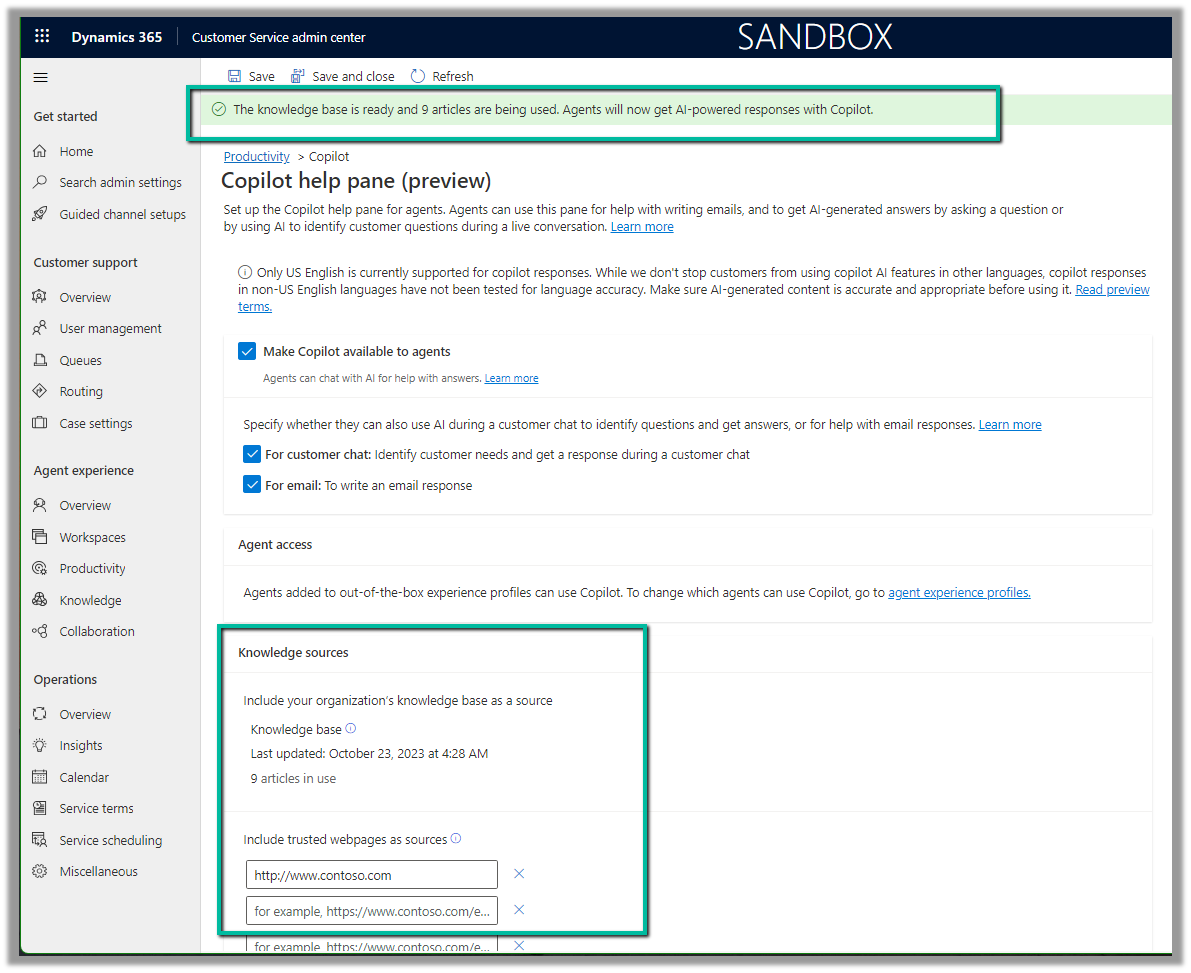
The copilot uses the internal (Published) Knowledge Articles to generate the responses.
If we go back to the setting where we enabled the Copilot help pane, we can see the message at the top about the knowledge base articles being used. Apart from the internal Knowledge base, a maximum of 5 trusted domains can be configured and can be used to produce the result.
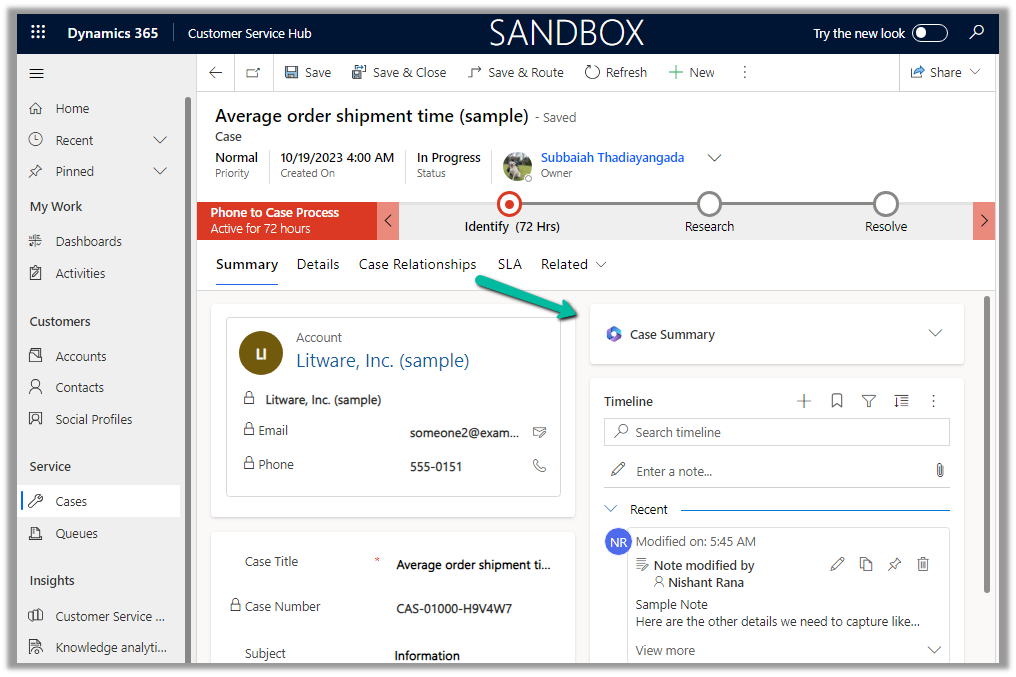
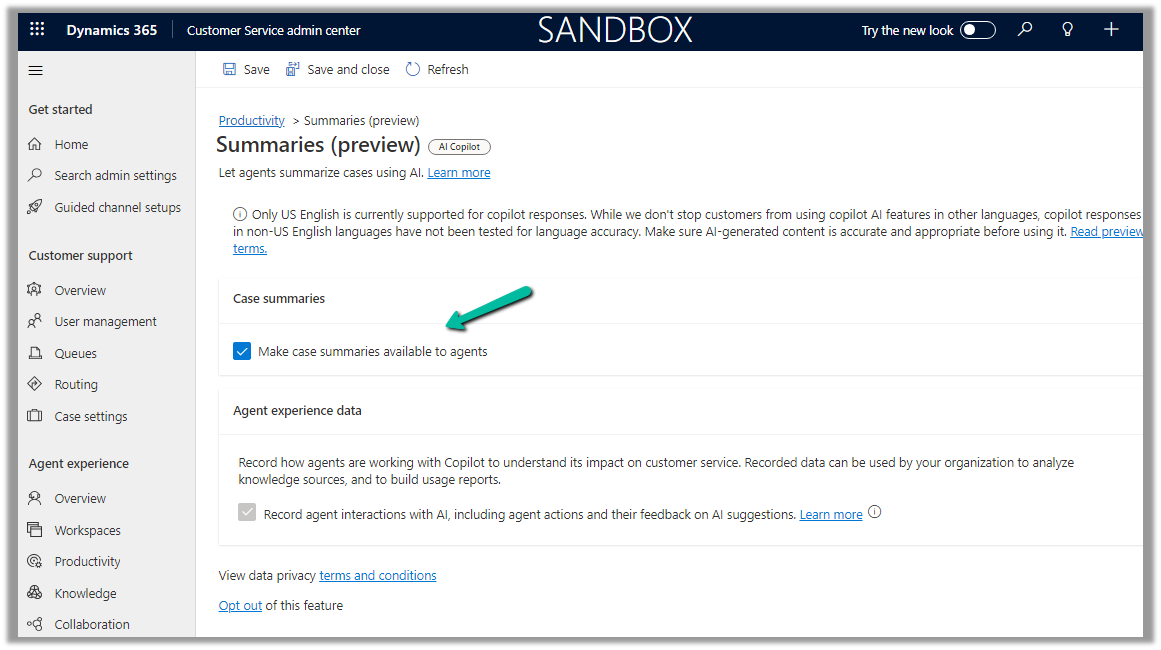
We can make use of copilot to summarize the cases. It applies to cases that are canceled and resolved also.
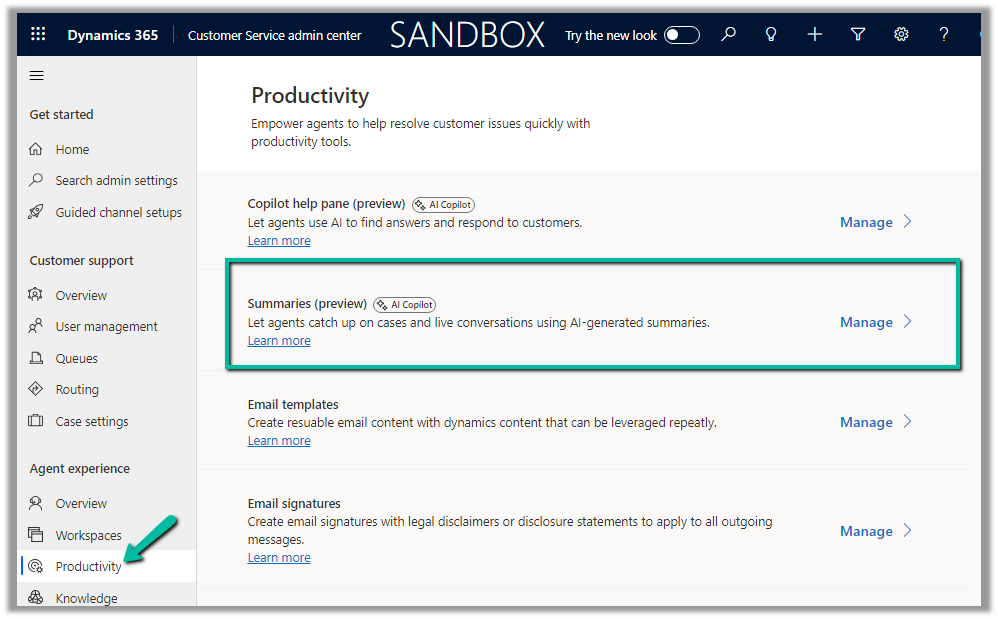
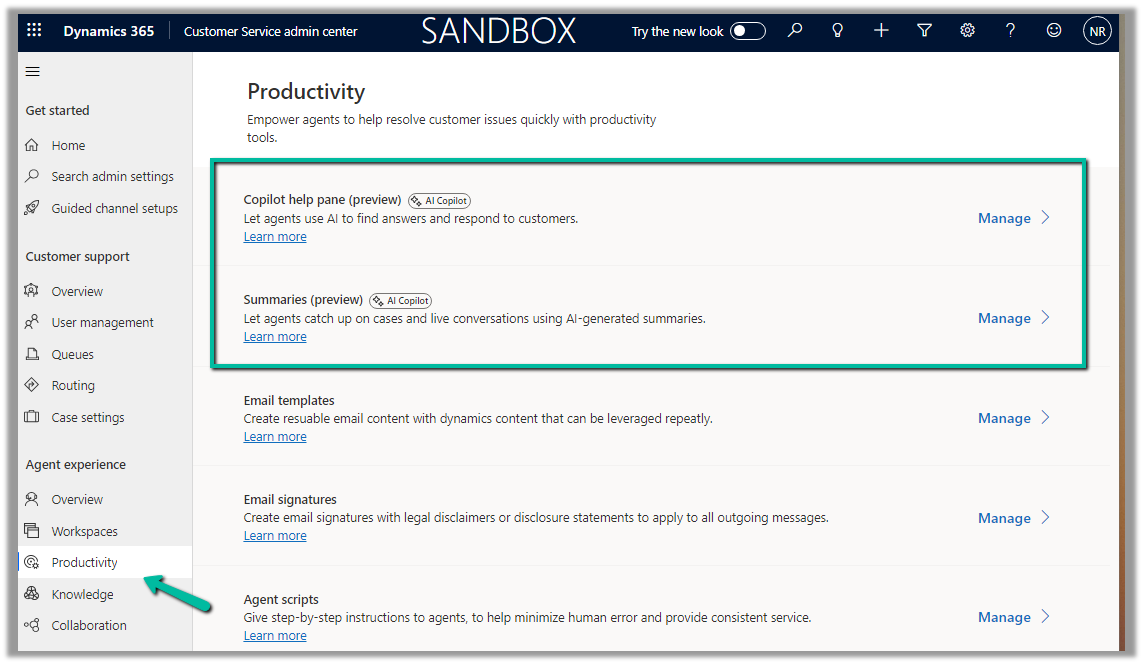
To enable it Navigate to the Customer Service admin center >> Agent Experience >> Productivity >> Summaries (Manage)
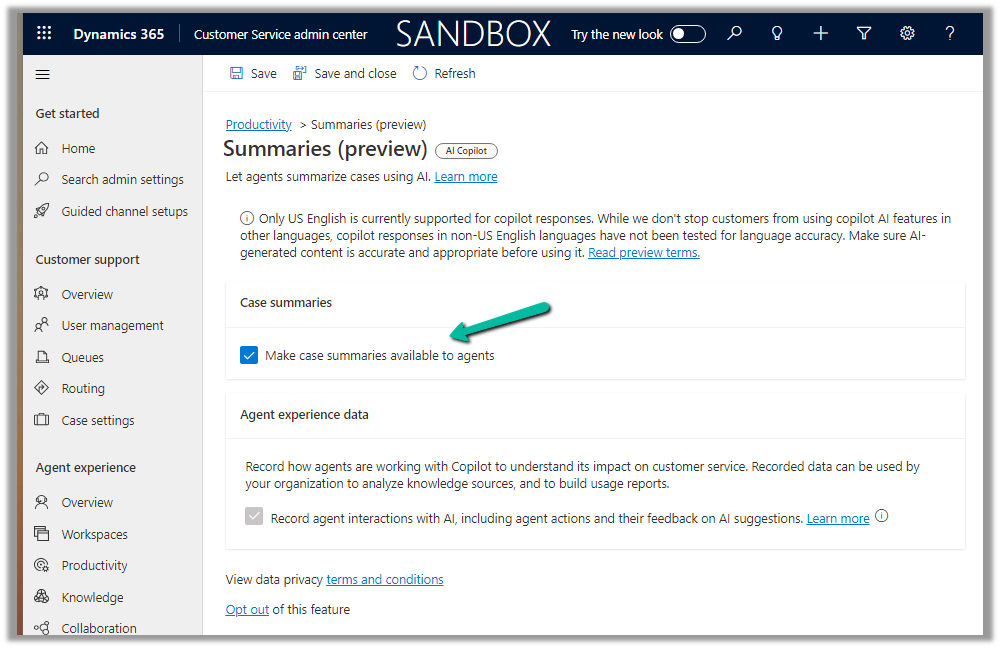
Check the Make case summaries available to agents option and save the setting.
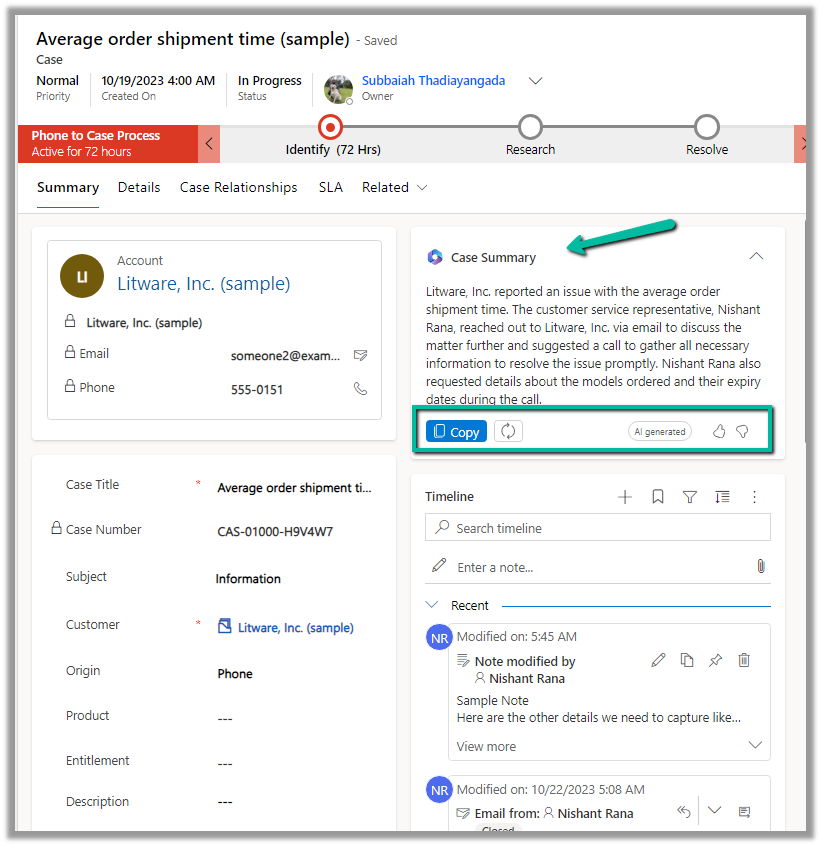
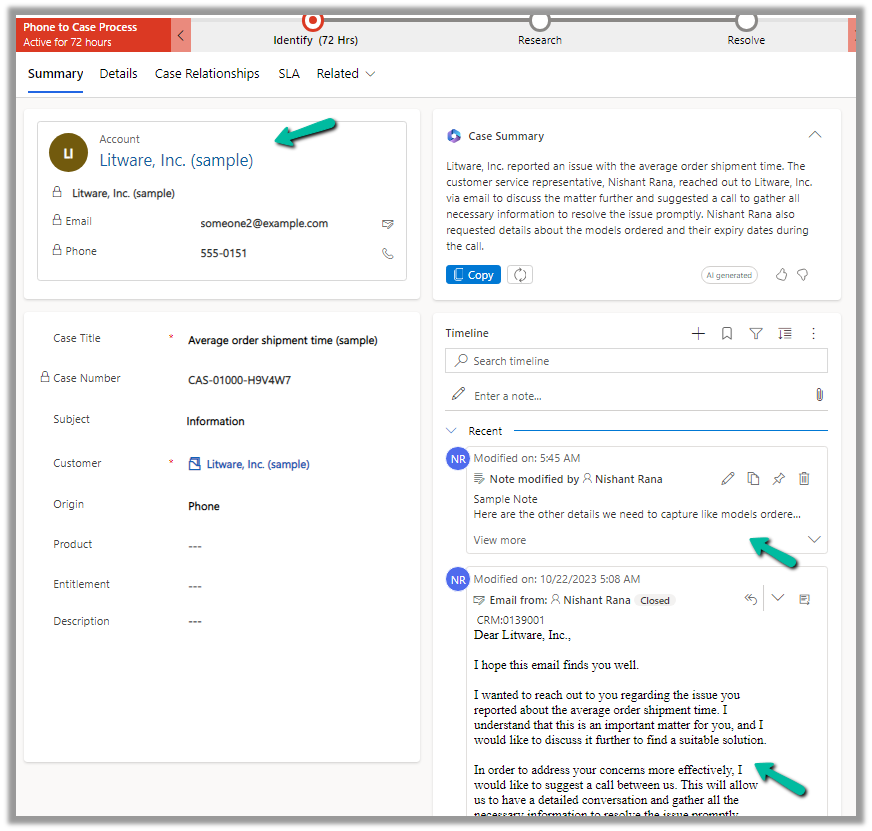
Now when we open a Case record, we can see the Case Summary card added, collapsed by default.
We can expand it to see the summary generated.
We can copy it, regenerate it, provide feedback etc.
The case summary considers key Case details like Case Title, Subject, Priority, Case Type, Description, Product, Emails, and Linked Notes as shown below.
The agents can quickly get the required details from the case summary instead of going through all the key fields, emails, and notes associated, thus allowing them to resolve the case quickly.
Copilot (preview) for Dynamics 365 Customer Service provides the following features –
Case Summary
Conversation Summary
Ask a question
Write an email
Draft a chat response.
To enable it, navgiate to Customer Service Admin Center >> Agent Experience >> Productivity >> Manage (Copilot help pane and Summaries)
Check the required Copilot help pane settings and save.
Similarly for Summaries
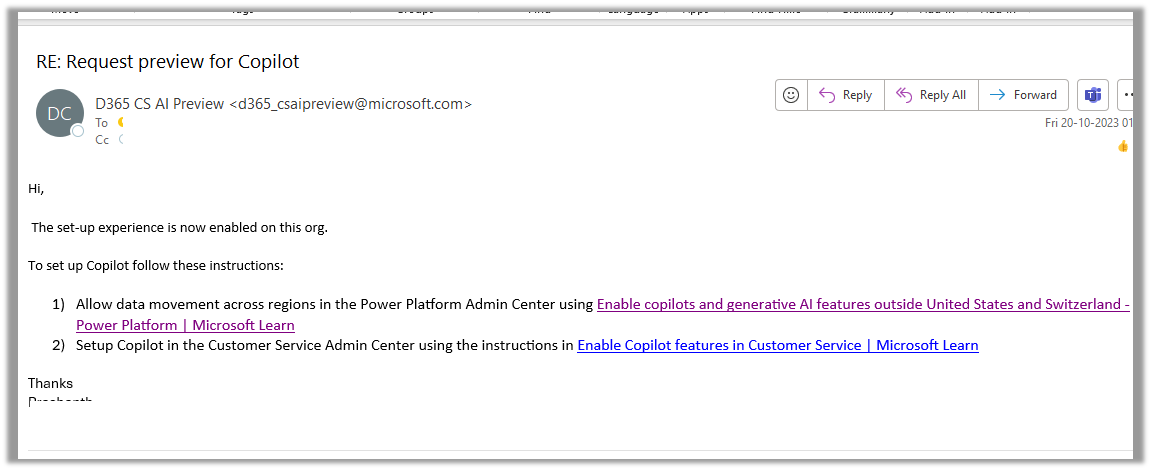
For geographies outside the United States, to enable the Copilot features for Customer Service, we need to send an email to d365_csaipreview@microsoft.com with the Organization ID to enable the preview.
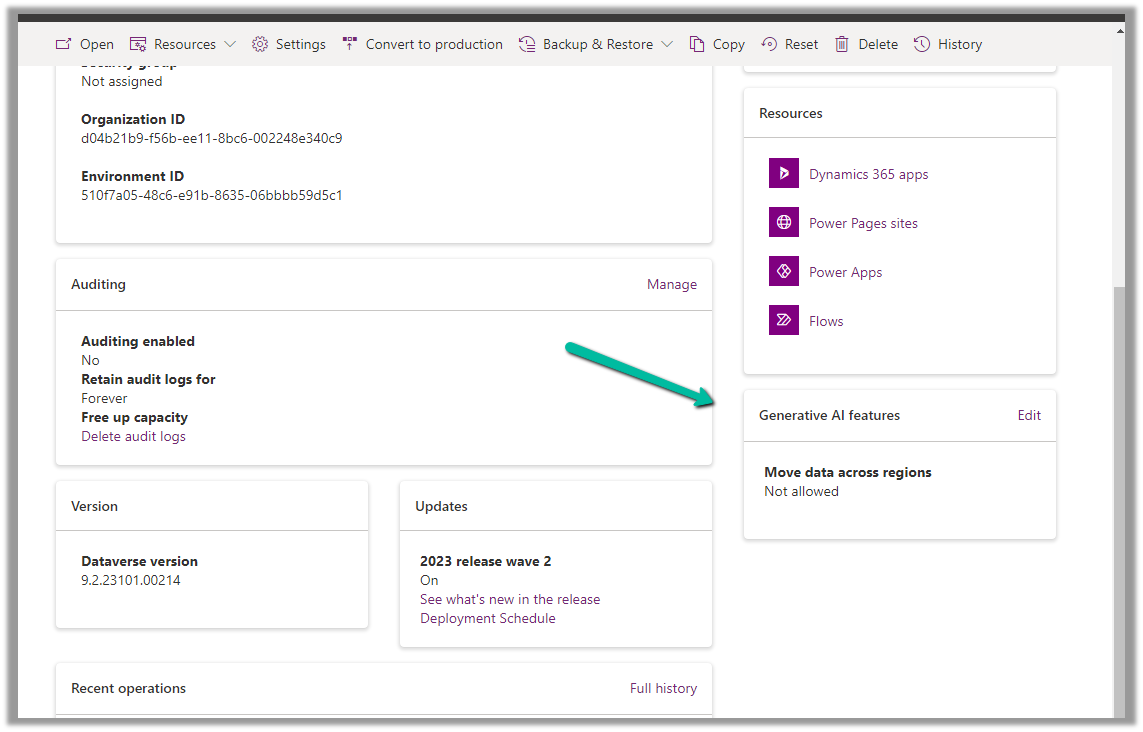
We can get the Organization ID from the Power Platform admin center for the environment.
As our environment was in the Australia region, we followed the same and within the next day, we got a response from Microsoft that it had been enabled in our Environment.
As per the email, the next step is to Enable copilots and generative AI features outside the US and Switzerland, for this again open the environment in the Power Platform admin center, and select Edit for Generative AI Features.
Check the Move data across regions option and enable it. (We need Global Admin or Power Platform admin role to enable it)
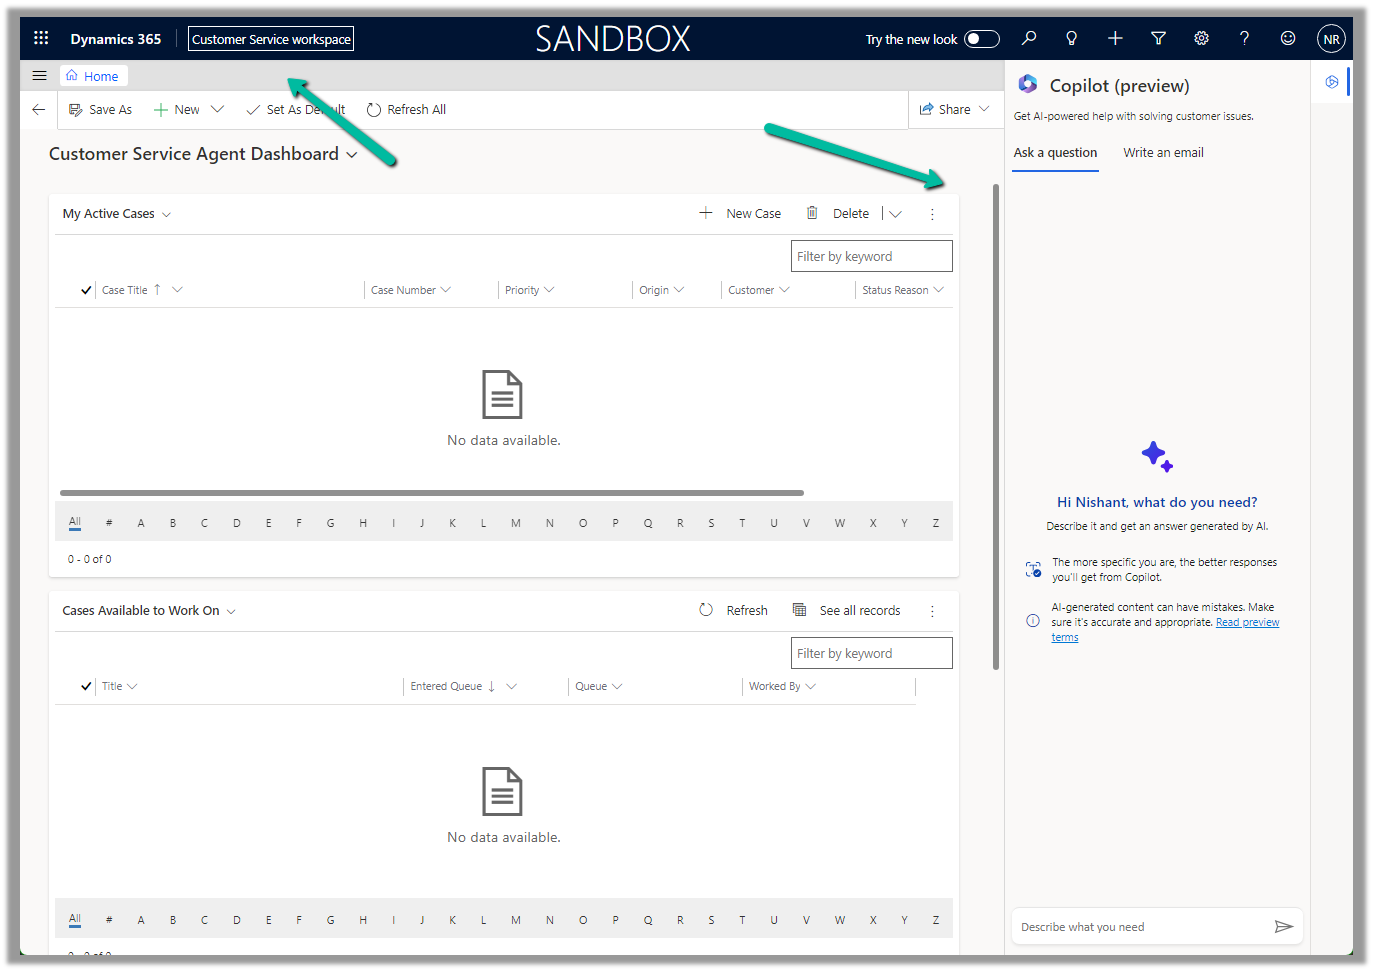
Once we have followed the above steps it adds the Copilot help pane in the Customer Service Hub app.
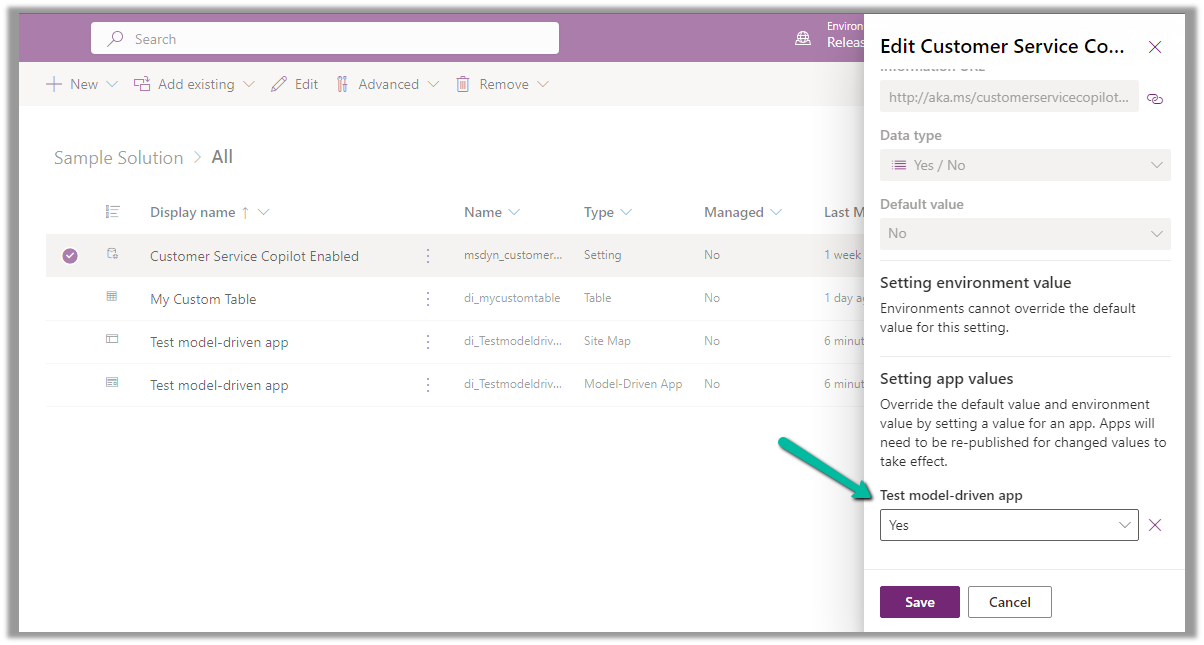
Similarly, for the Customer Service Workspace app, we can manage it in the corresponding Agent Experience profile.
Navigate to the Agent Experience >> Workspaces >> Manage (Agent Experience profiles)
We can see the Copilot AI features section (below is the out-the-box Customer Service workspace – default profile), we can accordingly update the corresponding agent experience profile(s) records configured/used for the agents.
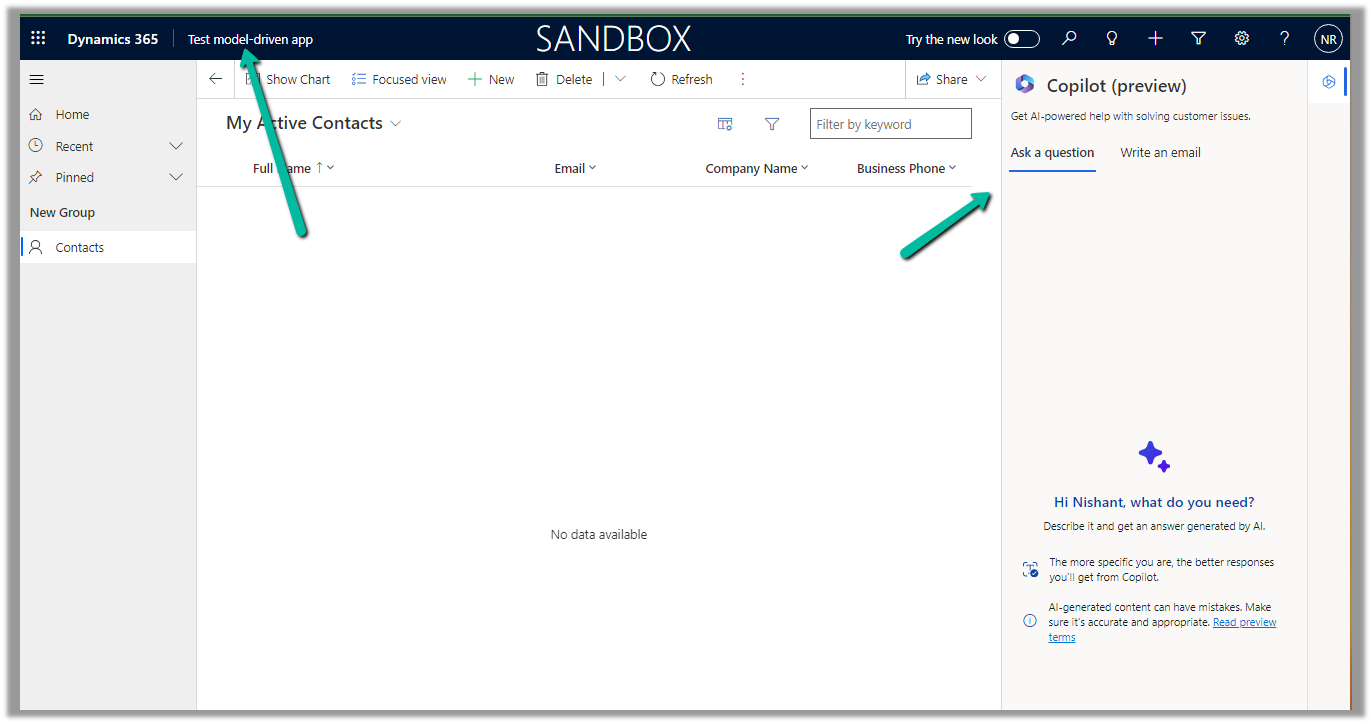
Below we can see the Copilot help pane in the Customer Service workspace app.
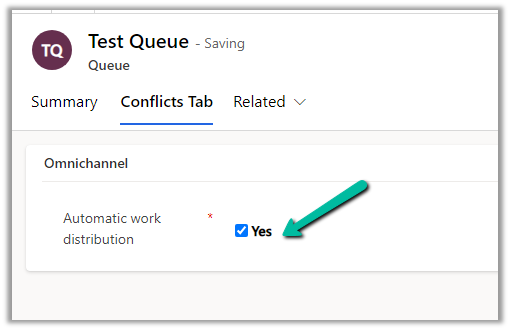
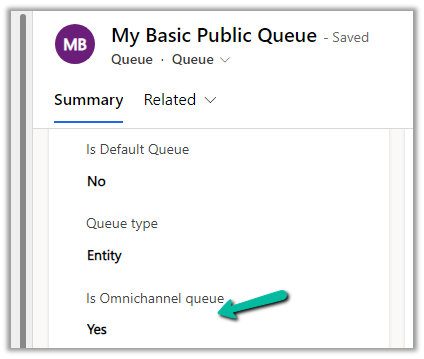
We can convert our basic queue to an advanced queue by setting the field “Is Omnichannel Queue” or “Automatic work distribution” schema name “msdyn_isomnichannelqueue“- to Yes.
We would usually do it to use the existing basic queue in the Unified Routing.
We can find that option in the Conflicts Tab of the Queue form
Or in case you cannot find the conflicts tab, you can add the field to the form
Here we need to be careful while converting the basic queue to an advanced queue, as we cannot revert this. If we try to do this we will get the below error –
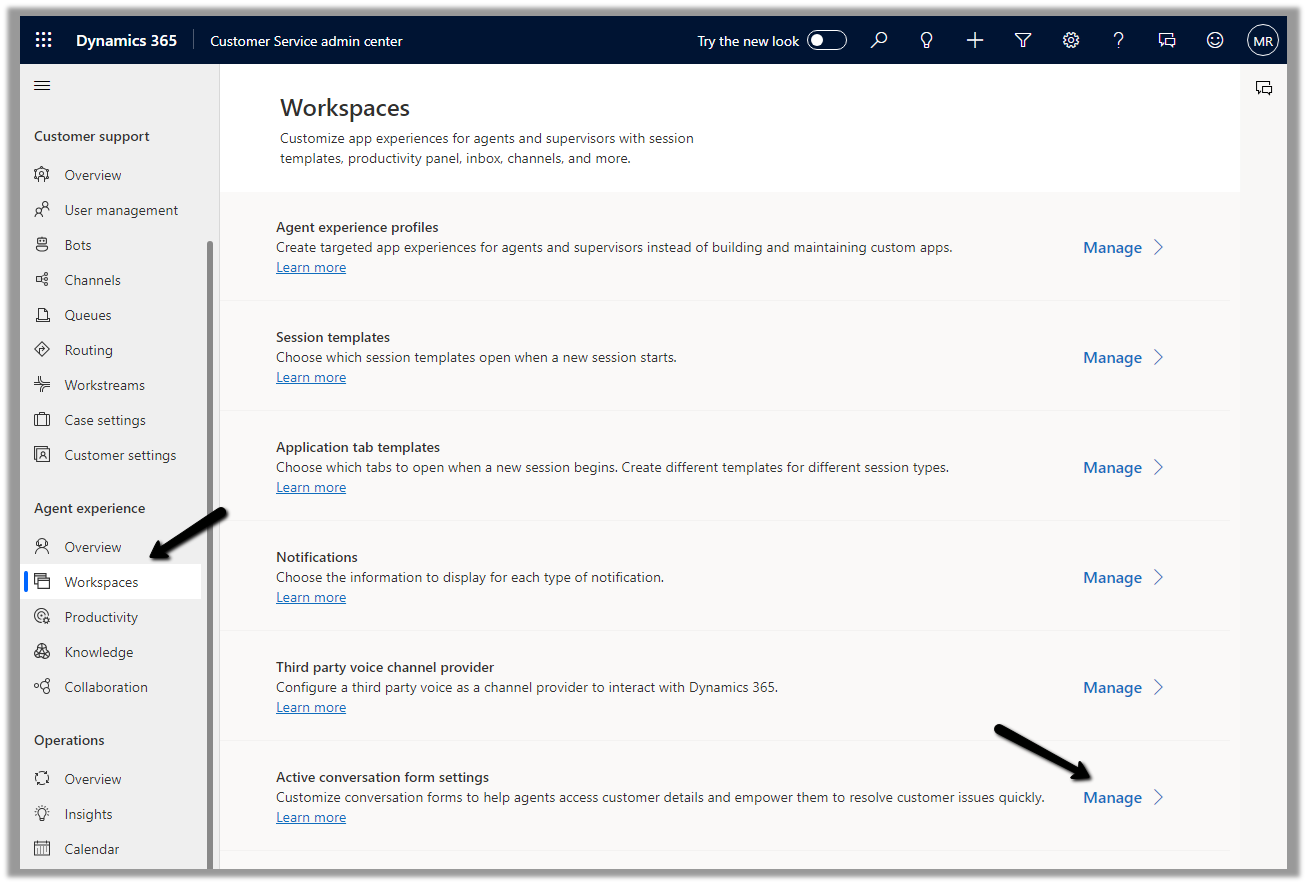
The conversation form in Omnichannel is now updated to allow agents to view and edit customer and case information more efficiently.
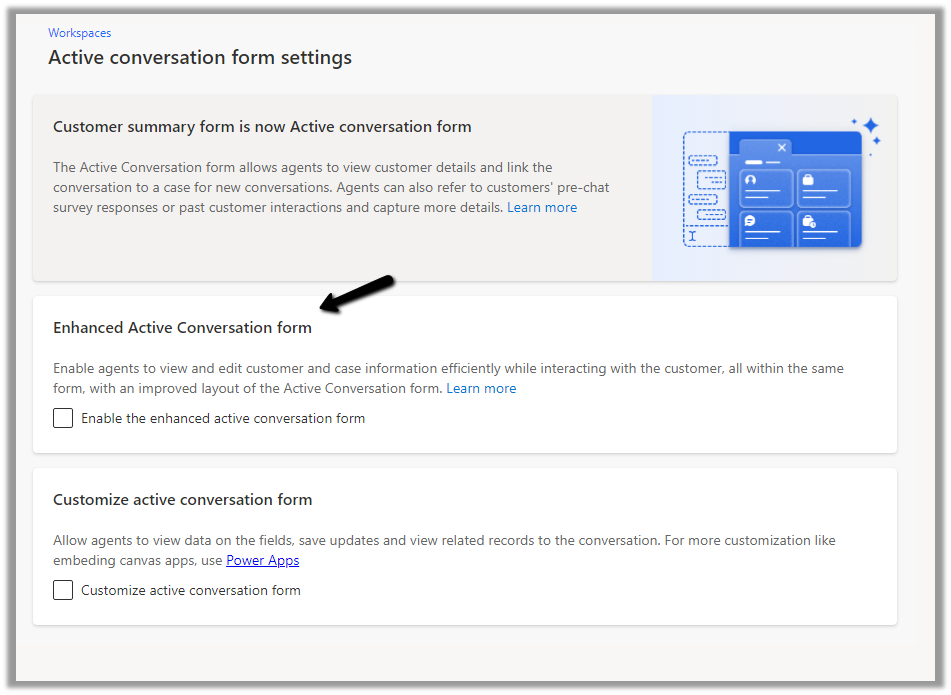
To enable it, Inside Customer Service Admin Center app – navigate to Workspaces >> Active Conversation form settings (Manage)
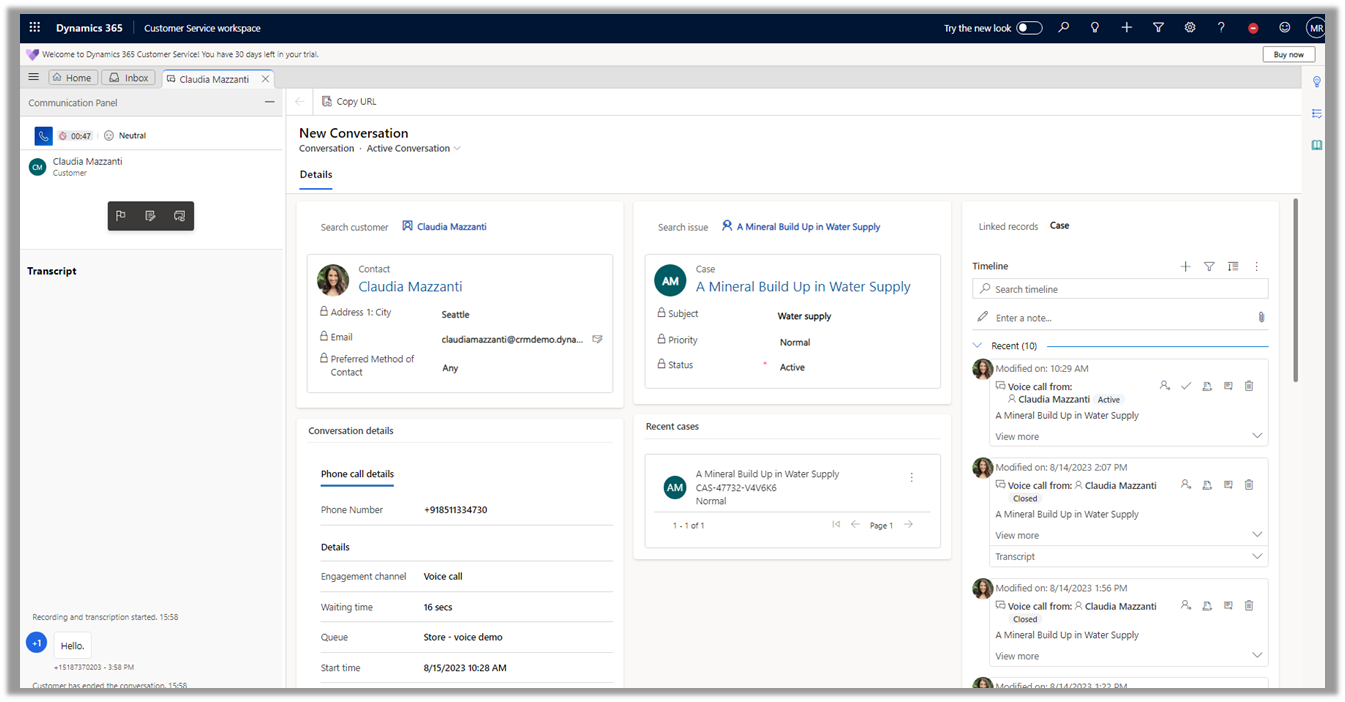
Before we enable it let us have a look at the exiting conversation form.
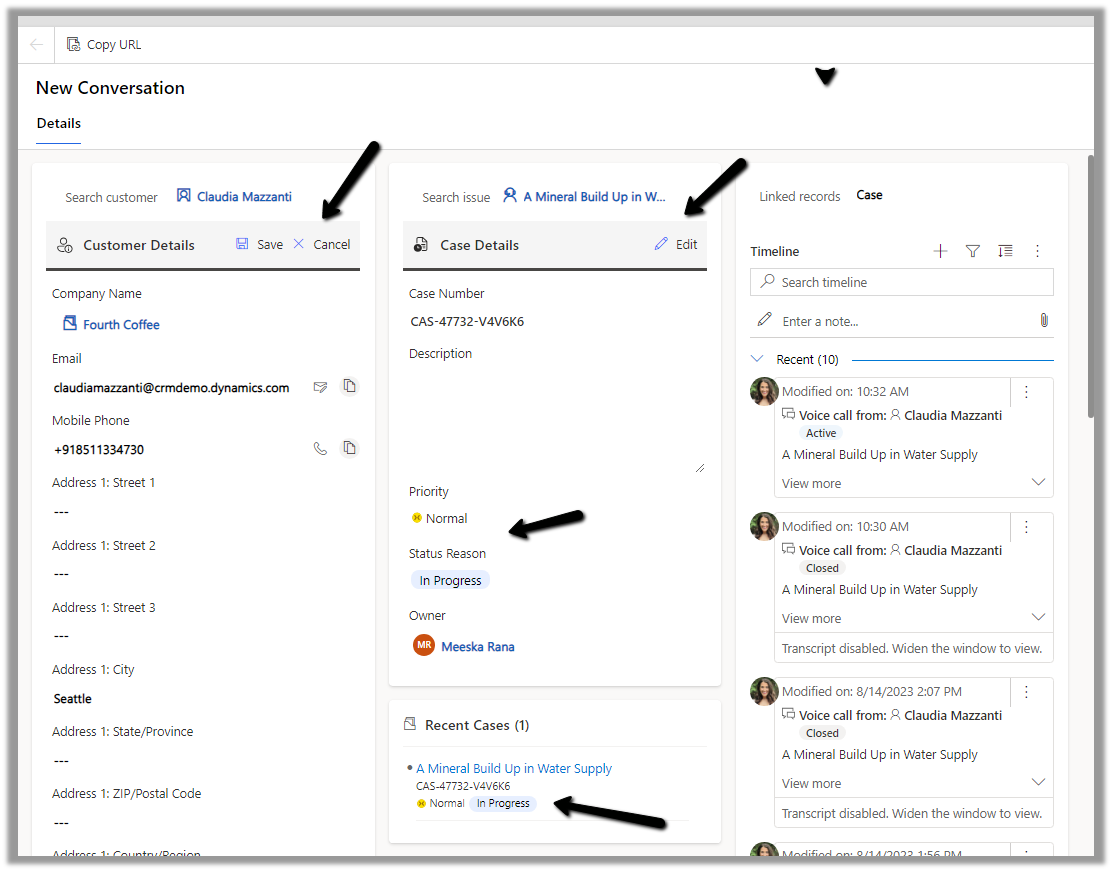
Now let us enable and compare it with the enhanced one.
We can see the form displaying a Customer 360 Card for Customer (Contact or Account), which also allows for inline editing of details from within the Conversation form, and a similar card showing case details and allowing for inline editing. The fields that are displayed are configurable.
Another change is the color-coded priority and case status field for easy discoverability for the agents.