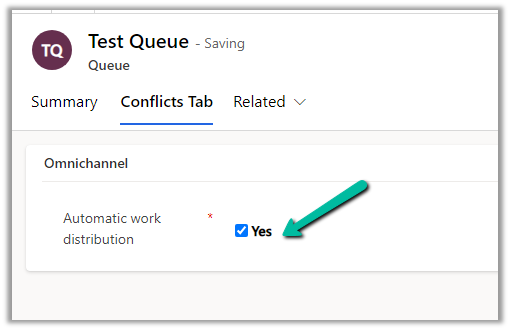
We can convert our basic queue to an advanced queue by setting the field “Is Omnichannel Queue” or “Automatic work distribution” schema name “msdyn_isomnichannelqueue“- to Yes.
We would usually do it to use the existing basic queue in the Unified Routing.
We can find that option in the Conflicts Tab of the Queue form
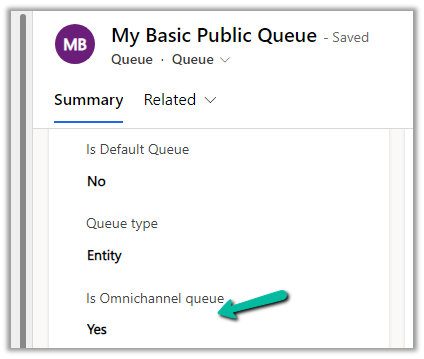
Or in case you cannot find the conflicts tab, you can add the field to the form
Here we need to be careful while converting the basic queue to an advanced queue, as we cannot revert this. If we try to do this we will get the below error –
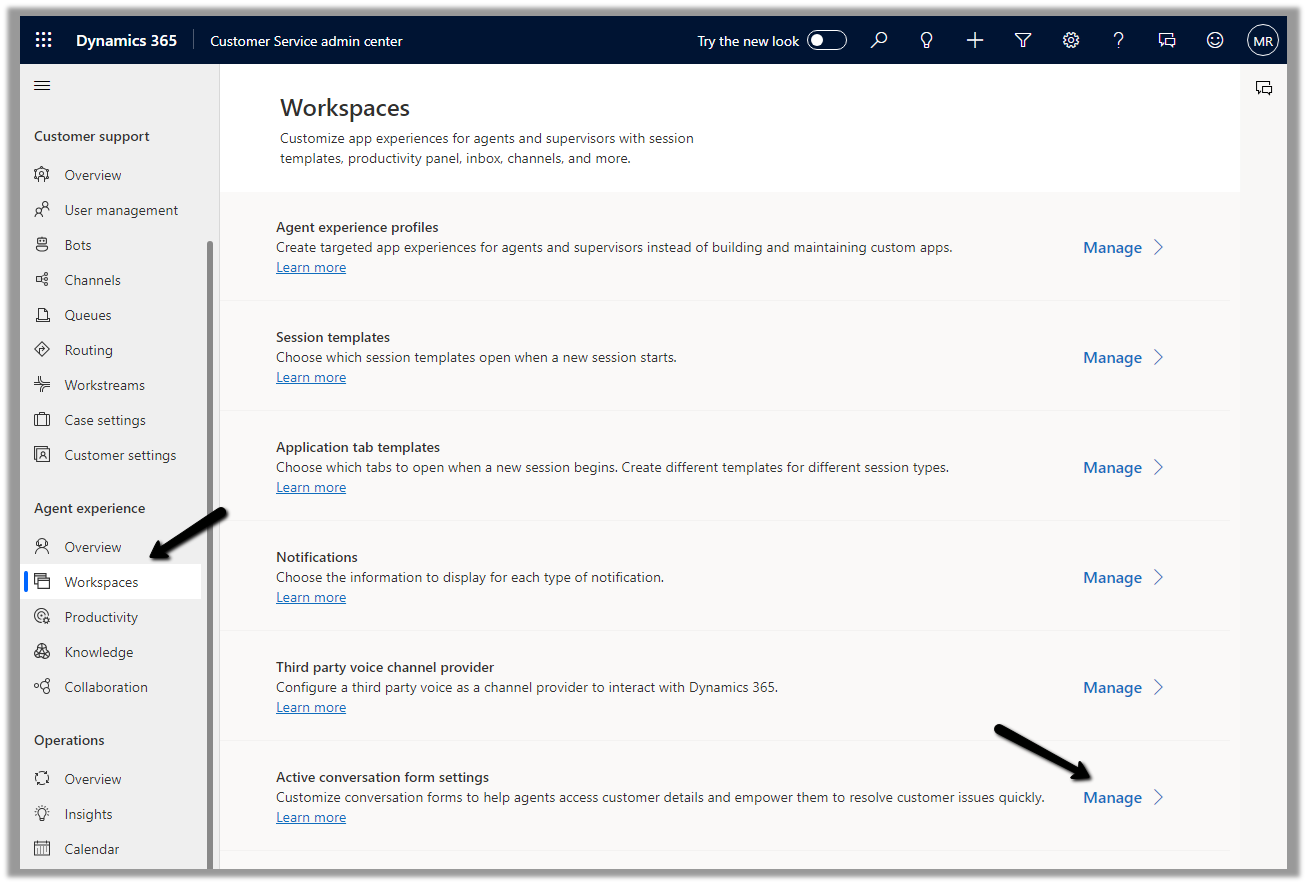
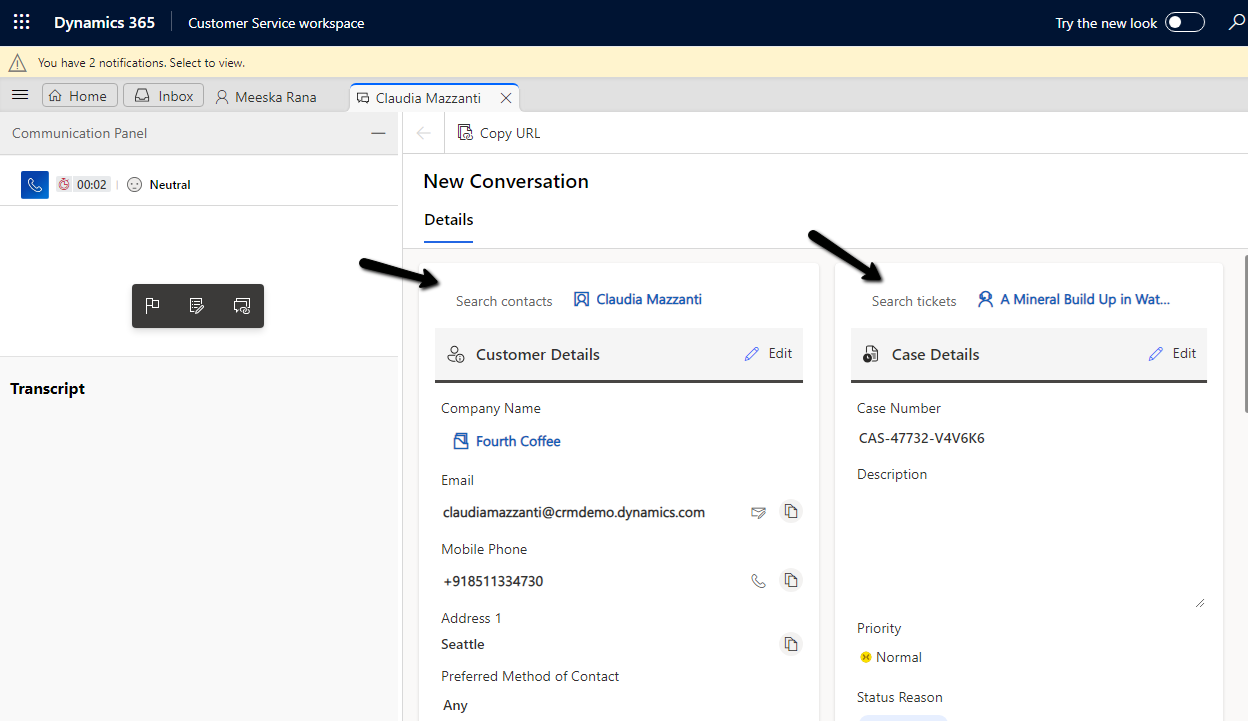
The conversation form in Omnichannel is now updated to allow agents to view and edit customer and case information more efficiently.
To enable it, Inside Customer Service Admin Center app – navigate to Workspaces >> Active Conversation form settings (Manage)
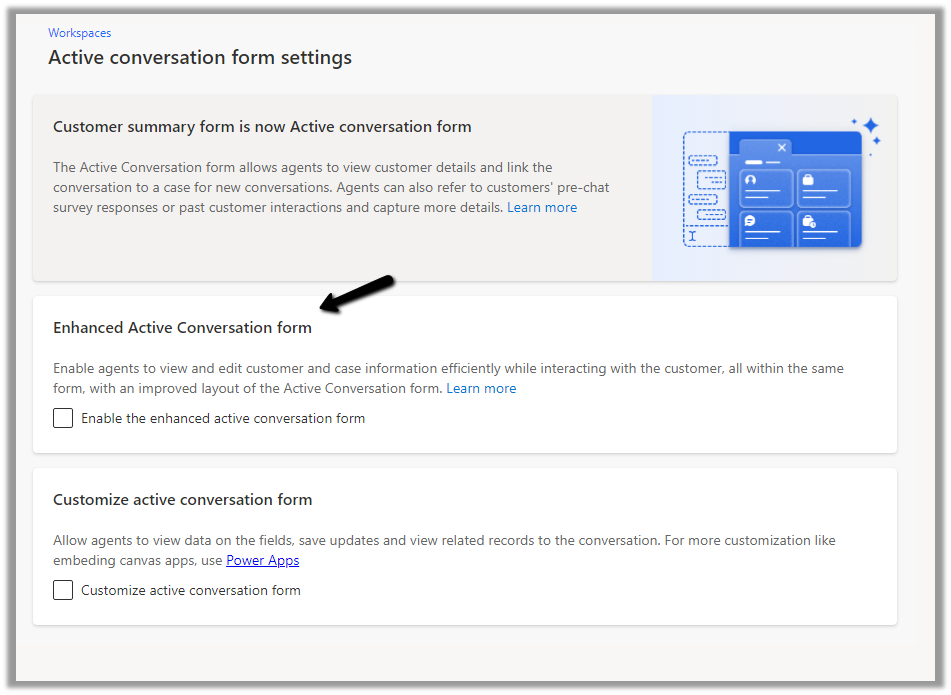
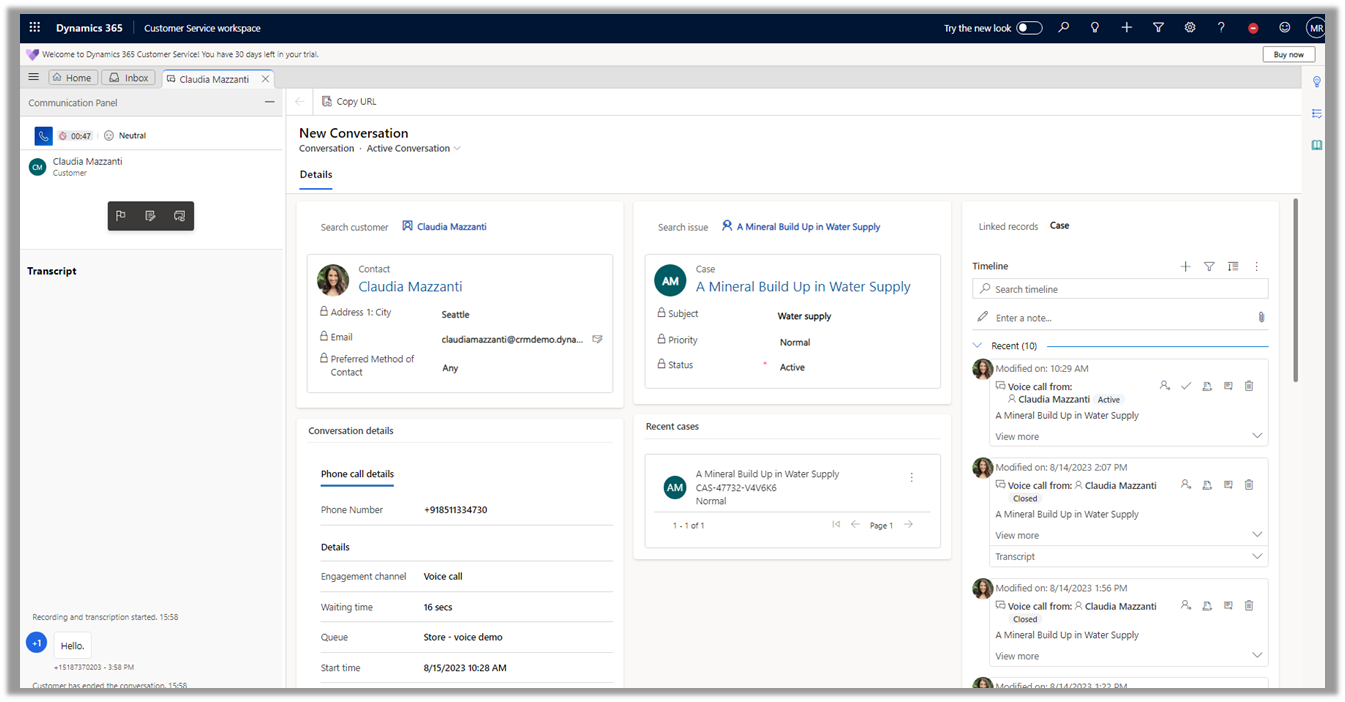
Before we enable it let us have a look at the exiting conversation form.
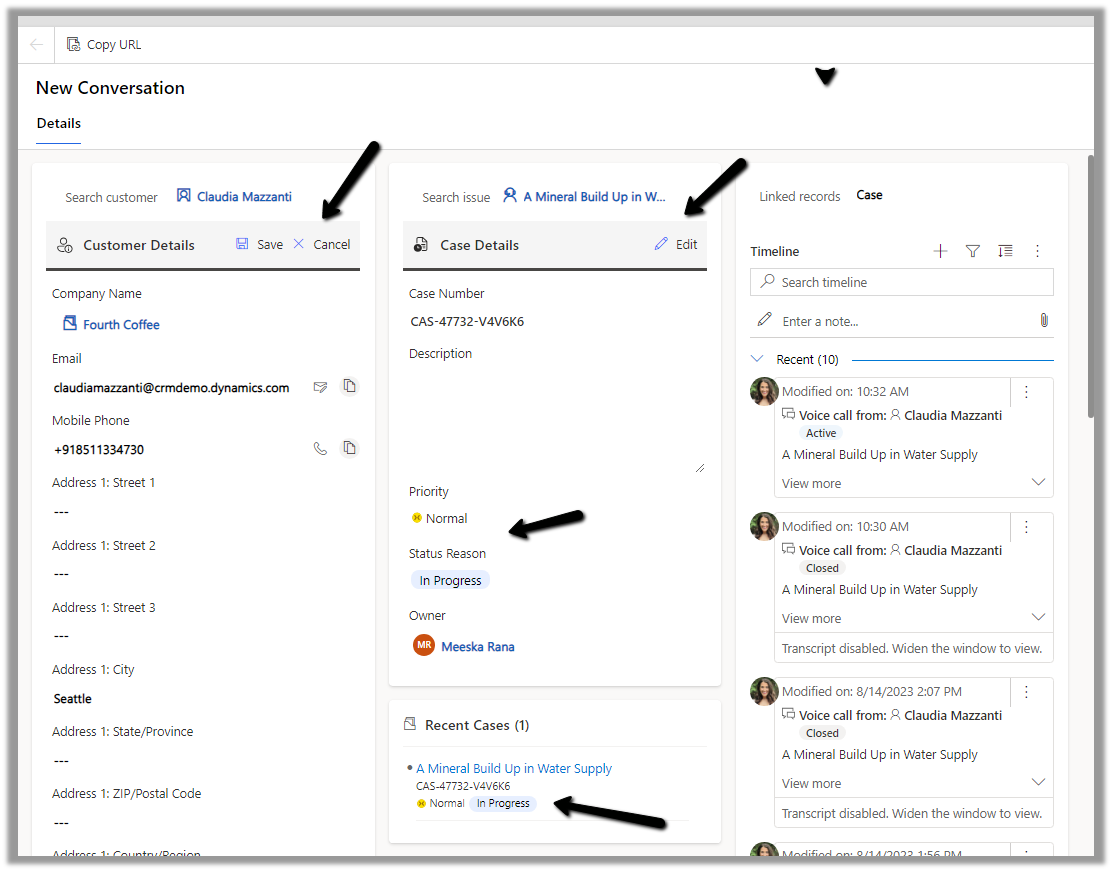
Now let us enable and compare it with the enhanced one.
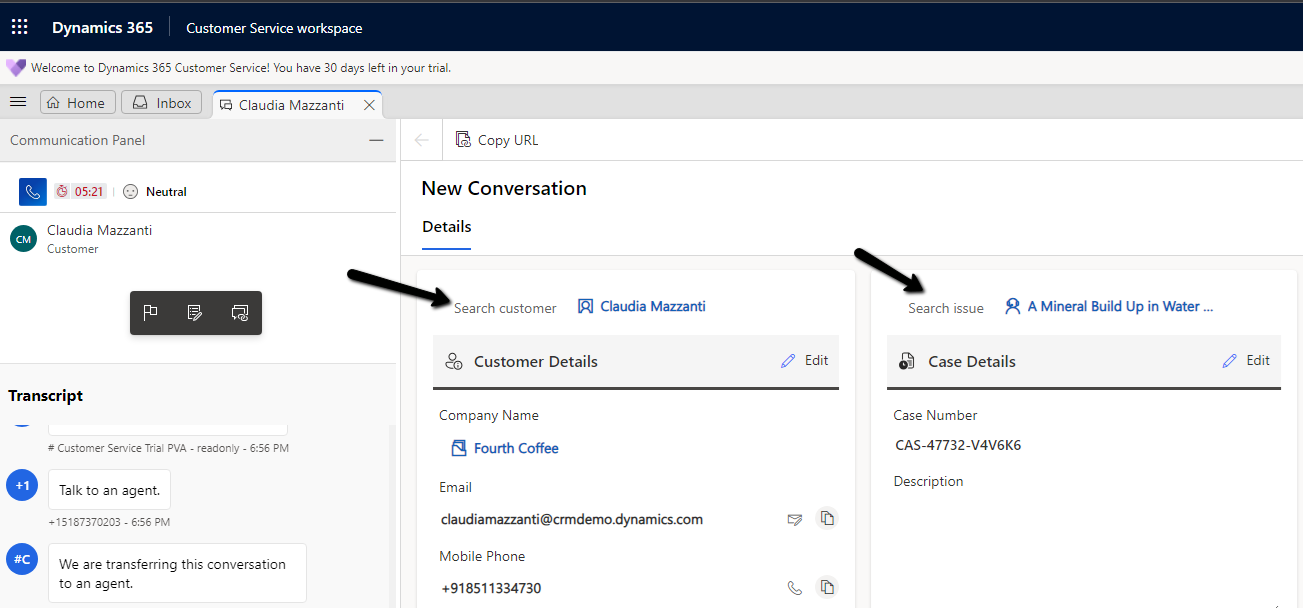
We can see the form displaying a Customer 360 Card for Customer (Contact or Account), which also allows for inline editing of details from within the Conversation form, and a similar card showing case details and allowing for inline editing. The fields that are displayed are configurable.
Another change is the color-coded priority and case status field for easy discoverability for the agents.
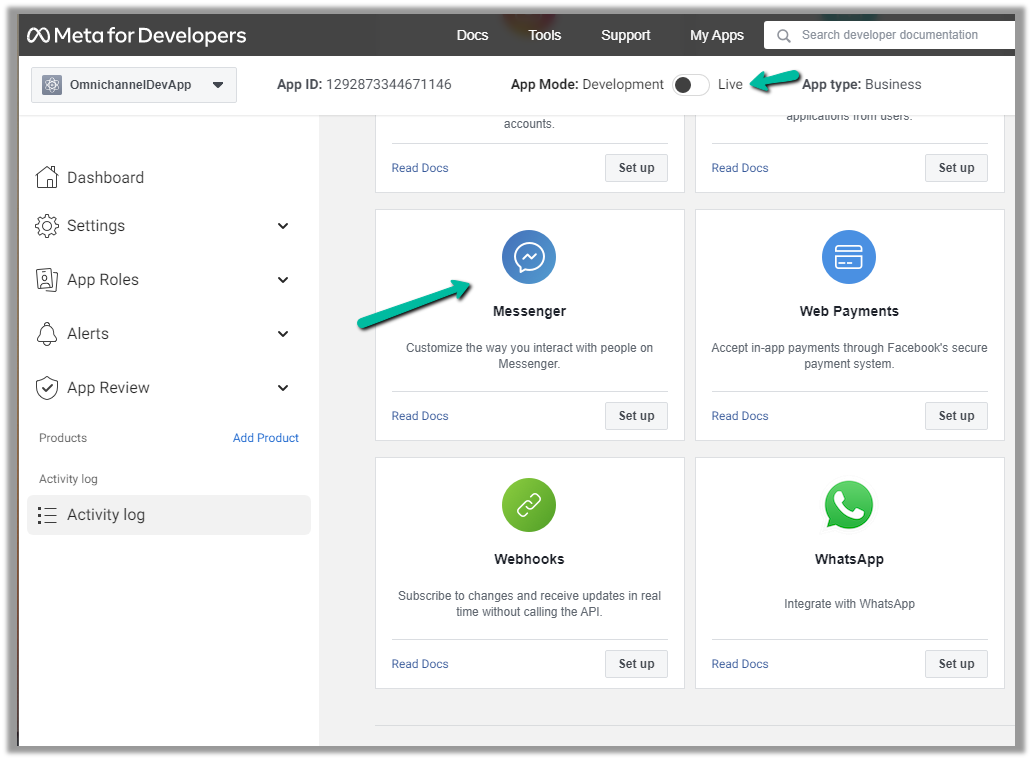
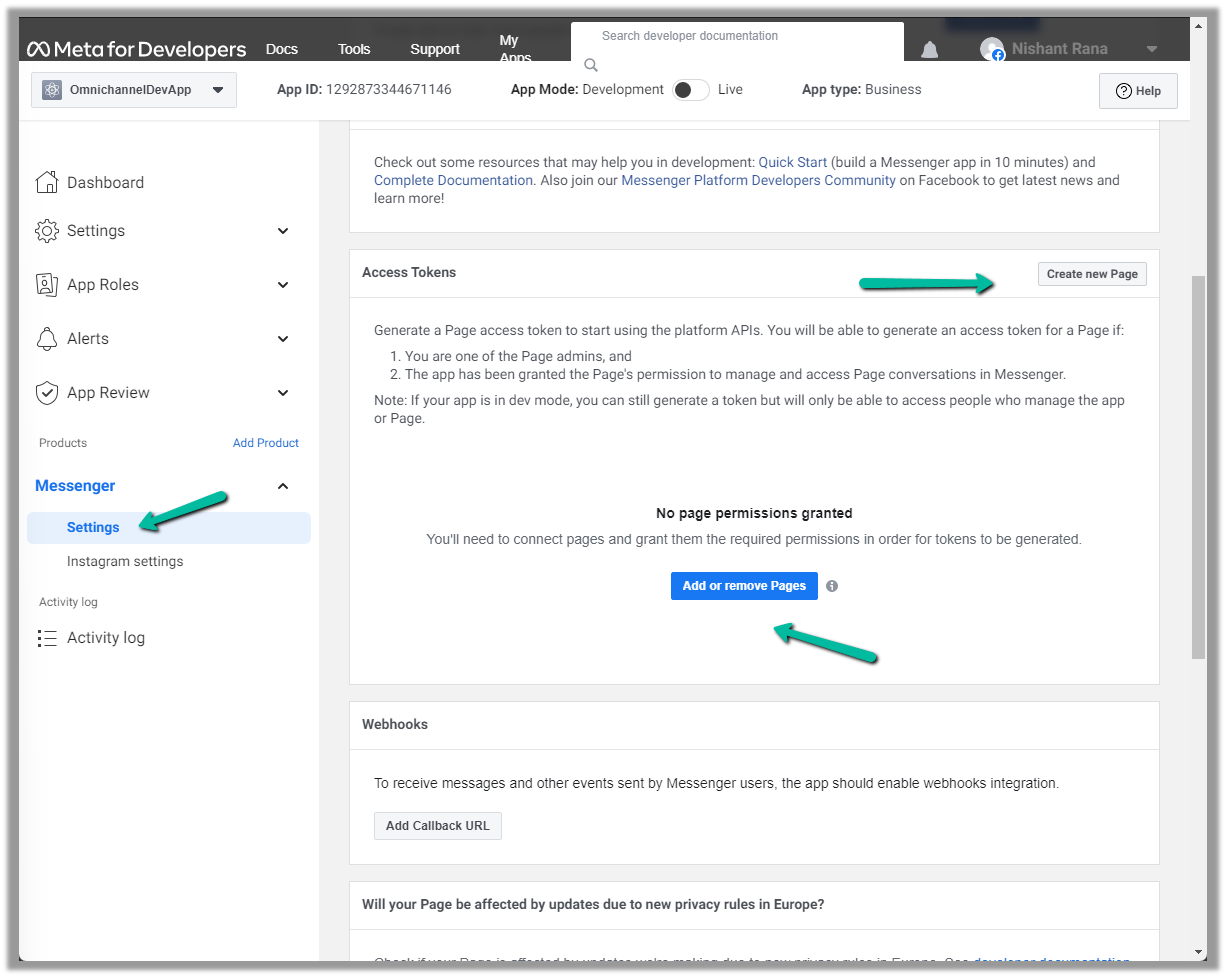
Next either add an existing page or create a new one and then add the newly created page in the Messenger >> Settings
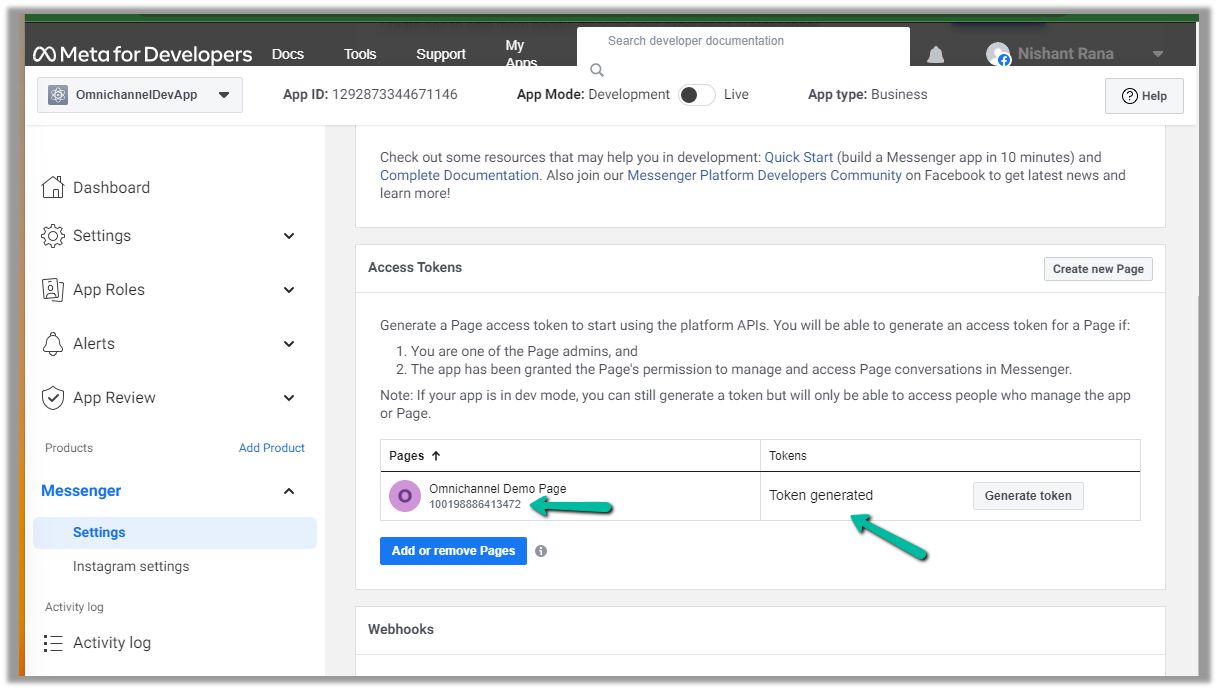
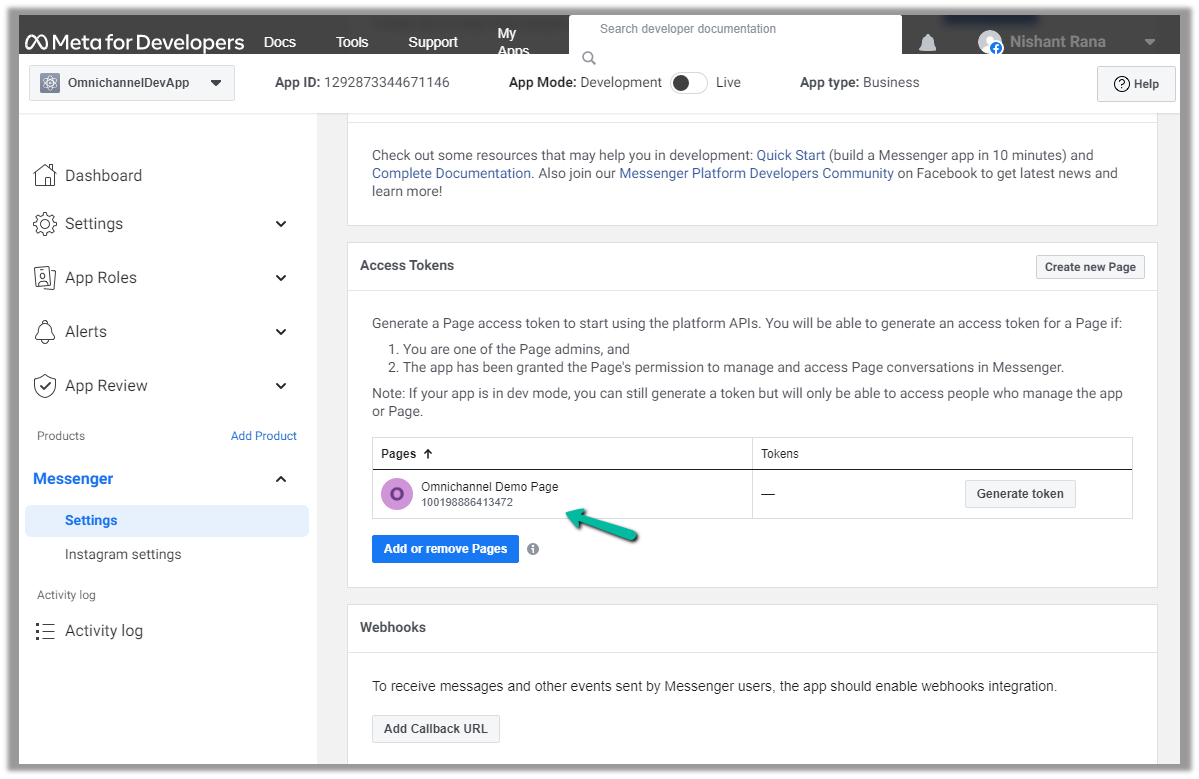
Here we created a new page and have added that page.
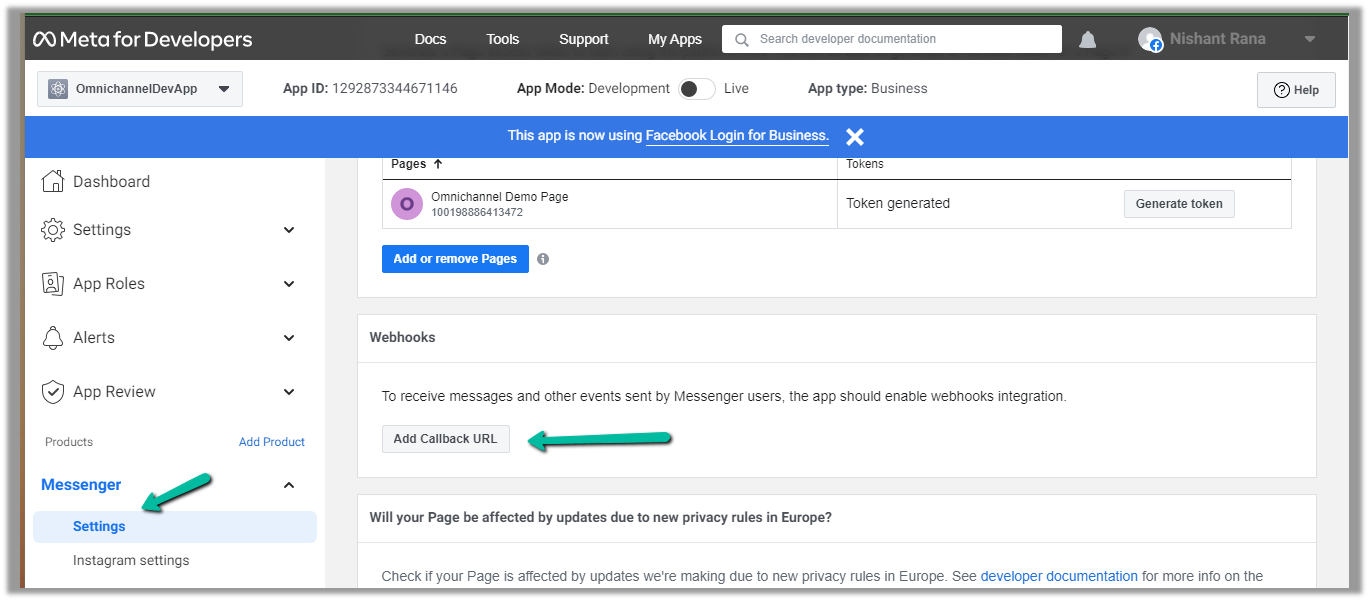
We can also Generate token for the page, which we will use while configuring Facebook Channel in Dynamics 365.
Click on Generate token and copy the token. Also, save the Page Id below the name of the page.
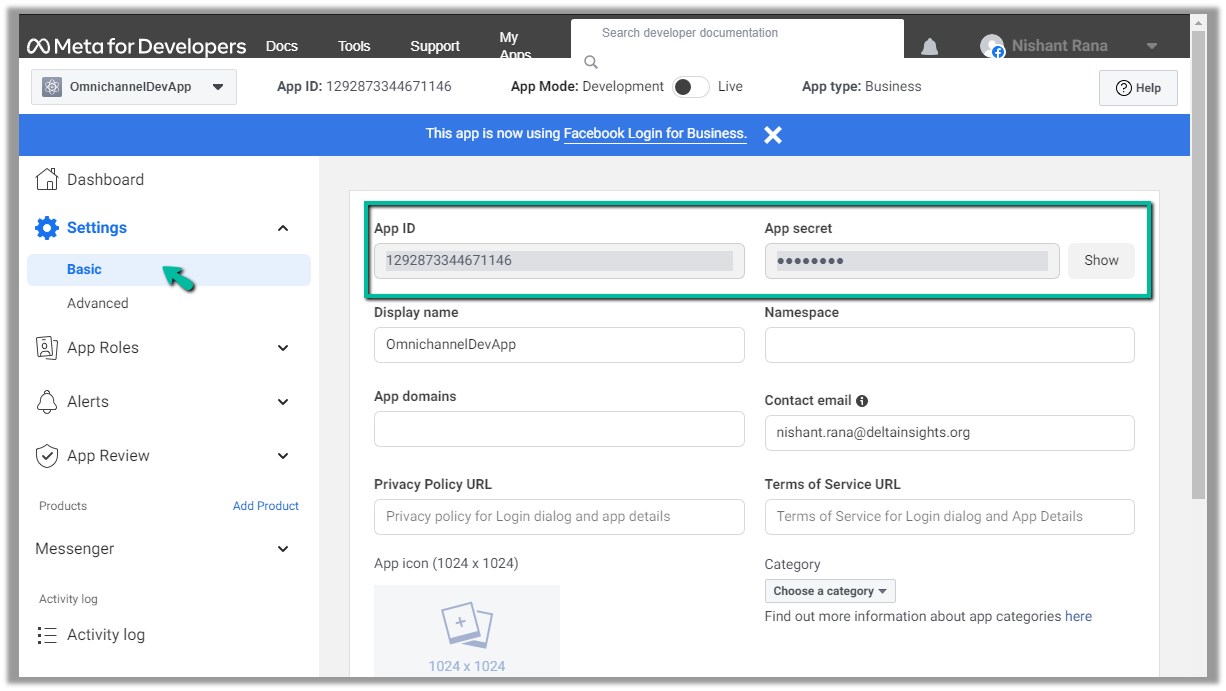
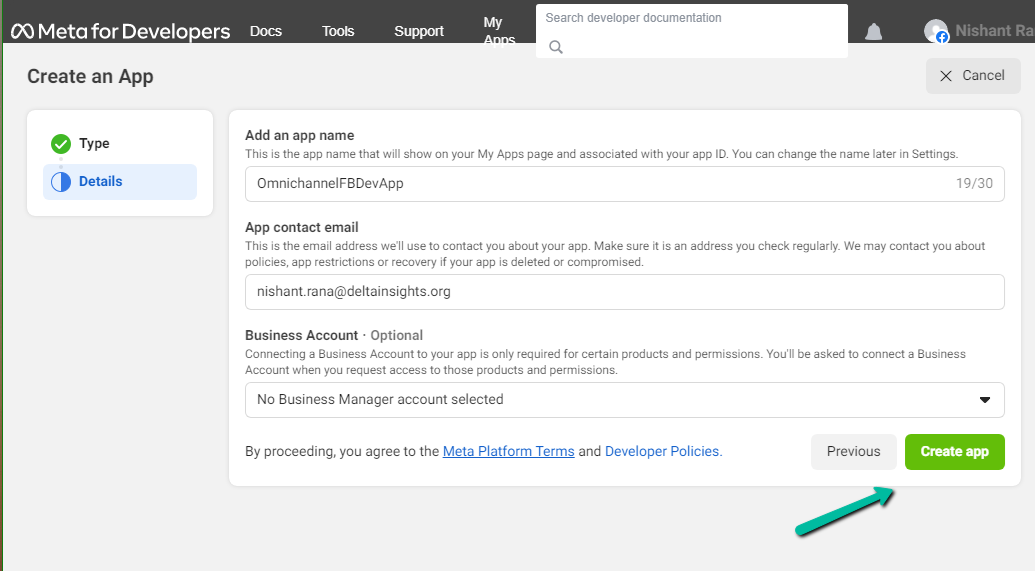
We will also need App ID and App Secret, which we can get from – Settings >> Basic
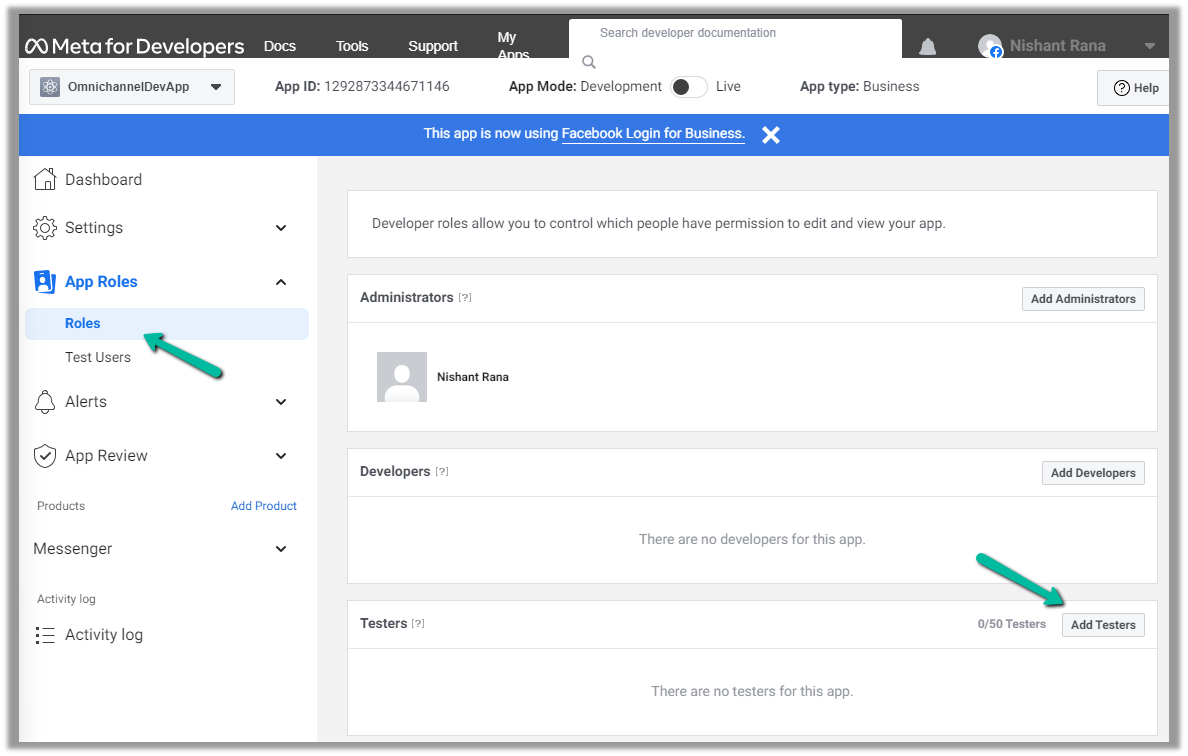
Next, we add a few test accounts to the app for testing/using the app. (we are not making the app publicly available or live, which would require and approval process)
Navigate to App Roles >> Roles >> Testers (Add Testers)
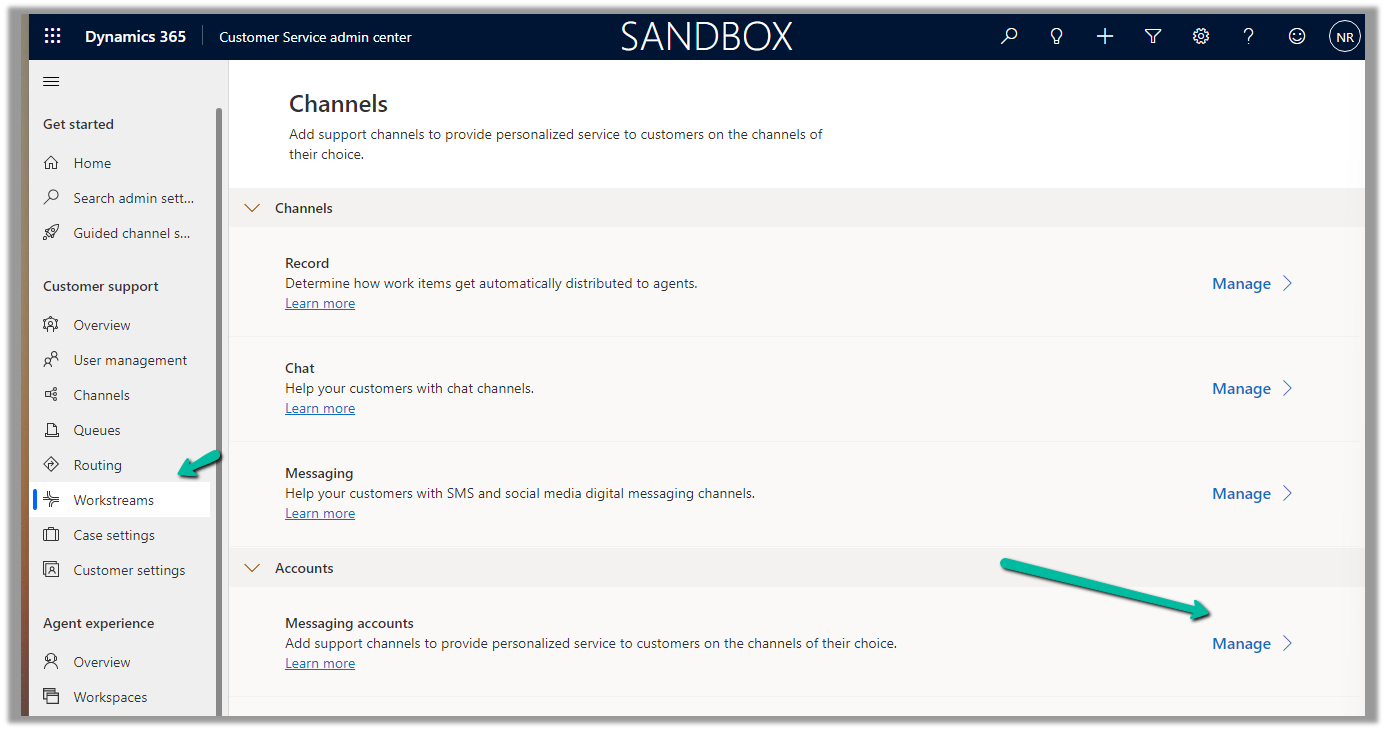
Back in Customer Service Admin Center, navigate to Customer Support >> Channels >> Messaging Accounts (Manage)
Add a New Account
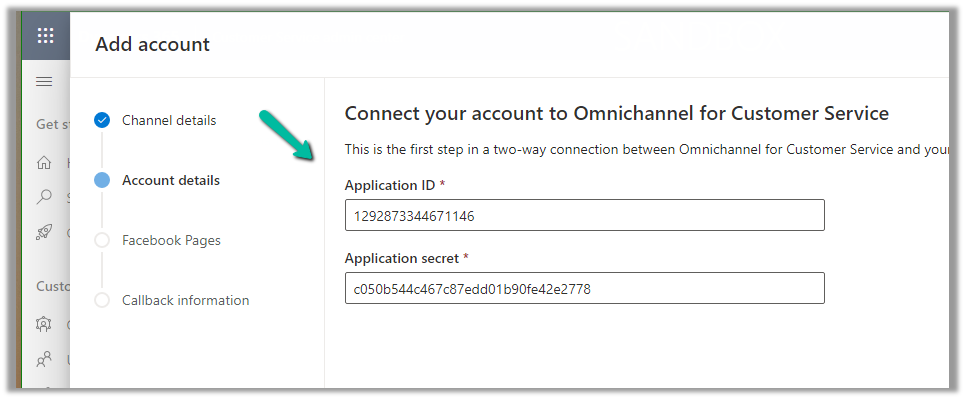
Click Next and provide the App ID and Application Secret
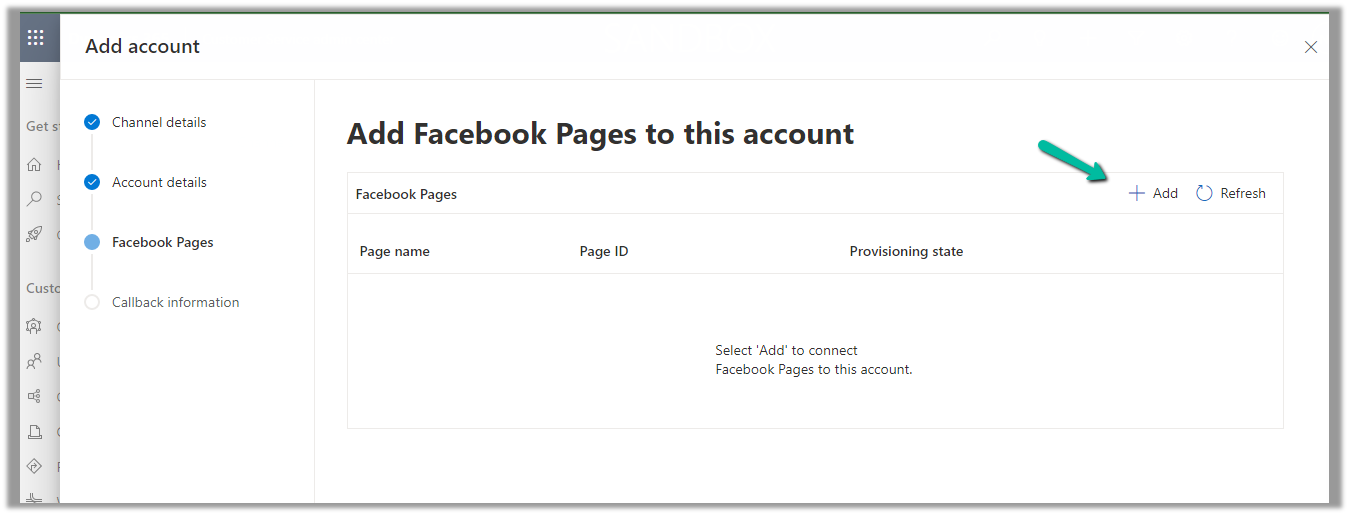
Add Facebook Page to the account
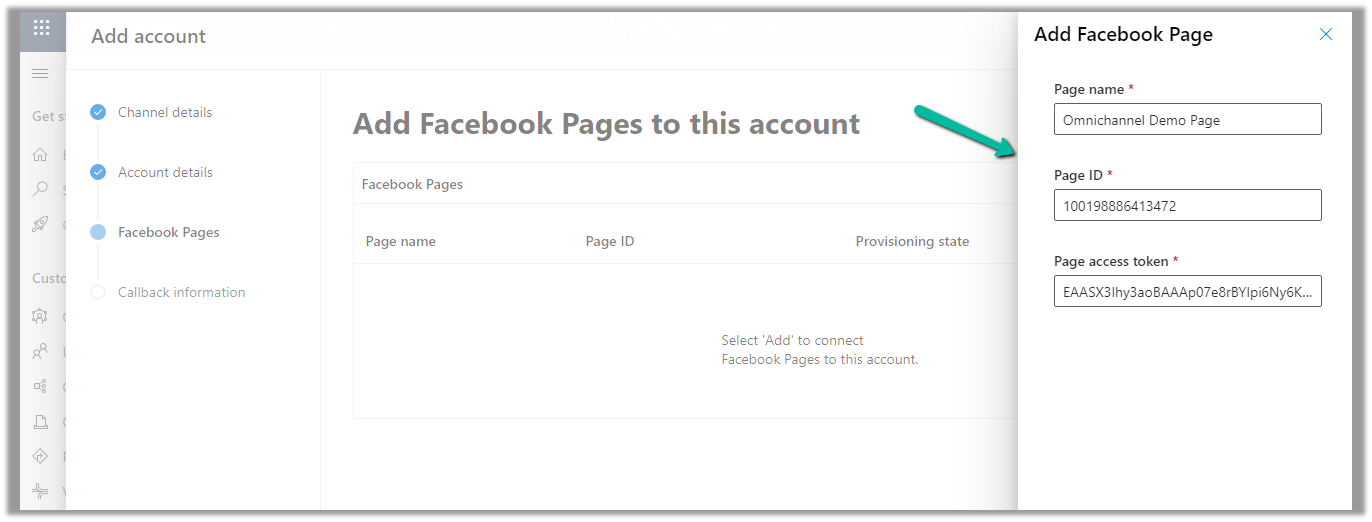
Provide the Page name, Page ID, and the Page access token.
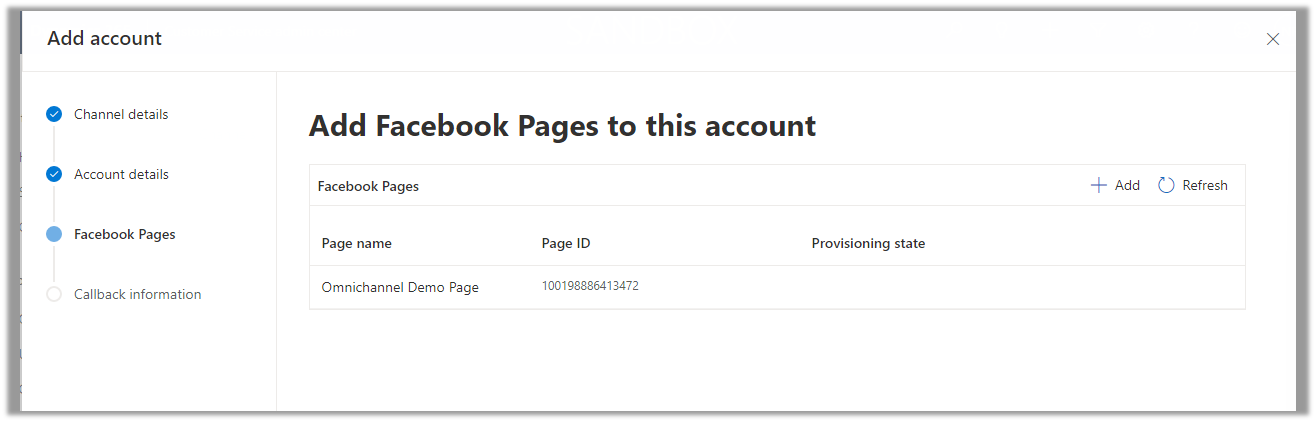
With the page successfully added, click on Next
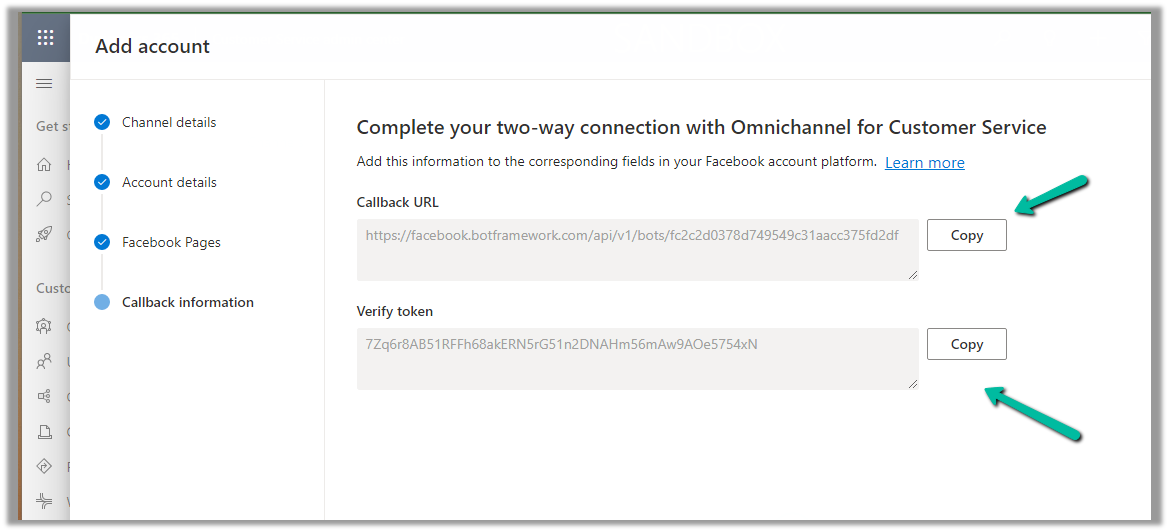
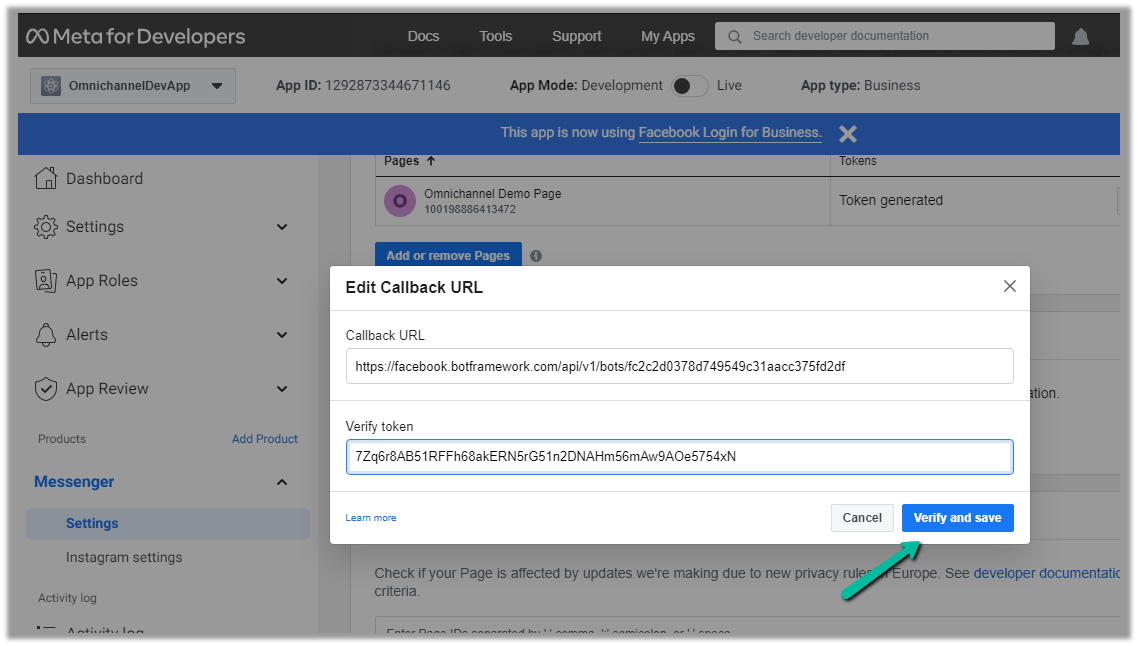
Copy the Callback URL and the Token.
Paste this information in the Messenger product added.
Click on Add Callback URL.
Click on Verify and save
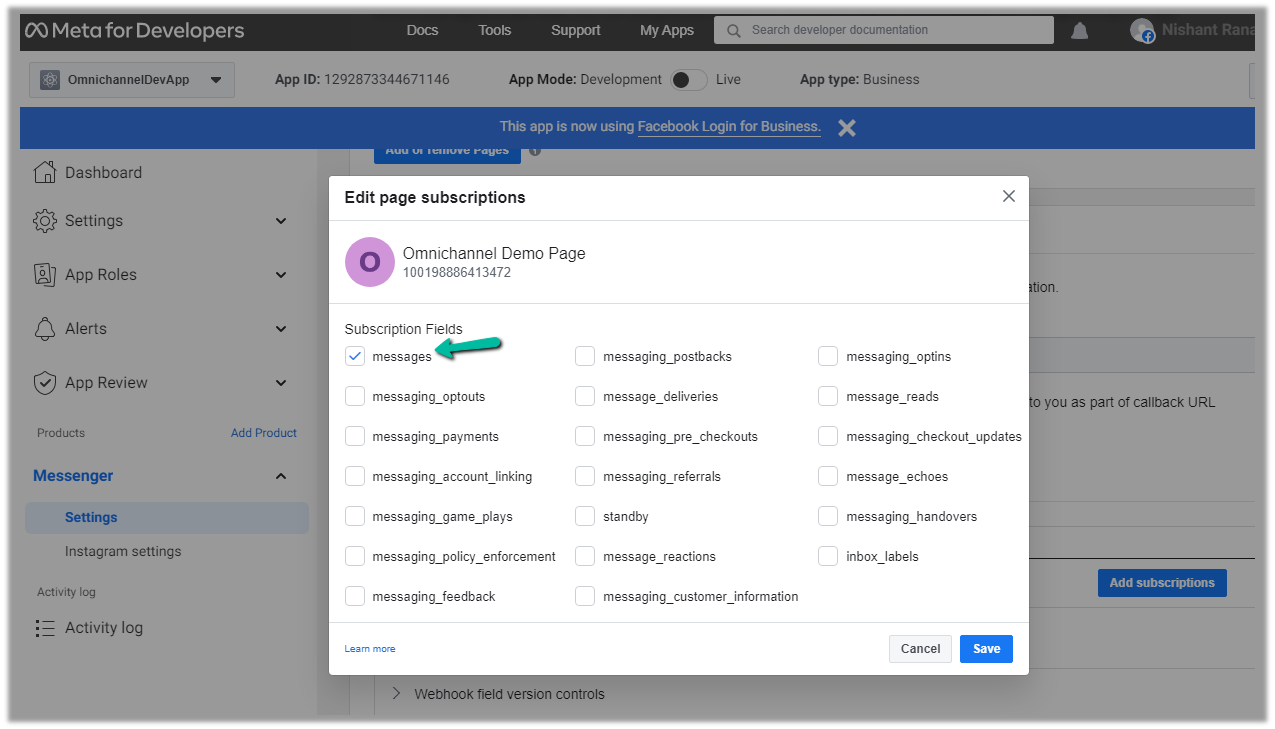
This adds the Webhooks details, click on Add Subscriptions for the Page added.
Select messages
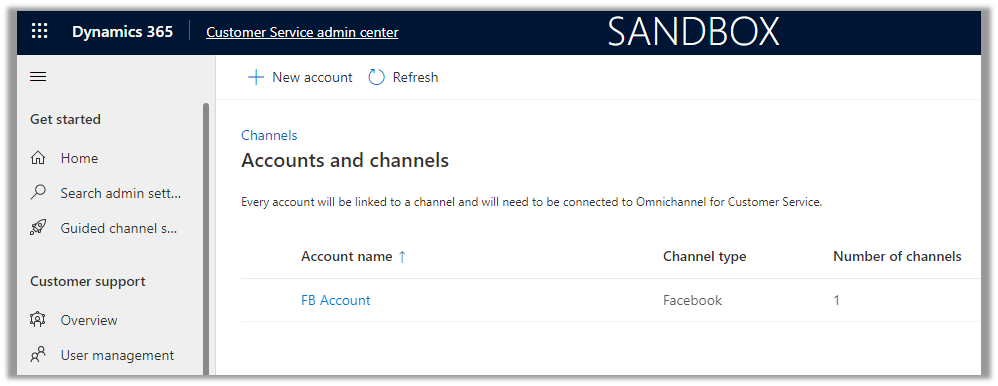
We can see the account added.
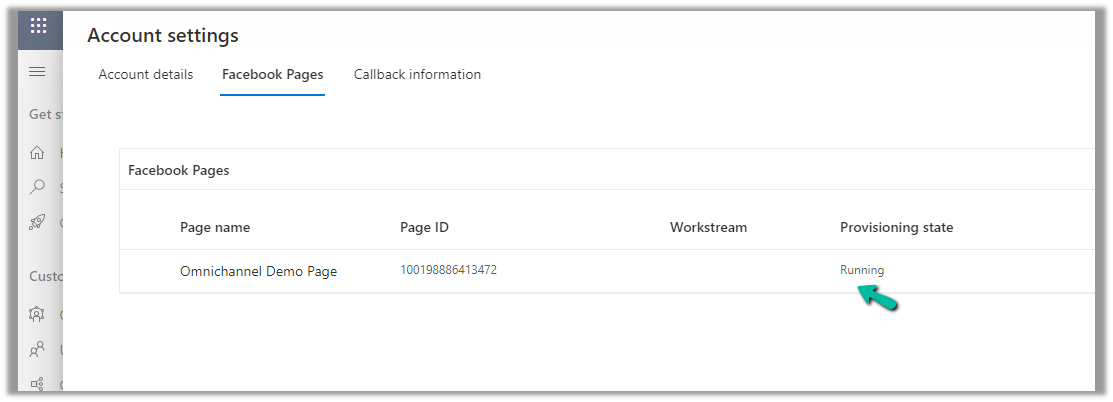
Open the record, and navigate to the Facebook Pages tab, there we can see the Provisioning state as Running.
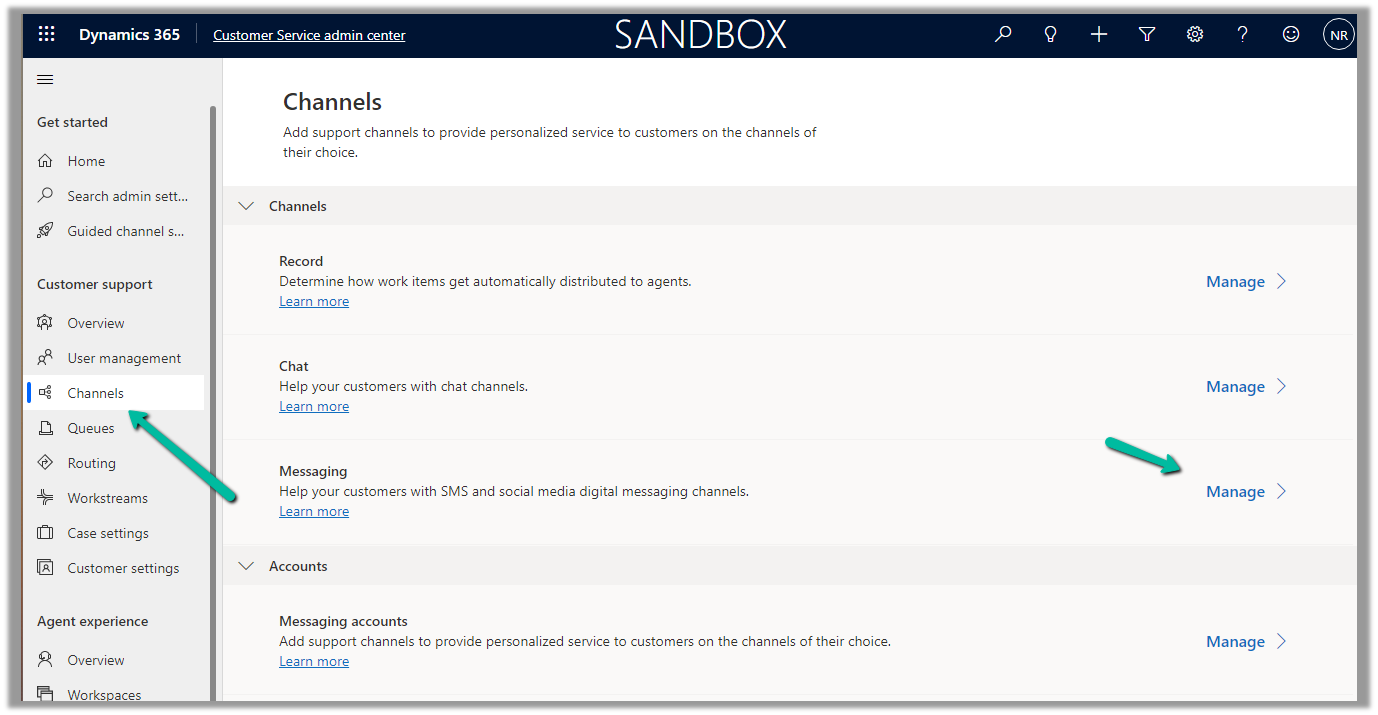
Next, we will create a Channel for this Facebook Account.
Navigate to Customer Support >> Channels >> Messaging (Manage) >> Add Channel
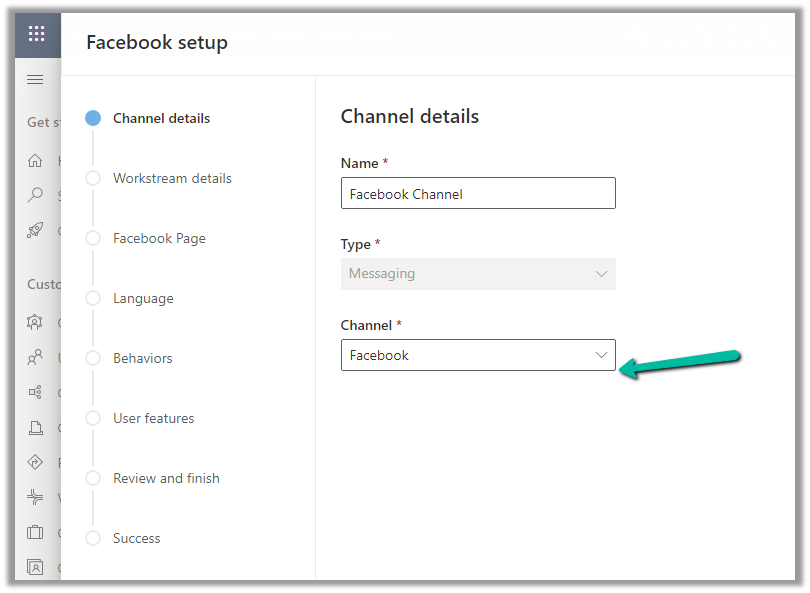
Select Channel as Facebook.
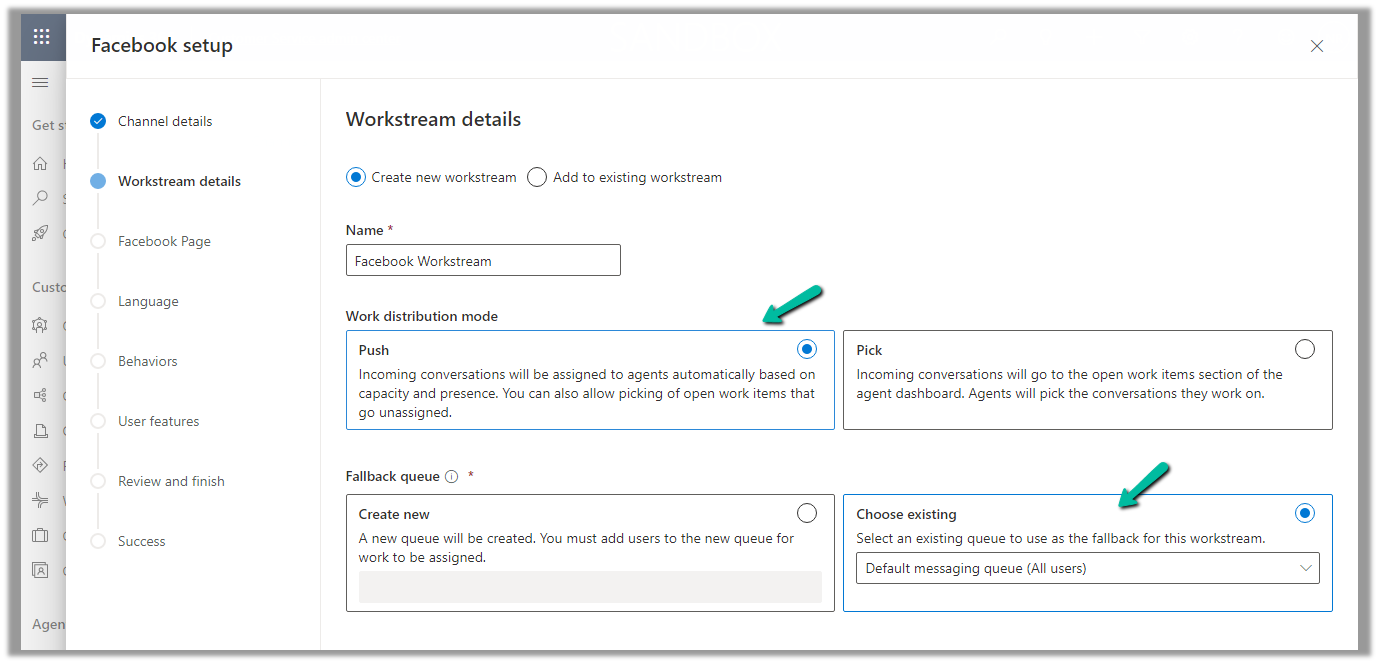
Add an existing workstream or create a new workstream.
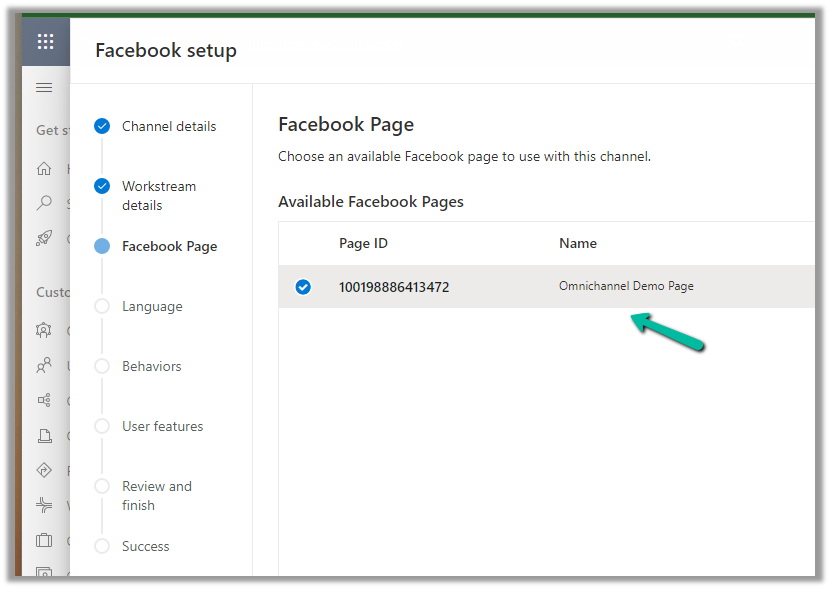
Next, select the Facebook Page configured in the previous steps.
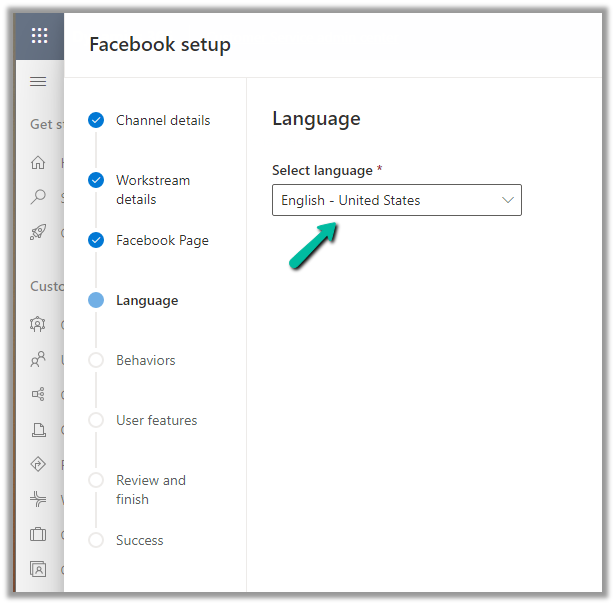
Language as English.
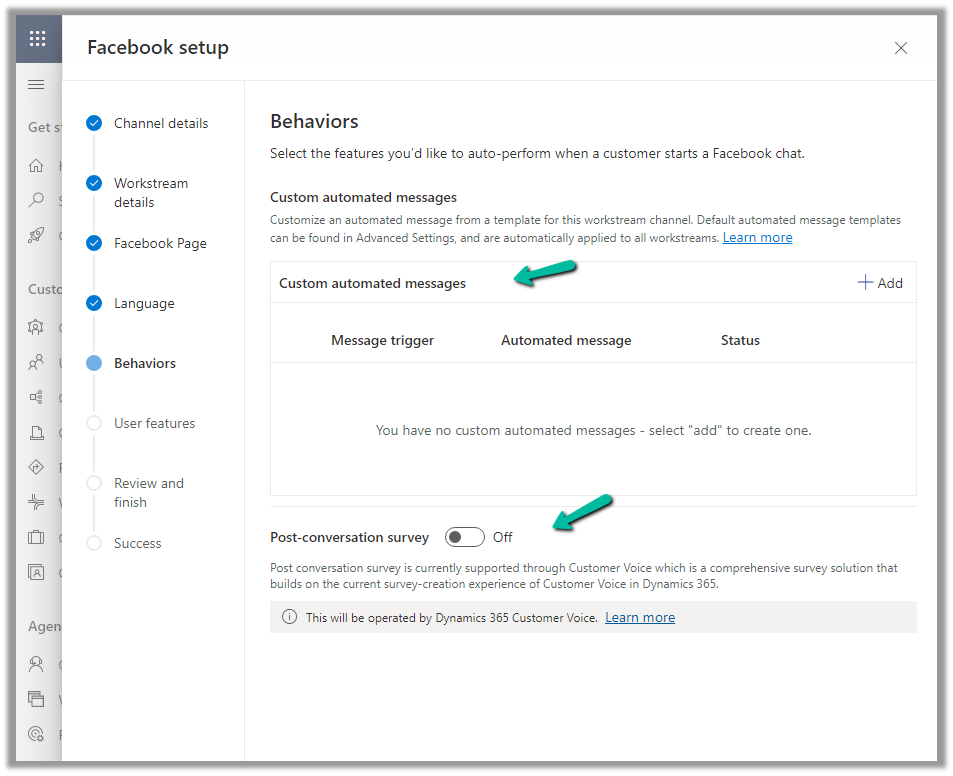
We can specify custom automated messages and Post Conversation survey settings here.
Specify the File attachments setting and message tag.
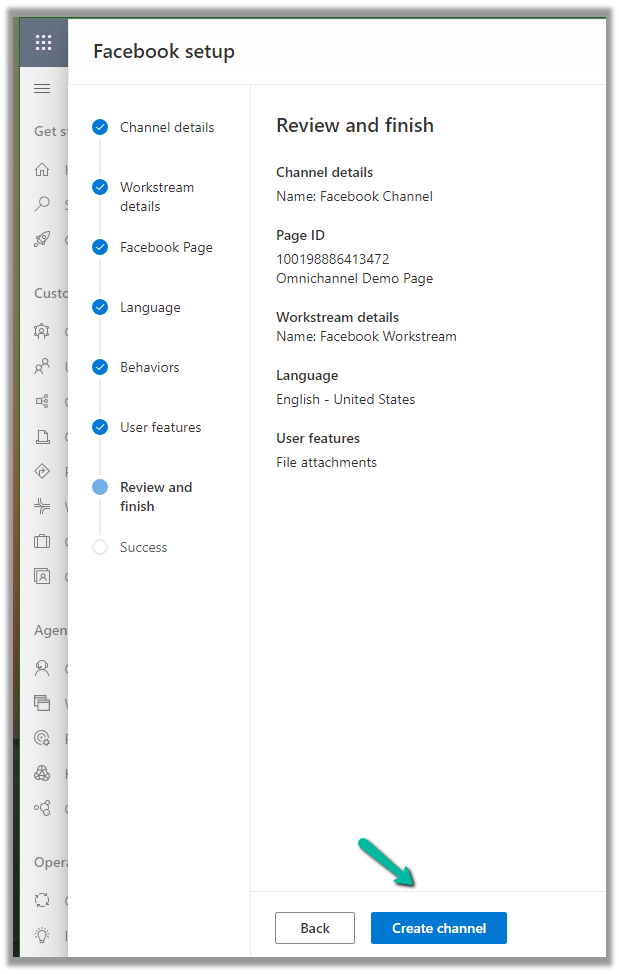
Review and if required edit the details and finally click on Create channel to create the Facebook channel
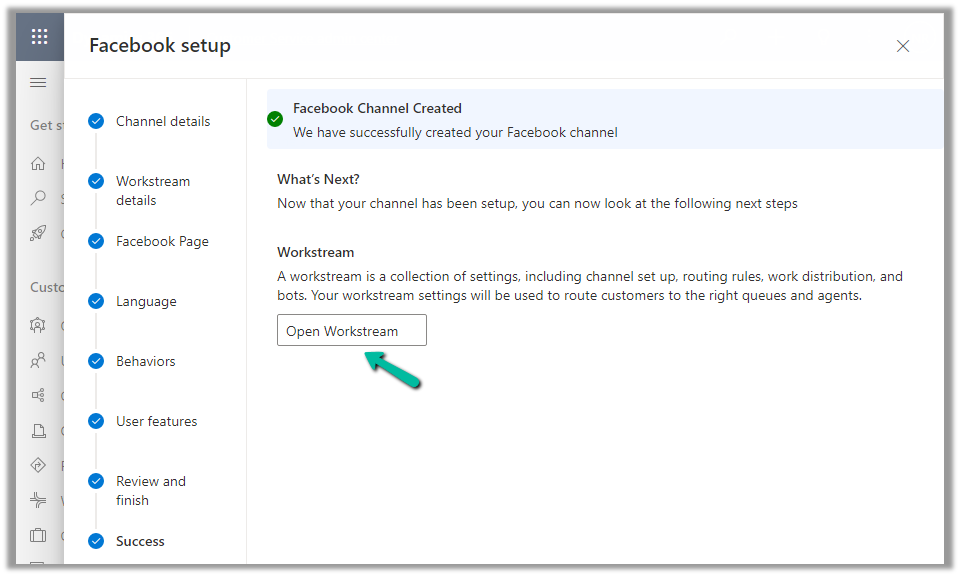
Next open the workstream created, to specify routing rules, work distribution, bot, etc. to route the customers to the queues/agents.
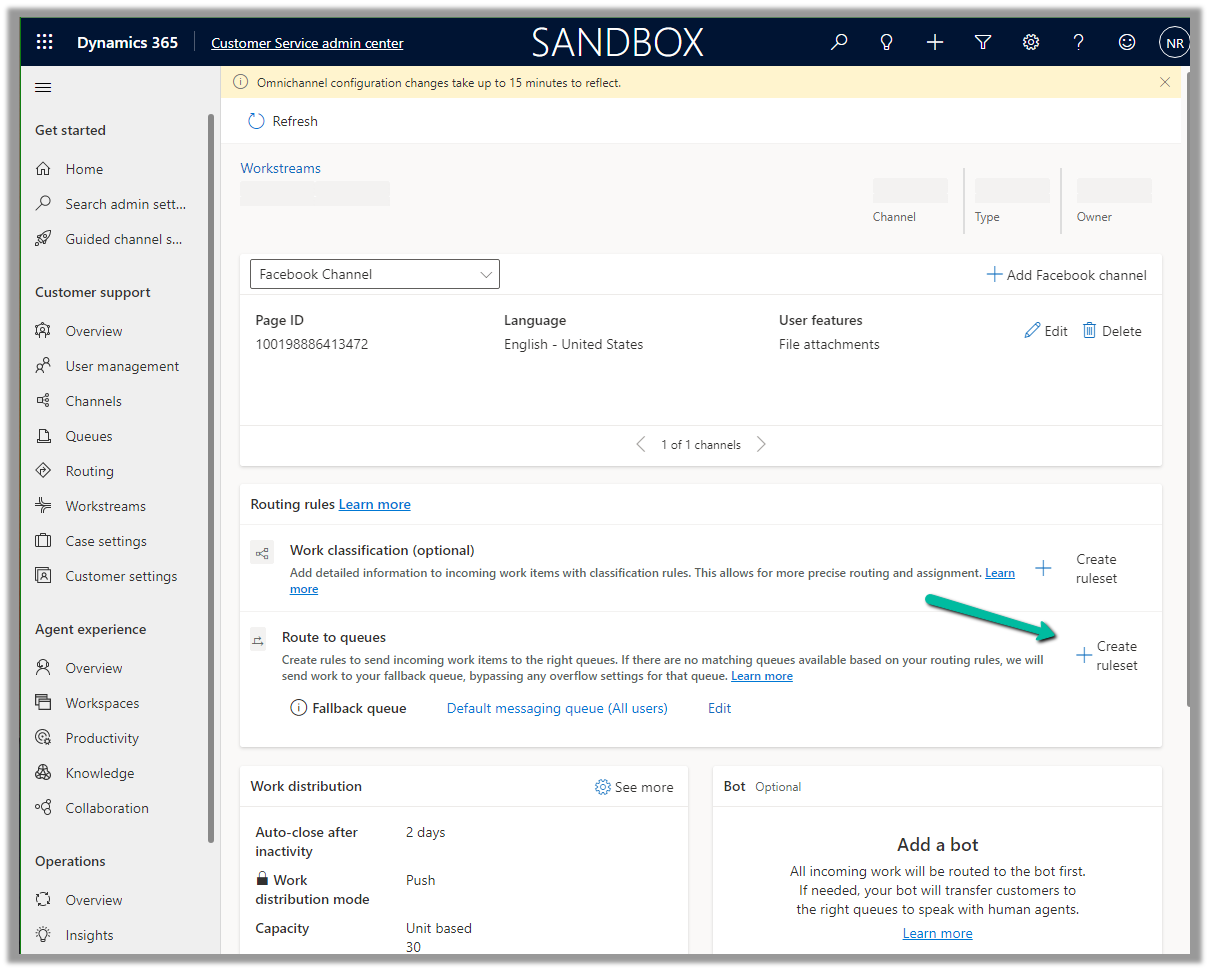
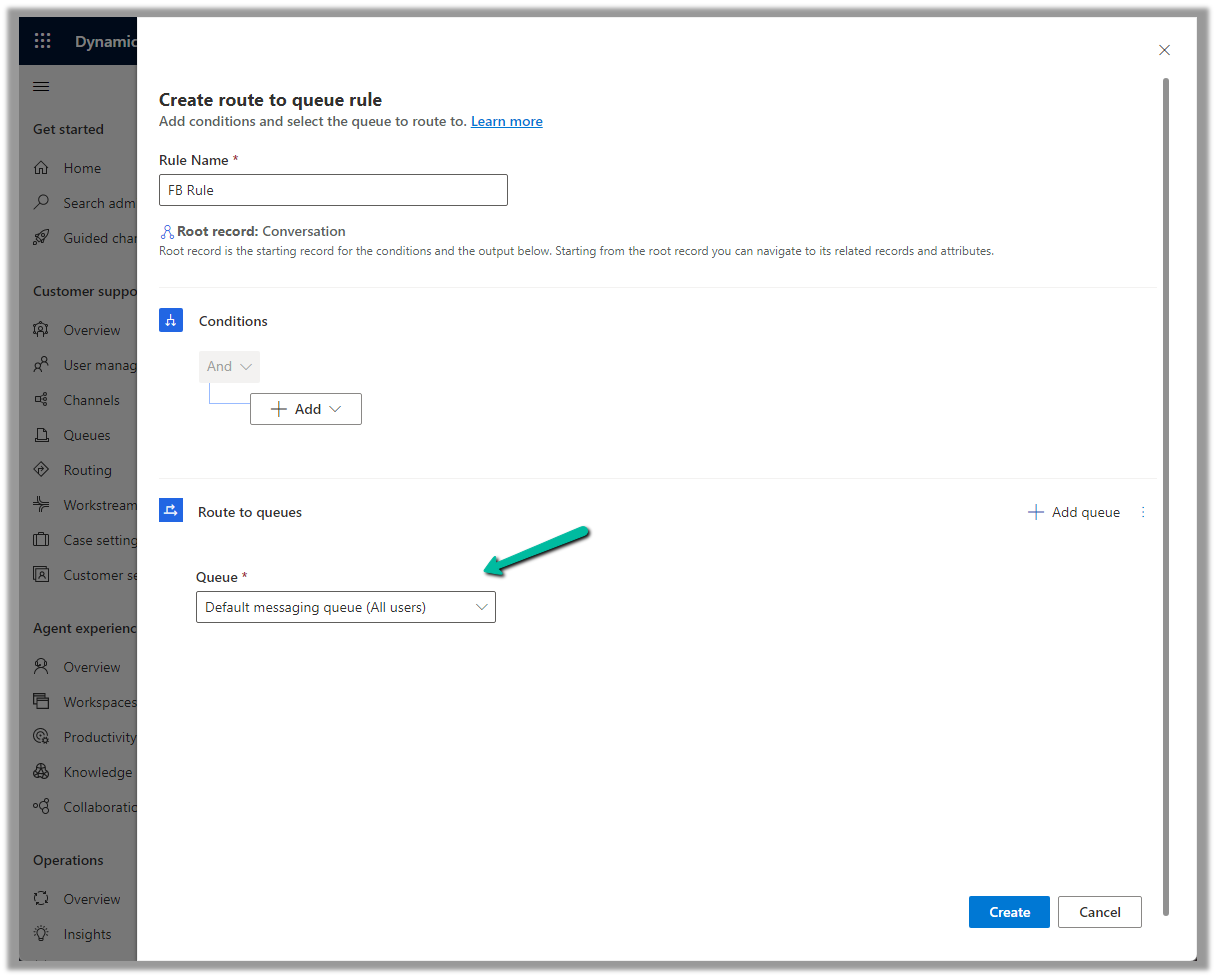
Here we can create a Route to Queue ruleset to route the messages on the Facebook page to a specific Queue.
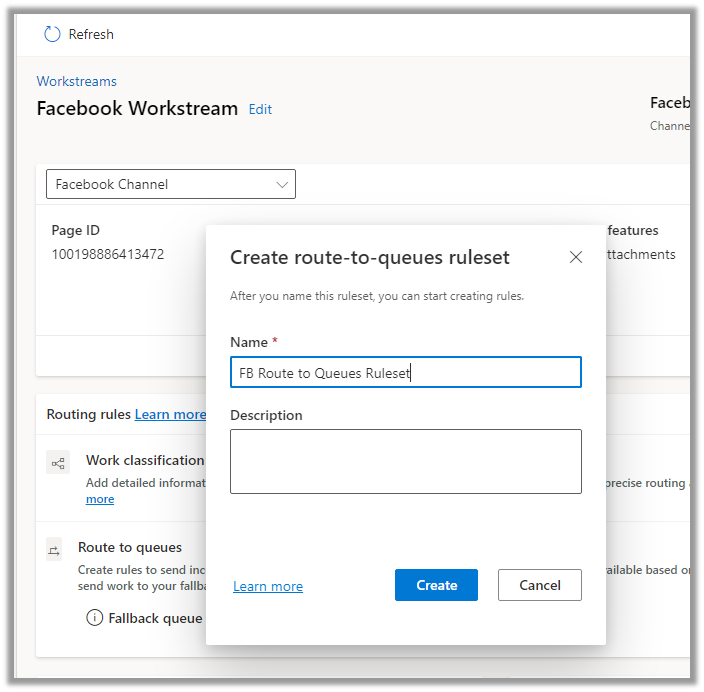
Create the ruleset record.
Next, Create a rule. We can define the conditions here (right now we are keeping it blank) and routing to the Default messaging Queue (we can create a specific queue and add only the required users).
Make sure you have added users to the Queue and assigned Omnichannel Agent security roles.
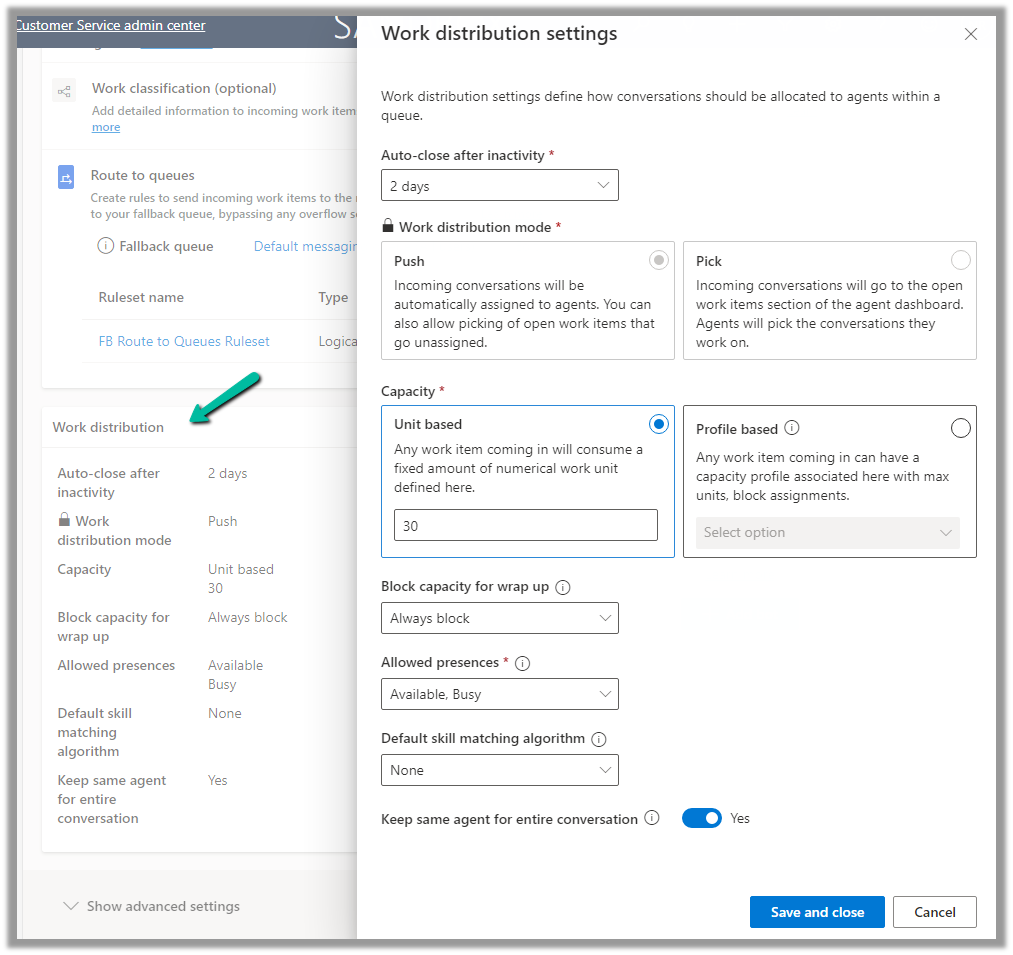
We can update the default Work distribution properties.
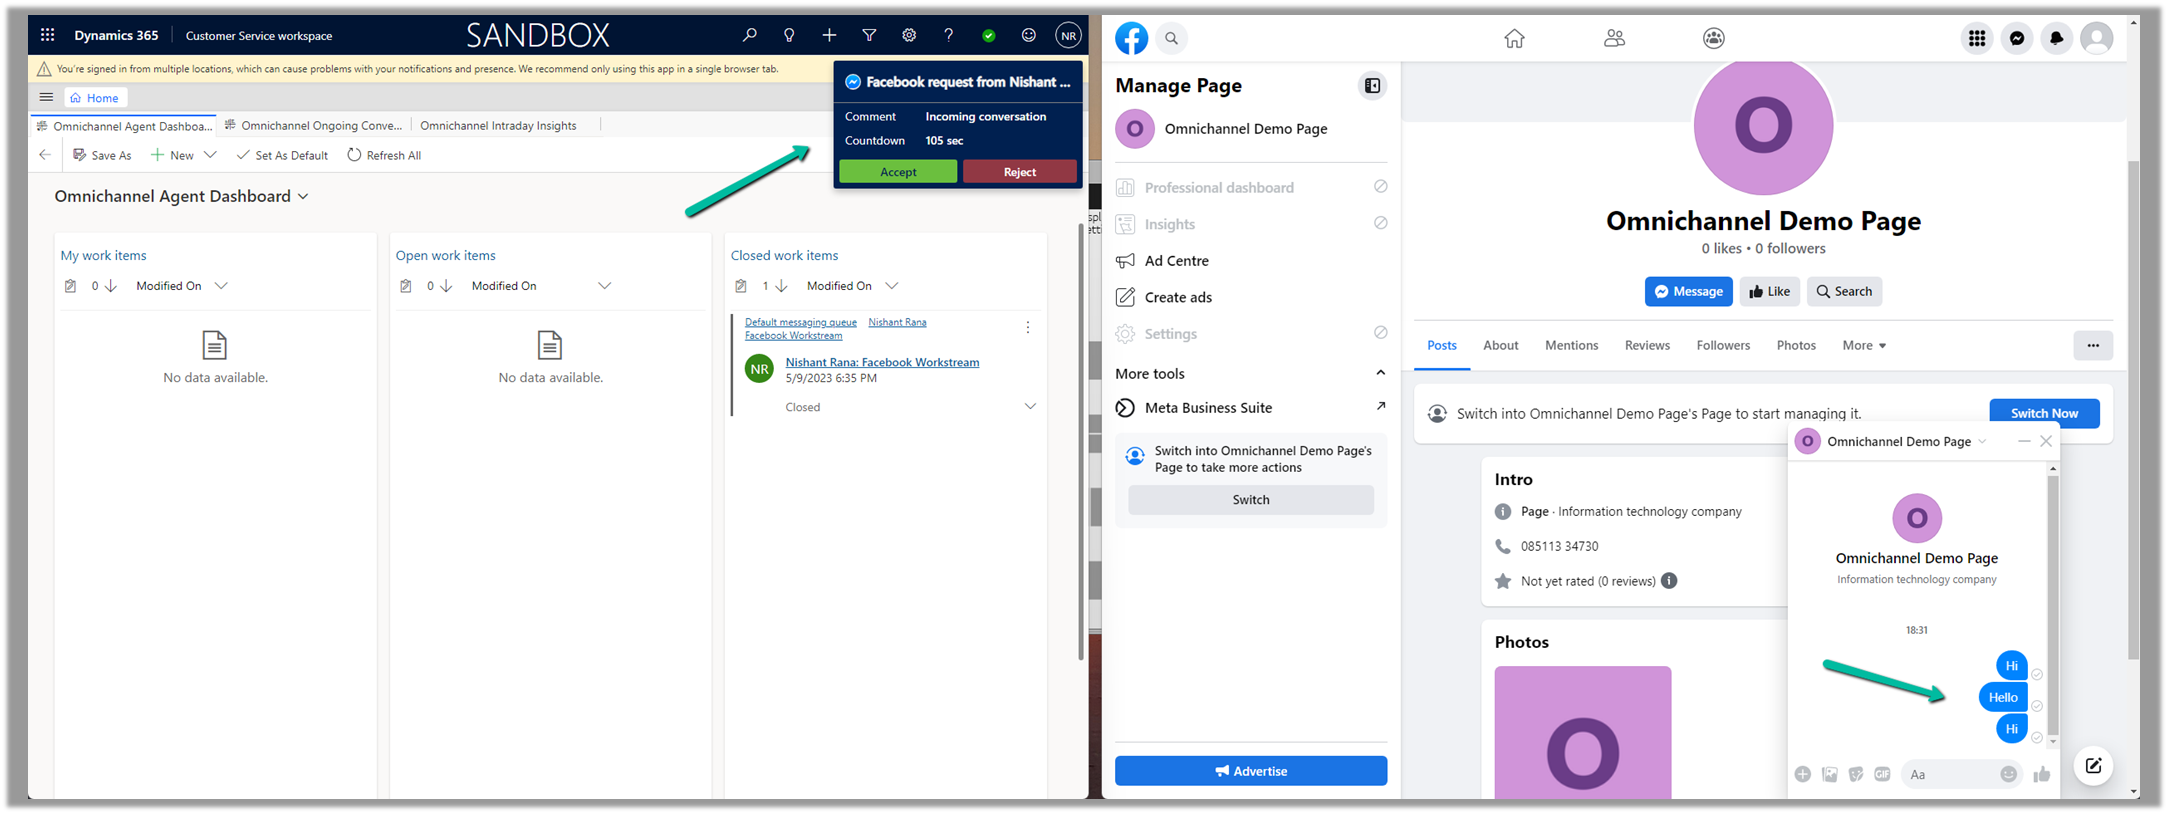
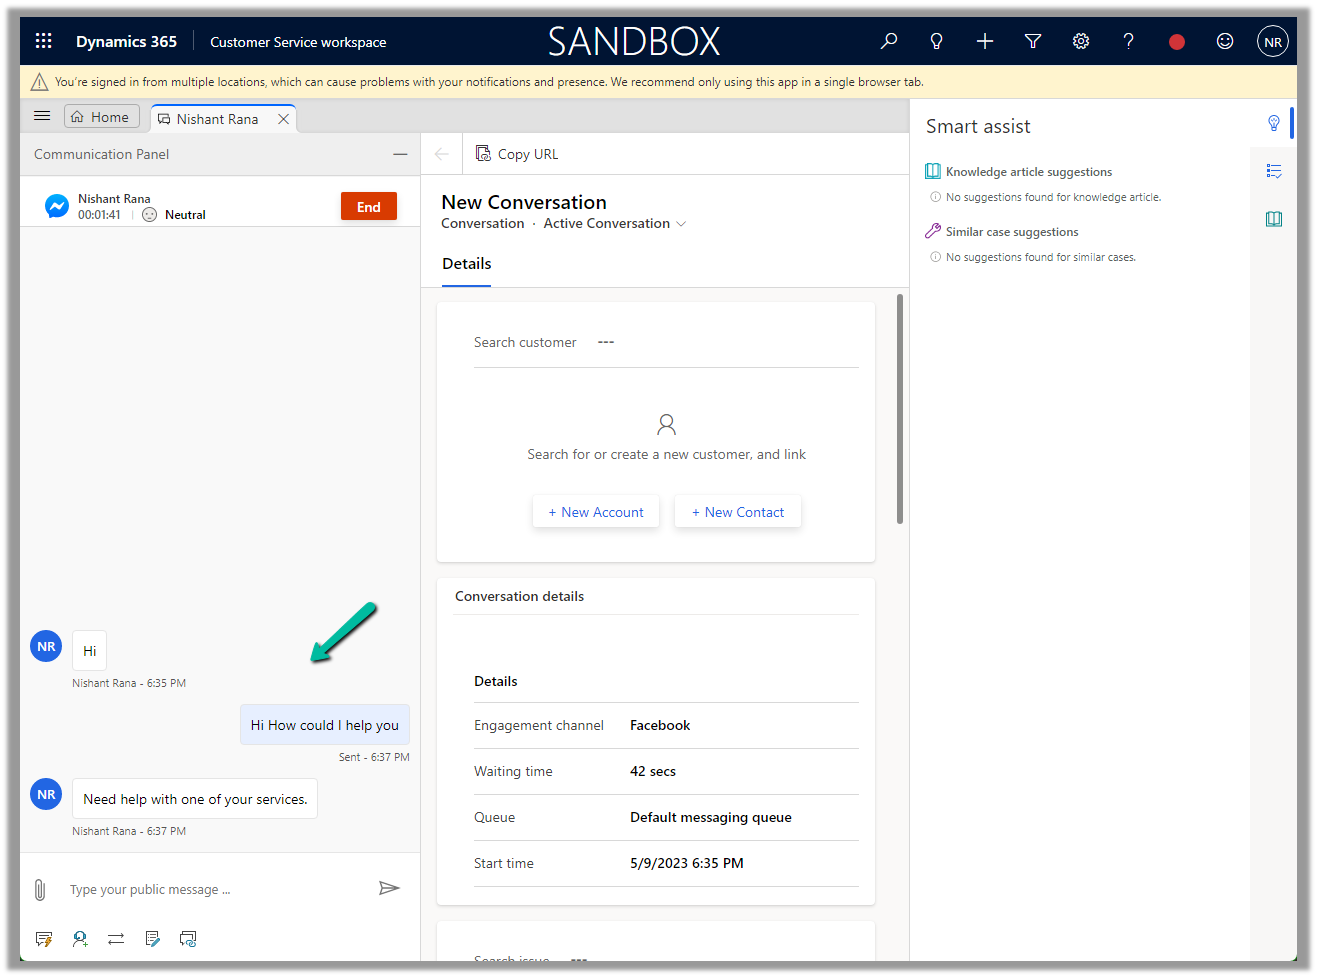
Now sending the message from the Facebook Messenger, will pop up the notification for the agent logged into Customer Service Workspace.
Accept the notification to start the conversation.


 We can also Generate token for the page, which we will use while configuring Facebook Channel in Dynamics 365.