
For setting up Outbound calling we need to first set up a phone number that will be used for outbound calling.
This would help – https://nishantrana.me/2022/10/17/how-to-set-up-omnichannel-voice-using-azure-communication-service-acs/
In a nutshell below are the steps we are going to perform –
- Configure Phone Number for outbound calling.
- Define a queue of type voice for outbound calling or use an existing queue.
- Configure outbound capacity profile and add users.
- Create an outbound profile using the phone number, queue, and outbound capacity profile.
Next click on Edit for the phone number added.
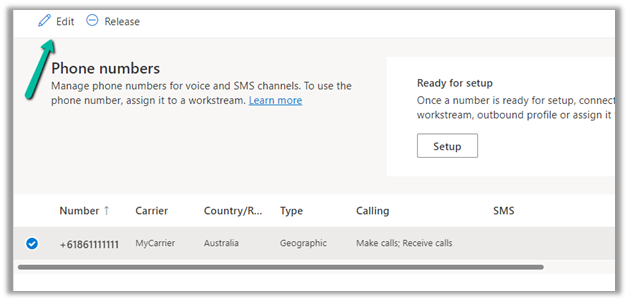
Select Make calls for the phone number and save the changes (if not already done) for enabling outbound calling.

Next select Setup for the phone number.
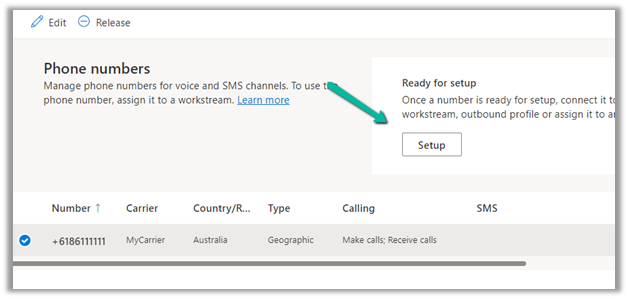
Select Create a profile to create an outbound profile. For agents to make an outbound call they must be assigned or added to an outbound capacity profile.

https://learn.microsoft.com/en-gb/dynamics365/customer-service/configure-outbound-inbound-profiles

For each phone number, we need to define an outbound profile.
Clicking on Create profile will take us to the page for creating the new outbound profile. We can also navigate there directly through – Advanced Settings >> Agent Experience >> Outbound and Inbound Profile >> Manage

Before we can create a
new outbound profile, we need to have Queue and Capacity Profile in place.
Here we have a Queue named Default Voice Queue of type Voice created and a user added to it.

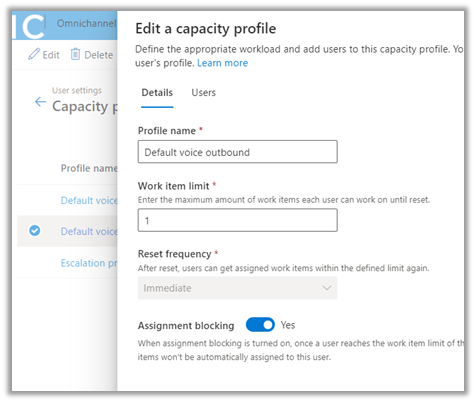
For creating a Capacity profile, navigate to User Attributes >> Capacity Profile >> Manage

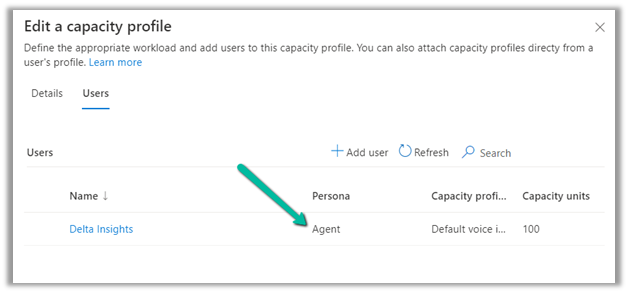
Here we have a capacity profile named – Default voice outbound with the users added to it.
With the Phone Number, Voice Type – Queue, and Capacity Profile defined, let us now create the new outbound profile.
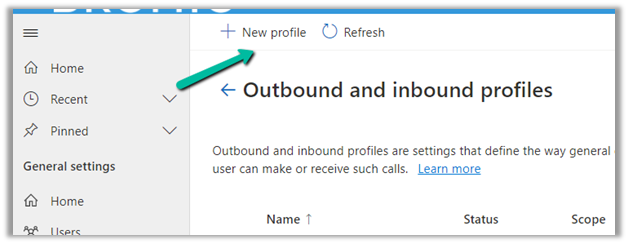
Navigate to – Advanced Settings >> Agent Experience >> Outbound and Inbound Profile >> Manage
Select + New profile
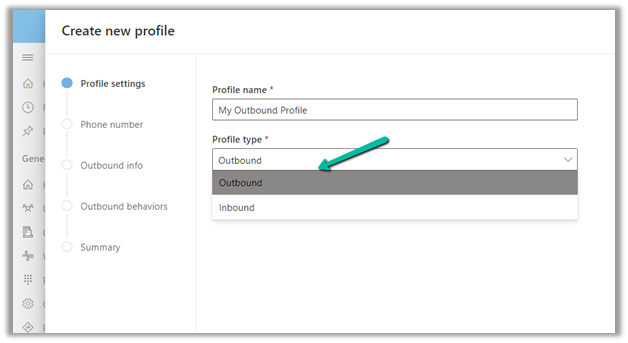
Specify the Profile name and Profile type as Outbound.
Add the phone number and specify the Outbound
info required.

Specify Outbound behaviours

Click on Next and check the details in the summary and Save and close to create the outbound profile record.

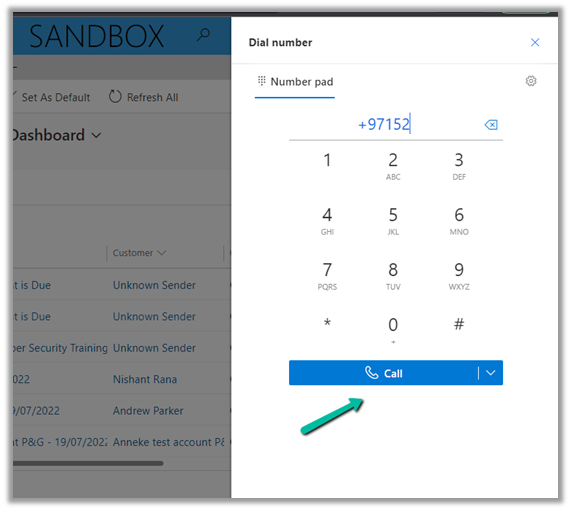
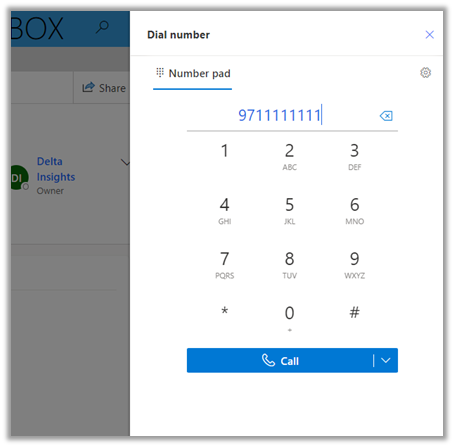
Now with the configuration done, agents can make calls by clicking the Launch
Dialer.
Or from the Mobile Phone field, they can click on the Phone icon.
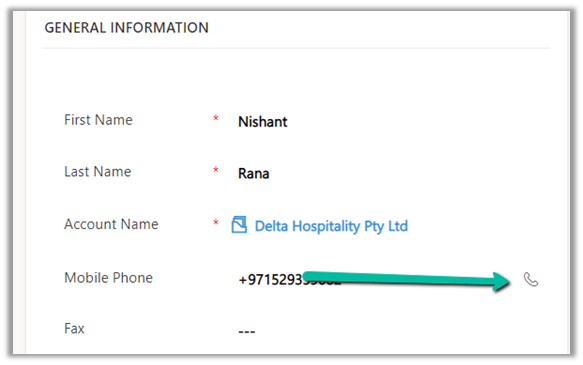
It launches the Dialer, with the phone number populated.
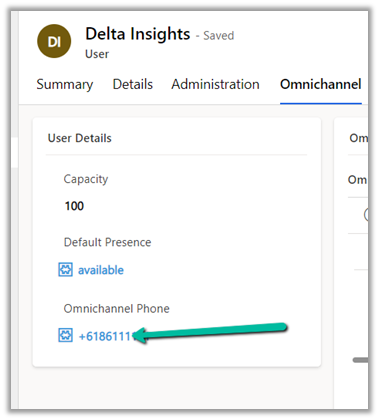
Lastly, we can also assign a Phone Number to a user, which allows him to make calls using that number. (toll-free numbers cannot be assigned)
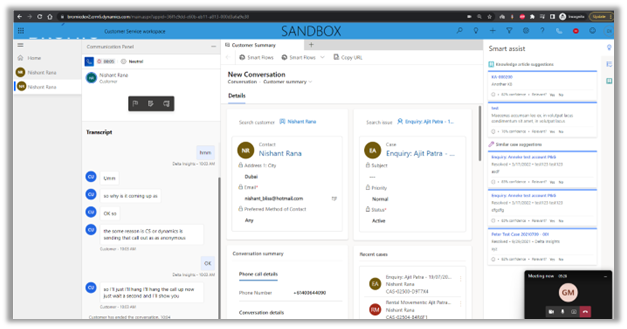
With all the proper configurations in place, we were able to make an outbound call using the phone number configured as shown below.
Please check – https://neilparkhurst.com/2022/04/05/omnichannel-for-customer-service-outbound-voice-calling/
Hope it helps..
Discover more from Nishant Rana's Weblog
Subscribe to get the latest posts sent to your email.


2 thoughts on “How to – configure Outbound Calling – Dynamics 365 Omnichannel for Customer Service”