How to – Use PCF Custom Control Builder (XrmToolBox Plugin) to update existing control in Dynamics 365 / PowerApps


A couple of months back I had written my first PCF Control to display GUID of the record, it was more of a hello world kind of thing.

https://pcf.gallery/guid-control/

Well, the code was using Xrm.Page client API which as we know is deprecated.

So, it was time to update it to use context instead.

More on context

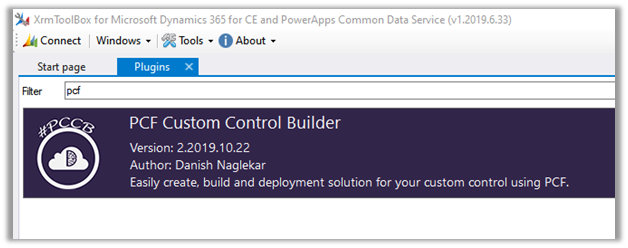
So, thought of using the wonderful PCF Custom Control Builder tool to do that by Danish (which got a new update today – 22- Oct-2019)

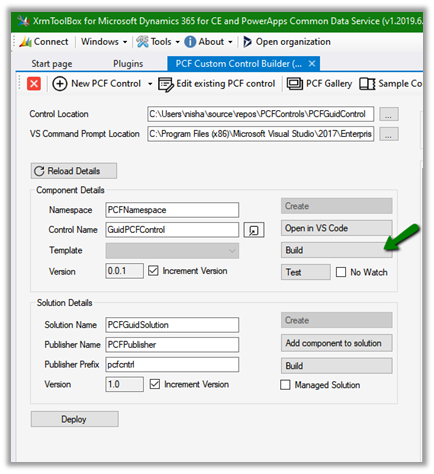
Connect to the organization, select Edit existing PCF Control option

Specify the Control Location and VS Command Prompt Location (VsDevCmd.bat)

And click on Reload Details which will list down the details of the component and the solution as shown above.

Click on Open in VS Code to open the project in Visual Studio Code and start making the required update.

It opens the project in Visual Studio Code.

i.e.

Here let us update the index.ts file to use context to fetch the GUID.

Save the changes. And click on Build

i.e.

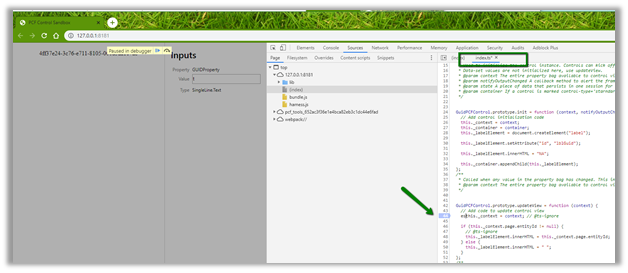
Now click on Test to see it in action or to debug.

We can see it populating the GUID

To debug it à we can use the developer tools (F12) and put the breakpoint in the index.ts file.

Now let us deploy it to our organization

Deployment in action

After successful deployment, we can see the solution added to our organization

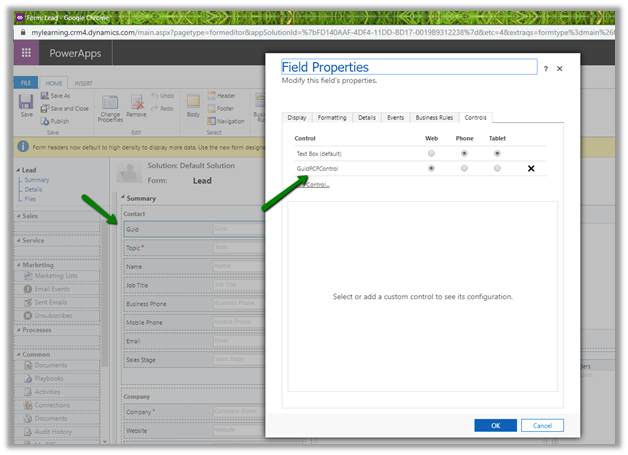
Now let us use it for the single line of the text control.

Publish the changes.

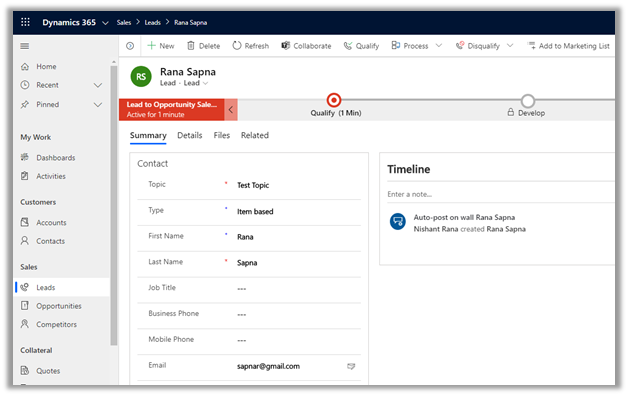
Create the new lead record and we can see the GUID of the record created in the control

Thus, the wonderful PCF Custom Control Builder plugin of XrmToolBox makes it so easy to update the existing PCF Control and also to create new PCF Control.

Hope it helps..

Advertisements

Single Instance / Organization Considerations in Dynamics 365 Customer Engagement / Dynamics CRM


Let us start from the scenario that the enterprise has decided to use Microsoft Dynamics CRM /365 CE as a preferred customer relationship solution for their organization.

For a large enterprise and/or having multiple different departments, the first question that comes up is, do they need to have a single instance or organization or multiple instance or organization. Well, that decision is not that easy but one thing is for sure the decision should be made as early as possible in the project.

Well you could refer to these posts that could help us to make the decision

https://medium.com/capgemini-dynamics-365-team/does-enterprise-scale-dynamics-require-multiple-instances-f1931a443930

https://nishantrana.me/2019/07/23/single-organization-vs-multiple-organization-single-instance-vs-multiple-instance-key-points-to-consider-in-dynamics-365-ce-on-premise/

Now suppose we have made the decision to go with the single instance \ organization, so what are some of the key points we need to consider.

There could be multiple ways of implementing and defining the segregation layer as well as what needs to be shared from data and customization perspective among the different business units, the most important being the security model and the business unit structure being one of the key components of it.

Check out the below Webinar –

http://www.xrmcoaches.com/2017/07/free-webinar-friday-creating-your-dynamics-365-security-model/

also listen to the below podcast to get some guidance around the setting up the security model

http://crmmvppodcast.com/episode-19-setting-up-your-security-architecture-like-a-crm-mvp

In one of our projects, the way we segregated different departments, after defining the appropriate business unit structure, was by having the Business Unit lookup (custom field) in all the common entities that were being shared by the departments and populating that field accordingly, every time record is created either through User Interface or through code and to refer the same field in the customizations (plugin, workflow etc.) as and when applicable.

In the other project, we were referring to the Business Unit lookup field in the System User / Team Entity.

Well there could be multiple ways of doing the same with its own pros and cons.

But what if you have already implemented for one of the units and didn’t consider that the same instance would need to be extended to accommodate the different business unit(s).

Well, then it is time to modify a couple of things to make the Business Unit structure scalable (if it is not).

Let us go through the each of the main components one by one and how they can be segregated among different business units.

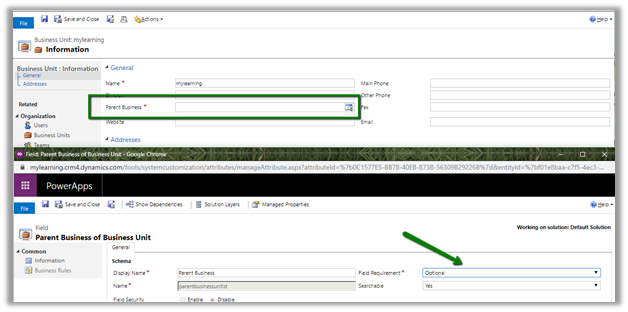
Wrong root business unit name?

Set Parent Business Unit lookup field as optional, open the Business Unit record and rename it.

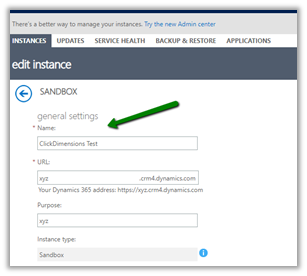
Need to rename the organization?

For Online à

Navigate to Admin Portal, select the instance and click on edit and update the organization name and if required the URL as well as shown below.


For On-Premise à

  • Follow the below steps to update the Display Name

https://blogs.msdn.microsoft.com/darrenliu/2013/09/21/change-crm-organization-display-name/

  • Updating Organization Database Name

https://blogs.technet.microsoft.com/crmbipl/2008/01/14/how-to-change-crm-4-0-organizations-database-name/

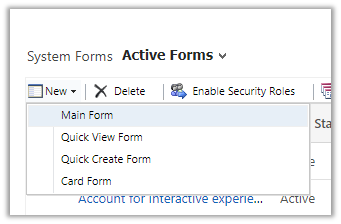
Forms

Create separate new Main forms for different business units.

Enable appropriate security roles for the Form.

Views

Fields

Reuse the fields that are common instead of ending up creating a large number of fields.

Field security profiles can also be used if required when certain entity’s records are shared across the business unit and we want to hide the sensitive information.

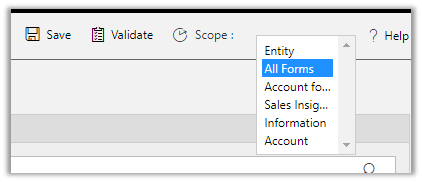
Business Rules

Business rule can be configured to run on the scope of Form instead of the Entity.

Dashboards

For Dashboards, we can enable the security roles.

Workflows

  • Use scope fields to make sure the workflows fire appropriately.
  • Or put the first step to check for which business unit it is firing (depends on the segregation logic implemented)

Plugins

Have a field in the records to identify to which Business Unit it belongs to and check for this field as the first thing in the plugin or check for the Business Unit of the user under whose context the plugin is getting fired or use the secure \ unsecure configuration etc. it purely depends upon the way the segregation logic has been implemented.

SLAs

Use SLA lookup field to apply the SLA dynamically through plugin or workflow.

https://nishantrana.me/2019/07/24/apply-sla-choosing-the-sla-in-the-sla-lookup-field-for-the-sla-enabled-entities-in-dynamics-365-ce/

Business Process Flow

If there are multiple business process flow, make sure appropriate one is applied

Apply business process flow while creating an entity record.

https://www.powerobjects.com/blog/2019/04/24/business-process-flows-switch-bpf-dynamics-365-javascript/

There would be multiple other key points to be considered apart from the one listed above specific to each implementation; the above points are some of the things that can be taken as guidelines.

Lastly we must consider  creating different apps for different department \ teams\ users and add required solution components to it.

Design custom business apps by using the app designer

Please feel free to add comments and share your thoughts.

Hope it helps..

Business Unit Hierarchy – My First XrmToolBox Plugin


Check out – XrmToolBox Plugin to generate Business Unit Hierarchy by Phani

Phani Rajasekhar's avatarPhani Rajasekhar

I am very happy to announce that my first plugin “Business Unit Hierarchy” is listed in XrmToolBox now.

Thanks to Nishant Rana for giving me an idea to develop this.

This plugin is simple but very useful. Most of the times we navigate to so many windows to understand the BU hierarchy in our organization (I faced this situation many times) but with this plugin it is very easy to get the complete overview of BU Hierarchy. I plotted the BU Hierarchy in tree view presentation which is easy to understand for any user.

Here are list of steps to use this plugin

  1. Install “Business Unit Hierarchy” plugin from XrmToolBox Plugins Store.
  2. Connect to your organization.
  3. Open the plugin and click on “Generate Business Unit Hierarchy” button.

That’s it, Business Units of your organization will be loaded in a hierarchical structure like in the above screenshot. The BU’s that are…

View original post 46 more words

Generate Dynamics 365 CE (CRM) Business Unit Org Chart through SmartDraw


Recently we were looking at the options of generating a Business Unit Org Chart for quick review.

Using SmartDraw we were able to do achieve it very quickly.

Steps

  • Keep only the Name and Parent Business column and delete all the other columns including the hidden ones.

  • Excel with required columns.

  • Create the trial account of SmartDraw cloud

  • Click on Org Charts from the New Document menu.

  • Select Build Org Chart from Data option

  • Browse and select the xls file.

  • Click on Process.

  • Select Show in Shape for the columns and click on the Build diagram.

  • The result

  • The other option is to select any of the Organizational Charts

  • Select Import from file

  • Select the excel file

  • The result

  • The chart can be exported, shared and print.

Thus SmartDraw makes it very easy to generate the Org Chart for the Business Unit.

To achieve the same through Visio

http://www.planetxrm.com/12-steps-to-creating-crm-business-unit-org-charts/

Hope it helps..

Contextual Email communication in D365 CE Wave 2


priyeshwagh777's avatarD365 Demystified

2019’s Wave 2 release have really put things where they should be. Once I enabled Early Opt-in while writing this post, this is a great feature for Sales people I came across and couldn’t resist sharing with you all – Contextual Email Communication! So kindly wait until updates are automatically applied to your org or try the same in your Sandbox first.

Isn’t going exclusively to Activity/Email entity extremely off-putting? I mean, you navigate away from your record you were working on and that isn’t productive, is it?

That’s when Contextual Email window comes in really handy. Here’s how you enable it in your 2019 Updates.

App Settings in Sales Hub

  1. In your Sales Hub, navigate to App Settings.
    appSettings
  2. Among other settings, look for Enhanced email and flick the switch from off to On.
    switchOffswitchOn
  3. Then click Apply at the bottom right and you’re set!
    applyChanges.png

Contextual/Enhanced Email

Now, when you’re…

View original post 69 more words

Live Chat using ProProfs Chat in Dynamics 365 CE (CRM)


ProProfs chat is another live chat solution that integrates with both Dynamis 365 CE as well as CRM On Premise. Recently I wrote about PowerChat which is another live chat solution that works on both online and on premise version of Dynamics CRM.

In this post we’d see how quickly we can setup the integration and be up and running and also compare it with PowerChat.

Navigate to https://www.proprofs.com/chat/integrations/microsoft-dynamics/ to get the details and click on Try Chat Free to get started.

After creating the account, go to Integration option and select Microsoft Dynamics and set the toggle switch on.

Specify the Dynamics CRM URL, Dynamics CRM Account, on-premise or online and should lead, contact and case should be auto created or not.

Once enabled, go to Installation option and copy the code and paste it on the website or page.

As soon as the visitor starts the chat, the agent will receive the Invite.

The agent can see the details of the visitor like location, device etc.

The customer can end the chat and give rating as shown below.

The agent gets the notification that user has ended the chat.

As configured, we can see the case, lead and contact record created in Dynamics 365 CE, with description having the chat transcript.

To add agents, we can choose the Add Operator option

Routing order gives the option of specifying the sequence of operator accepting chats if chat routing is enabled. Similarly, visitor can select the operation they want to interact with as specified by Allow Operator Selection option.

For different business units having different websites/ pages, we would want them to be served by different operators, herein we can use Departments.

Department will have a code which we need to place under the ProfProfs Chat code to send chat to that specific department.

Also, for Admin, there are Reports available Summary, Rating, Operator, Timesheet, Visitor.

Theme settings à

Chat Window Settings à

Real Time Monitoringà

Comparing the ProProfs Chat with PowerChat with regards to Dynamics CRM integration à

  • PowerChat provides a managed solution that we import inside our Dynamics CRM, then we register through the configuration page of that solution to get started. In case of ProProfs there is no solution file. We register at their site.
  • PowerChat Users are Dynamics CRM Users and can chat with visitors from within Dynamics # CRM. In ProProfs Chat, the operators are not the crm users and their account needs to be created / added separately.
  • PowerChat allows different Chat Widgets to be created, to be used in different web pages or web sites. Agents can be associated to the Chat Widgets. In ProProfs Chat, there is concept of Departments to achieve the same.
  • PowerChat allows agents the option to create lead/ contact/case records manually during the chat. In ProProfs Chat, the lead /contact/ case records are auto created based on the configuration, we can select which records to be created.
  • PowerChat auto creates PowerChat Activity record for each chat which has all the details of the chat. ProProfs Chat doesn’t create any other records expect lead/contact/case inside Dynamics CRM.
  • They both have the option of configuring the chat windows, fields to be added, snippets to be reused during chat, multi agent support.
  • PowerChats is natively integrated with Dynamics CRM, so the CRM Users do not have to be working on 2 different applications. However, ProProfs brings in with it lot more features like routing chat to another operator, co-browsing, APIs support, Reports, Real Time Visitor monitoring etc.

Check the guide here to see all the features

https://chathelp.proprofs.com/home

Hope it helps..