How to – Add users to the Queue – using Manage NN relationships XrmToolBox Plugin and AddPrincipalToQueueRequest (Dynamics 365)


Recently we implemented Unified Routing for one of our projects, and as part of testing we were supposed to add multiple users to different queues (advanced queues in case of unified routing).

So we were looking for a way to do this either through any existing tool or programmatically.

Well, using the Manage NN relationships XrmToolBox plugin we can add users to the queue.  (Thanks to Prashant for suggesting this)

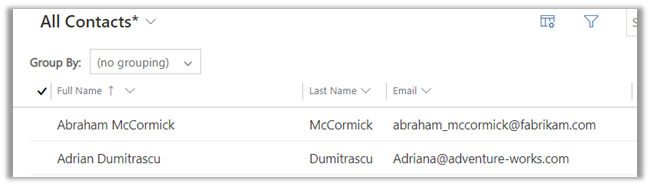
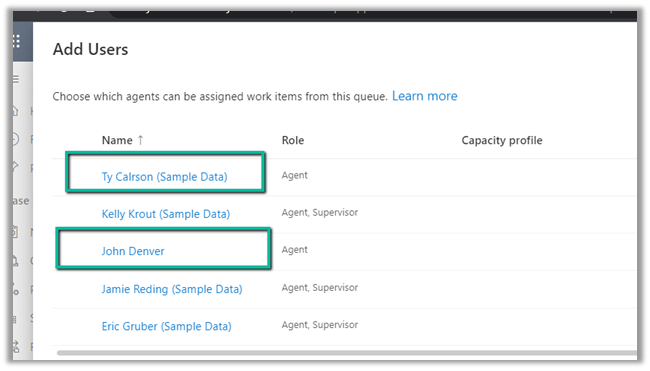
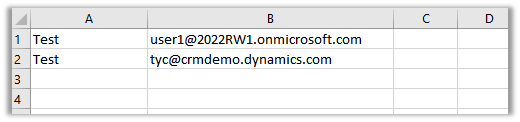
Just as an example, we want to add the below users

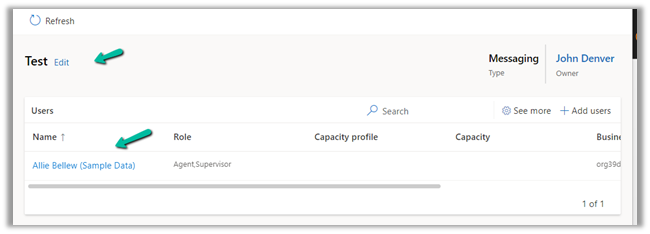
to the following Queue named Test, which currently has only one user added to it.

Below is the sample CSV file we have created having the name of the Queue and the email id of the users to be added.

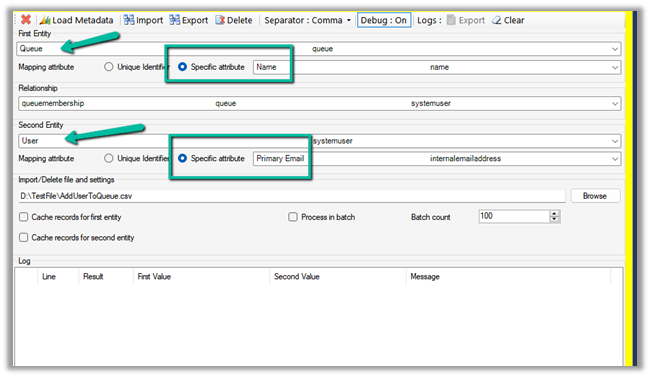
Now let us open the Manage NN relationships tool and specify the appropriate values there.

Here we have specified the First Entity as Queue and the Second Entity as System User.

For Queue we have selected Name and for System User, we have specified Primary Email as the attribute to be considered while importing the data.

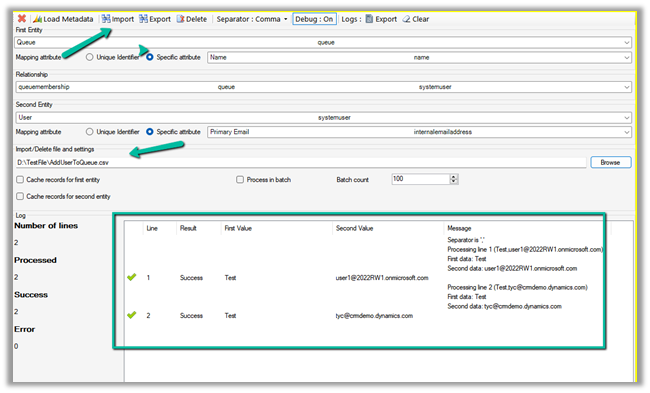
Click on Browse and load the file, followed by a click on the Import button to start the process.

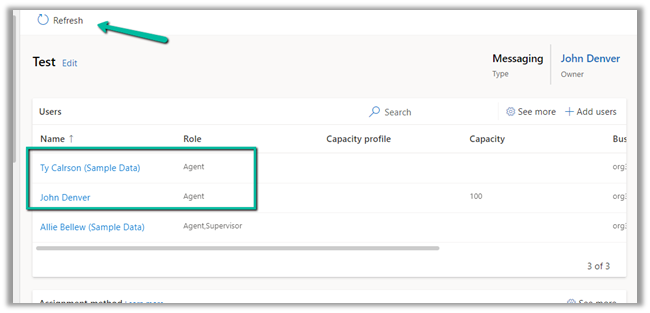
As we have received the Success result, let us refresh our Queue to see if the users were added to the Queue or not.

As expected we can see the users added to the Test Queue.

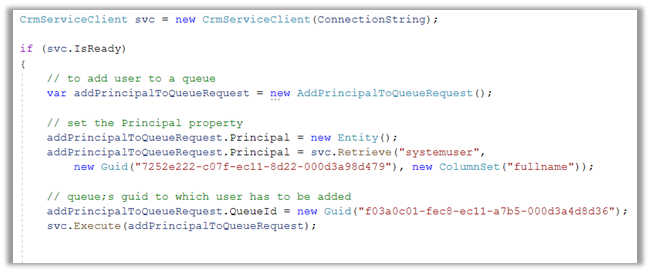
We can also add users programmatically by using the AddPrincipalToQueue Request class.

We need to populate the Principal and QueueId property as shown below.

More on AddPrincipalToQueueRequest.

Hope it helps..

Advertisements

Import Data (Import Data Wizard) – Few key points


Let us understand a few points about the Import Data feature with a simple example –

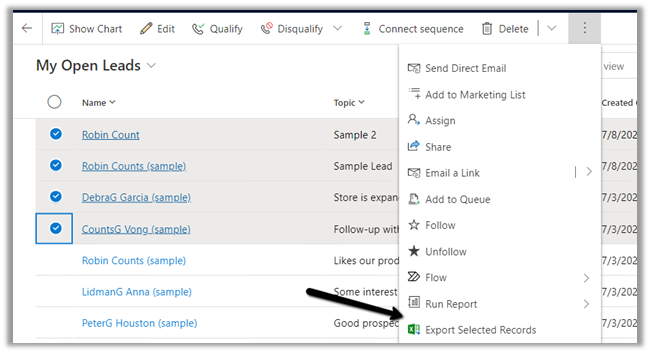
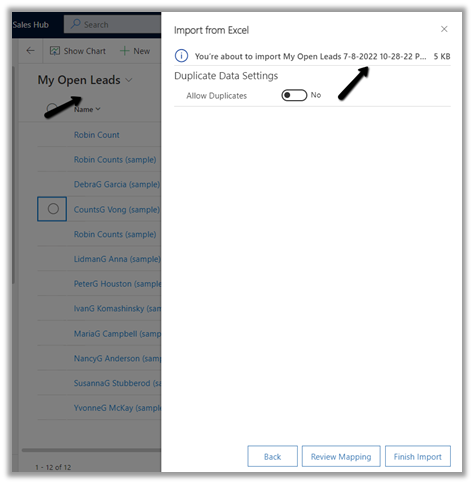
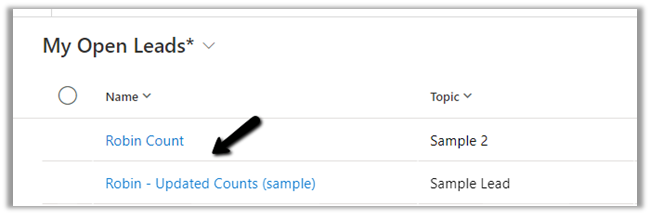
Say for example we have exported the following 4 records.

The exported file will have the view name along with the timestamp.

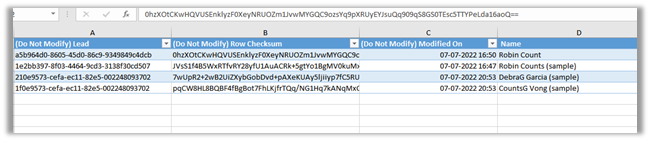
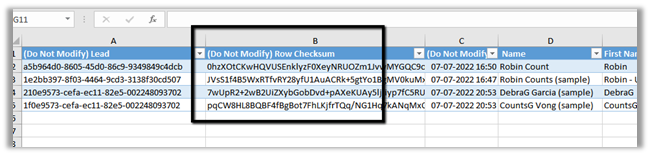
The exported file – 

It has 3 hidden columns that allow for re-import of these records possible.

1st column contains the GUID of the record, the second contains the Row Checksum which it uses to make sure to update only those records or rows which are changed, and the 3rd column is Modified On which it uses to track if the record has been modified since it was exported.

Now let us update one of the records we exported inside CRM.

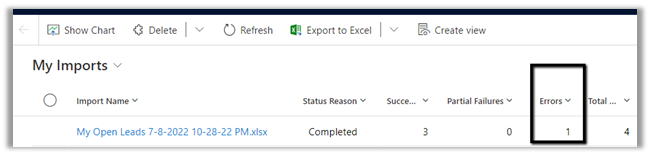
On importing the same file,

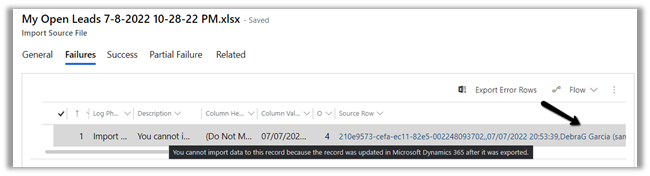
as expected we get 1 failure.

Error message – “You cannot import data to this record because the record was updated in Microsoft Dynamics 365 after it was exported” for the same record which we updated inside the app.

Now let us update one of the records (which has a possible duplicate) and re-import the file.

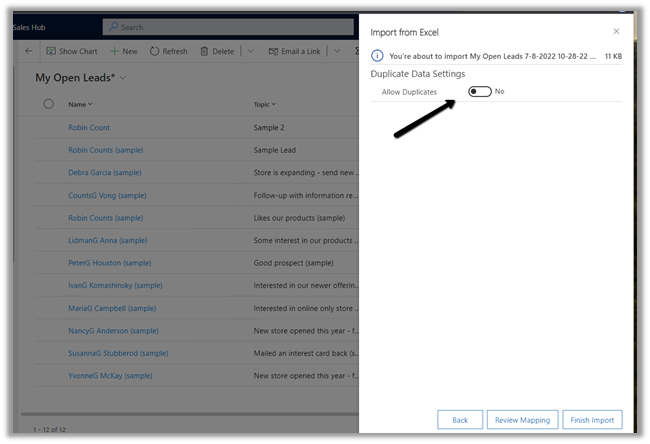
During import, we have let the Allow Duplicates settings be default i.e. No.

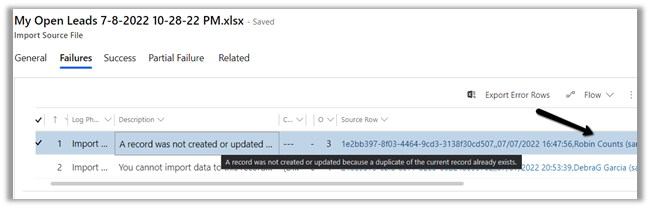
This time also apart from the previous error we get one partial failure.

The error message says – “A record was not created or updated because a duplicate of the current record already exists.

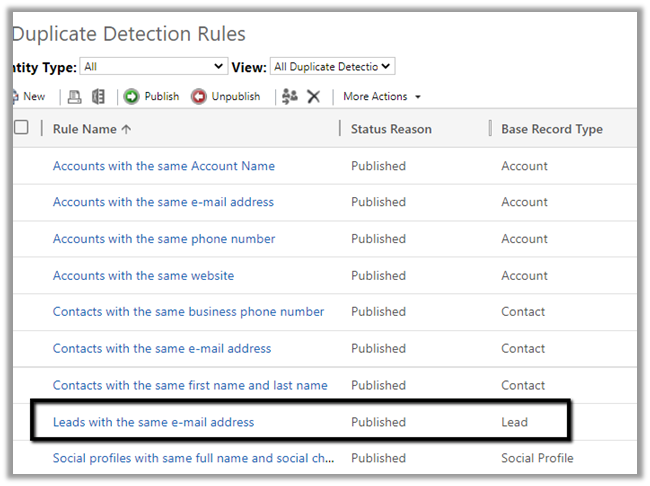
This is because the record that was modified and imported was having another record having the same email id, triggering our duplicate detection rules. Also, we had specified Allow Duplicates as No while importing the file.

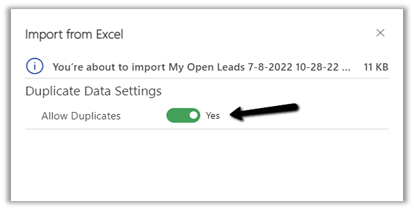
This time let us set Allow Duplicates as Yes and try the import with the same file.

As expected there was no partial error this time.

And the record got updated this time.

Another point to remember is if we export and import the file without any changes, or for the rows with no modification, it will not perform any action, i.e. trigger a create/update for any of the records.

For tracking the changes, as we mentioned earlier it uses the Row Checksum column’s hash value.

Now let’s update the GUID of the record in the 1st row (changed b to c in the end) and the modified date (changed to 55 from 53 minute part) for the 4th row and see the results.

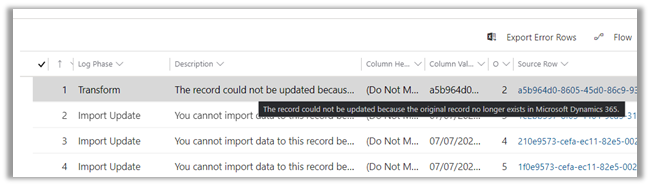
As expected both these records failed – 1st one where we changed the GUID with the error message – “The record could not be updated because the original record no longer exists in Microsoft Dynamics 365” and the 4th row with the error that “You cannot import data to this record because the record was updated in Microsoft Dynamics 365 after it was exported” as we had changed the Modified Date in the imported excel file.

Lastly, let us restore the original value of those 2 fields of the hidden columns and try the import to see the results.

As expected we do not get any error for those 2 rows as we had restored the original value.

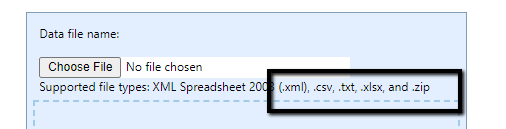
  • For .zip files 32 MB is the max size limit for other file types i.e. xlsx, csv, txt and xml it is 8 MB.

G

  • Microsoft recommends import to be limited to 20K rows or fewer.

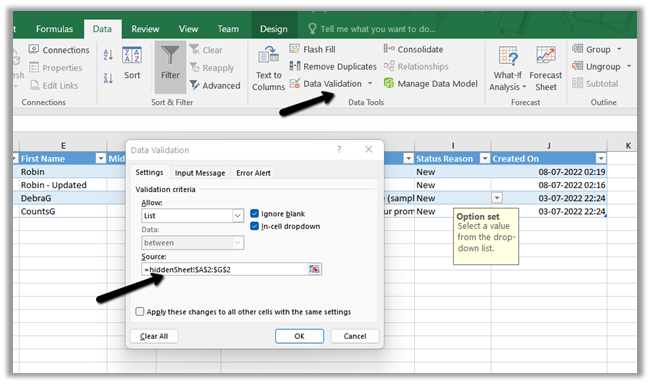
Just in case we are interested to see how the data validation works especially for the option set field in the exported excel file from CRM.

Select the field in excel and open the Data Validation from the Data tab, which refers to the hiddenSheet.

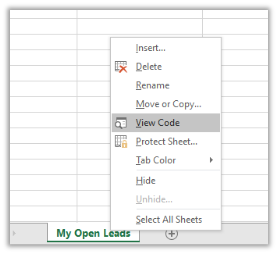
To see the hiddenSheet, right-click the worksheet and select the View Code option.

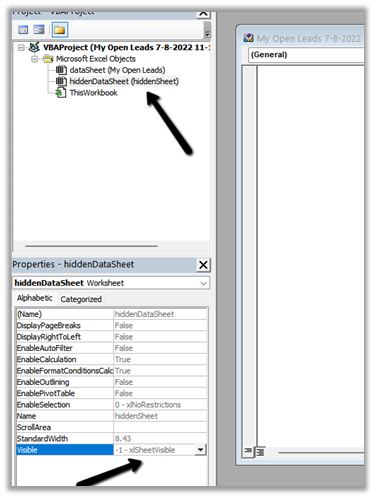
It opens the VBA window, where we can select the hiddenDataSheet object and change its Visible property to -1-xlsSheetVisible.

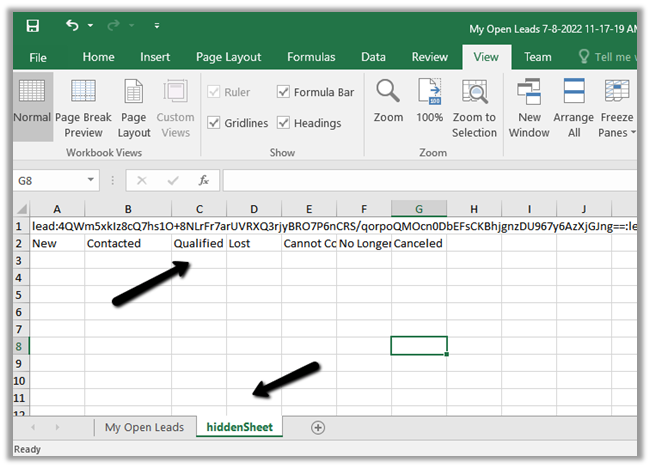
Back in our excel, we can see the hiddenSheet visible and the values of our option-set fields.

Hope it helps..

Advertisements

Managed Environments (preview) – Power Platform Admin Center


Managed Environments is a new feature added in the Power Platform Admin Center to simplify the administration of the platform. It is in Preview currently.

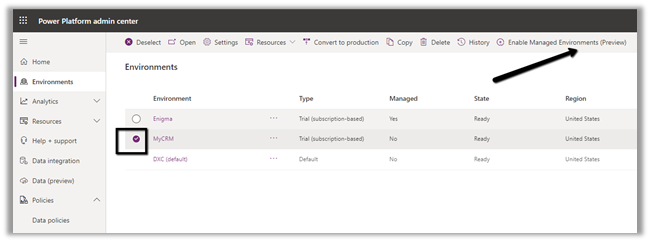
To enable it, select a particular environment and click on Enable Managed Environments.

We will need either Global Admin, Power Platform Administrator, or Dynamics 365 Administrator AD roles to enable the Managed Environments.

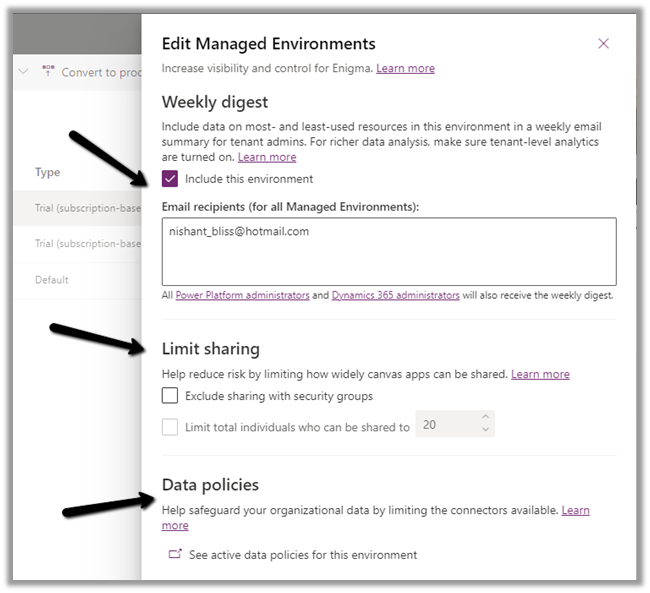
Through Managed Environment, we can specify who can receive the Weekly
Digest i.e., a weekly email summary of resource usage in the environment, apart from Dynamics 365 and Power Platform Admin. (it can be managed through PowerShell also)

Limit the sharing of the canvas apps to the security group and max number of users.

New Environment filters for the Managed Environment with regards to data policies.


For the Weekly Digest, we need to enable the tenant-level analytics from Power Platform Admin Center, click on the settings gear, and enable it from the Power Platform settings window.

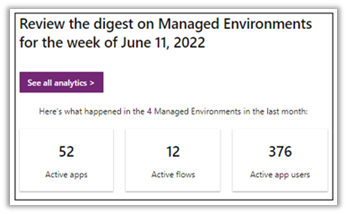
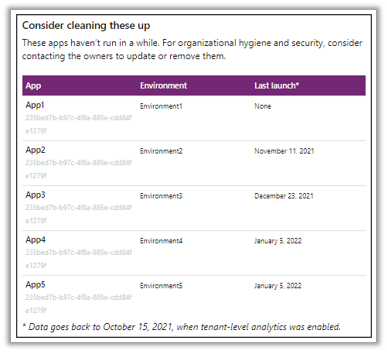
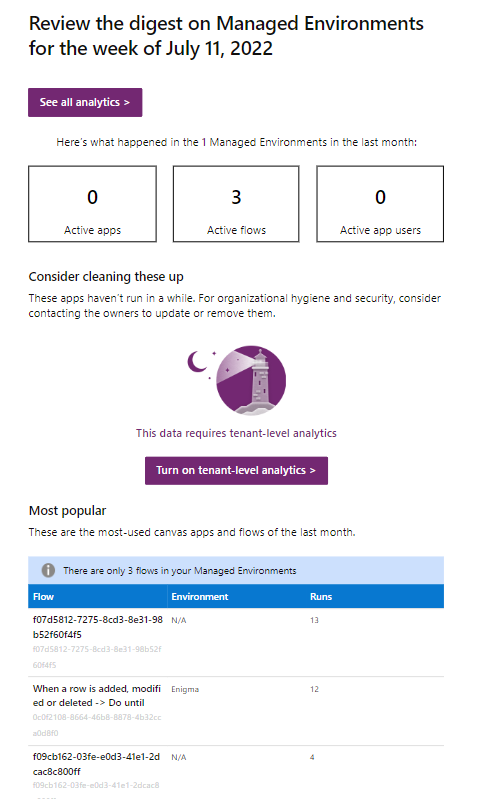
Below are the information provided in the Weekly Digest

Total Apps, active flows and active app users in the past month in the managed environments.

Details of the apps that haven’t been launched for a long time.

Details of the most popular apps and flows of the last month.

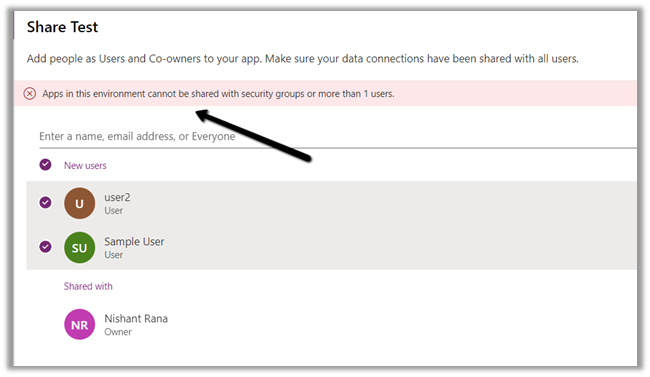
Through Limit Sharing we can configure sharing with security groups as well as the max number of users with whom the app can be shared with. Here just for testing, we have set it as 1.

On trying to share the canvas apps with more than one user we will get the below error

“Apps in this environment cannot be shared with security groups or more than 1 user.”

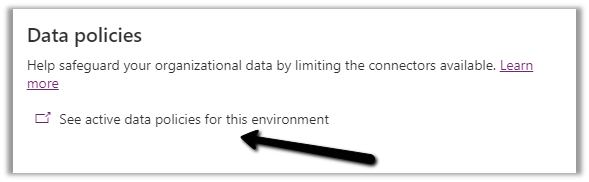
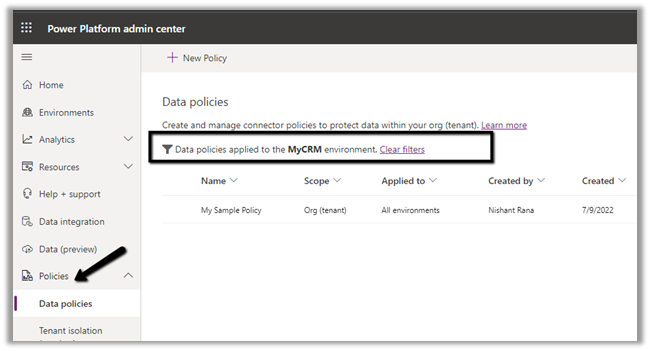
The Data policies option adds the additional filter on the Data Policies page to show the details for the selected environment.

Click on the See active data policies for this environment

Below we can see the Environment filter added.

Get all the details here

Below is the mail we received for one of our trial tenant, which had hardly anything in it.

Analytics

Hope it helps..

Advertisements

Fixed – Unable to add record type ‘Lead’. It is invalid to create component msdyn_decisioncontract with the same export value as an existing component in Unified Routing (Dynamics 365)


Recently while trying to enable Unified Routing on Lead table/ entity we got the below error.

“Unable to add record type ‘Lead’. It is invalid to create component msdyn_decisioncontract with the same export value as an existing component

The issue was that the we forgot to enable the unified routing on lead before migrating lead related unified routing records in that environment, from the development environment.

So as per the details in the error message, we found the below record and deleted it.

After deletion it allowed us to enabled the Unified routing on Lead as shown below.

Hope it helps..

Advertisements

Autonumber field values in case of exception in Dynamics 365 / CRM


Recently in one of our projects, where we were using the auto number attribute (with sequential numbers), we realized that it gets incremented even in case of an exception thrown during Pre Stage of the Plugin Execution. We were assuming the number gets incremented only after the record gets created i.e. on post-stage.

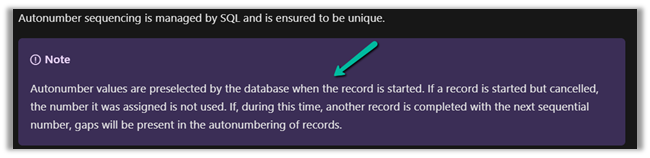
But as the documentation mentions, the number gets pre-selected as soon as the record is started.

https://docs.microsoft.com/en-us/power-apps/maker/data-platform/autonumber-fields

Let us see it in action also –

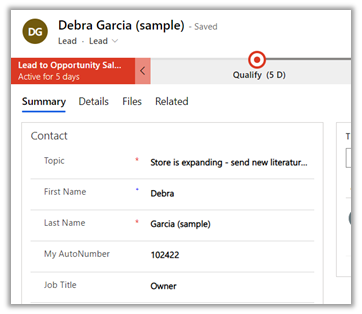
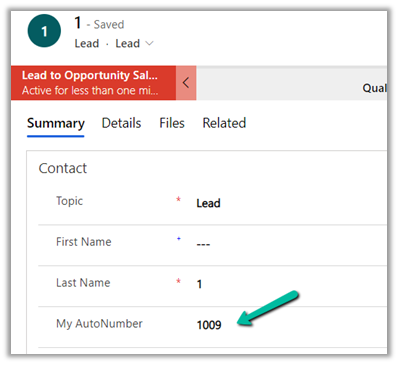
Here we have the lead record created with My Autonumber as the auto number column with seed as 1000

The auto number field has a value of 1009 currently.

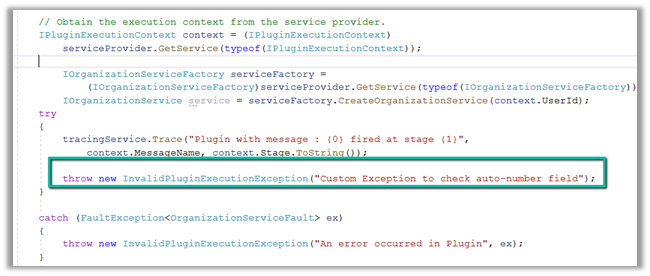
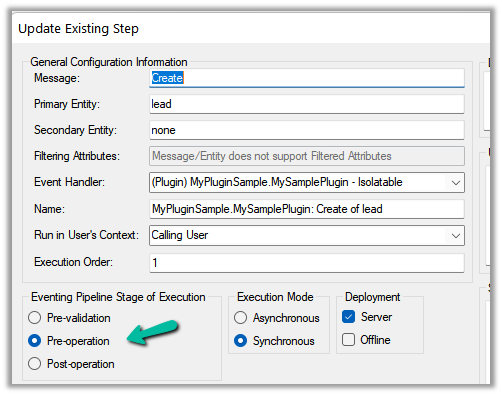
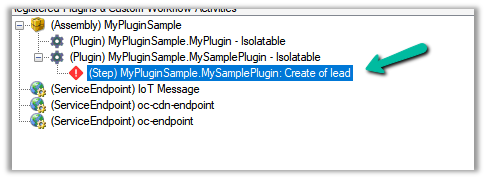
Now let us register a plugin on the Pre-Create stage that throws the exception.

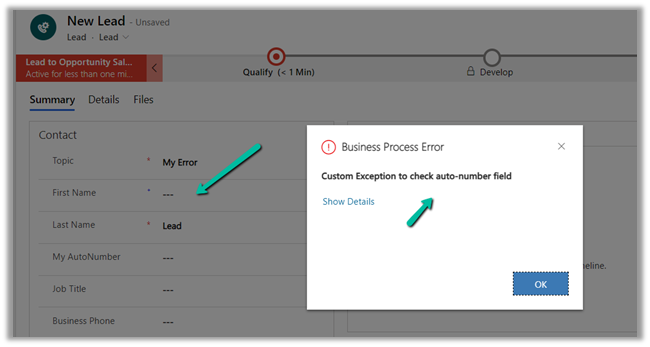
Let us try creating a new lead record, which as expected will throw the exception.

Let us try saving the record 3 times more, triggering the record creation as well as the plugin along with the exception.

Now let us disable the plugin step and save/create the record.

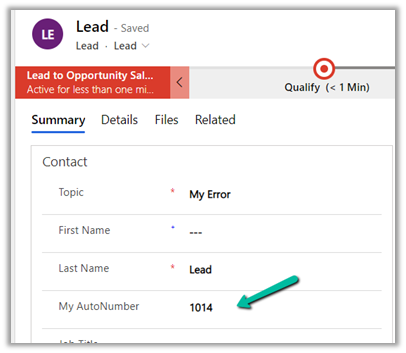
As expected the record gets created, and the auto number field has a value of 1014.

The same behavior was observed in case of Pre-Validation stage.

Hope it helps..


Advertisements

Fixed – You can’t delete this queue because it has items assigned to it – Dynamics 365 Customer Service Hub / CRM


Recently while trying to delete some of the Queue (Advanced Queue) in our case, we were getting the below error.

You can’t delete this queue because it has items assigned to it. Assign these items to another user/team, or queue and try again.

We checked and there were no queue items assigned to that queue.

Eventually what worked was to Deactivate that Queue first and then we were able to delete it.

Hope it helps..

Advertisements