Workstreams Overview – part 1 – Dynamics 365 Customer Service / Omnichannel


Workstreams can be defined as records or settings, where we can set up the channel, and define routing rules, work distribution, and bots to route work items to the appropriate queue/agents.

Workstream can be of 3 different types – Messaging, Record, and Voice.
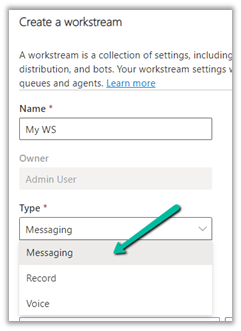
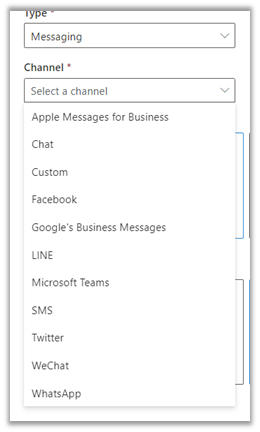
For Messaging we can specify the below channels – Apple messages for business, Chat, Custom, Facebook, Google’s Business Messages, LINE, SMS, Twitter, WeChat, and WhatsApp.
  • For Messaging Type as Channel, we can specify Work Distribution Mode as either Push or Pick.

We also need to specify a Fallback Queue, this Queue will be used if no matching queues are found based on the routing rules.

In the case of the Chat channel, we have the option of making chats persistent, so any new messages from the customer will be routed to the same queue and same agent if available or the next best agent.

For all other channel types, we have the same Work Distribution mode and Fallback queue option.

  • For the workstream type as Record, we can select the entities with queues enabled. The remaining option of work distribution mode and fallback queue remains the same.

For the record routing to work, we need to make sure Unified Routing is switched on in the environment.

And the entity is enabled for record routing.

  • For the workstream type as Voice, we have the voice channel selected as default and disabled.

The only difference is in the distribution mode, where we do not have the option of Pick.

In a nutshell –

Workstream Type 

Channel 

Additional Information 

Messaging 

Apple Message for Business, Chat, Custom, Facebook, Google’s Business Messages, LINE, Microsoft Teams, SMS, Twitter, WeChat, WhatsApp 

For Chat, we have an additional option to make chats persistent.

https://learn.microsoft.com/en-us/dynamics365/customer-service/persistent-chat

Push and Pick – Work distribution mode. 

Record 

Entities With Queue and Record Routing enabled

Push and Pick – Work distribution mode 

Voice 

Voice Call (default / disabled) 

Only Push distribution mode. 

In coming blog posts we’d delve deep into the workstreams configuration.

Hope it helps..

Advertisements

How to – Provision / Setup Omnichannel for Customer Service trial – Dynamics 365


In this post, we’d start by creating a trial of Dynamics 365 Customer
Service.

Navigate to – https://dynamics.microsoft.com/en-us/customer-service/overview/

And select Try for free

Enter your email details and follow the steps.

In a few mins, the trial will be ready.

Clicking on Launch Trial opens the Customer Service Workspace app.

Below are the other apps we can see installed as part of the Customer Service Trial, including the Omnichannel Admin Center and Omnichannel for Customer Service along with the Customer Service admin center app.


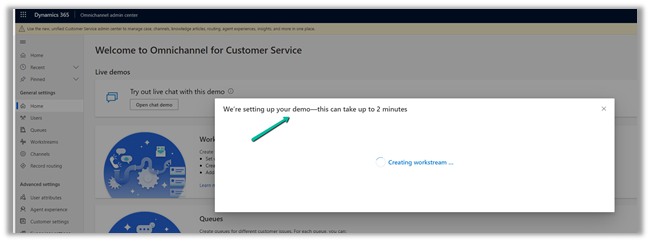
Opening the Omnichannel Admin Center app allows us to configure the Chat Demo.

In a few seconds, the demo will be configured.

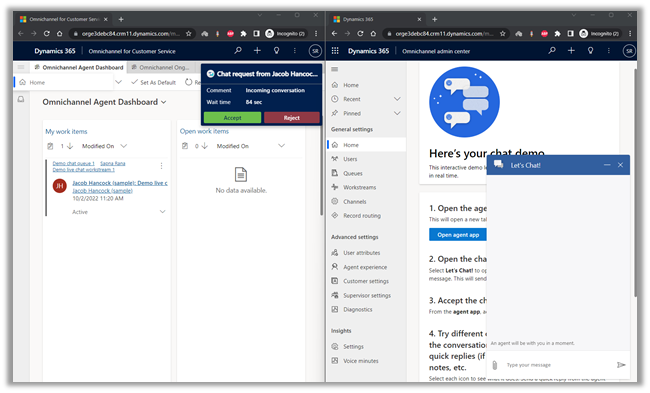
Clicking on the Open agent app opens the Omnichannel  for Customer Service App.

Click on Let’s Chat! widget to start the chat.

Opening the Let’s Chat widget sends the notification to the agent as shown below.

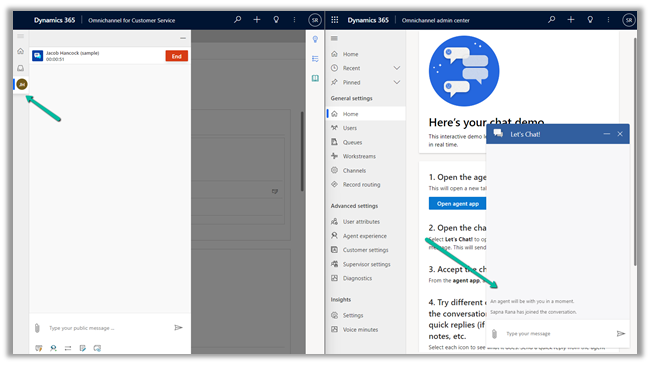
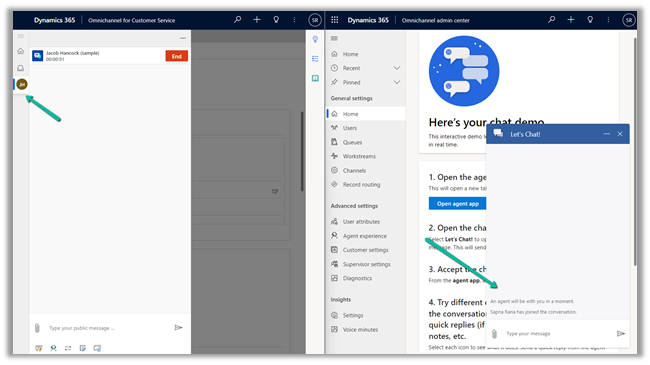
Clicking on Accept in the notification starts a new session.

It also starts the conversation.

The agent can click on End or the customer can close the Chat Widget to end the conversation

The End button is grayed out and the customer gets the message as Agent has ended the conversation.

As we can see, we have the working Omnichannel trial environment ready for us to try out different channels/features, etc.

In Power Platform Admin Center, if we check inside Resources >> Dynamics 365 Apps for the Customer Service Trial we can see the Omnichannel Apps installed.

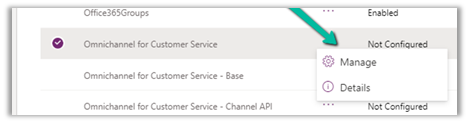
Interestingly if we navigate to Resources >> Dynamics 365 apps and check the Omnichannel for Customer Service app we see the status Not configured.

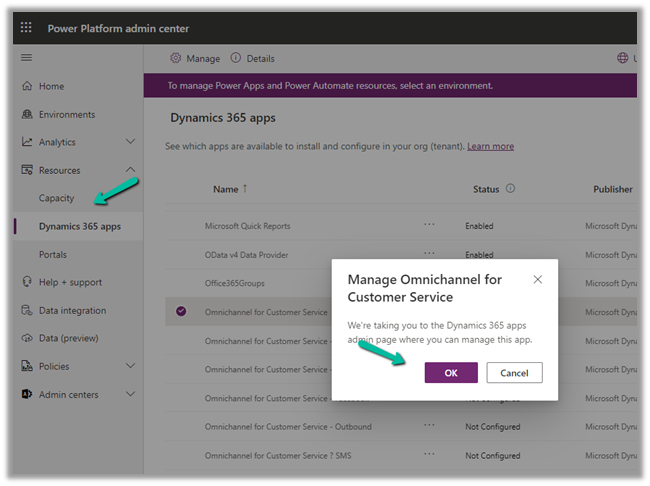
Clicking on the Manage option, opens the dialog box, informing us that it will navigate us to Dynamics 365 apps admin page.

In our case it kept us asking to sign in, instead of taking us to the admin page.

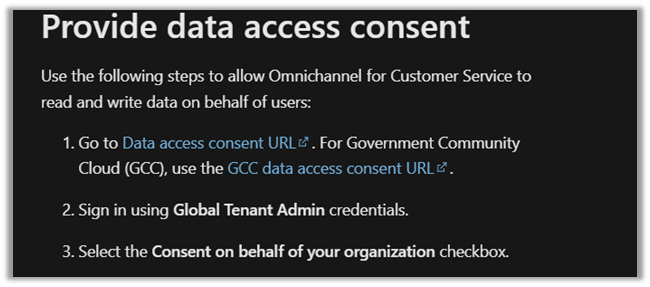
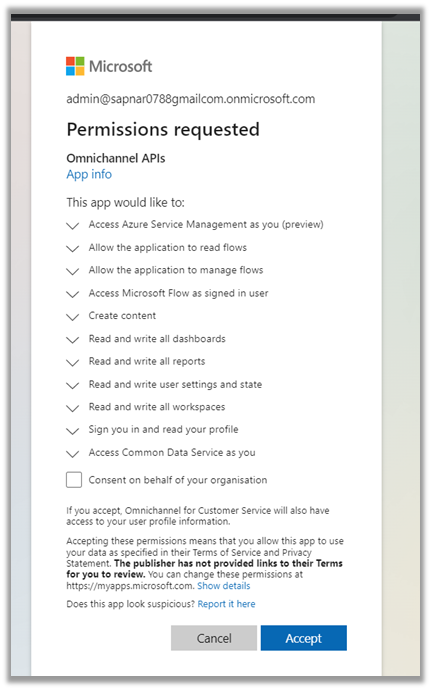
So next we tried Providing the data access consent as mentioned in the MS Docs.

https://learn.microsoft.com/en-us/dynamics365/customer-service/omnichannel-provision-license#provide-data-access-consent

For which we got the below error.

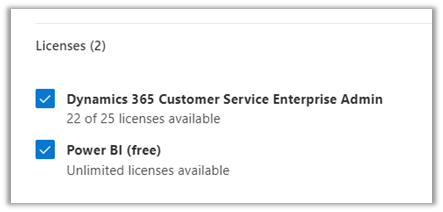
As it failed, we tried the same after assigning the Power BI (free) license to the admin user. (The user should also have Microsoft 365 Global Admin roles along with System Administrator in the env.)

https://learn.microsoft.com/en-us/dynamics365/customer-service/try-channels

https://learn.microsoft.com/en-us/dynamics365/customer-service/omnichannel-provision-license#prerequisites

And it worked this time.

This time clicking on Manage for the Omnichannel for Customer Service, took us to the Dynamics 365 Admin page.

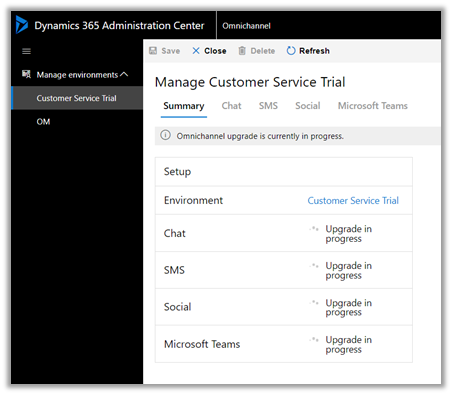
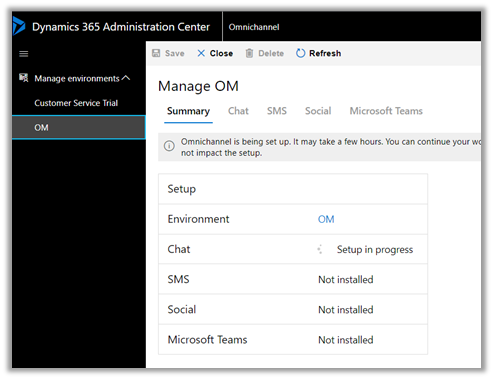
Inside Dynamics 365 Administration Center we can manage the environments in which we want to install or remove the Omnichannel as well as different channels inside it.

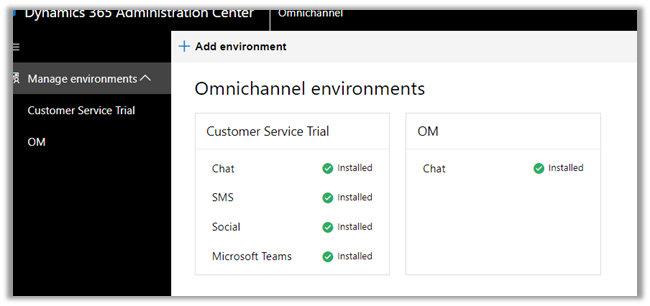
From the Admin Center, we managed to upgrade the Omnichannel in the Customer Service Trial environment and also configure it in another sandbox environment.

Interestingly even after the update/setup was completed

the status of Omnichannel for Customer Service on the Dynamics 365 Page was “Not configured”, which could be some bug or something as mentioned in the MS Docs.

https://learn.microsoft.com/en-us/dynamics365/customer-service/omnichannel-provision-license#set-up-omnichannel-for-customer-service-

“You can safely ignore the status”

So in our case, when we had configured the Customer Service Trial, the Omnichannel was already configured in that environment as we saw earlier. We were mainly facing issues to access the Dynamics 365 Administration Center, which got resolved after assigning the Power BI License to the admin user followed by giving the required consent.

Kindly refer to the below links to learn about Omnichannel in in-depth

https://neilparkhurst.com/2022/08/11/omnichannel-for-customer-service-collection-2/

https://thecrm.ninja/omnichannel-for-dynamics-365/

https://www.youtube.com/watch?v=WM2JLGNPzT8

Hope this helps..

Advertisements

How to – Clone a record in Dataverse / Dynamics 365 (C#)


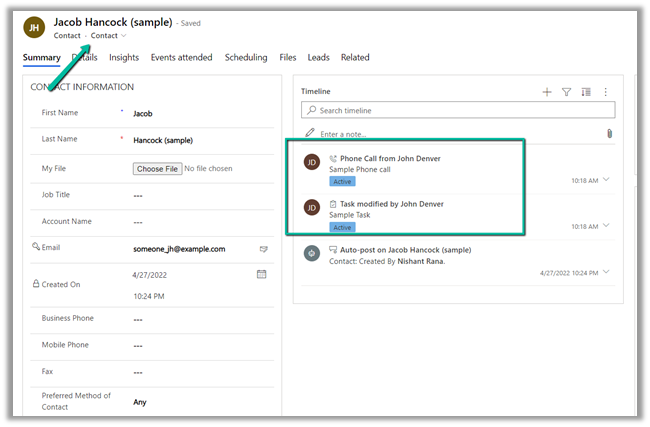
Here we will be cloning the below contact record –

For it, we can make use Clone method of EntityExtensions class

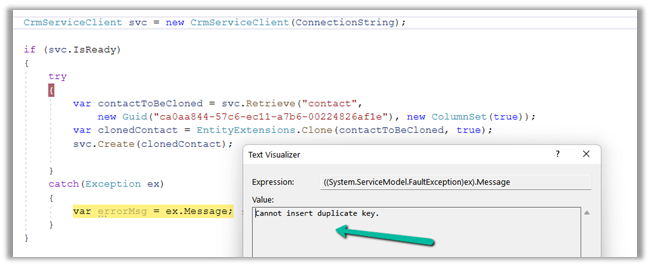
If we run the below code, we will get the “Cannot insert duplicate key” exception.

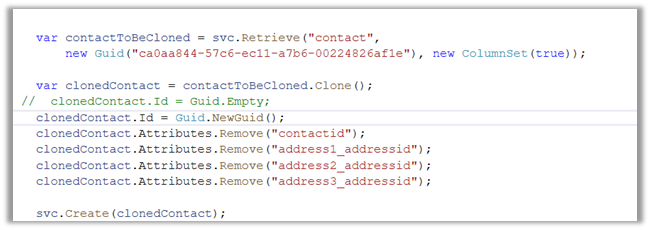
Because we need to set the ID for the newly cloned record to either empty or a new GUID.

Also, we need to remove the contactid attribute or entity’s id field else we will get the below exception – “Entity Id must be the same as the value set in property bag

Also if we are retrieving all the attributes we need to make sure we remove those attribute which can cause below unique constraint errors.

Sql error: The operation attempted to insert a duplicate value for an attribute with a unique constraint. CRM ErrorCode: -2147012606 Sql ErrorCode: -2146232060 Sql Number: 2627

In case of contact, we had to remove the address id attributes, to get the record cloned.

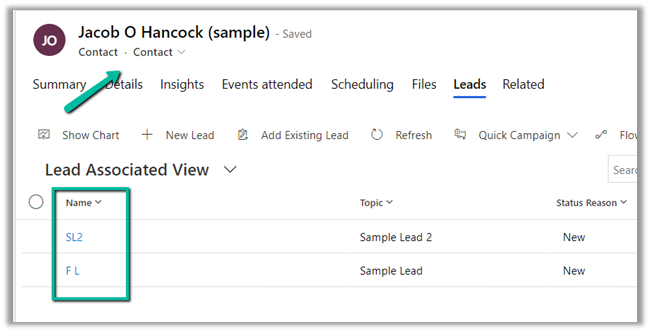
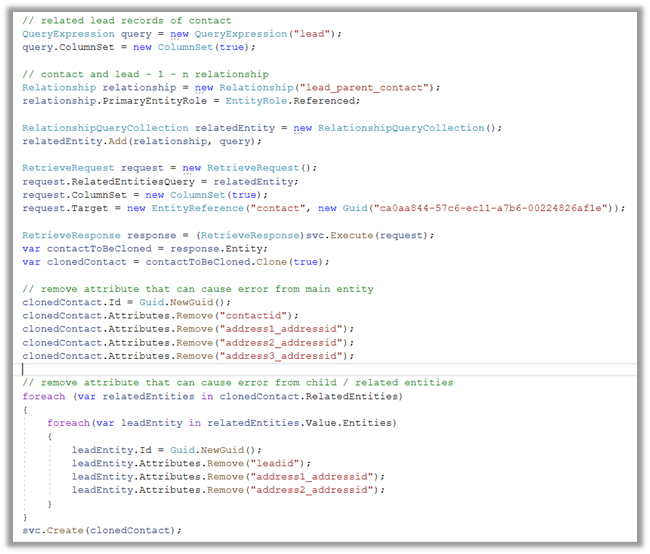
Now let us clone the same contact record with its related leads.

  • Here first we need to retrieve contact along with its associated lead record.
  • Then remove the id attribute that could duplicate issues in the child lead records also.

Please refer the helpful posts –

https://debajmecrm.com/clone-record-dynamics-crm-clone-method/

https://www.inogic.com/blog/2014/08/clone-records-in-dynamics-crm/

https://dyncrmexp.com/2017/10/24/retrieve-primary-entities-along-with-related-entities-with-one-queryexpression/comment-page-1/

https://dynamict.eu/2016/08/09/create-record-with-related-records-in-a-single-request-using-c/

Hope it helps..

 // related lead records of contact
                    QueryExpression query = new QueryExpression("lead");                    
                    query.ColumnSet = new ColumnSet(true);

                    // contact and lead - 1 - n relationship
                    Relationship relationship = new Relationship("lead_parent_contact");
                    relationship.PrimaryEntityRole = EntityRole.Referenced;

                    RelationshipQueryCollection relatedEntity = new RelationshipQueryCollection();
                    relatedEntity.Add(relationship, query);

                    RetrieveRequest request = new RetrieveRequest();
                    request.RelatedEntitiesQuery = relatedEntity;
                    request.ColumnSet = new ColumnSet(true);
                    request.Target = new EntityReference("contact", new Guid("ca0aa844-57c6-ec11-a7b6-00224826af1e"));

                    RetrieveResponse response = (RetrieveResponse)svc.Execute(request);
                    var contactToBeCloned = response.Entity;                   
                    var clonedContact = contactToBeCloned.Clone(true);

                    // remove attribute that can cause error from main entity             
                    clonedContact.Id = Guid.NewGuid();
                    clonedContact.Attributes.Remove("contactid");                    
                    clonedContact.Attributes.Remove("address1_addressid");
                    clonedContact.Attributes.Remove("address2_addressid");
                    clonedContact.Attributes.Remove("address3_addressid");

                    // remove attribute that can cause error from child / related entities
                    foreach (var relatedEntities in clonedContact.RelatedEntities)
                    {
                        foreach(var leadEntity in relatedEntities.Value.Entities)
                        {
                            leadEntity.Id = Guid.NewGuid();
                            leadEntity.Attributes.Remove("leadid");
                            leadEntity.Attributes.Remove("address1_addressid");
                            leadEntity.Attributes.Remove("address2_addressid");
                        }
                    }
                    svc.Create(clonedContact);
Advertisements

How to – Use Import Column to Upload files to File Column / Attribute in SSIS KingswaySoft(Dynamics 365 / CRM)


A few weeks back had posted on how to upload files to the File Column type field using KingswaySoft’ s Integration Toolkit and Premium Flat File Source and Premium Derived column which are part of the SSIS Productivity Pack of KingswaySoft

https://nishantrana.me/2022/03/17/how-to-upload-files-from-file-column-attribute-using-ssis-kingswaysoft-dynamics-365-crm/

Here we will see an example of achieving the same without using the KingswaySoft Productivity Pack’s Premium Flat File Source and Derived column. (although would recommend using it as it includes over 300 premium components making it easier to rapidly build efficient solutions)

https://www.kingswaysoft.com/products/ssis-productivity-pack

Below is our source file

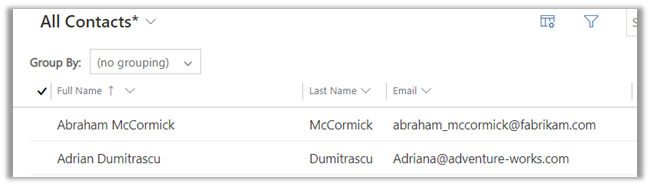
The contact records in CRM

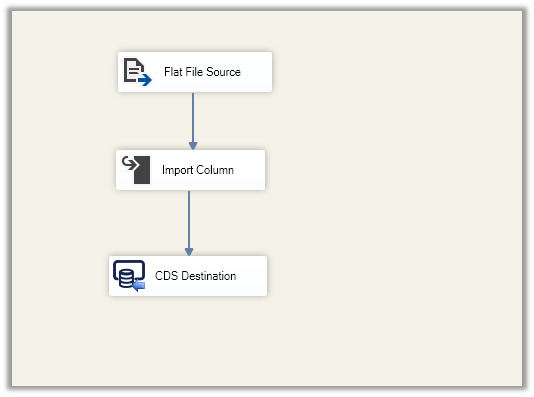
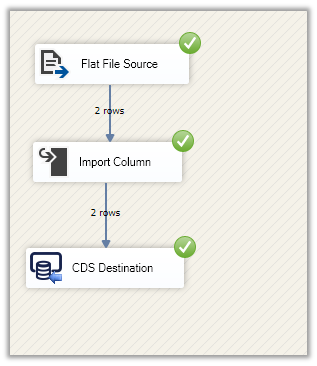
Below is how the package looks like

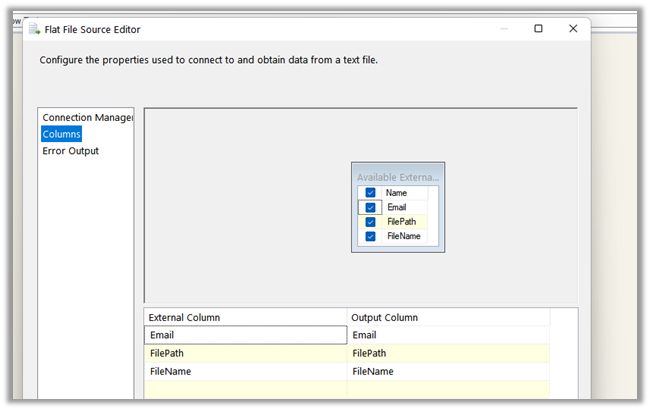
The Flat File Source points to the location where we have the source csv file containing email, file path, and file name.

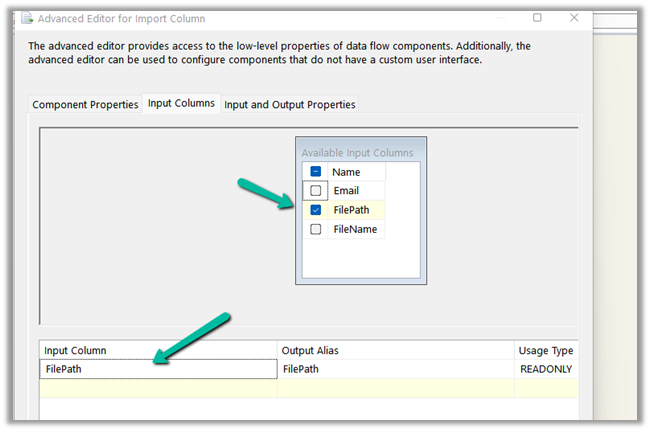
Import Column takes the File Path as the Input.

For the Input and Output properties, add an output column (BinaryColumn) of DataType = image.

In the FilePath input column properties, specify the column id of the output column.

Finally, in the CDS / CRM Destination Component, we are performing an upsert using the Email id as a match.

Here we have mapped the output column of the Import Column i.e. BinaryColumn to the binary content field of the file type attribute of the CRM.

Let us now run the package.

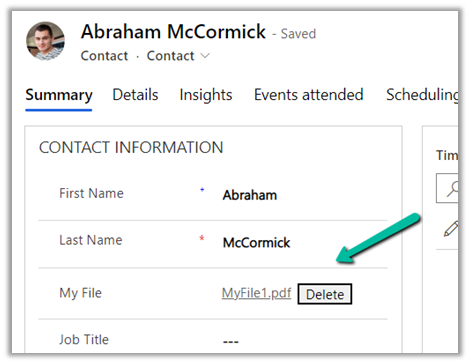
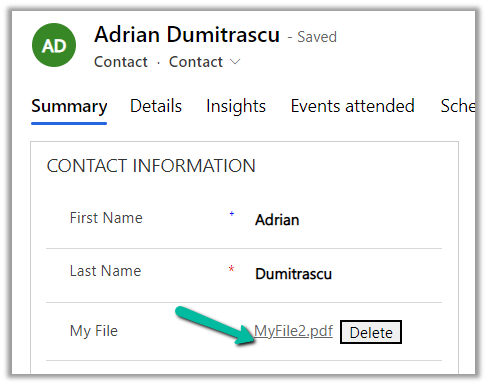
Let us now open the records and check.

As expected we can see the file uploaded.

Also, check out –

To extract attachments from notes-https://nishantrana.me/2021/02/10/extracting-attachments-from-notes-in-dynamics-365-dataverse/

To download files using Download Block Requesthttps://nishantrana.me/2022/03/14/how-to-download-file-from-file-column-using-initializefileblocksdownload-and-downloadblock-request-dynamics-365-crm-dataverse/

To upload files using Upload Block Requesthttps://nishantrana.me/2022/03/15/how-to-upload-file-to-file-column-using-initializefileblocksupload-and-uploadblock-request-dynamics-365-crm/

Understand File and Image Data Typehttps://nishantrana.me/2021/10/01/using-file-and-image-data-type-in-dataverse-dynamics-365/

Try out the wonderful, feature-rich, and powerful SSIS Integration Toolkit for Dynamics 365 by KingswaySofthttps://www.kingswaysoft.com/products/ssis-integration-toolkit-for-microsoft-dynamics-365/download

Check other articles on SSIS plus CRM – https://nishantrana.me/2018/11/26/ssis-and-microsoft-dynamics-365/

Hope it helps..

Advertisements

How to – Use Script Component to Upload files to File Column / Attribute in SSIS – KingswaySoft (Dynamics 365 / CRM)


A few weeks back had posted on how to upload files to the File Column type field using KingswaySoft’ s Integration Toolkit and Premium Flat File Source and Premium Derived column which are part of the SSIS Productivity Pack of KingswaySoft

https://nishantrana.me/2022/03/17/how-to-upload-files-from-file-column-attribute-using-ssis-kingswaysoft-dynamics-365-crm/

Here we will see an example of achieving the same without using the KingswaySoft Productivity Pack’s Premium Flat File Source and Derived column. (although would recommend using it as it includes over 300 premium components making it easier to rapidly build efficient solutions for different scenarios)

https://www.kingswaysoft.com/products/ssis-productivity-pack

Here we will be using Script Component to read the file from the path and convert it to DT_IMAGE.

Below is our source file

The contact records in CRM

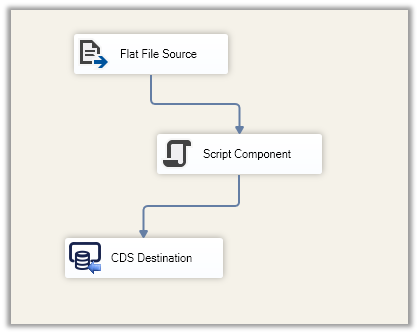
Below is how the package looks like

The Flat File Source points to the location where we have the source CSV file containing email, file path, and file name.

Script Component has File Path and File Name as the input.


Add a column using Add Column in the Output Columns, with Data Type as image [DT_IMAGE]


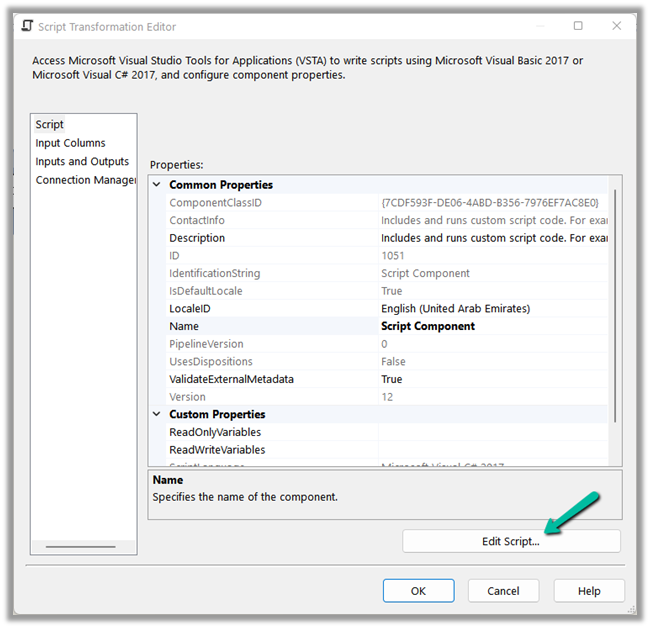
Click on Edit Script..

Add the below code to read the bytes from the file path and add it to the output column.

Finally, in the CDS / CRM Destination Component, we are performing an upsert using the Email id as a match.

Here we have mapped the output column of the Import Column i.e. DerviedFileContent to the binary content field of the file type attribute of the CRM.

Let us now run the package.

Let us now open the records and check.

As expected we can see the file uploaded.

Also, check out –

To extract attachments from notes-https://nishantrana.me/2021/02/10/extracting-attachments-from-notes-in-dynamics-365-dataverse/

To download files using Download Block Requesthttps://nishantrana.me/2022/03/14/how-to-download-file-from-file-column-using-initializefileblocksdownload-and-downloadblock-request-dynamics-365-crm-dataverse/

To upload files using Upload Block Requesthttps://nishantrana.me/2022/03/15/how-to-upload-file-to-file-column-using-initializefileblocksupload-and-uploadblock-request-dynamics-365-crm/

Understand File and Image Data Typehttps://nishantrana.me/2021/10/01/using-file-and-image-data-type-in-dataverse-dynamics-365/

Try out the wonderful, feature-rich, and powerful SSIS Integration Toolkit for Dynamics 365 by KingswaySofthttps://www.kingswaysoft.com/products/ssis-integration-toolkit-for-microsoft-dynamics-365/download

Check other articles on SSIS plus CRM – https://nishantrana.me/2018/11/26/ssis-and-microsoft-dynamics-365/

Hope it helps..

Advertisements

Import Data (Import Data Wizard) – Few key points


Let us understand a few points about the Import Data feature with a simple example –

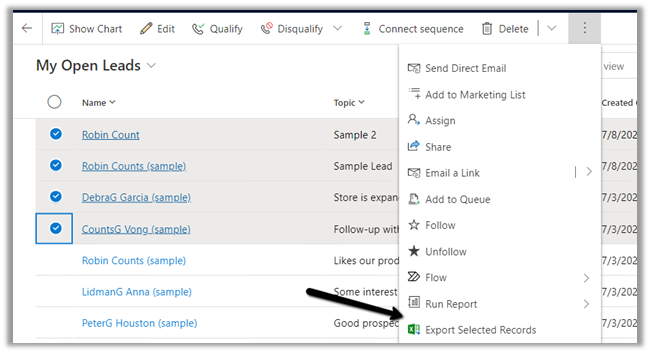
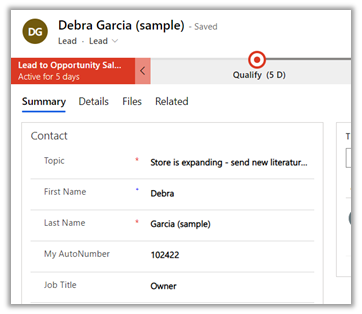
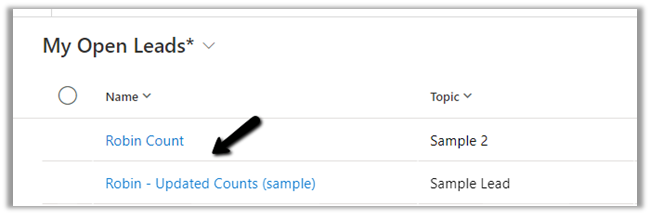
Say for example we have exported the following 4 records.

The exported file will have the view name along with the timestamp.

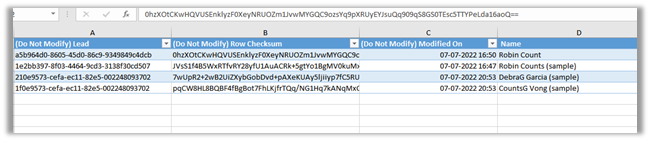
The exported file – 

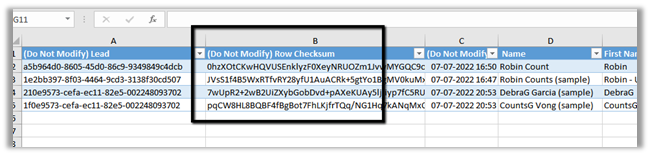
It has 3 hidden columns that allow for re-import of these records possible.

1st column contains the GUID of the record, the second contains the Row Checksum which it uses to make sure to update only those records or rows which are changed, and the 3rd column is Modified On which it uses to track if the record has been modified since it was exported.

Now let us update one of the records we exported inside CRM.

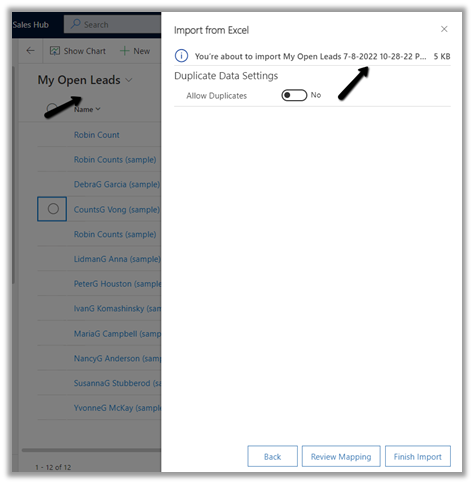
On importing the same file,

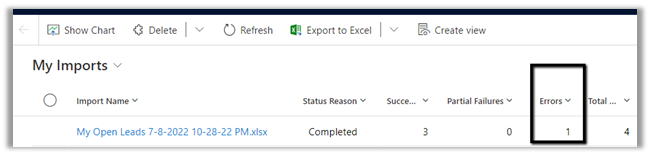
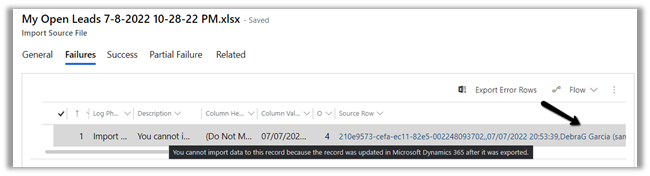
as expected we get 1 failure.

Error message – “You cannot import data to this record because the record was updated in Microsoft Dynamics 365 after it was exported” for the same record which we updated inside the app.

Now let us update one of the records (which has a possible duplicate) and re-import the file.

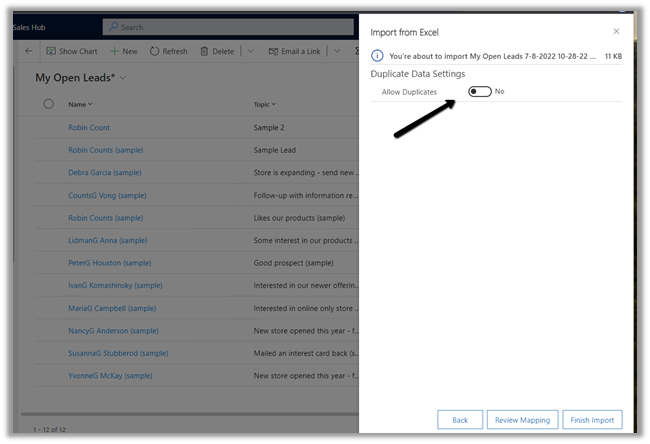
During import, we have let the Allow Duplicates settings be default i.e. No.

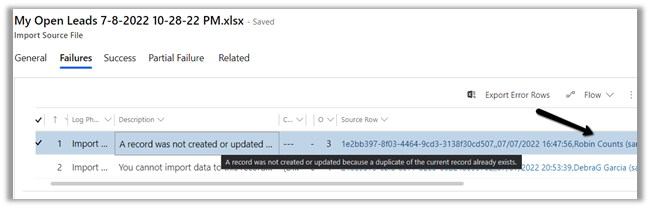
This time also apart from the previous error we get one partial failure.

The error message says – “A record was not created or updated because a duplicate of the current record already exists.

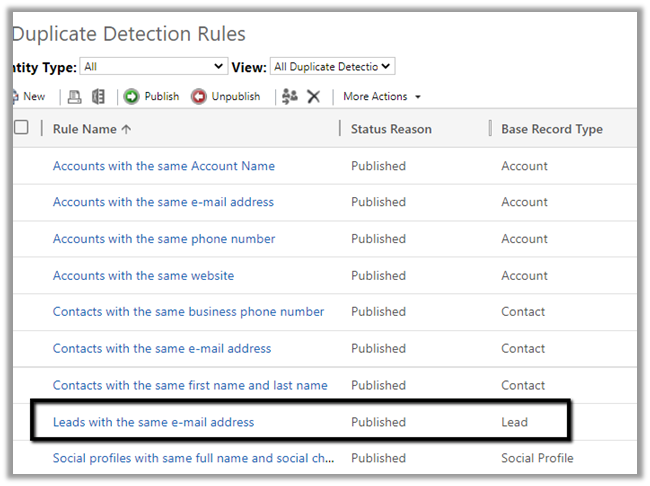
This is because the record that was modified and imported was having another record having the same email id, triggering our duplicate detection rules. Also, we had specified Allow Duplicates as No while importing the file.

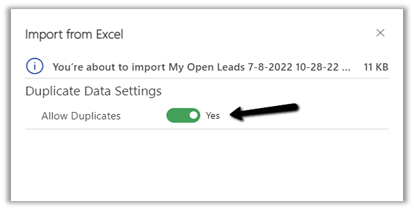
This time let us set Allow Duplicates as Yes and try the import with the same file.

As expected there was no partial error this time.

And the record got updated this time.

Another point to remember is if we export and import the file without any changes, or for the rows with no modification, it will not perform any action, i.e. trigger a create/update for any of the records.

For tracking the changes, as we mentioned earlier it uses the Row Checksum column’s hash value.

Now let’s update the GUID of the record in the 1st row (changed b to c in the end) and the modified date (changed to 55 from 53 minute part) for the 4th row and see the results.

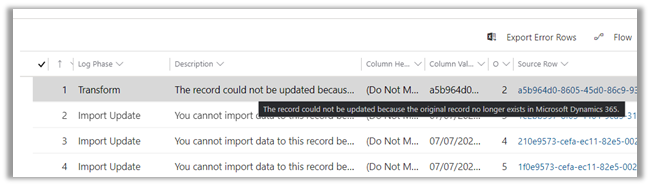
As expected both these records failed – 1st one where we changed the GUID with the error message – “The record could not be updated because the original record no longer exists in Microsoft Dynamics 365” and the 4th row with the error that “You cannot import data to this record because the record was updated in Microsoft Dynamics 365 after it was exported” as we had changed the Modified Date in the imported excel file.

Lastly, let us restore the original value of those 2 fields of the hidden columns and try the import to see the results.

As expected we do not get any error for those 2 rows as we had restored the original value.

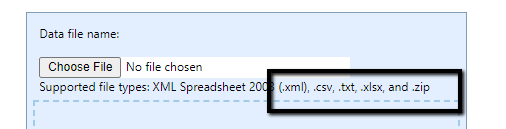
  • For .zip files 32 MB is the max size limit for other file types i.e. xlsx, csv, txt and xml it is 8 MB.

G

  • Microsoft recommends import to be limited to 20K rows or fewer.

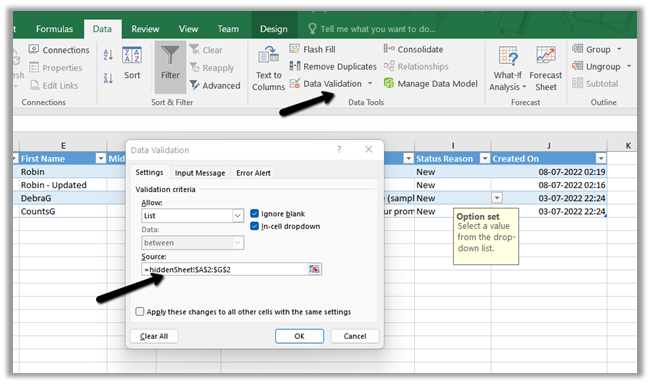
Just in case we are interested to see how the data validation works especially for the option set field in the exported excel file from CRM.

Select the field in excel and open the Data Validation from the Data tab, which refers to the hiddenSheet.

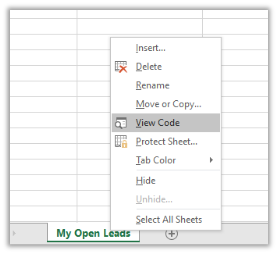
To see the hiddenSheet, right-click the worksheet and select the View Code option.

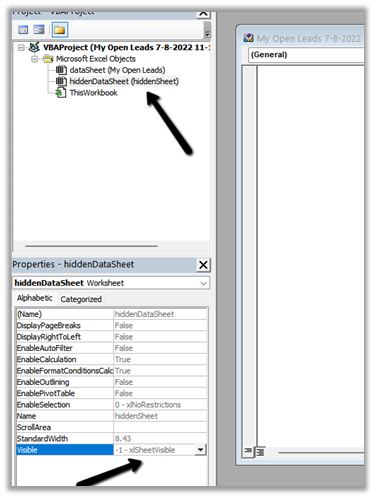
It opens the VBA window, where we can select the hiddenDataSheet object and change its Visible property to -1-xlsSheetVisible.

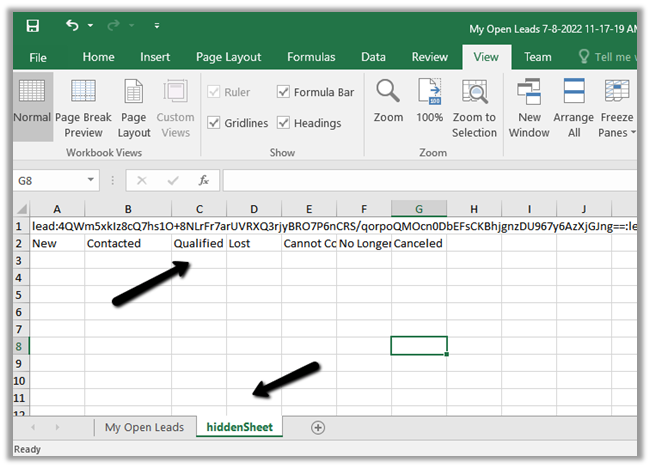
Back in our excel, we can see the hiddenSheet visible and the values of our option-set fields.

Hope it helps..

Advertisements