Step by step – Deleting an existing plugin from Plugin Assembly (Dataverse)


Recently we had a requirement to remove an existing plugin, as that was no more required.

Of course, we can simply disable the step here, but then going forward we might end up with too many such plugins and we will always have an overhead to make sure those steps are disabled, whenever we deploy the plugin to other environments,

As a first step, we can remove the plugin class from the project, either exclude or delete

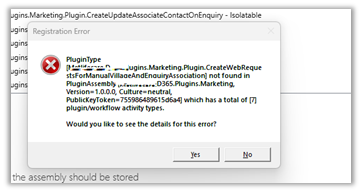
Here, if we try to update the assembly we will get the error about the missing Plugin Type.

So as a next step, we need to Unregister the plugin from the Assembly through the Plugin Registration Tool.

Now we will be able to update our Plugin Assembly successfully.

Lastly, when we have to move the Solution having this plugin assembly to another environment, we can first remove the same Plugin Type from that environment through the Plugin Registration tool, before importing the solution.

Please refer to the helpful post – https://d365demystified.com/2021/12/19/renaming-or-deleting-a-plugin-in-dynamics-365-crm/

Hope it helps..

Advertisements

Filtering Attributes for Create message – Plugin (Dataverse / Dynamics 365)


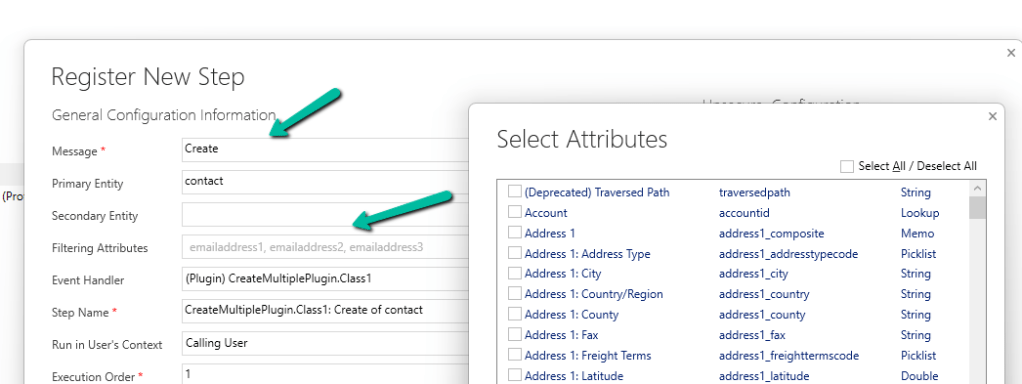
While registering a plugin step, found that we can now specify Filtering Attributes for Create message.

Check the below post for more details –

Advertisements

How to use – User Multiplexing to get better performance for Data Migration /Integration using KingswaySoft Integration Toolkit for Dynamics 365 (Dataverse / SSIS)


Let us see how we can make use of User Multiplexing to get better performance.

Below is our SSIS Package, which uses Data Spawner to create sample records, 20 K in this case, and CDS Destination to create those records (contact).

Data Spawner is used to create the 20000 contact record.

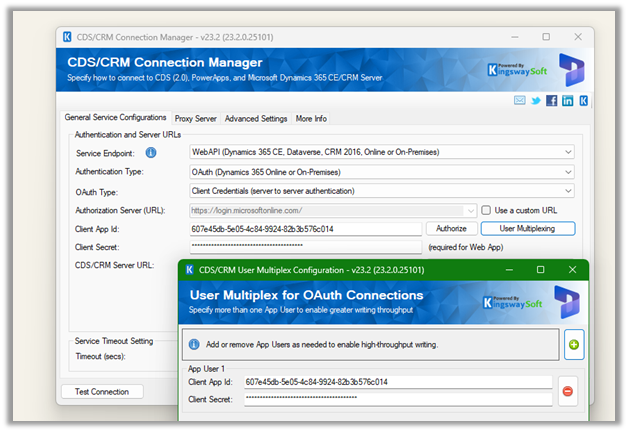
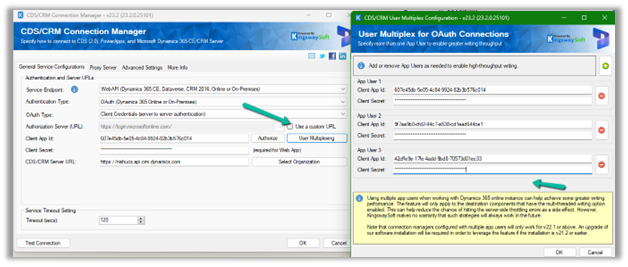
The CRM Connection is using just one application user.

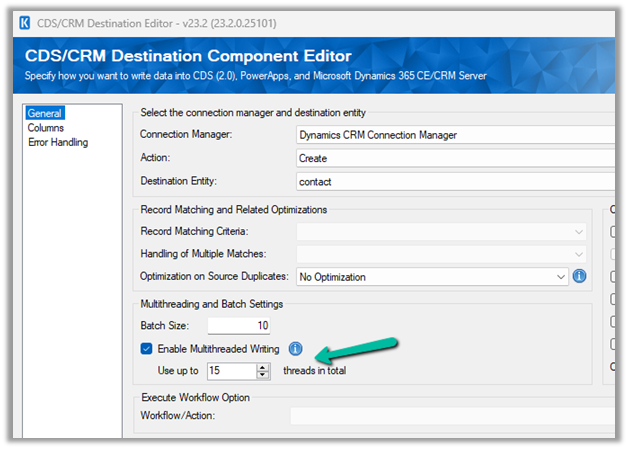
For the Destination Component we have specified,

  • Batch size = 10
  • Thread = 5

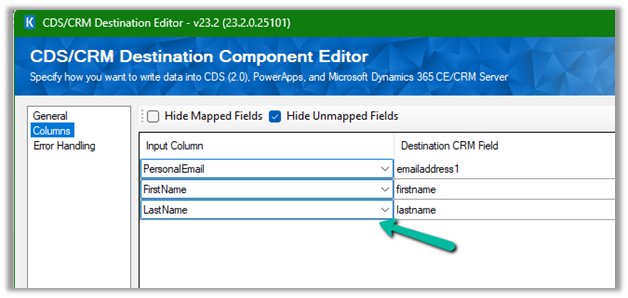
The mapping –

To create 20 K contact records with the above settings took around 20 mins –

Now let’s add 2 more application users making it 3 application users in total. We’d keep the batch size and thread the same i.e. 10 and 5.

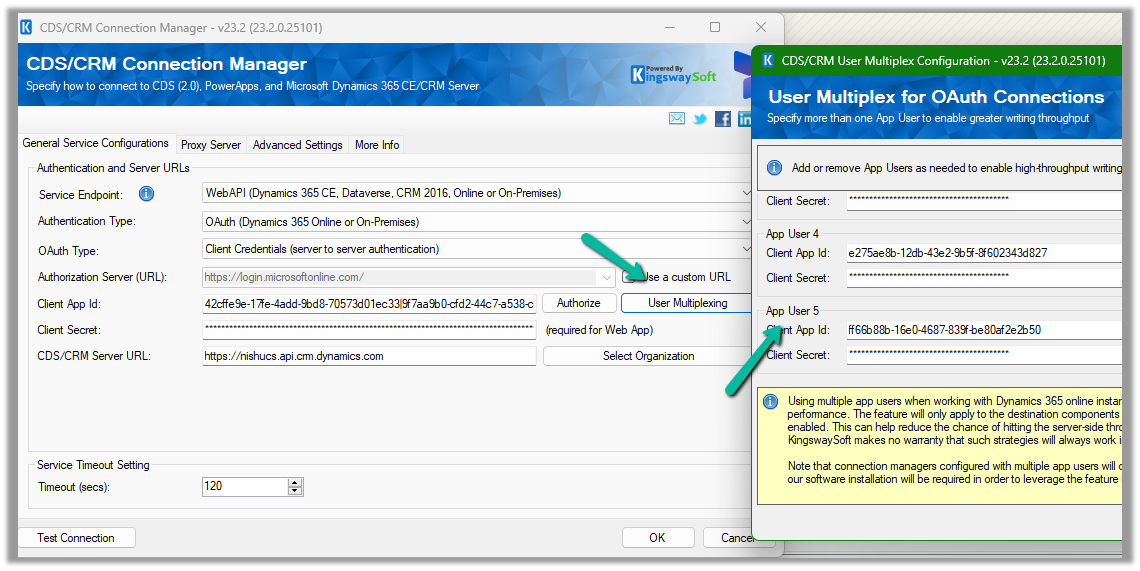
Open the Connection Manager>> User Multiplexing and add 2 more application users configured in the environment.

Let us run it again and observe the performance, this time it took around

11 minutes.

Let us increase the thread to 15 this time and see

It came down to 6 minutes.

Now let us keep the batch size at 10 and thread at 15, but increase the number of application users to 5.

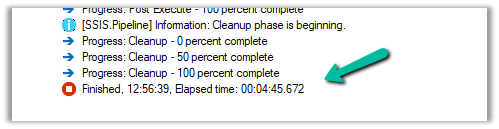
This brought it further down to 4:45

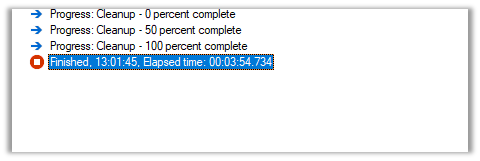
Let us run now with 10 batch sizes, and 5 application users but with 20 threads instead of 15.

It took 3:54 minutes

So to create 20 K contact records –

Batch Size

Thread

Application Users

Execution Time (mins)

10

5

1

19:39

10

5

3

11:17

10

15

3

6:47

10

15

5

4.45

10

20

5

3.54

Thus we need to consider using User Multiplexing (having different connections running under different application users) for better performance.

Get all details here – https://www.kingswaysoft.com/products/ssis-integration-toolkit-for-microsoft-dynamics-365/help-manual/crm/connection-manager

Hope it helps..

Advertisements

Cleaning up the ActivityPointBase to free up storage– Dataverse / Dynamics 365


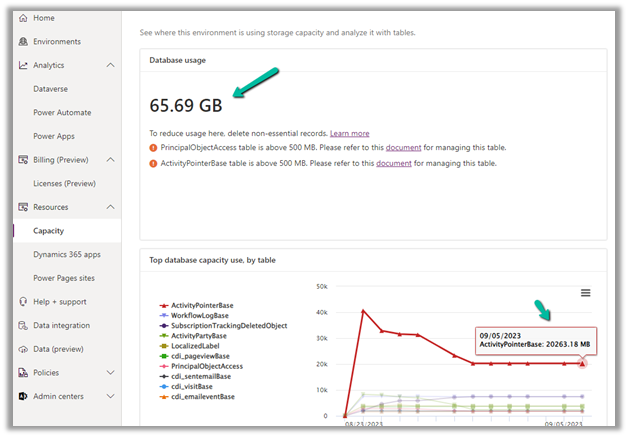
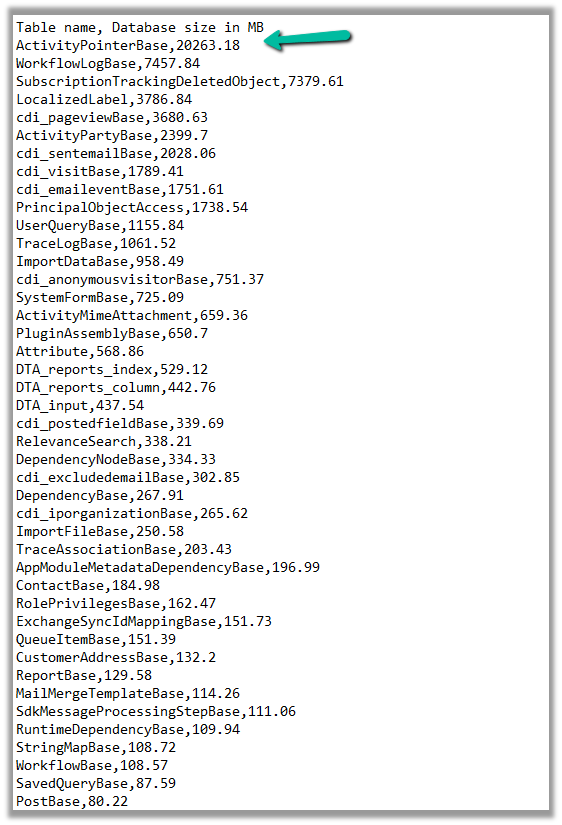
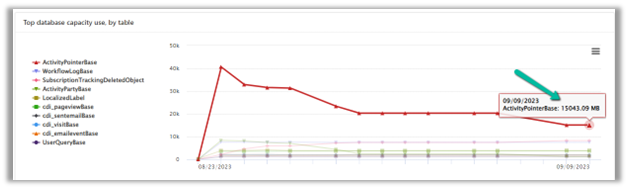
In one of our environments, the ActivityPointBase table was occupying nearly 20 GB. It was earlier 40 GB, and we then deleted email records to bring it down to 20 GB.

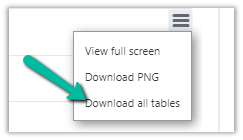
On downloading the table details, we did not get a clear idea of what activity-type table was occupying that much space.

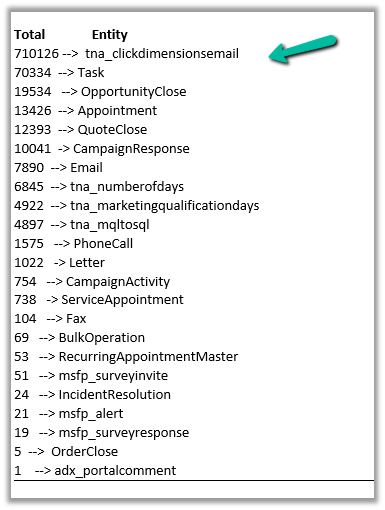
So we raised the Microsoft Support ticket, and they shared with us the breakdown of records occupied by different activity type tables.

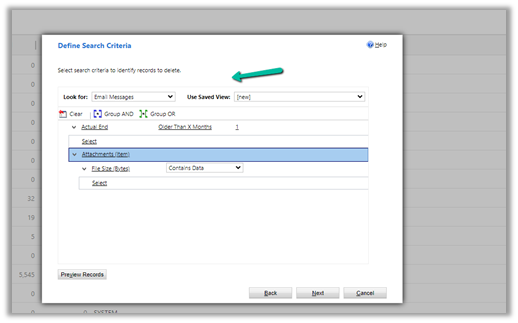
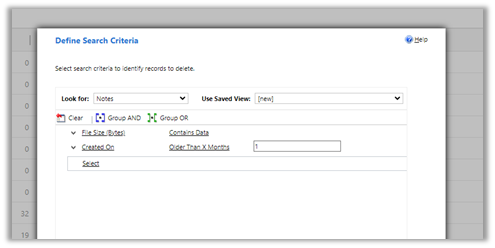
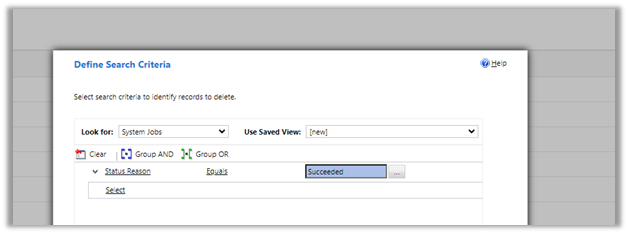
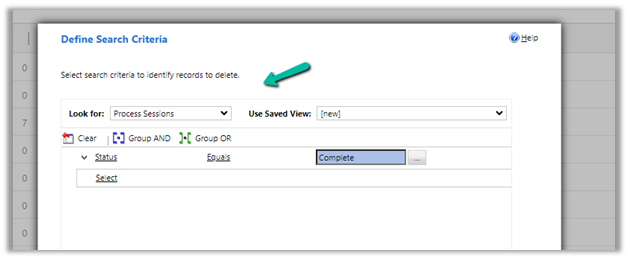
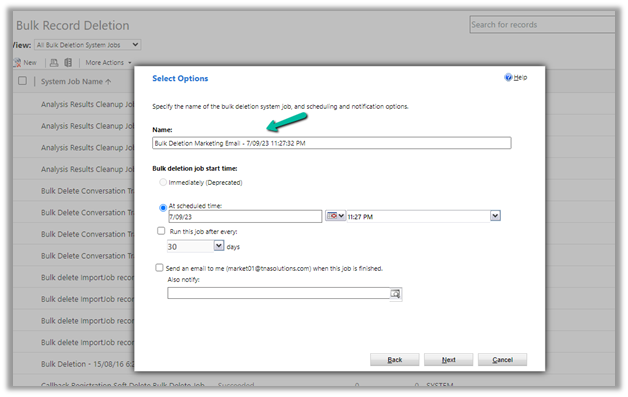
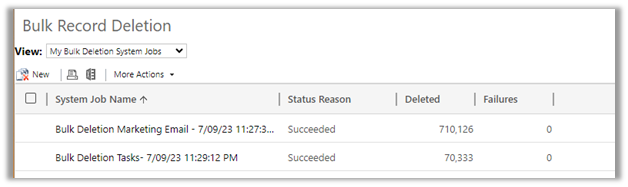
Then we configured our Bulk Deletion Job to delete the corresponding activity type records.

This helped us to bring down the ActivityPointerBase from 20 GB to 15 GB.

https://learn.microsoft.com/en-us/power-platform/admin/capacity-storage

Hope it helps..

Advertisements
Use Sales Copilot to compose email messages (preview)– Dynamics 365


Sales Copilot can generate and suggest email content while composing or replying to an email in Dynamics 365 in the context of a Lead or Opportunity record.

Allow data movement across regions in the Power Platform Admin Center using Enable copilots and generative AI features outside United States and Switzerland – Power Platform | Microsoft Learn

To enable Sales Copilot, navigate to

Sales Hub >> App Settings >> Sales Copilot (preview) >> Set up Sales Copilot

Or if we have already enabled it, we can manage the features provided along with the different apps we want to apply the Sales Copilot using the Manage apps option.

Here we can specify to which apps we want to enable the Compose and Chat feature

The Compose refers to the AI-driven email insights here.

Let us create a new Email from the timeline of the lead record.

We can see the Sales Copilot Compose in the inactive state right now. It becomes active when opening an email record or creating a new email record with either lead or opportunity in the Regarding field.

On the new email record, we can see the Compose tab enabled, and the option Describe the email you want.

We get the option to specify the statement, for which the content should be generated.

Below we can see the suggested content

We also get the option to Add content to the Email, Copy it

Adust tone and add more details

Also, Restore the last version, Try again, Start Over

Similarly, in the case of replying to an email we get the below options to start with along with an Email Conversation Summary.

Selecting the Address a Concern option generates the following content.

Get all the details here

Hope it helps..

Advertisements

Auto-create SharePoint Folder (SharePoint Document Location) on record create using Power Automate Flow (Dataverse)


We recently had a requirement to create the SharePoint folder automatically on the Account records creation, instead of having the users click on the Documents tab to create it.

We could write a Power Automate flow to achieve this.

Here we have enabled the Share Point server-based integration. Also, the SharePoint Site and the main or parent folder for the Account are already created/configured.

Below is the corresponding Document location record for the parent Account folder.

  • So basically, we will create a new folder inside the Account folder in the SharePoint site configured in CRM.
  • Then create a new SharePoint Document Location record specifying the Account document location as a parent.
  • And then Associate / Relate the new account record created with this new document location record.

Below is how our Flow will look like –

  1. Triggers on Account record creation.

2. Create a new folder inside Account Folder, here for the name of the folder we are using the format “AccountName_AccountNumber“

3. Create a new Document Location record, associating the Account document location with the parent location record. Here we are specifying the same folder name in the relative URL.

We can also fetch the GUID of the Account document location and/or use a variable to store the GUID.

4. Lastly, we are associating these 2 new records.

Below is our newly created account record.

Below we can see our flow ran successfully.

We can see the new folder created and associated.

Here if we click the Documents tab immediately after creating the account record, before our flow runs, we might have the OOB folder also getting created along with our custom folder (flow being asynchronous). If our custom folder is already created and associated before the user clicks on the documents tab, then CRM will not be creating a new folder.
Hope it helps..

Advertisements