Analytics capabilities of Kupp Code Analytics


In the previous posts, we covered the Overview and Key Features of Kupp Code Analytics, the installation and setup process of the extension, and its Intellisense capabilities.

Here we’d have a quick look at the analytics capabilities of the extension.

To enable it, inside Visual Studio, navigate to Tools >> Options >> Kupp Code Analytics >> General or Extensions >> Kupp Code Analytics >> Analytics >> Configure Analytics

Set “Enable C# Code Analyzer” to “True”. Requires Visual Studio to be restarted on change.

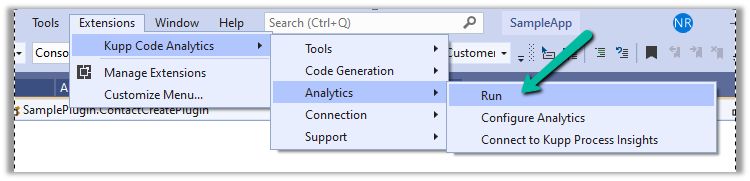
To run the analytics, select Extensions >> Kupp Code Analytics >> Analytics >> Run
Below we can see the results of running the analytics on our sample plugin class.
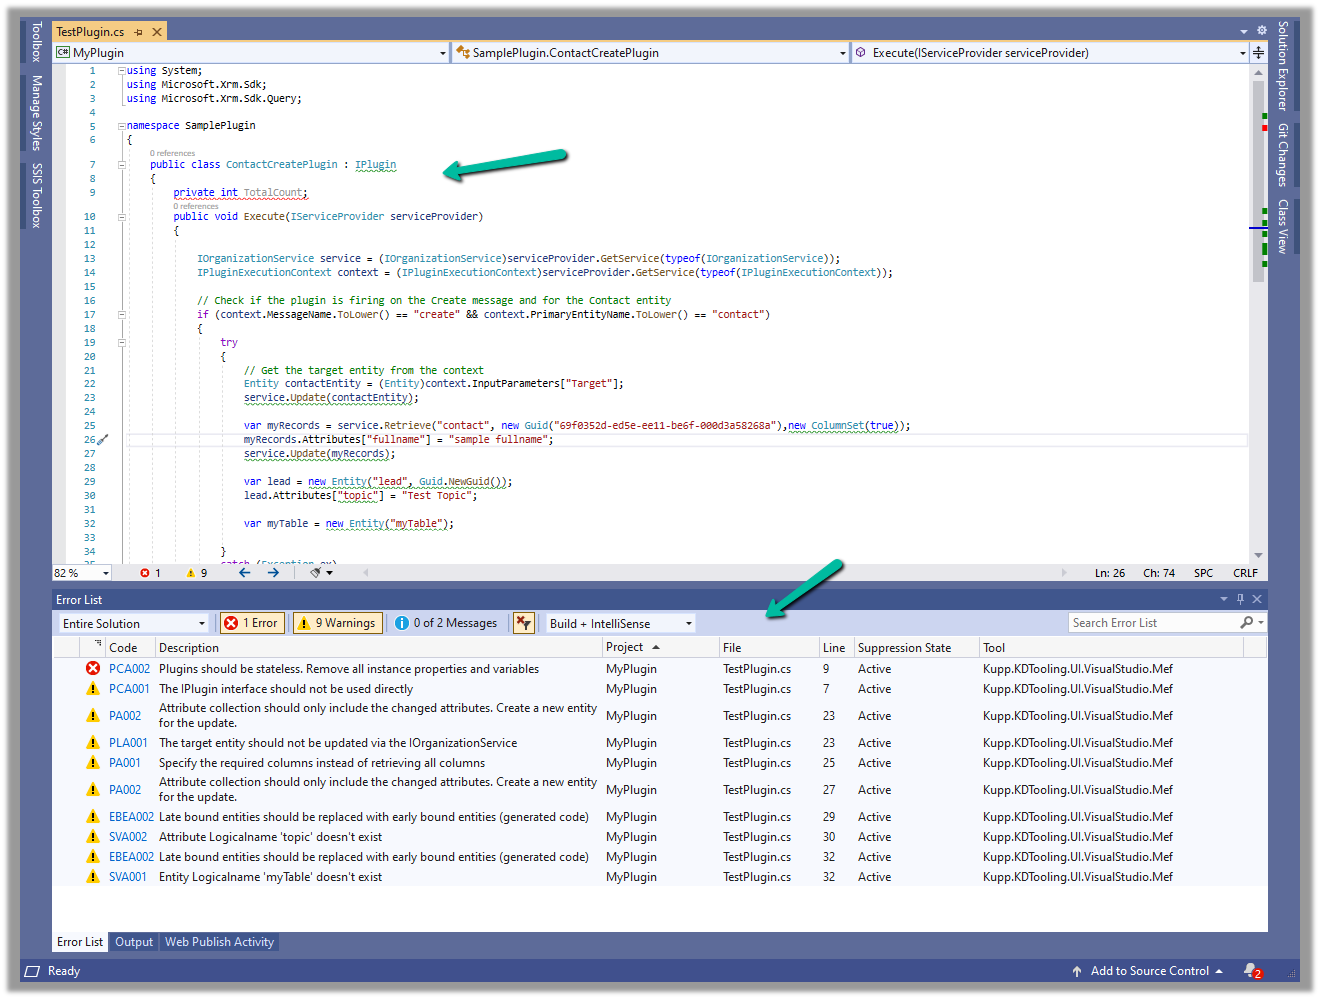
Let us see the code analysis rules one be one.

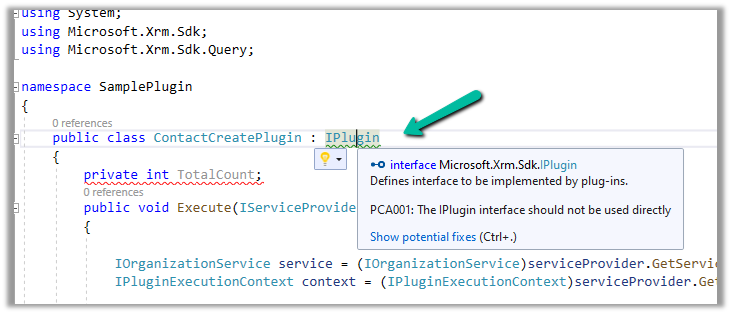
PCA001: The lPlugin interface should not be used directly.

The suggestion is to use a custom base class instead to handle the call delegation, using the context information of the plugin.
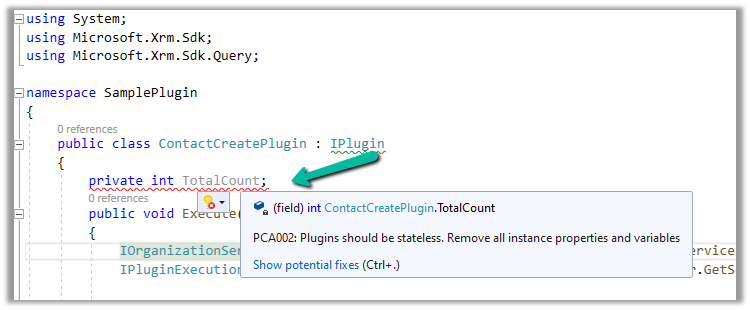
PCA002: Plugins should be stateless. Remove all instances properties and values.

Plugins are instantiated on a per-request basis and handle specific execution contexts. The plugin instances are short-lived and should not be assumed to persist across multiple requests. Also if multiple plugin instances execute especially in the case of bulk operations, it could lead to concurrency issues.
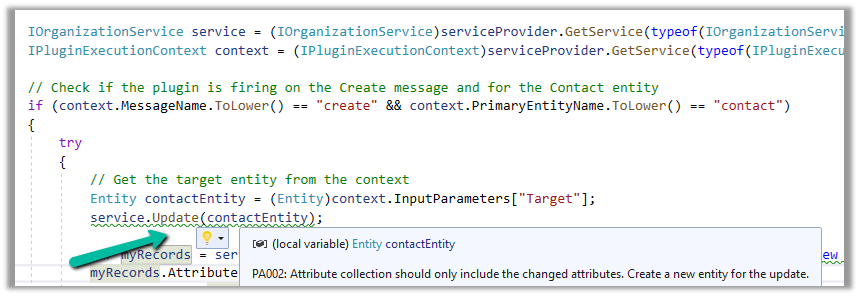
PA002: Attribute collection should only include the changed attributes. Create a new entity for the update

While updating the table or entity, create a new Entity instance and only include those attributes that are changed.
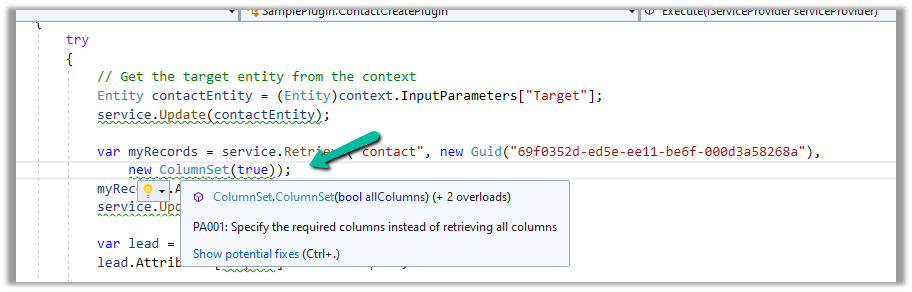
PA001: Specify the required columns instead of retrieving all columns.

Specify the required attributes to be retrieved instead of all columns as this would impact the performance.
EBEA002: Late bound entities should be replaced with early bound entities.

SVA001: Entity Logicalname ‘myTable’ doesn’t exist.

It is suggested to use early bound entities as they provide Type Safety and IntelliSense Support decreasing the likelihood of runtime errors and can enhance productivity through auto-completing and context-aware suggestions.

These were a few of the examples, that show the key capabilities of the extension, for the complete list, please refer to the product documentation

Hope it helps..

Advertisements

Free up storage space – Dataverse / Dynamics 365


Recently for setting up a new environment, we created a new sandbox environment and copied the production environment to it. Next, we had to reduce the storage space occupied by this new environment.

We followed the below steps

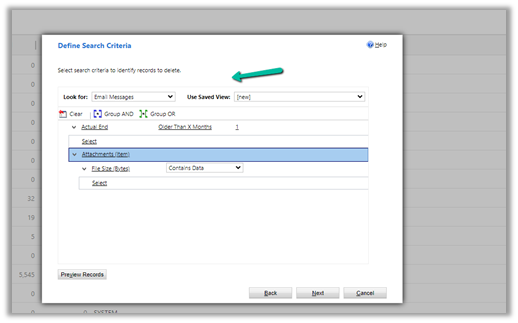
  • Bulk Deletion Job – Delete Email Messages having Attachments older than 1 month.
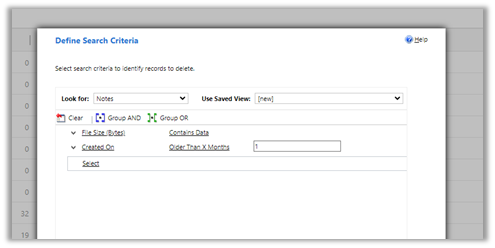
  • Bulk Deletion Job – Delete Notes having attachments older than 1 month.
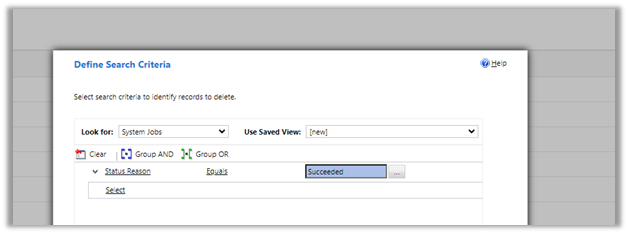
  • Delete System Job with Status as Succeeded.
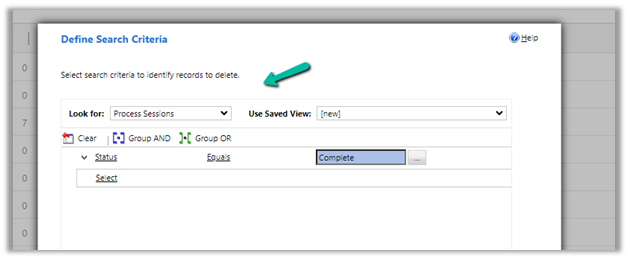
  • Delete Process Session with Status as Complete
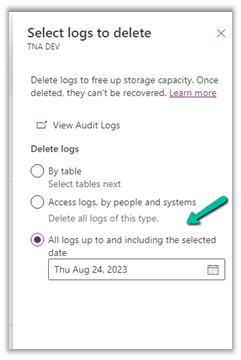
  • For Logs, we deleted Audit Logs
  • Similarly, we can also delete Plugin Trace Logs records.

These steps allowed us to decrease the Database Usage from 110 GB to 65 GB.

And File Usage from 315 GB to 16 GB.

Also, check –

Get all the details here –

https://learn.microsoft.com/en-us/power-platform/admin/free-storage-space

Hope it helps..
Advertisements

Pin Activities in Timeline – Dynamics 365


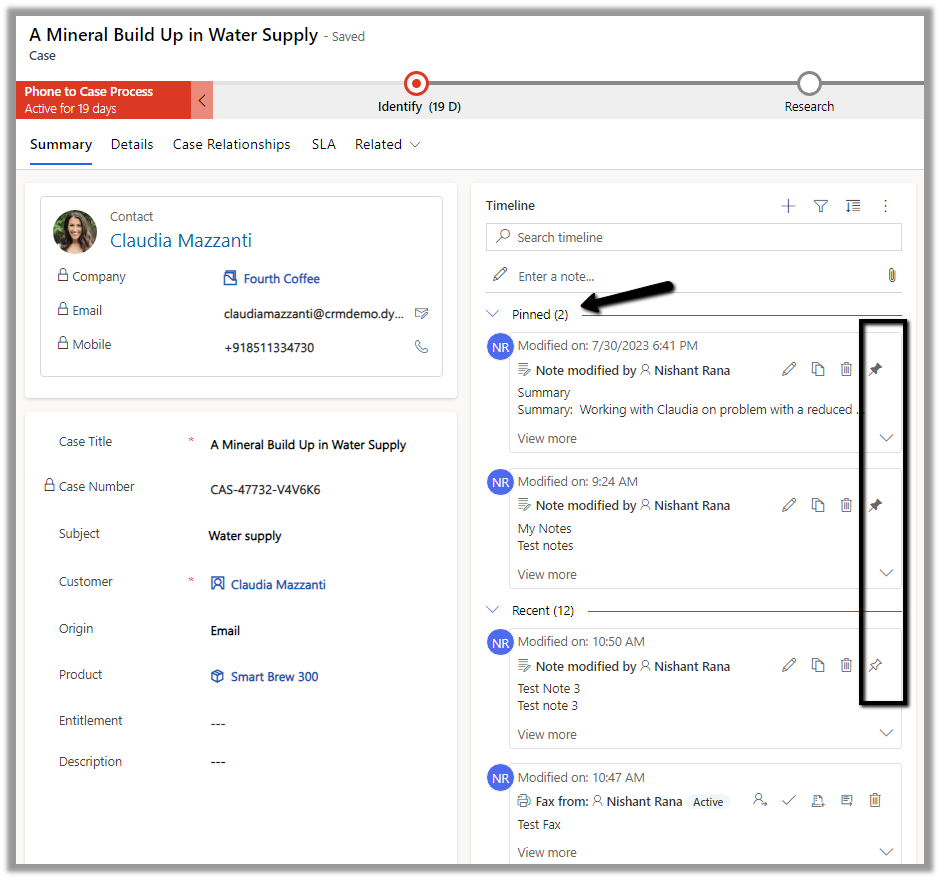
With the 2023 Release Wave 2, as per Microsoft Documentation, we can pin activities such as records to the top of the timeline.

We could see that option available for the Notes in the timeline.

It also shows the number of records pinned.

To unpin it, we need to click the icon again, and the record will move to its original position.

Hope it helps..
Advertisements

Getting Started – Installation and Setup Kupp Code Analytics


In the previous post, we covered key features and capabilities of Kupp Code Analytics – the powerful Visual Studio Extension for Power Platform and Dynamics 365 Developers.

You can refer to it here

In this blog post, we’d cover the installation and setup of the Kupp Code Analytics extension.

To get the extension, inside Visual Studio Marketplace, we can search for it and download the appropriate extension.

Below we can see that there are 2 versions of the extension available, one for Visual Studio 2022 and the other for Visual Studio 2019.

Visual Studio 2022 – https://marketplace.visualstudio.com/items?itemName=KuppSoftware.kca2022

Visual Studio 2019 – https://marketplace.visualstudio.com/items?itemName=KuppSoftware.KuppCodeAnalytics2019

We can also install it from inside Visual Studio, navigate to Extension, search for Kupp Code Analytics, and download the extension.

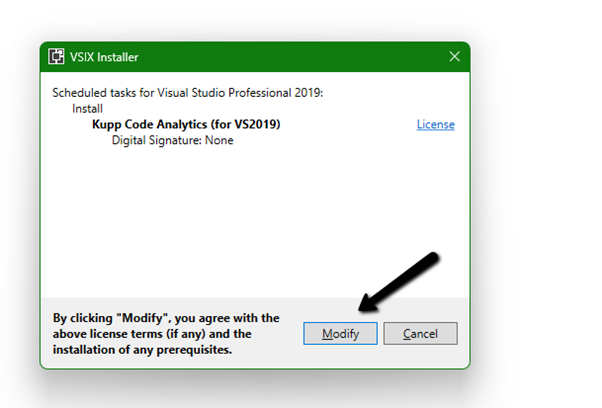
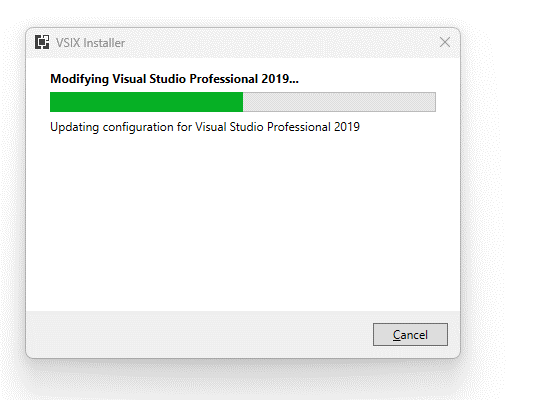
Click on Install / Modify (if already existing) to start/modify the installation.

Below we have successfully installed the extension for Visual Studio 2019.

Next, we need to specify and activate the License

We have 2 types of licenses available for the extension.

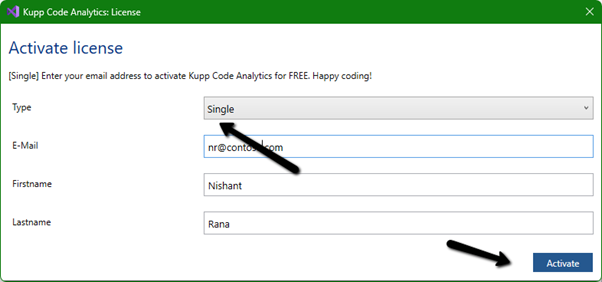
Community License (free)– Select type Single, enter the contact details and click on Activate to apply for the community license. Clicking on Activate activates the license instantly.

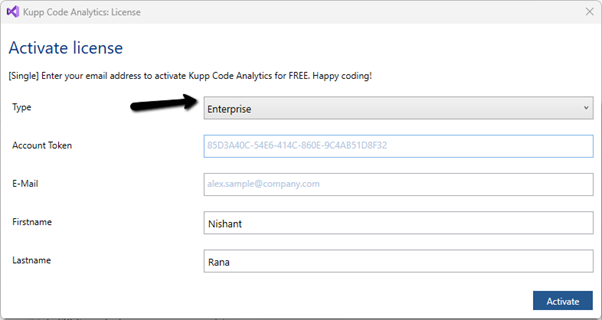
Enterprise License – This is paid license for the enterprise, that comes with additional features and capabilities not available in the Community license.

We can contact the sales team of Kupp for it – https://kuppsoft.com/contact/

Once added, we can see and manage the license information in Tools >> Options >> Kupp Code Analytics >> License

With Extension Installed, and the license activated, the next step is to configure the tool to connect to our Power Platform / Dynamics 365 Environment.

Navigate to Extensions >> Kupp Code Analytics >> Connection >> Configure

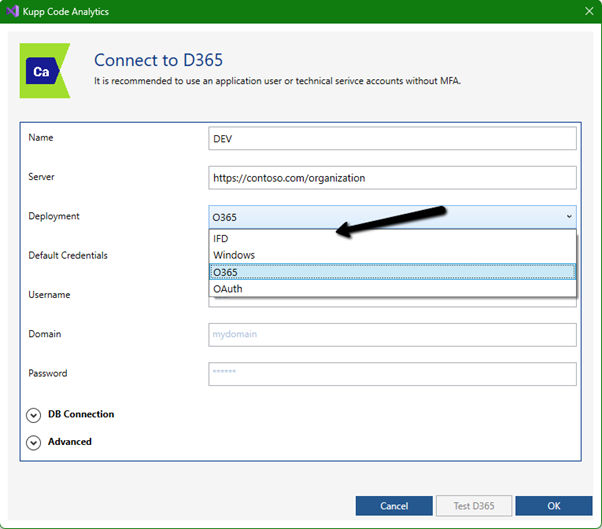
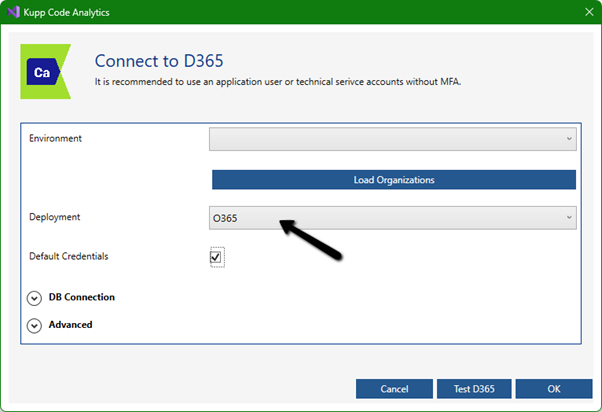
Select the appropriate connection or deployment type

Here to connect to Dynamics 365 Online, we keep the Deployment type as O365 and click on Load Organization

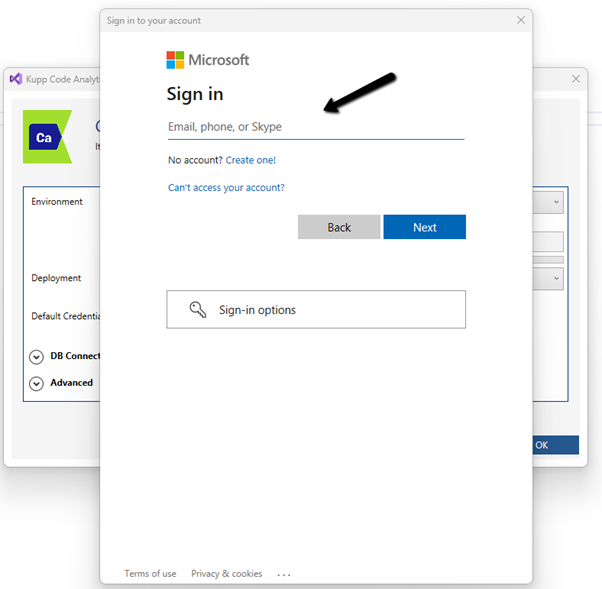
This opens the sign-in dialog where we can provide the appropriate account details.

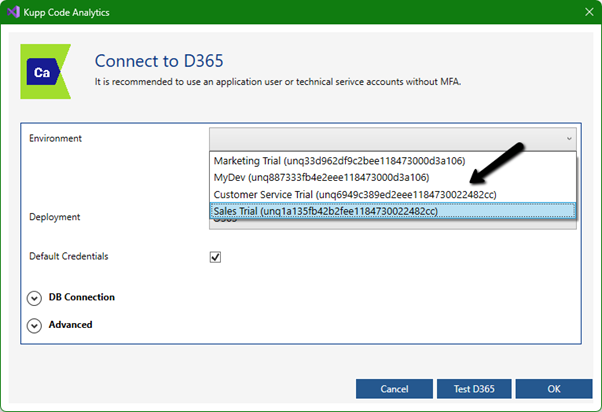
After successful sign-in, we see all the environments populated to which the user has access. Select the environment, we want to connect to.

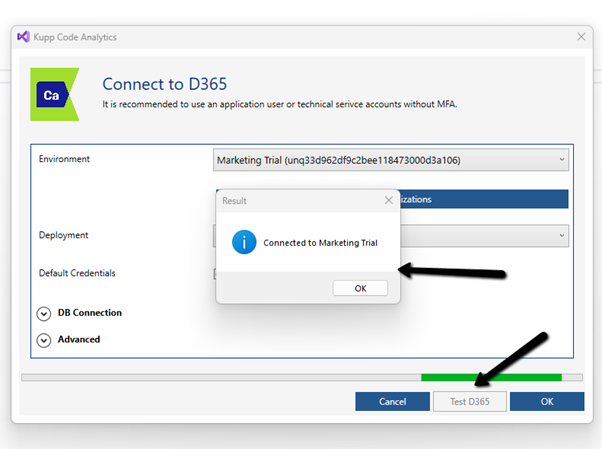
After selecting the environment, we can click on the Test D365 button and test the connection.

On a successful connection, we will get the success message as shown below.

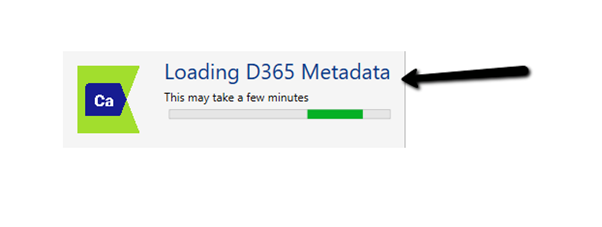
Clicking on OK will close the connection dialog box, and the tool will start the process of downloading the metadata for the environment connected. The download should be complete in a matter of a few seconds.

This completes the installation and configuration part of the extension. In the next blog post, we’d cover the key features of the extension in detail.

Also don’t forget to check out the other intuitive products developed by Kupp Software GmbH –https://kuppsoft.com/our-products/

Hope it helps..
Advertisements

How to – Create an Automated low-code plug-in (Dataverse) (experimental)


In the previous post, where we installed the Dataverse Accelerator app and saw how to write basic low-code Instant Plugins.

Here we’d look at the Automated low-code Plugins.

Select the New Plugin option in the Dataverse Accelerator app to create Automate Plugins.

We get the option to select the table, the event, define the behavior of the plugin using Power FX, specify pre or post-operation, and the solution as shown below.

To keep it simple, we have created a plugin on pre-operation that checks for null, the email address field in the Contact record on Create, and if blank throws an error.

On trying to create a contact record without an email address, we get the exception as specified in the plugin.

That’s all we are done with our plugin.

Now interestingly if we check our solution specified, we will not find our plugin there. We need to add them to the solution manually right now, here we need to look for FxExpression.

Read more about it here – https://debajmecrm.com/how-to-write-plugins-in-dataverse-using-low-code-powerfx-functions/

And all the details here

Hope it helps..
Advertisements

How to – Create an Instant low-code plug-in (Dataverse) (experimental)


Low-code plug-in is a new experimental feature released by Microsoft, for early adopters, not meant to be used in production. As per Microsoft, “the experimental features can change radically or completely disappear at any time“.

There are 2 types of low-code plug-ins we can write – Instant and Automated.

Instant plug-ins are triggered manually and support parameters, whereas automated plug-in as the name suggests, runs when a particular event (create, update, or delete) occurs on a table and they do not support parameters.

As a prerequisite, we need to first install the Dataverse Accelerator

We can install it from Admin Center >> Resources >> Dynamics 365 Apps

Or from the App Source, look for Dataverse Accelerator and click Get in now.

https://appsource.microsoft.com/en-us/product/dynamics-365/microsoftpowercatarch.dataversekit1?exp=kyyw

Specify the Environment to start the installation. (Should take around 5 minutes)

Open the Dataverse Accelerator App.

Click on + New plugin for the Instant Plugins

Provide the display name and the description for the plugin, and also select the appropriate solution.

We can specify optional Input and Output parameters along with the Expression that uses Power FX formulas to define the logic for the plugin.

Our sample plugin takes City as the Input Parameter and returns the total number of contact records having that same city.

Save the plugin and click on Test.

Provide the value for the input parameter and click on Run.

We can see the status as Success and the output parameter Result having a value of 4.

This completes our plugin.

Now to use it, click on the Integrate tab.

The tab provide us the required details.

We can copy the Power FX expression and use it inside the Canvas App.

We get the output as expected.

Below we are calling it from within the Power Automate Flow from a Perform an unbound action

The result –

Get more details and Check out the known limitations

Hope it helps..
Advertisements