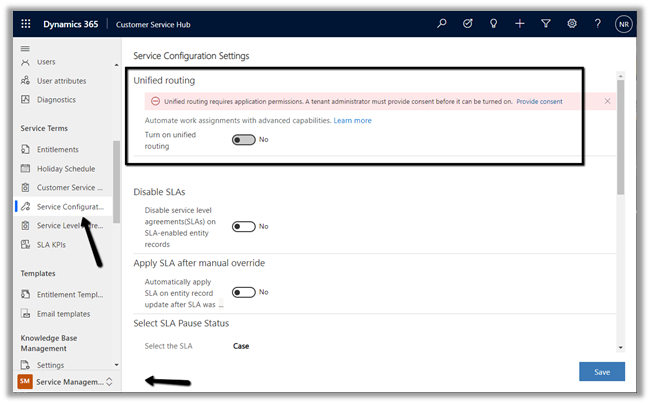
However, we can still override the default Azure AD Session policy, by setting the session timeout and/or inactivity timeout for the individual environment.
To set the same navigate to –
Environments > [Environment] > Settings > Privacy + Security in Power Platform Admin Center.
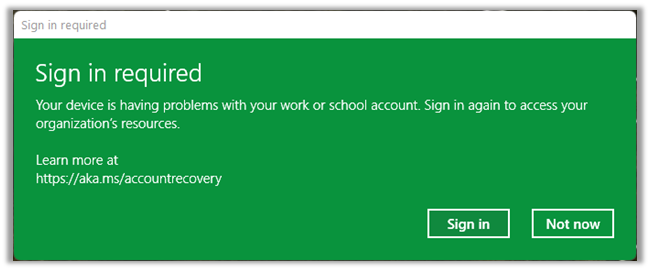
Suppose we want to Test & Enable Mailbox of the below user programmatically.
We can see the below notification for the disabled mailbox.
This mailbox is disabled for email processing. For more information, see the alerts.
Below is the sample code –
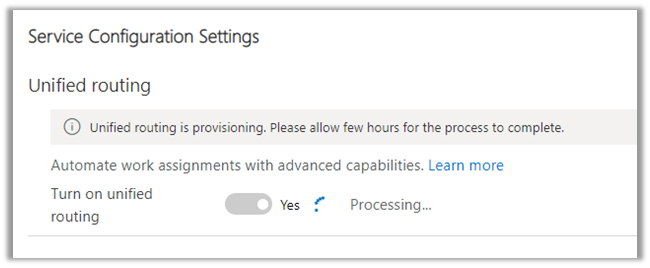
On running the code, we can see the notification removed and the mailbox for the user enabled successfully.
C# Code –
      CrmServiceClient svc = new CrmServiceClient(ConnectionString);

            if (svc.IsReady)
            {
                var mailBox = new Entity("mailbox", new Guid("C88A539A-F493-EC11-B400-000D3A4F37D3"));

                // testemailconfigurationscheduled = Indicates if the email configuration test has been scheduled for a mailbox record
                mailBox.Attributes["testemailconfigurationscheduled"] = true;

                svc.Update(mailBox);
Suppose we want to Approve the Email for the mailbox of the user(s) programmatically.
We’d see the below notification for the user whose mailbox is not yet approved.
Email won’t be processed for this mailbox until the email address of the mailbox is approved by an Office 365 Global Administrator or by an Exchange Administrator. For more information, contact your system administrator.
Below is the sample code –
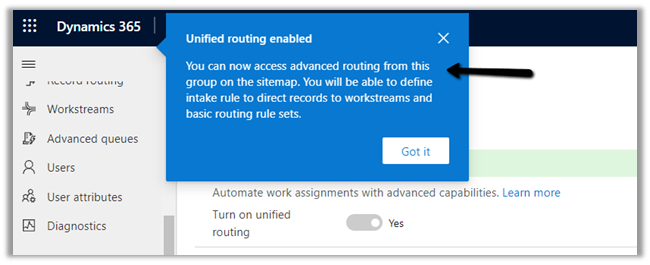
On running the code, we can see the notification for the email address approval removed or the mailbox approved for the user.
C# Code –
            CrmServiceClient svc = new CrmServiceClient(ConnectionString);

            if (svc.IsReady)
            {

                var systemUser = new Entity("systemuser", new Guid("C48A539A-F493-EC11-B400-000D3A4F37D3"));

                // emailrouteraccessapproval - status of the primary email address
                //0	= Empty, 1 = Approved, 2 = Pending Approval, 3 = Rejected
                systemUser.Attributes["emailrouteraccessapproval"] = new OptionSetValue(1);

                svc.Update(systemUser)
The code should run under the context of the user who has either Global Admin or Exchange Admin role.
In the previous post, we saw how we can create a user filter (outlook) for a particular user and apply the same to other users through Sync Filter Manager – XrmToolBox plugin.
In this post, we’d achieve the same through System View.
Here we have created below System View on Tasks entity/table.
The Created On Doesn’t Contain Data False Condition will make sure none of the records of the task are synced.
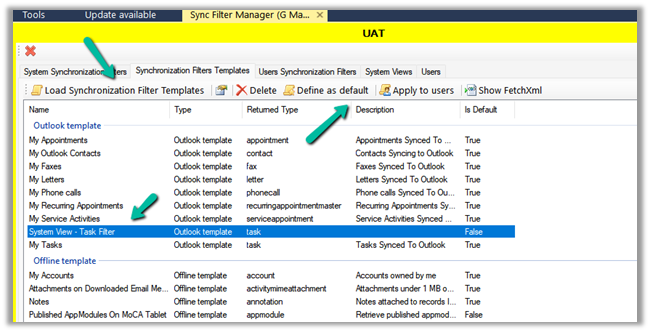
Open the Sync Filter Manager, navigate to the System Views tab and click on Load System Views
Select the new System View- Task Filter which we created earlier and click on Create – System Synchronization Filter Template from selected view(s)
Select Outlook Template for System Rule Type
We are presented with the option to specify the user(s) to who we want to apply the new template.
If we select Yes, we get the Select users dialog box to select the user(s).
Inside the Synchronization Filters Templates tab, we can click on Load Synchronization Filter Templates to list down all the outlook templates.
We can see our custom template listed there.
From there again we apply it to the user(s) or define it as the default filter.
After applying Define as default, we can see the custom filter applied to the new users. It won’t be applied or make changes to the filters of the existing users.
So for the existing users, we have to explicitly apply this filter using Apply to users option
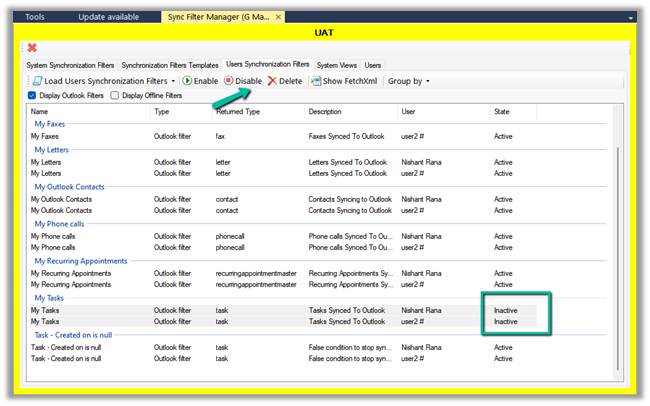
As the last step, we need to disable or delete any other filter on the task, to make sure that we only have the new filter applied.
On disabling the filter, we can see their status updated as inactive.
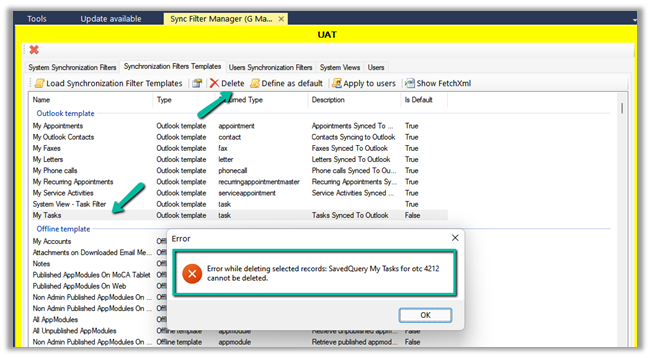
Lastly, we can only delete Custom Outlook Template, if we try deleting any default out of the box template we will get the below error.
E.g. on trying to delete the My Tasks default filter, we will get the below error
“Error while deleting selected records: SavedQuery My Tasks for otc 4212 cannot be deleted”