When creating records using the Dataverse Web API, the default behavior is to return a successful response without including the record data in the response body.
A standard create request does provide access to the newly created record’s GUID through the OData-EntityId response header. However, if we need additional column values from the newly created record, we would typically need to perform a separate retrieve request.
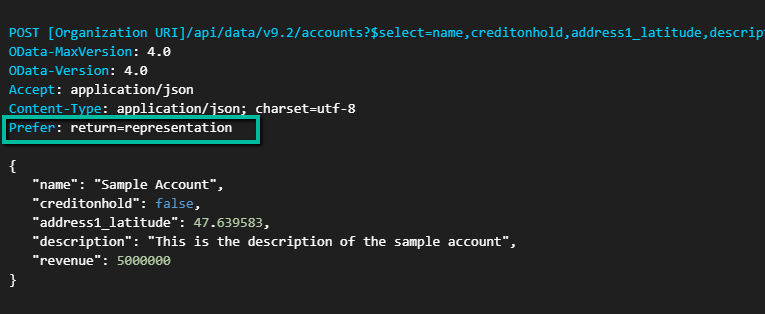
Dataverse provides a convenient way to return record data as part of the create operation itself by using the Prefer: return=representation request header.
Let’s see how it works.
Creating a Record and Returning Data
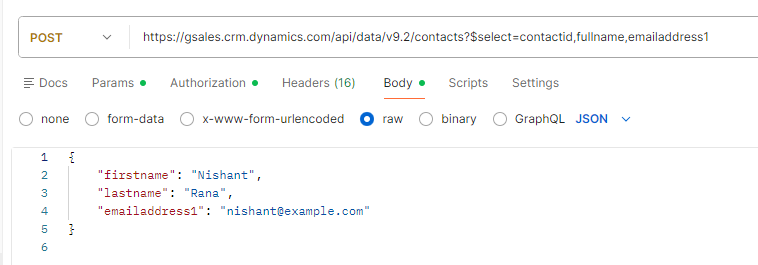
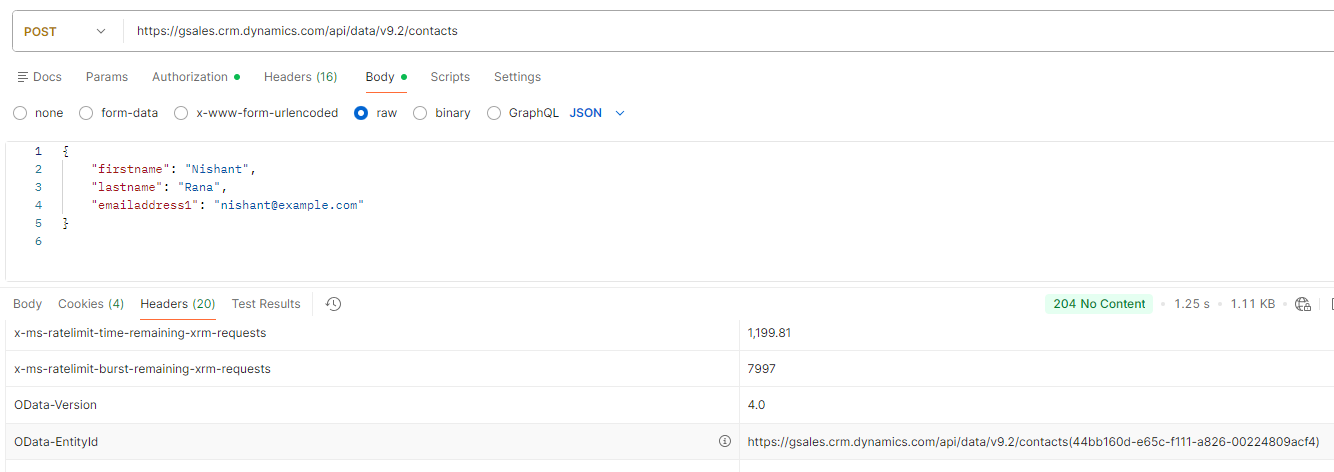
Suppose we want to create a Contact record and immediately retrieve some of its values.
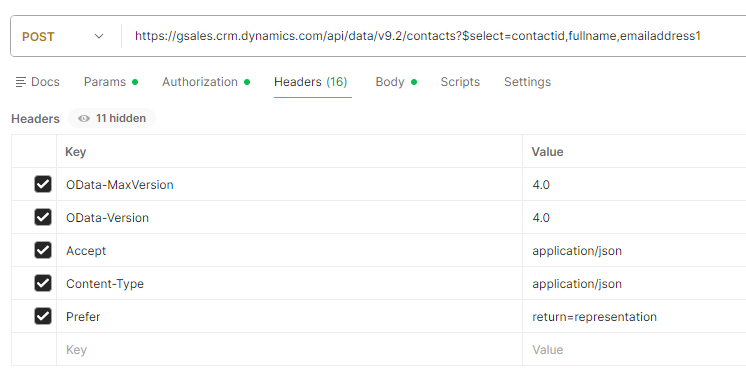
POST https://.crm.dynamics.com/api/data/v9.2/contacts?$select=contactid,fullname,emailaddress1
Content-Type: application/json
Prefer: return=representation
Request Body:
{
    "firstname": "Nishant",
    "lastname": "Rana",
    "emailaddress1": "nishant@example.com"
}
The key part of the request is the following header:
Prefer: return=representation
This tells Dataverse to return the created record in the response.
Using $select to Limit Returned Columns
In the example above, the request URL includes a $select clause:
?$select=contactid,fullname,emailaddress1
This allows us to control which columns are returned in the response.
Returning only the required columns helps reduce the response size and makes the response easier to process.
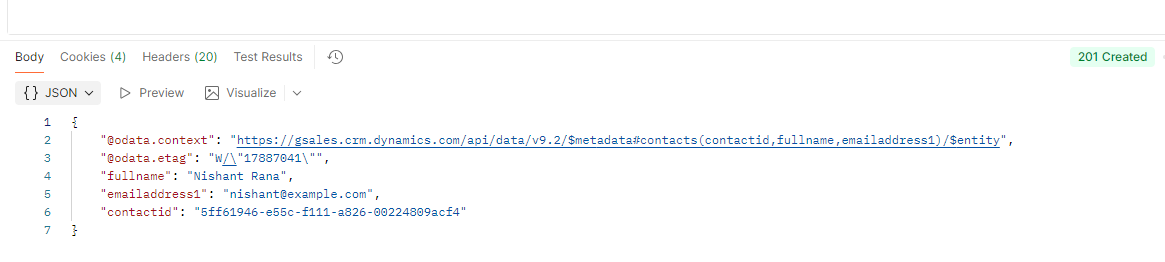
Response
When the request succeeds, Dataverse returns an HTTP 201 Created response along with the requested column values.
Example response:
{
    "contactid": "4e7d5c6a-xxxx-xxxx-xxxx-xxxxxxxxxxxx",
    "fullname": "Nishant Rana",
    "emailaddress1": "nishant@example.com"
}
Because the record data is already available in the response, there is no need to perform an additional retrieve request to obtain these values.
Standard Create vs Return Representation
Let’s compare the behavior with a standard create request.
A normal create request returns an HTTP 204 No Content response.
HTTP/1.1 204 No Content
The response also includes an OData-EntityId header containing the URI of the newly created record.
OData-EntityId: https://.crm.dynamics.com/api/data/v9.2/contacts(4e7d5c6a-xxxx-xxxx-xxxx-xxxxxxxxxxxx)
This means we can still obtain the GUID of the created record without using Prefer: return=representation.
However, if we need additional values such as calculated fields, default values applied by Dataverse, or other column data, a separate retrieve request would typically be required.
Feature | Basic Create | Create with Data Returned |
Status Code | 204 | 201 |
Response Body | No | Yes |
Extra Retrieve Needed | Usually | No |
Performance | Faster | Slightly More Expensive |
Best For | Bulk Operations | Integrations & UI Scenarios |
When Should We Use It?
Using Prefer: return=representation can be useful when:
- An integration needs values from the newly created record immediately.
- We want to retrieve calculated or system-generated values.
- A client application needs to display record information immediately after creation.
- We want to avoid an additional retrieve request and simplify the integration logic.
If only the GUID of the newly created record is required, the standard create operation is usually sufficient.
Get more details – Create with data returned
Hope it helps..