How to – Identify Dynamics 365 Marketing Application App and its corresponding environment


We can easily identify the Marketing App and the environment in which it has been provisioned.

Login to Power Platform Admin Center >> Resources >> Dynamics 365 Apps

https://admin.powerplatform.microsoft.com/

We can find the unique name of the environment/organization suffixed with the name of the app i.e. Dynamics 365 Marketing Application for the configured app.

Navigate to the environment’s Advanced Settings >> Customizations >> Developer Resources 

We can find the Unique Name of our organization there


Hope it helps..


Advertisements

How to – Hide Approve / Reject Button in Approval Email in Power Automate Approval Workflow


Recently we had a requirement to remove or hide the Approve and Reject buttons from the approval email as we wanted the user to manage it all from the Approval Center.

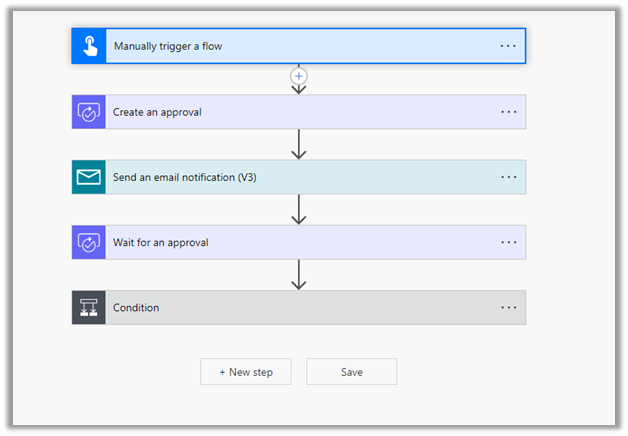
The way we implemented this is by replacing the Start and wait for an approval action with Create an approval, Send email notification and Wait for an approval action.

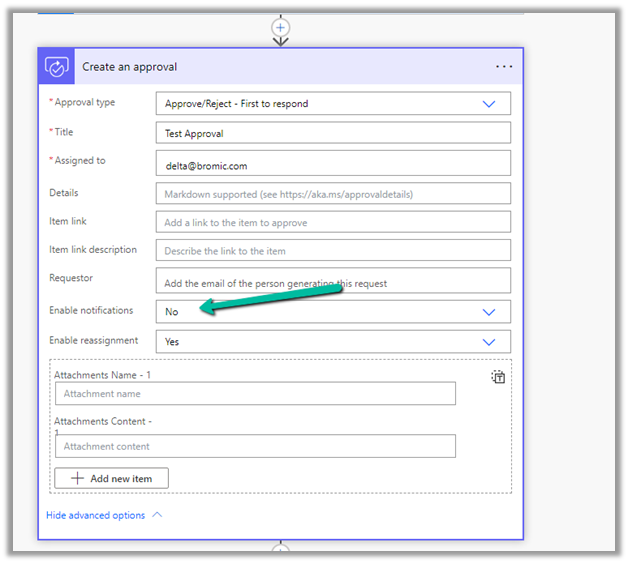
For Create an approval action, set Enable notifications as No this makes sure no email is sent.

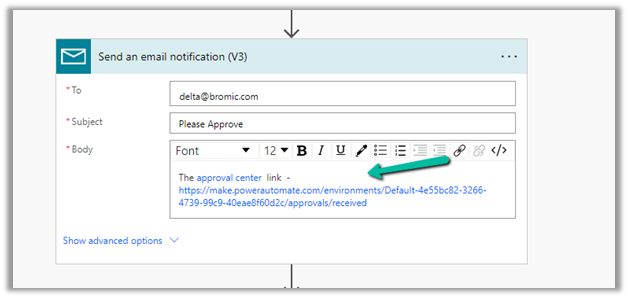
Followed by– in the body, specify Send an email notification the Approval Center link.

Followed by Wait for an approval, specify the Approval ID there.

And the Condition control and the required logic.

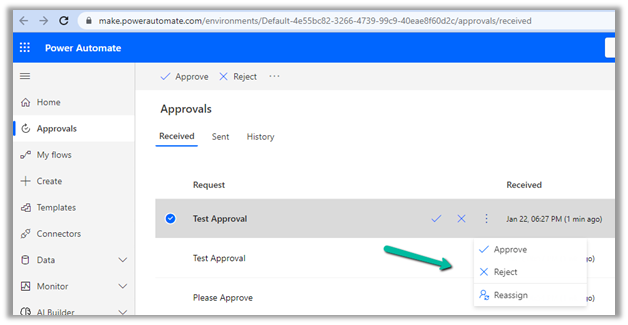
After running the flow, the user will get the email and can click the link to navigate to the Approval center.

The user can then take the required action from within the Approval center.

The flow will wait for the user

Also, check – Implementing approvals with Teams notifications

https://powergi.net/2021/07/11/use-power-automate-approvals-with-teams-notifications-only-no-emails/

Check other articles on Power Automate Approvals 

Approvals – Power Automate & Dynamics 365

Hope it helps..

Advertisements

Format property missing in Date Picker in custom page – Dataverse / PowerApps


Recently while designing the custom page, we realized that the format property is missing for the Date Picker control. This is because Date Picker control is based on Fluent UI Library.

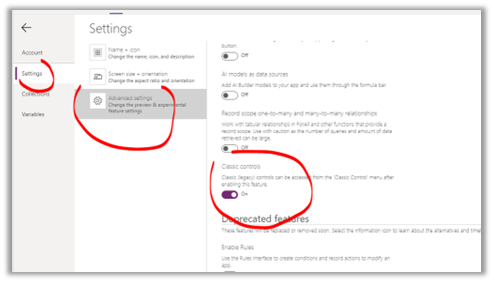
One option earlier was to enable the Classic Controls from Settings

And replace the existing control with the classic control

Also, check – https://debajmecrm.com/get-todays-date-format-dates-in-power-apps-canvas-app/

https://powerusers.microsoft.com/t5/Building-Power-Apps/Date-picker-missing-format-property/td-p/903794

https://powerusers.microsoft.com/t5/Building-Power-Apps/Custom-Page-Date-Picket-Format-Date/td-p/1349351

Hope it helps..

Advertisements

Sample formula for Associating N:N records and Creating 1:N records in Canvas App (PowerApps / Dataverse)


Just sharing the sample formula, we used for associating selected products from the gallery to lead on OnSelect of a button.

Here collectionCheckedProducts contains the checked products from the gallery bound to the product data source –

varEnquiryIdWithoutCurlyBraces contains the GUID of the Lead record. Here Enquiry is Lead renamed.

Enquires(leadproduct_association) is the name of the relationship between lead and product.

Relate function is used to associate multiple selected products in collectionCheckedProducts to a lead record.

And below is the sample formula we used for creating Quote Product for selected products from the gallery.

varEnquiryIdWithoutCurlyBraces contains the GUID of the Quote record. Proposal Data Source is the Quote renamed.

Hope it helps..


Advertisements

How duplicate phone numbers for customers (contact/account) are handled in Voice Channel (Dynamics 365 Omnichannel for Customer Service)


Before we delve into different scenarios, few key points, we need to be aware of about Phone Numbers in Voice Channels.

  • Voice Channel considers Contact’s Mobile Phone (mobilephone) and Account’s Phone (telephone1) fields.

https://learn.microsoft.com/en-us/dynamics365/customer-service/record-identification-rule

  • The phone number should be in E.164 format inside Dynamics 365.

https://learn.microsoft.com/en-us/dynamics365/customer-service/voice-channel-bring-your-own-number?tabs=customerserviceadmincenter#prerequisites

https://developers.omnisend.com/guides/e164-phone-number-formatting

  • If no matching customer (contact or account) is found, the conversation record will not have any customer prepopulated.

  • If 2 contacts are having the same Phone Number (E.164) format, i.e. multiple matches found

In that case, also, no customer is tagged in the conversation record, the agent would have to search for the customer.

  • If 2 contacts and 1 account have the same Phone Number

The Conversation records get associated with the Account record.

  • If 1 contact and 1 account have the same Phone Number

The conversation record gets tagged against the Contact

  • If there is only 1 account record with that phone number and no contact records

The conversation record has an Account tagged to it.

  • In case multiple accounts are found with the same phone number and no matching contact

No customer is tagged in the conversation record

  • If there are multiple contacts and multiple accounts with the same phone number

No customer is tagged in the conversation record.

In short –

Matching Contact

Matching Account

Result

0

0

NA

1

0

Contact

1

1

Contact

2

0

NA

0

1

Account

0

2

NA

2

2

1

2

Account

NA

Hope it helps..


Advertisements

How to – configure Facebook Webhook Validation with Power Automate Flow (Dataverse / Dynamics 365)


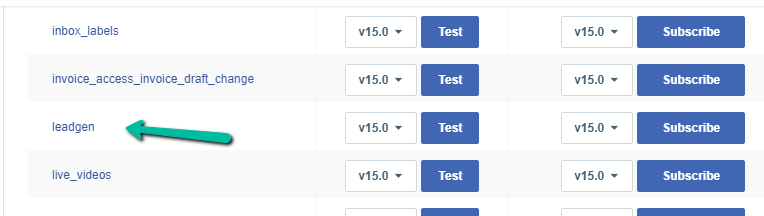
Recently we were working on Facebook Leads integration with Dynamics 365. Webhook for Leads can be configured to send real-time notifications of the Leads ads changes.

The first step of setting up Webhook requires creating an HTTPS endpoint that can process 2 types of HTTP Requests – Verification and Event notifications.

Here we will see how to configure the Power Automate flow for verification.

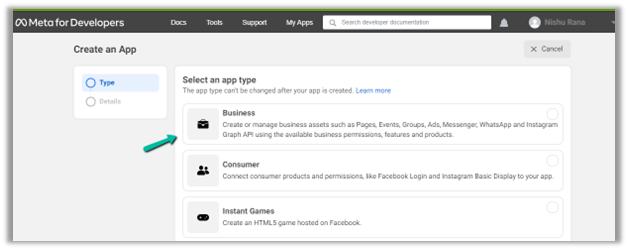
Login to Meta for Developers – Facebook and create an app.

https://developers.facebook.com/

Select Business for the app type.

After the App is created, select Webhooks to be added to the app. Click on Set up.

Next click Subscribe to this object. Here we have User selected.

For getting leads notification we need to select Page 

FBPagePreview in new tab

And subscribe to leadgen object

leadgen

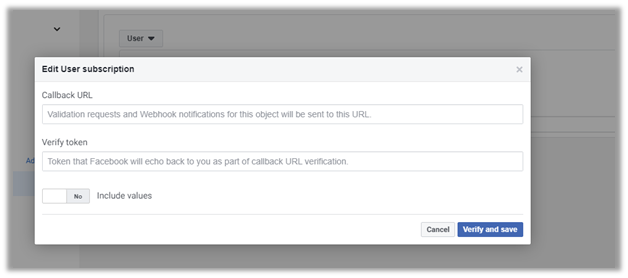
It asks us to specify the Callback URL and Verify token.

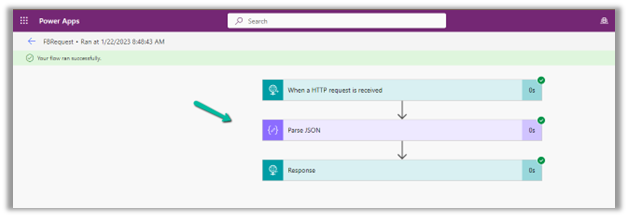
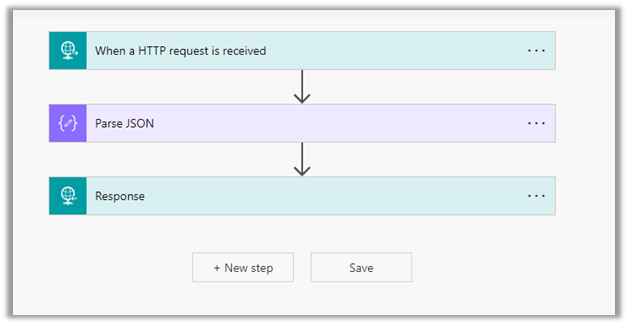
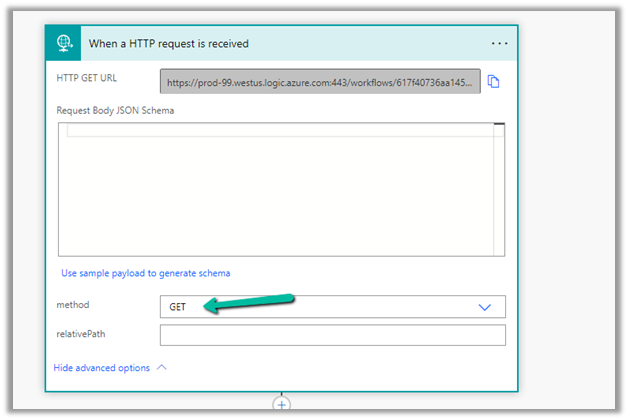
Back in Power Automate create a Flow with Request type Trigger, followed by Parse JSON and Response actions.

For HTTP Request, select GET as the method, as FB will send a GET request to the endpoint URL, with the verification requests included in the endpoint of the URL.

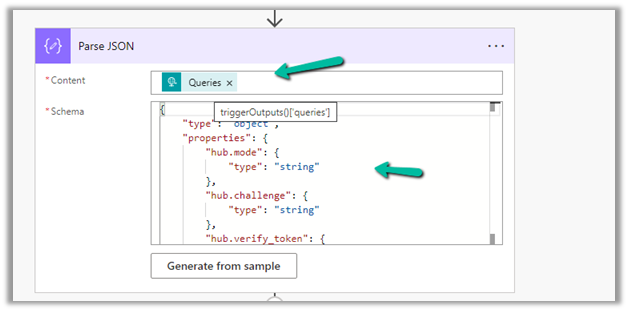
Next, Parse the JSON and specify the Content and Schema

Content – 

 triggerOutputs()['queries']

Schemajson


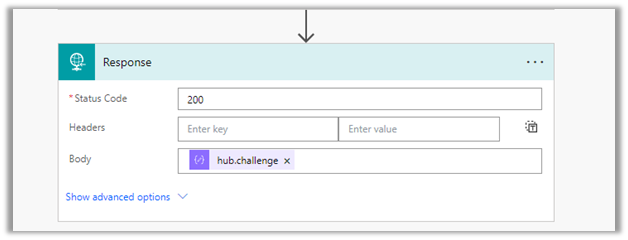
Lastly in Response, set Status Code as 200 and Body as hub.challenge.

Here FB expects the Endpoint to verify the hub.verify_token (which we haven’t set up yet) and respond with hub.challenge value after verification.

Save the Flow, and copy the URL generated for the HTTP Request trigger.

Back in Meta for Developers, in edit user subscription paste the Callback URL and for now in place of token specify any value and click on Verify and Save.

We should now have a Webhook endpoint (Flow) successfully configured

We can also see our Flow ran successfully.

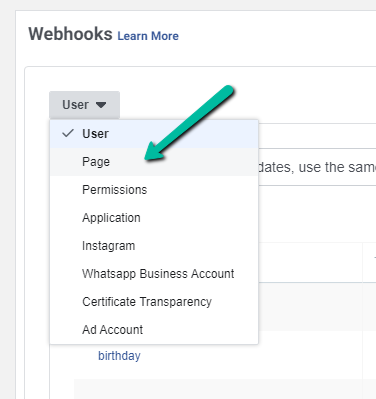
Here in the example we configured the webhook validation for User events, for Facebook Lead we need to configure it for Page, the other options available are Permissions, Application, Instagram etc.

Please check – 

https://powerautomate.microsoft.com/nl-nl/blog/connect-facebook-workplace-to-sharepoint/


Hope it helps..

{
    "type": "object",
    "properties": {
        "hub.mode": {
            "type": "string"
        },
        "hub.challenge": {
            "type": "string"
        },
        "hub.verify_token": {
            "type": "string"
        }
    }
}
Advertisements