How to – Delete Audit data by entity / table, date, user access, and specify retention duration – updates in Dataverse (Dynamics 365 / CRM)


Recently we saw a new update in our sandbox environments with regards to Audits.

Login to Power Platform Admin Center, select an environment.

We can see a new section Auditing added.

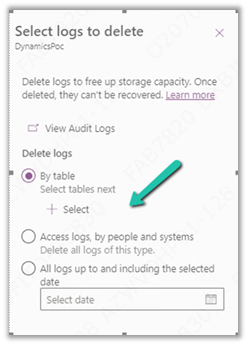
Click on Delete logs allows us to –

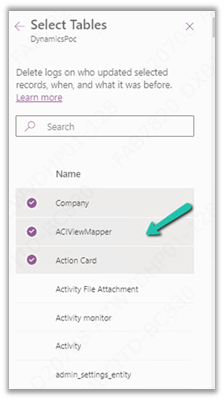
  • Delete logs by Table

We can select the tables there.

  • Delete only access logs data.
  • Delete logs up to the selected date.

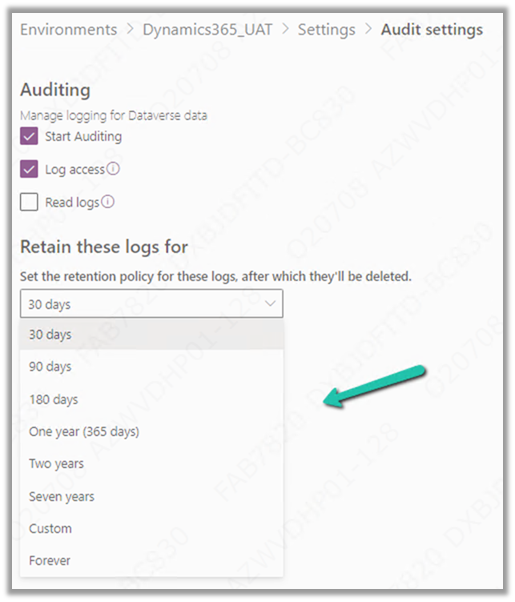
And now we can also manage or specify the retention duration for the audit log.

These are very useful updates to the Audit feature in the platform which more or less have been similar since CRM 3.0 days.

Check other posts on Audit – 

https://nishantrana.me/2021/08/31/audit-entity-table-few-key-points-dynamics-365-power-apps/

https://nishantrana.me/2021/05/17/how-to-export-the-audit-history-values-from-dynamics-365/

https://nishantrana.me/2018/10/08/using-kingswaysofts-cds-crm-source-component-to-get-audit-information-in-dynamics-365-ce-ssis/

How to – Use RetrieveAttributeChangeHistoryRequest to get audit data for an attribute (Dataverse/ Dynamics 365/ CRM) – Nishant Rana’s Weblog

Hope it helps..

Advertisements

Couldn’t add resource. Microsoft Dataverse is in use error in Dynamics 365 Customer Insights


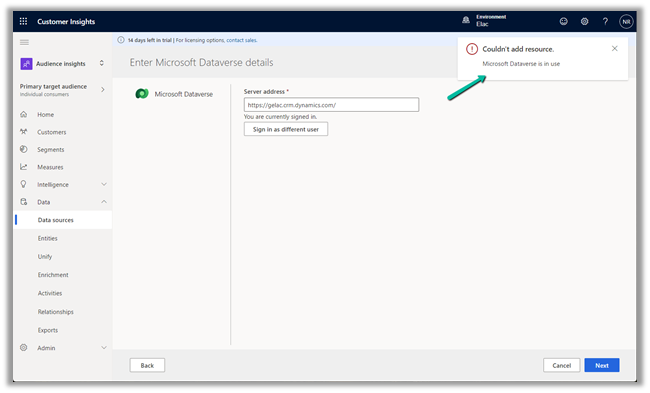
We might get the below error while trying to add Microsoft Dataverse Data source in Dynamics 365 Customer Insights.

“Coundn’t add resource. Microsoft Dataverse is in use”

As the error message indicates, this is because we have an already existing data source connected to that same organization.

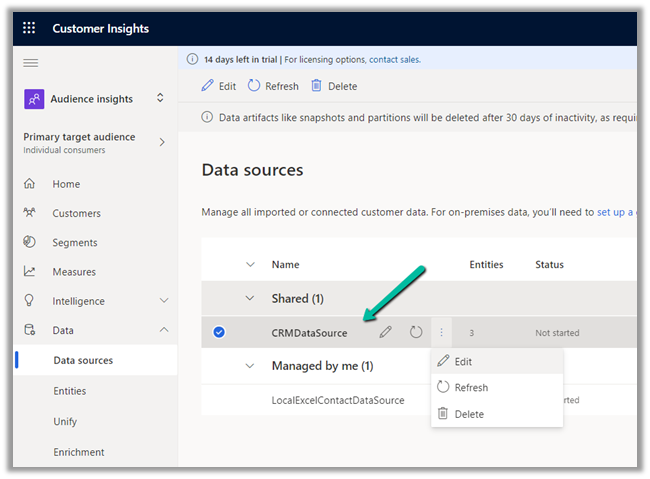
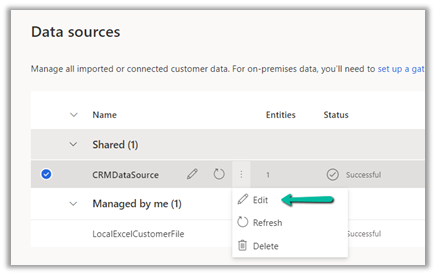
We can edit the Data Source and can add entities to the same connection.

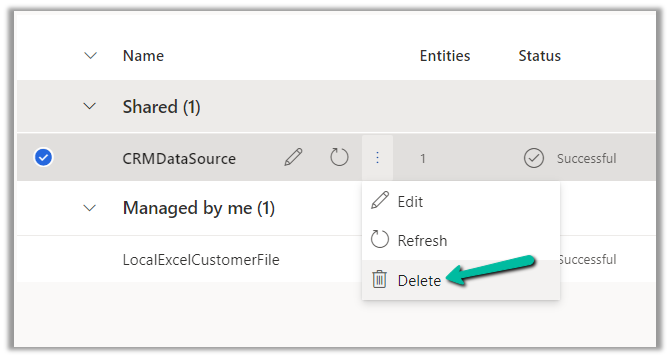
also delete the data source, if its entities are not used in Match and Merge

else we will get the below error message.

“To proceed, remove its entities from: Match, Merge”

In this case we will have to remove the entities from any Merge and Match configuration first.


Hope it helps..

Advertisements

How to – Import Data from Dataverse / CRM to Dynamics 365 Customer Insights


In the last post, we had set up the trial version of Dynamics 365 Customer Insights.

https://nishantrana.me/2022/01/26/how-to-set-up-dynamics-365-customer-insights-trial/

Currently, our trial instance has no data.

We can ingest data into Dynamics 365 Customer Insights from Microsoft Dataverse either using Microsoft Power Query (Dataverse Connector)

or Microsoft Dataverse import method.

The Microsoft Dataverse import method doesn’t copy the data into the Customer Insights / Audience Insights Data Lake, however, it doesn’t allow for Extract, Transform, Load (ETL) as in the case of Microsoft Power Query data source.

Select Audience Insights >> Data >> Data Sources >> Choose your import method – Microsoft Dataverse

Provide a name to the data source and click on Next.

Enter the Server address, Sign in, and click on Next.
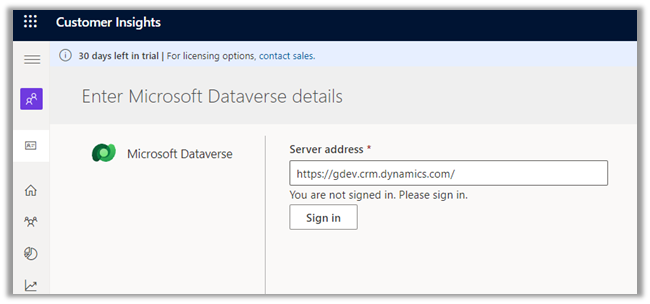
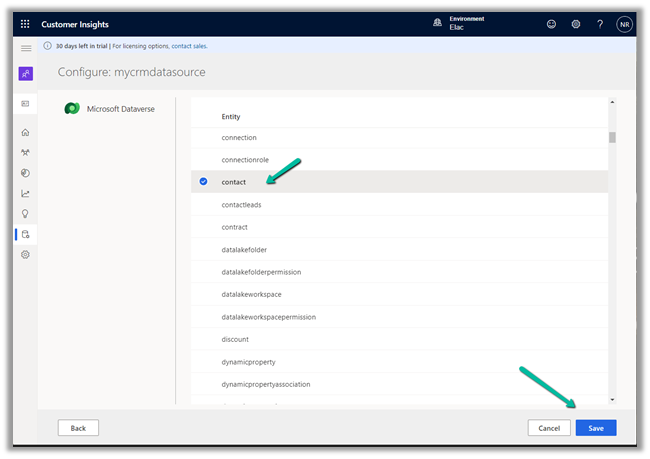
Select the Entity, here we have selected the contact entity for now.
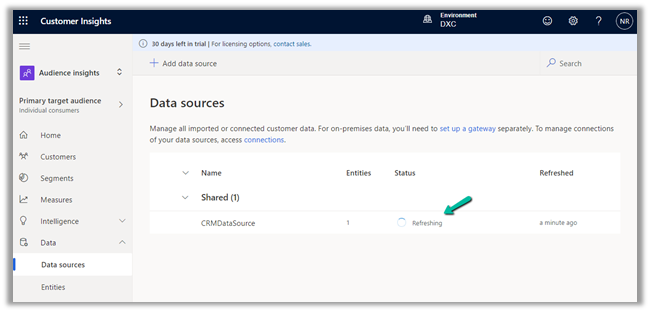
We can see the data source is being refreshed.
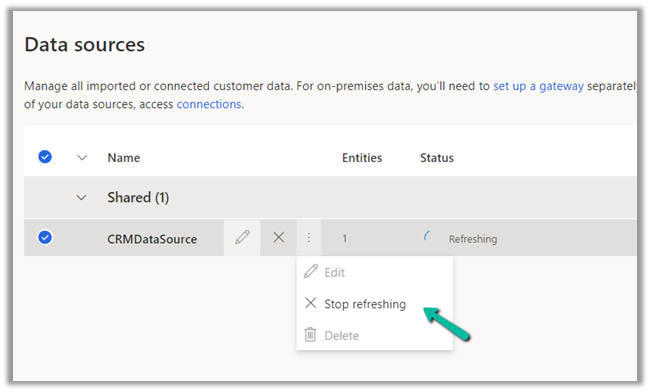
We have the option of stopping the refresh.
We are having 100 records in our contact entity inside CRM.

It took around 5 hours for the refresh to complete successfully.

We have the option of Edit, Refresh and Delete on the Data Source after the successful refresh.

We can see the contact entity available within Data >> Entities section
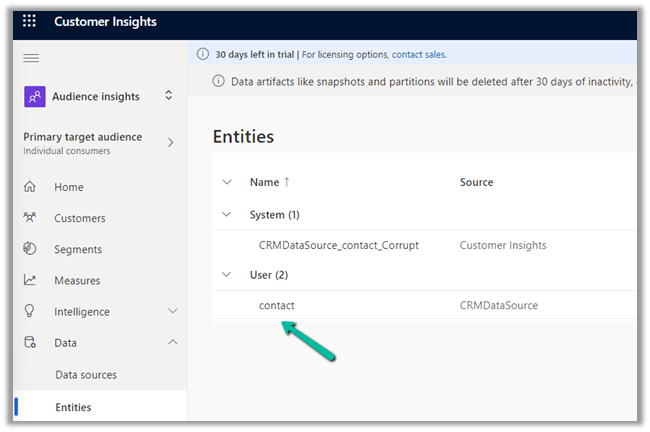
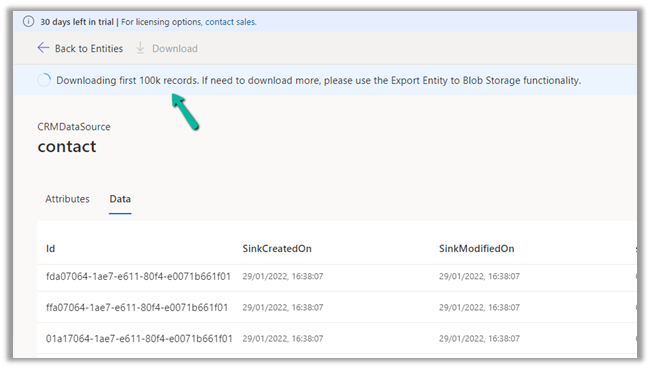
Clicking on contact, we can see the Attributes used and Data in it as well as the option to download the data.

The download will be downloading the first 100K records.
Now when it comes to creating a unified customer profile through (MMM) i.e. mapping, matching, and merging, it requires a minimum of 2 entities to be there, to generate the Customer Profile.

In the next post, we will import some sample contact data from a local excel file and use it for further configuring our customer profile.

How to – Import Data from local data files to Dynamics 365 Customer Insights

How to – Unify (Map, Match and Merge) Entities in Dynamics 365 Customer Insights

Hope it helps..

Advertisements

How to – Set up Dynamics 365 Customer Insights Trial


https://nishantrana.me/2022/02/09/how-to-import-data-from-local-data-files-to-dynamics-365-customer-insights/To set up the trial of Customer Insights, open the Dynamics 365 Free Trial Page and scroll down to Dynamics 365 Customer Data Platform section

https://dynamics.microsoft.com/en-gb/dynamics-365-free-trial/

Click on Try for free

Sign in with your work account or the Dynamics 365 trial account created and click on Get Started

As a first step, it asks for specifying the region for the communication preferences.

For the trial, let us choose the Audience Insights option.

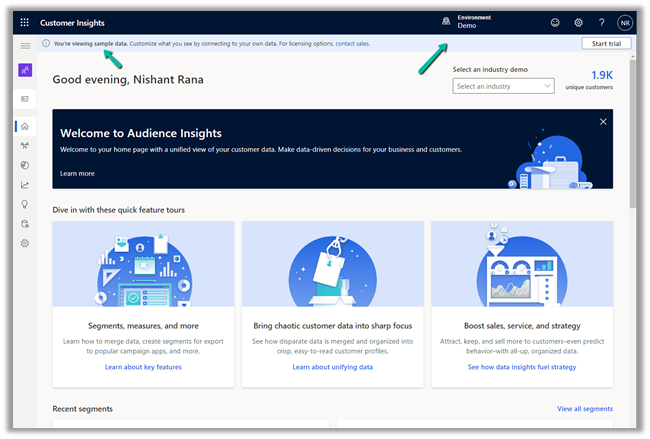
It opens the Demo environment having the sample data. We can explore and understand the features with the sample data or we can start a trial.

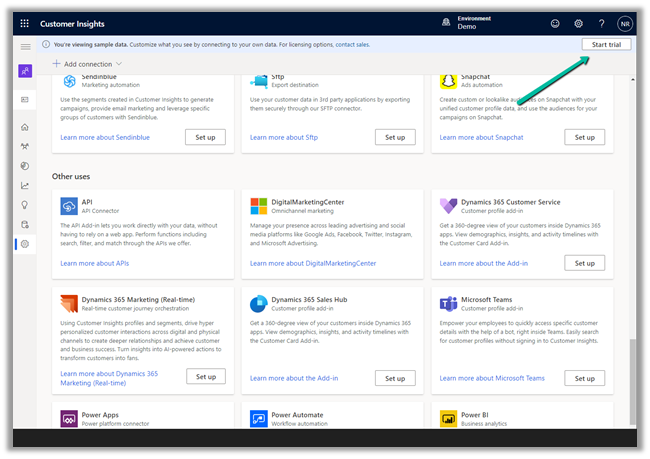
Let us select the option Start trial in the tool bar to connect it to an existing CRM / Dataverse Environment.


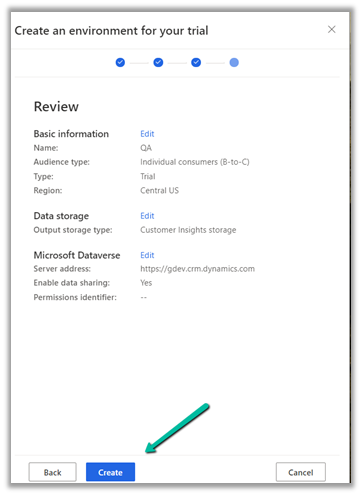
Enter the basic information requested. Make sure you have selected the correct region else you might get unable to create an environment error later.

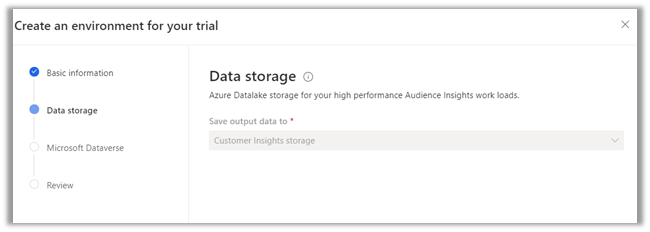
The data storage option comes as disabled.

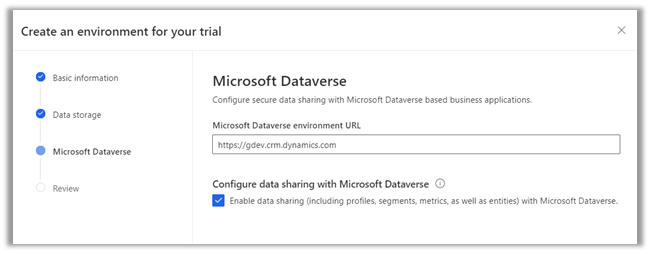
Specify the Dataverse / CRM environment’s URL. (here I am logged in with System Administrator user who is also the Global Admin)

Finally, review the information and click on Create.

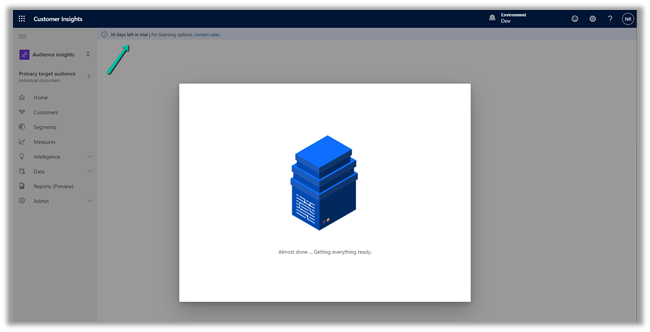
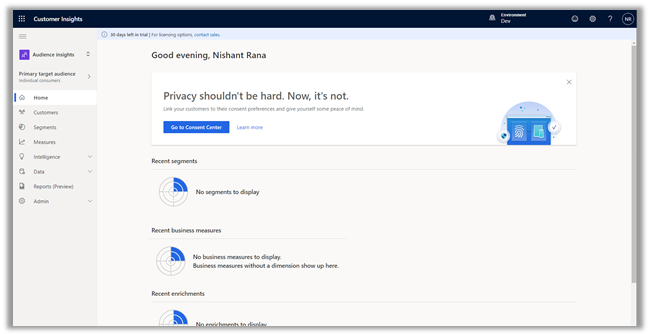
This will configure a 30 day trial against the CRM / Dataverse environment.

Now we are ready to explore it further.

How to – Import Data from Dataverse / CRM to Dynamics 365 Customer Insights

How to – Import Data from local data files to Dynamics 365 Customer Insights

How to – Unify (Map, Match and Merge) Entities in Dynamics 365 Customer Insights

Hope it helps..

Advertisements

How to – Use RetrieveAttributeChangeHistoryRequest to get audit data for an attribute (Dataverse/ Dynamics 365/ CRM)


We can use RetrieveAttributeChangeHistoryRequest to get the change history of a particular field / attribute of a record.

We need to set the Target and the AttributeLogicalName property of the request.

AuditDetails records of the RetrieveAttributeChangeHistoryResponse contains the detail of the audit records.

The Audit History records in CRM- 

AttributeAuditDetail contains the details of the changes made on the field’s value. It contains property like – objectid, userid, operation etc. as well as new value and the old value as shown below.

Sample Code (C#) 

 string ConnectionString = "AuthType = OAuth; " +
                  "AppId=51f81489-12ee-4a9e-aaae-a2591f45987d; " +
                  "Username=User1@xxxx.onmicrosoft.com; " +
                  "Password=*******; " +
                  "RedirectUri=app://58145B91-0C36-4500-8554-080854F2AC97;" +
                  "Url = https://xxx.crm.dynamics.com//;";


            CrmServiceClient svc = new CrmServiceClient(ConnectionString);

            if (svc.IsReady)
            {

                var attributeChangeHistoryReq = new RetrieveAttributeChangeHistoryRequest();

                attributeChangeHistoryReq.Target =
                    new EntityReference("incident", new Guid("0a9f62a8-90df-e311-9565-a45d36fc5fe8"));
                attributeChangeHistoryReq.AttributeLogicalName = "prioritycode";

                var attrChangeResponse = (RetrieveAttributeChangeHistoryResponse)svc.Execute(attributeChangeHistoryReq);
                var auditDetailCollection = attrChangeResponse.AuditDetailCollection;


                foreach (var auditDetails in auditDetailCollection.AuditDetails)
                {
                    // Type =  AttributeAuditDetail, AuditDetail, 
                    var type = auditDetails.GetType();

                    if (type == typeof(AttributeAuditDetail))
                    {
                        var attributeDetail = (AttributeAuditDetail)auditDetails;

                        var userName = attributeDetail.AuditRecord.GetAttributeValue<EntityReference>("userid").Name;
                        var operation = attributeDetail.AuditRecord.FormattedValues["operation"];
                        var action = attributeDetail.AuditRecord.FormattedValues["action"];
                        var createdOn = attributeDetail.AuditRecord.GetAttributeValue<DateTime>("createdon");
                        var newValue = attributeDetail.NewValue.FormattedValues["prioritycode"];
                        var oldValue = attributeDetail.OldValue?.FormattedValues["prioritycode"];

                    }
                }
            }

Check other posts on Audit –

Hope it helps..

Advertisements

How to – Use Do until and Delay in Power Automate


Let us take a simple example to understand the usage of the Do unit with Delay control in Power Automate.

“When a Case Record’s Priority is updated to High until the case is resolved we want to perform certain action e.g. send a notification email or call an action etc. every 2 minutes or so.”

This is how the final flow looks like –

First is the trigger, when the case record is modified, i.e. priority code field with value as 1.

Next, initialize a Boolean type variable as false, this will be used within the Do until loop condition.

  • Next, add the Do until control with the condition – ConditionMet i.e. the variable is equal to true.
  • Followed by Delay action, here we have specified a 2-minute delay.
  • Next, we are retrieving the same record to check the condition, this is required to get the updated value within the loop.
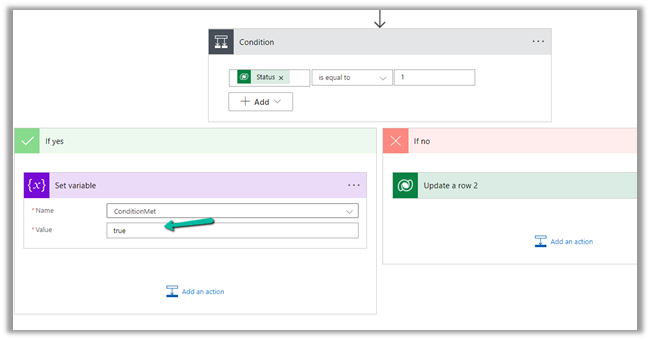
  • Condition is – is the case resolved? i.e. Status is equal to 1.
  • If Yes then we are setting the variable as true to come out of the do until loop.
  • If No then we perform any action, like send an email notification, reminder or call any action, etc.

The Current Iteration Index of Do unit holds the value of the current index starting from 0. Here we are updating the case title with the index just for testing.

To see it in action, let us Test the flow.

Updating the priority of the case to high triggers the flow.

After a delay of 6 minutes, we can see the Case Title updated with the current index i.e. 2 as it has iterated 3 times starting from 0.

Let us now resolve the case.

We can see our flow successfully completed after the 4th iteration after the case is resolved.

Also refer –

https://techwizard.cloud/2018/05/20/microsoft-flow-mystery-of-do-until-loop/

https://www.futurelearn.com/info/courses/cloudswyft-msft-dynamics-365-power-platform-auto/0/steps/208142

Hope it helps.

Advertisements