In the previous post, we created a simple custom API https://nishantrana.me/2021/01/13/use-custom-api-to-create-custom-messages-in-dynamics-365/
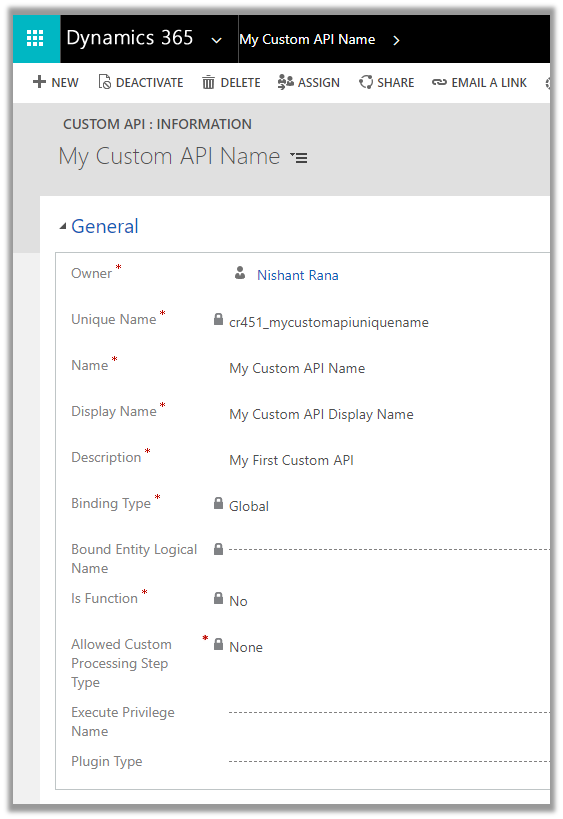
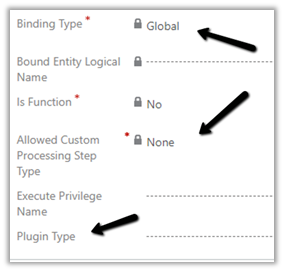
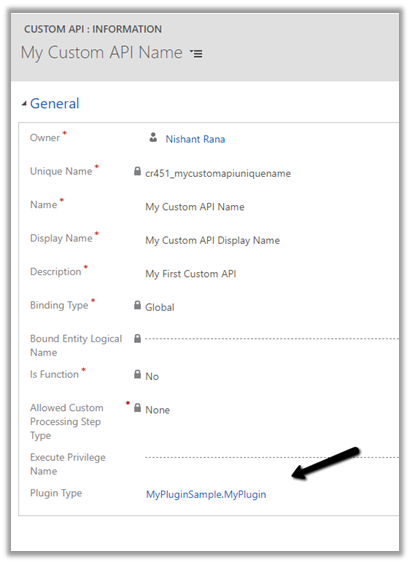
Let us look at its different properties starting with ExecutePrivilegeName
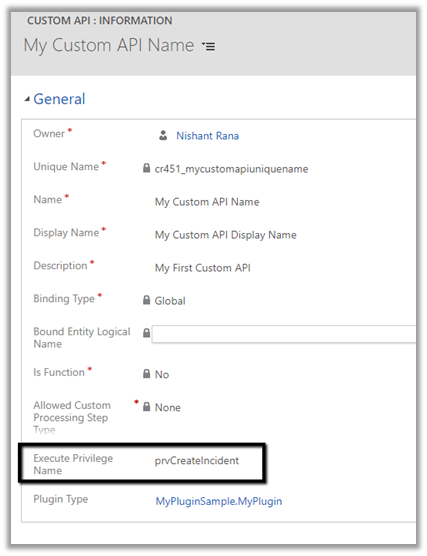
Execute Privilege Name attribute of custom API allows us to specify the name of the privilege that allows execution of the custom API.
Let us update the custom API and specify the privilege name.
For simplification, we have used prvCreateIncident here i.e. Create Case / Incident Privilege.
To get the Privilege name
https://%5Borgname%5D.api.crm.dynamics.com/api/data/v9.1/privileges?$select=name

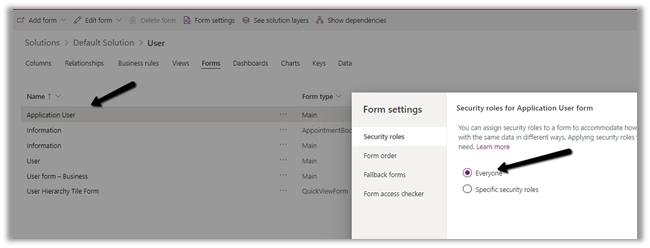
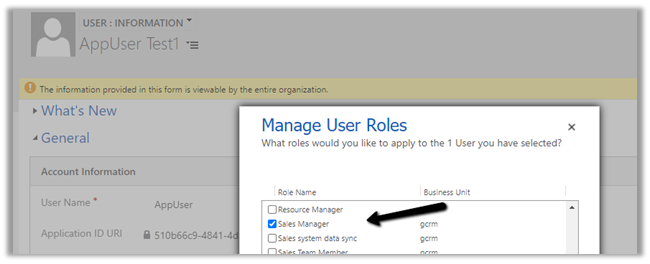
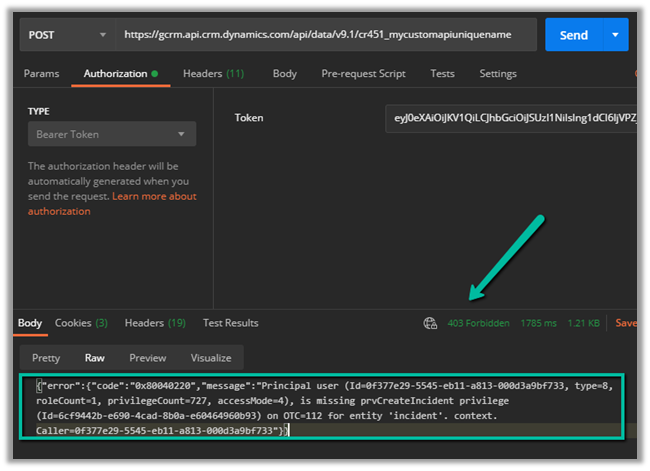
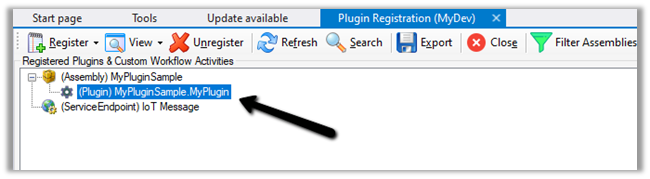
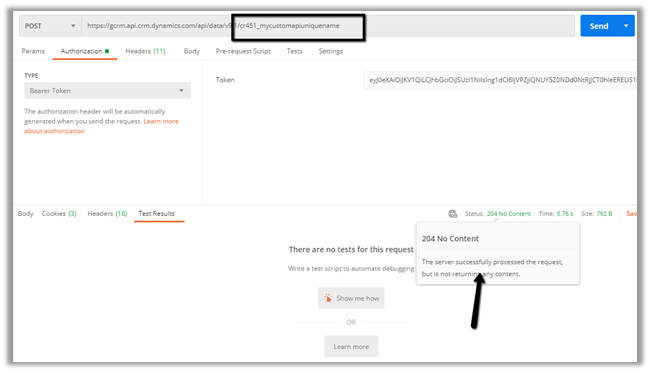
To test, we updated the security of the Application User to Sales Manager role which doesn’t have the create incident privilege.
Calling the custom API this time as expected gave us the below error
{“error”:{“code”:”0x80040220″,”message”:”Principal user (Id=0f377e29-5545-eb11-a813-000d3a9bf733, type=8, roleCount=1, privilegeCount=727, accessMode=4), is missing prvCreateIncident privilege (Id=6cf9442b-e690-4cad-8b0a-e60464960b93) on OTC=112 for entity ‘incident’. context.Caller=0f377e29-5545-eb11-a813-000d3a9bf733″}}
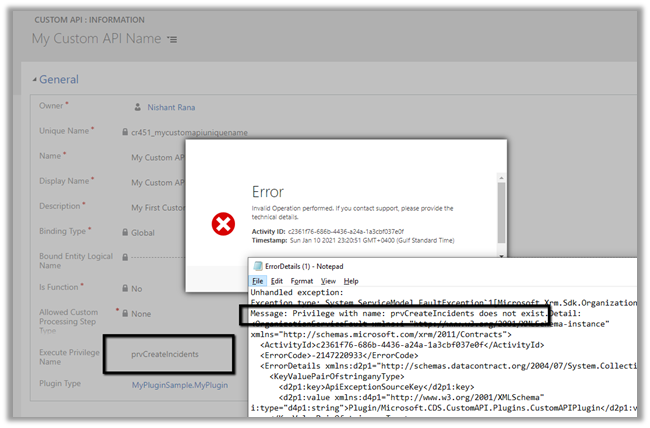
If we specify an incorrect privilege name we would get the below error and will not be able to save the record.
Hope it helps..
- Plugin Registration Tool Login with Multi-Factor Authentication (MFA) – Uncheck “Show Advanced”
 If we’re logging into the Plugin Registration Tool using an account protected with Multi-Factor Authentication (MFA), there’s one small setting that can cause login failures — Show Advanced. We need to make sure “Show Advanced” is unchecked before clicking Login. When this option is selected, the tool exposes … Continue reading “Plugin Registration Tool Login with Multi-Factor Authentication (MFA) – Uncheck “Show Advanced””
 - No Dependencies Shown… But still can’t delete the component? Check Your Cloud Flows (Dataverse / Dynamics 365)
 Recently, while performing cleanup in one of our environments, we were removing unused components to reduce clutter and technical debt. As part of this activity, we attempted to delete an old Business Process Flow (BPF) that was no longer required. However, when trying to delete the Business Process … Continue reading “No Dependencies Shown… But still can’t delete the component? Check Your Cloud Flows (Dataverse / Dynamics 365)”
 - Solution Failed to Import – Missing Lookup View Dependency in Dataverse / Dynamics 365
 Recently, while trying to import a solution, we got the below dependencies error. Solution ” Configuration” failed to import: The dependent component SavedQuery (Id=50658a7f-473b-ec11-8c64-000d3a8ead20) does not exist. Failure trying to associate it with SystemForm (Id=a00da85e-5fc4-f011-bbd3-000d3ad2506c) as a dependency. Missing dependency lookup type = PrimaryKeyLookup. The error indicated that … Continue reading “Solution Failed to Import – Missing Lookup View Dependency in Dataverse / Dynamics 365”
 - Renaming Sitemap Display Name in Dataverse / Dynamics 365
 While working with a model-driven app in Dataverse, we needed to change the display name of the sitemap. What made this interesting was that there is no option in the UI to rename the sitemap display name directly. After exploring the UI options and confirming that the sitemap … Continue reading “Renaming Sitemap Display Name in Dataverse / Dynamics 365”
 - Fixed: Audit History Page Not Loading (Dataverse / Dynamics 365)
 Recently, we ran into an issue where the Audit History page stopped loading on the form. Interestingly, the problem was limited only to the Account forms. Whenever we tried to open Audit History, we received the generic error below: An error has occurred. Try this action again. If … Continue reading “Fixed: Audit History Page Not Loading (Dataverse / Dynamics 365)”
 - Why We Switched Our Plugin from PreOperation to PreValidation – Dataverse / Dynamics 365
 We had a business requirement to block the closing of a Quote as Lost under certain conditions. Instead of leaving the quote in an Active state, we wanted the system to explicitly move it back to Draft and show a clear error message to the user explaining why … Continue reading “Why We Switched Our Plugin from PreOperation to PreValidation – Dataverse / Dynamics 365”
 - Using the Restore Message to Recover Deleted Records in Dataverse
 Accidental data deletion in Dataverse happens more often than we expect. A bulk delete job, an incorrect Power Automate flow, or incorrect manual delete can remove important records in seconds. Instead of restoring the environment, Dataverse provides a much better alternative: the Restore message, which allows us to … Continue reading “Using the Restore Message to Recover Deleted Records in Dataverse”
 - Advancing and Finishing a BPF Using RetrieveProcessInstancesRequest and RetrieveActivePathRequest (Dataverse / Dynamics 365)
 In earlier posts, we looked at how to move a Business Process Flow (BPF) stage and finish the process by directly updating the BPF entity instance. In this post, we’ll use RetrieveProcessInstancesRequest and RetrieveActivePathRequest to move a Business Process Flow to its final stage and finish it, using … Continue reading “Advancing and Finishing a BPF Using RetrieveProcessInstancesRequest and RetrieveActivePathRequest (Dataverse / Dynamics 365)”
 - Finishing (Deactivating) and Reopening a Business Process Flow Using C# Console App (Dataverse / Dynamics 365)
 In the previous post, we explored how to move a Business Process Flow (BPF) to the next stage using a console application, with the Phone to Case Process as a working example. Advancing the BPF stage, however, is only part of the lifecycle. Even after the flow reaches … Continue reading “Finishing (Deactivating) and Reopening a Business Process Flow Using C# Console App (Dataverse / Dynamics 365)”
 - Advancing a Business Process Flow Stage Using a C# Console App (Dataverse / Dynamics 365)
 In Dynamics 365, Business Process Flows are usually progressed by users through the UI. However, in scenarios like data migration, bulk remediation, or backend automation, we may need to move a BPF stage programmatically. Here we will cover one of the ways we can advance the Business Process … Continue reading “Advancing a Business Process Flow Stage Using a C# Console App (Dataverse / Dynamics 365)”


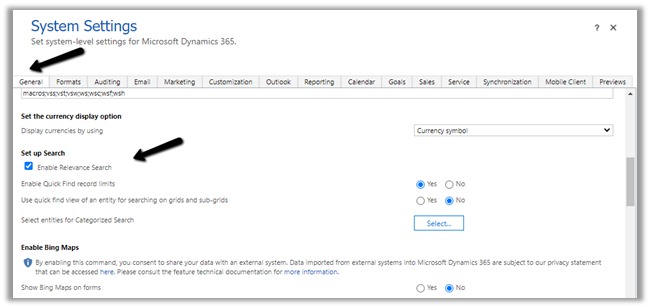
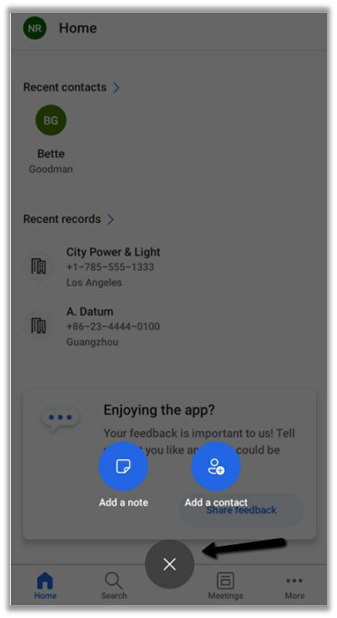
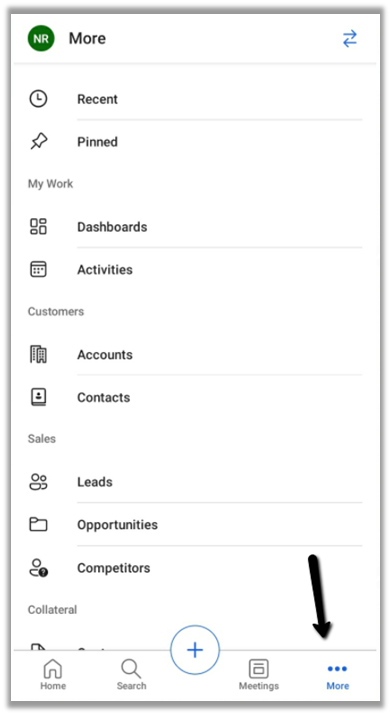
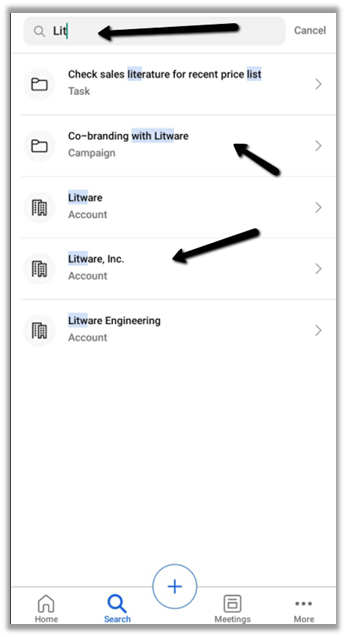
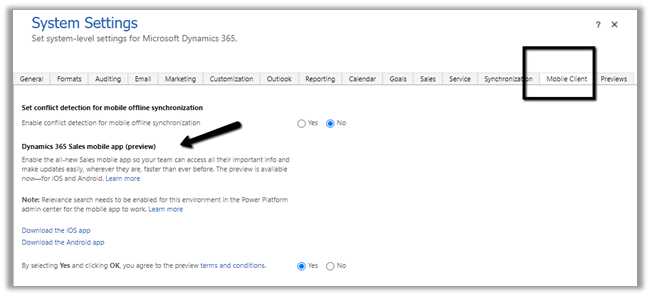 We also need to enable Relevance search on the environment for the mobile app’s search to work.