For quick reference – https://nishantrana.me/2021/01/06/sample-code-dynamics-365-web-api-organization-service/
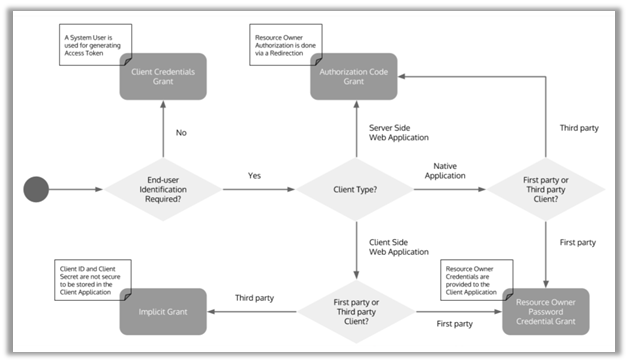
In the last post we learned about connecting to Dynamics 365 Web API using Resource Owner Password Credential (ROPC), here we’d be covering the Client Credentials grant.
Check other posts on OAuth 2.0 and Dynamics 365 Web API
OAuth 2.0 with Dynamics 365 CE Web API
Client Credentials grant is designed for the client applications who are the resource owner and when basically there are no users involved, a batch (cron) job or a service using Web API, running in the background, on the server is one such example.
Sample console app to connect to CDS using AuthType – OAuth https://nishantrana.me/2020/11/09/sample-code-to-connect-to-cds-dynamics-365-ce-using-oauth/
Here we will not be using the authorization endpoint, and the client application will be sending its own credential, instead of impersonating a user, directly to the token endpoint. The benefit compared to basic authentication or API keys is that credentials are not being sent with every request, it is only sent while requesting the access tokens along with all the other benefits of using access token – stateless, fine-grained access control, access token lifetime etc.
Let us see an example of using the Client Credentials grant in our console application. Along with the Client Id that we got when we registered our client application in the Azure Active Directory, we would need the Client Secret.
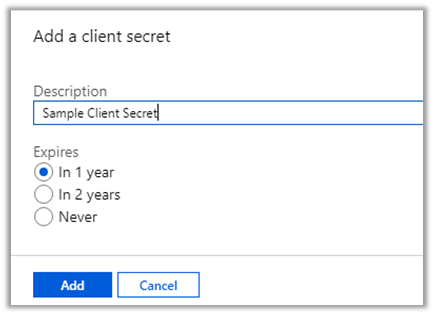
Follow the below steps to generate the Client Secret
Login to Azure Admin Portal
https://portal.azure.com
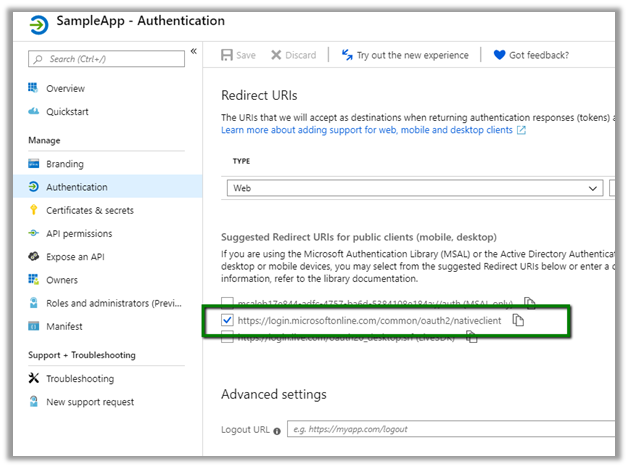
Select the application registered and click on Certificates & secrets option
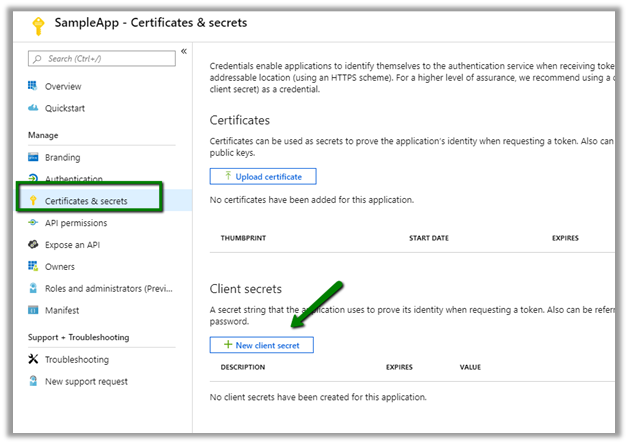
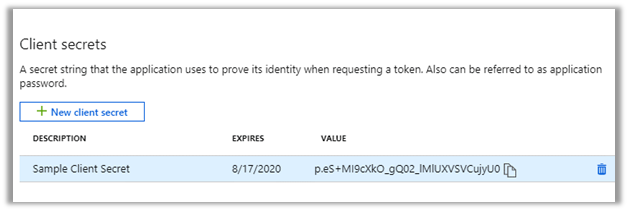
Click on New client secret button to generate the client secret. Copy the generated client secret. Select the expiry as per the need.
Copy the secret generated and save it, as it won’t be available later when we are navigating here.
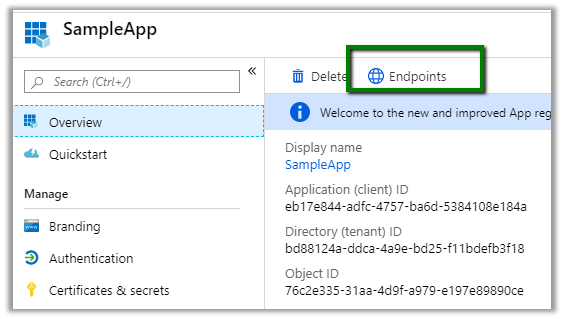
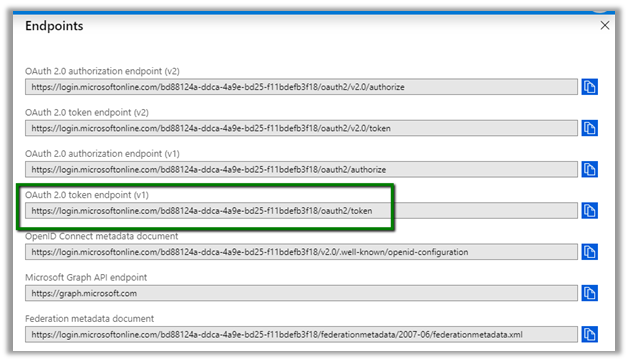
Also, we can get the Authentication Token Endpoint, for that navigate to Overview à Endpoints
And copy the OAuth 2.0 token endpoint.
Next step is to create the Application User within Dynamics 365 CE corresponding to the client application.
Login to Dynamics 365 CE, Settings à Security à Users àset View as Application Users and click on New button
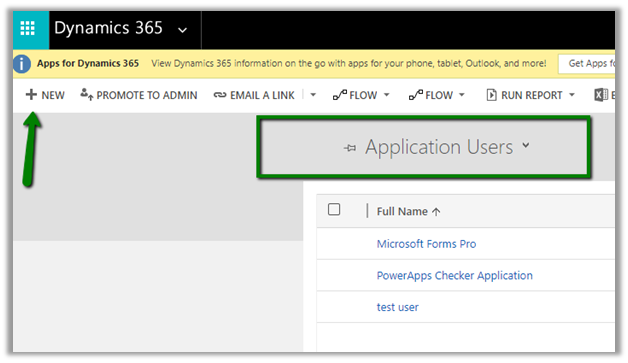
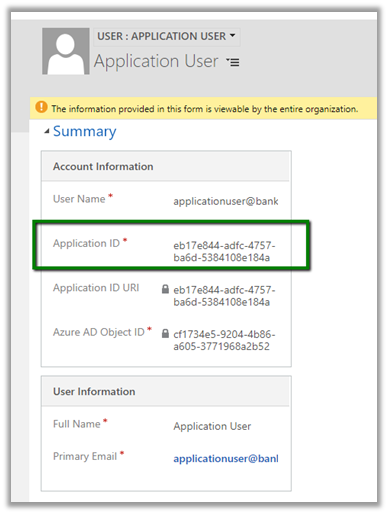
Set Application Id as the Client Id of the Application registered and specify other mandatory values and save the record.
Assign appropriate security role to the new application user added.
Other Sample Code –https://nishantrana.me/2021/01/06/sample-code-dynamics-365-web-api-organization-service/
Sample C# Code à
static void Main(string[] args)
{
// Dynamics CRM Online Instance URL
string resource = "https://bankfabdemo.crm.dynamics.com";
// client id and client secret of the application
ClientCredential clientCrendential = new ClientCredential("eb17e844-adfc-4757-ba6d-5384108e184a",
"p.eS+MI9cXkO_gQ02_lMlUXVSVCujyU0");
// Authenticate the registered application with Azure Active Directory.
AuthenticationContext authContext =
new AuthenticationContext("https://login.microsoftonline.com/bd88124a-ddca-4a9e-bd25-f11bdefb3f18/oauth2/v2.0/token");
AuthenticationResult authResult = authContext.AcquireToken(resource, clientCrendential);
var accessToken = authResult.AccessToken;
// use HttpClient to call the Web API
HttpClient httpClient = new HttpClient();
httpClient.DefaultRequestHeaders.Add("OData-MaxVersion", "4.0");
httpClient.DefaultRequestHeaders.Add("OData-Version", "4.0");
httpClient.DefaultRequestHeaders.Accept.Add(new MediaTypeWithQualityHeaderValue("application/json"));
httpClient.DefaultRequestHeaders.Authorization = new AuthenticationHeaderValue("Bearer", authResult.AccessToken);
httpClient.BaseAddress = new Uri("https://bankfabdemo.crm.dynamics.com/api/data/v9.0/");
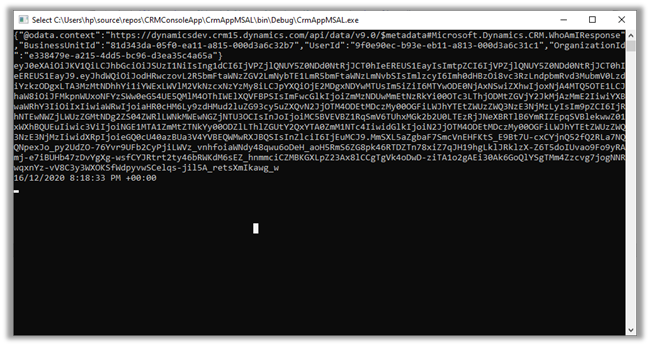
var response = httpClient.GetAsync("WhoAmI").Result;
if (response.IsSuccessStatusCode)
{
var userDetails = response.Content.ReadAsStringAsync().Result;
}
}
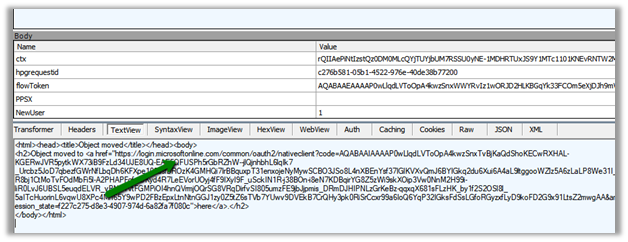
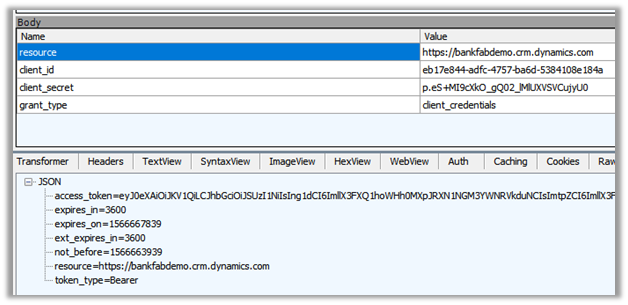
Within Fiddler à

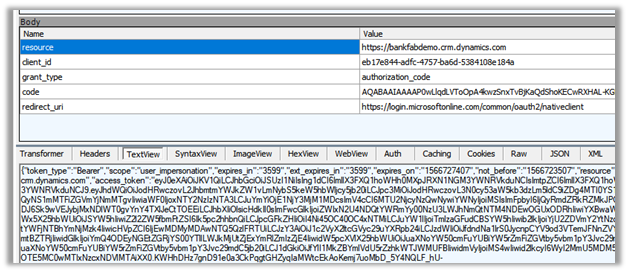
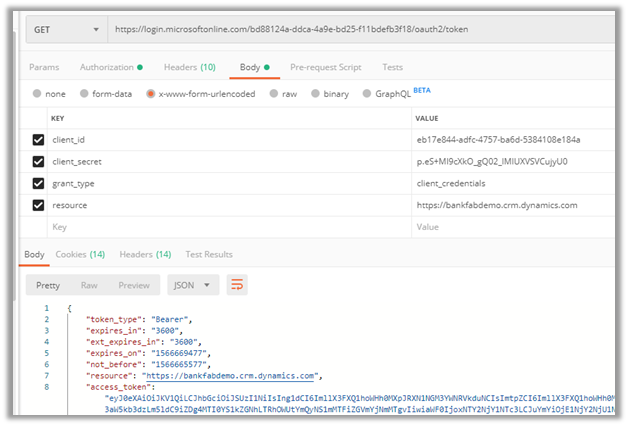
Within Postman à
Sample Code – Dynamics 365 Web API / Organization Service
Hope it helps..
https://docs.microsoft.com/en-us/powerapps/developer/data-platform/xrm-tooling/use-connection-strings-xrm-tooling-connect#connection-string-examples
Below is the example using CrmServiceClient – replace client id, client secret and the URL –
 string ConnectionString = "AuthType = ClientSecret; " +
                   "ClientId=ad7a1cc4-838b-4270-9c11-29eb1686e203; " +
                   "ClientSecret=m7.H2Di~vizo.jZ0odh-C-85qg70QPfnsI; " +
                   "Url = https://[org].crm.dynamics.com/;";


            CrmServiceClient svc = new CrmServiceClient(ConnectionString);

            if (svc.IsReady)
            {
               // perform the logic

            }