A simple implementation using Azure Functions, Microsoft Flow, Microsoft PowerApps, Dynamics CRM and SendGrid


Let us  implement a simple scenario where we create a lead record in CRM which then talks with Flow (and Power App).

The Flow calls an Azure Function (Custom API) that sends mail to the lead’s email address using SendGrid

1) Let us create an Azure Function that uses SendGrid to send email to the lead’s email address.

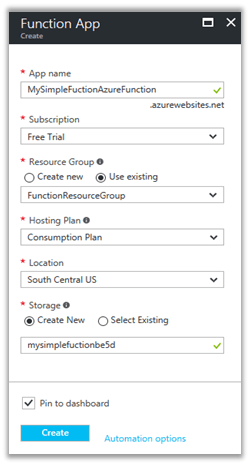
Login to Azure Portal and create a new Function App.

https://portal.azure.com

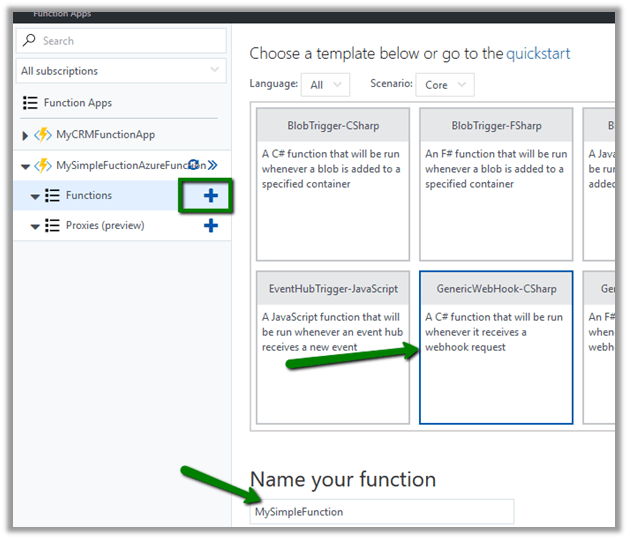
Let us create a Function using Generic Web Hook CSharp template

To keep it simple let us only enable GET method. Go to Integrate tab and in Allowed HTTP Methods Select Selected Methods and check GET.

Also set mode as Standard and Authorization Level as anonymous, which means we do not need a API Key to be passed as query parameter to talk with the function.

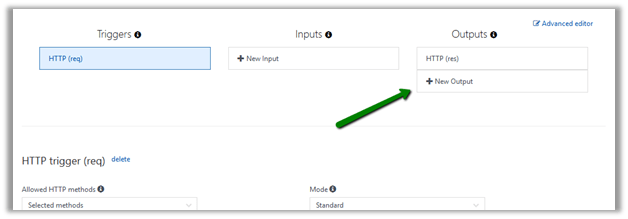
Now let us add a new Output

Select SendGrid as the template

Click on Save.

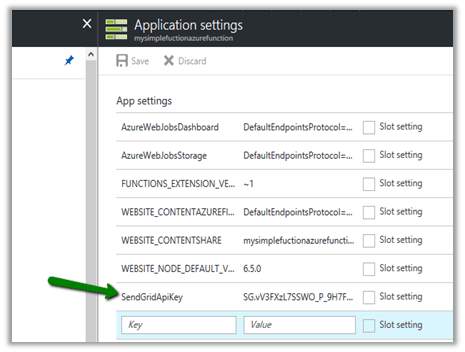
Here we would need to define SendGridApiKey.

Go to SendGrid portal and create a free account over there

https://sendgrid.com

Create and API Key and copy it’s value.

Now go to Application Settings of the Function App and set this key value with SendGridApiKey as the key name.

Now let us go back to our code and update it to work with lead object and Mail class which would be used for sending email using SendGrid API.

Here first we are referring the SendGrid assembly, then getting fullname and email from query string and then creating Mail object.

Save and check the log if the compilation succeeded or not.

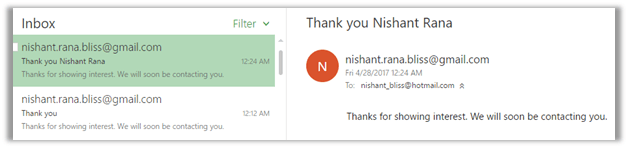
Testing our Function.

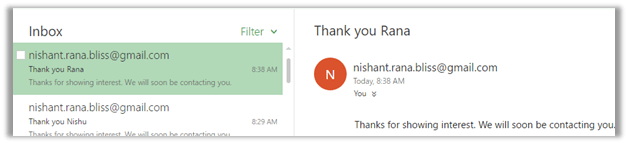
We can see the mail in the mail box.

This completes our first part.

2) Now let us create the Swagger definition for it which we will use in Power Apps and Microsoft Flows for using this Azure Function as Custom API.

Select our function and click on API definition.

Click on Function.

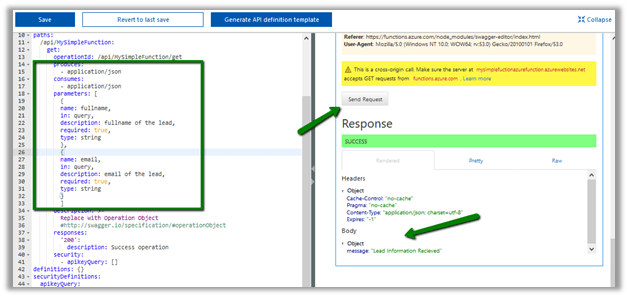
Update the generated API Definition Template with query parameter details and also test it.

As it is running successfully, click on Export to Power Apps + Flow

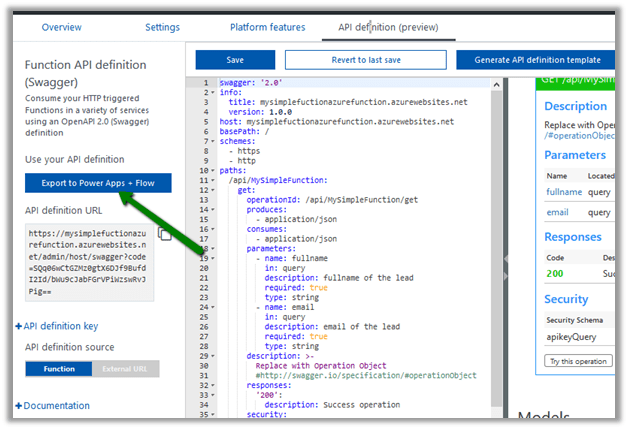
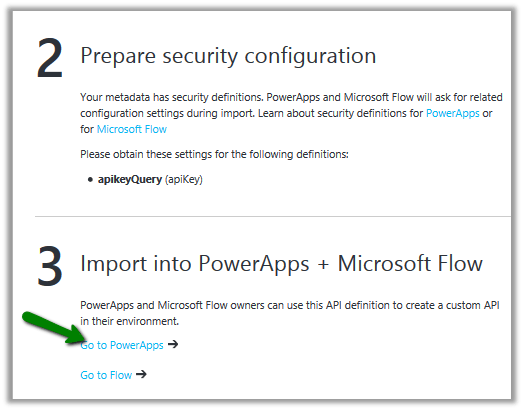
This opens up the new section that details the steps we need to follow for using our Azure Function with Power Apps and Microsoft Flow.

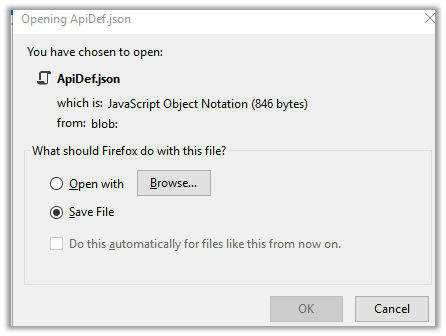
There click on Download button.

Click on Go to PowerApps

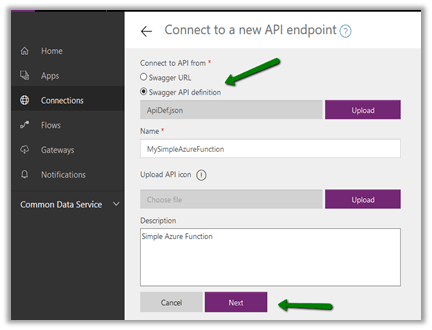
It opens up the PowerApps portal (asks for log in) and opens the New Connection page.

https://web.powerapps.com

Upload the JSON Definition file for our Azure Function, provide name and description and click on Next.

Click on Create.

Let us quickly test our new connection.

Click on New App in our PowerApps web portal.

Select PowerApps Studio for Web. Let us create a Blank App Phone.

Add a new Data Source and select our Azure Function there.

To get the API Key go to our function and expand API Definition Key.

It works properly.

3) Now let us move to our last step, wherein we use it inside Microsoft Flow and integrate it with Dynamics CRM.

The good thing is to configure the same for Microsoft Flow, we do not have to do any extra step as both Microsoft Flow and PowerApps share the same connection infra.

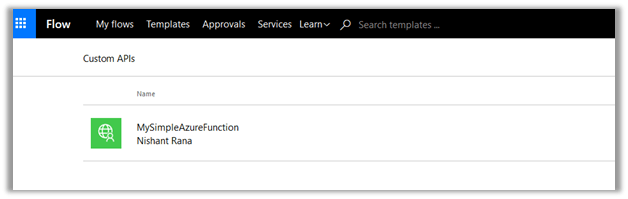
Go to Microsoft Flow portal

https://flow.microsoft.com/

We can find our Custom API already added there.

Let us create a new flow. Start with Dynamics 365.

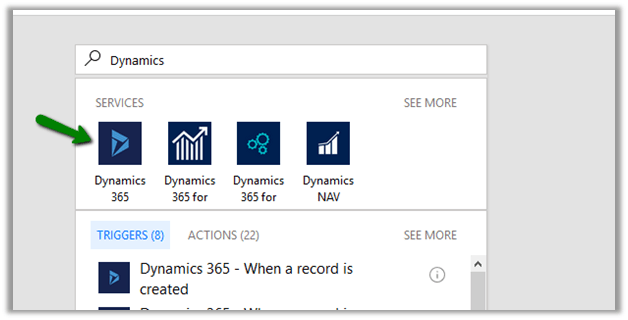
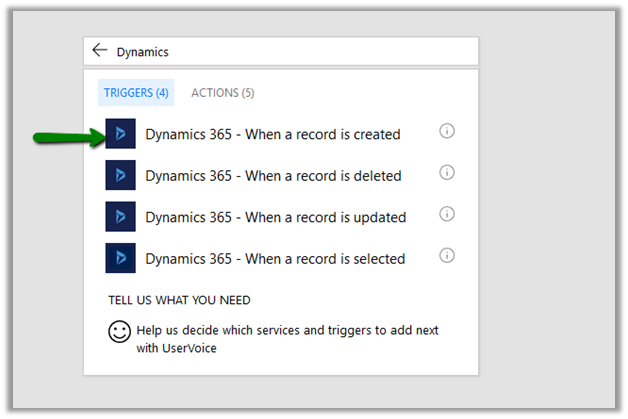
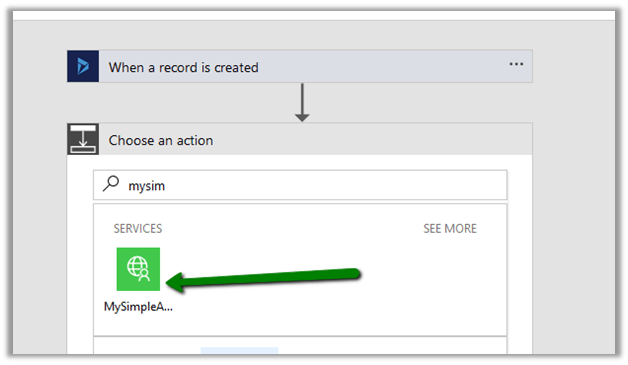
When a record is created. Select Organization Name and Leads as the entity and click on Add an Action.

Search for our Custom API.

Select LastName and Email as Dynamic Content from the lead record created.

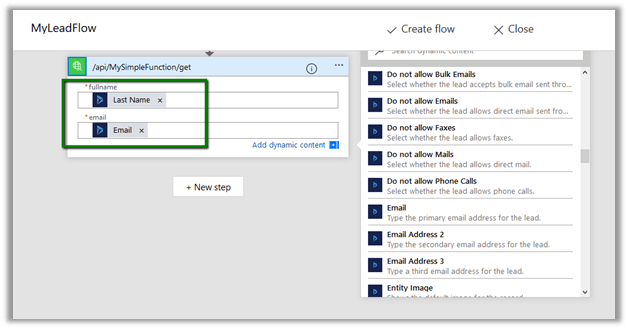
Click on Create Flow to create the flow.

Unfortunately, we get the below error

Let us go back to our Swagger Definition and update it.

We have updated it as following

Let us quickly test it, import it in Power Apps as new connection and come back to our Flow.

Edit the connection there and specify the API Key as we had done earlier inside Power Apps and update it.

Open Flow and quickly add the required steps and click on Create Flow.

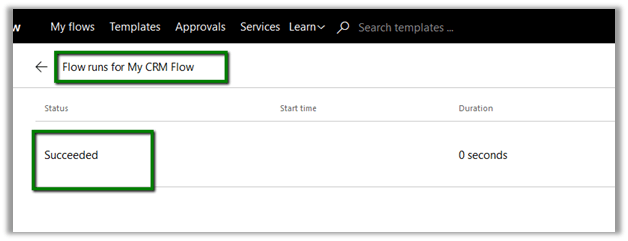
We have successfully created our flow. Now let us test it.

Let us create a new lead record

Our flow runs and sends the mail

That’s it we are done with our simple implementation. The main purpose of this post was to show the integration possibilities which could help us design and implement real world complex scenarios.

Hope it helps..

How to – Use WebClient to call external service from CRM Online Sandboxed Plugin (HTTP POST and JSON)


Sharing a sample code that can be used to send JSON data using POST to an external service inside CRM Online Plugin. As plugin runs in sandbox mode we cannot reference Newtonsoft’s JSON.NET library http://www.newtonsoft.com/json. The other option could be to use ILMerge, which isn’t that elegant.

Here, basically we are passing some information related to lead to an external service on Post Create of it.

</p>
<p>using Microsoft.Xrm.Sdk;<br />
using System;<br />
using System.IO;<br />
using System.Net;<br />
using System.Runtime.Serialization.Json;<br />
using System.Text;</p>
<p>namespace MyTestPlugin<br />
{</p>
<p> public class Lead<br />
 {<br />
 public string Topic { get; set; }<br />
 public string FullName { get; set; }<br />
 public string Email { get; set; }<br />
 }</p>
<p> public class MyPluginClass : IPlugin<br />
 {<br />
 public void Execute(IServiceProvider serviceProvider)<br />
 {<br />
 try<br />
 {<br />
 // Obtain the execution context from the service provider.<br />
 IPluginExecutionContext context = (IPluginExecutionContext)serviceProvider.GetService(typeof(IPluginExecutionContext));</p>
<p> // The InputParameters collection contains all the data passed in the message request.<br />
 if (context.InputParameters.Contains("Target") &amp;&amp; context.InputParameters["Target"] is Entity)<br />
 {<br />
 // Obtain the target entity from the input parameters.<br />
 Entity entity = (Entity)context.InputParameters["Target"];</p>
<p> using (WebClient client = new WebClient())<br />
 {<br />
 var myLead = new Lead();<br />
 myLead.Topic = entity.Attributes["subject"].ToString();<br />
 myLead.FullName = entity.Attributes["fullname"].ToString();<br />
 myLead.Email = entity.Attributes["emailaddress1"].ToString();</p>
<p> DataContractJsonSerializer serializer = new DataContractJsonSerializer(typeof(Lead));<br />
 MemoryStream memoryStream = new MemoryStream();<br />
 serializer.WriteObject(memoryStream, myLead);<br />
 var jsonObject = Encoding.Default.GetString(memoryStream.ToArray());</p>
<p> var webClient = new WebClient();<br />
 webClient.Headers[HttpRequestHeader.ContentType] = "application/json";<br />
 var code = "key";<br />
 var serviceUrl = "https://xyz.azurewebsites.net/api/mylead?code=" + code;</p>
<p> // upload the data using Post mehtod<br />
 string response = webClient.UploadString(serviceUrl, jsonObject);<br />
 }<br />
 }<br />
 }<br />
 catch (Exception ex)<br />
 {<br />
 throw new InvalidPluginExecutionException(ex.Message);<br />
 }<br />
 }<br />
 }<br />
}<br />

Hope it helps..


Advertisements

Configuring Live Assist (Preview) for Dynamics 365.


Let us see how we can configure Live Assist step by step.

First, go to Applications tab of the Dynamics 365 Administration Center.

Select Live Assist for Dynamics 365 and click on Manage.

Click on Accept to give permission to the app.

Select the Dynamics 365 Instance and provide your email id, accept the terms and conditions and click on Submit.

This configures the Live Assist on the specified Dynamics 365 Instance and also sends the email to the email id specified.

Once the configuration is done, we can see the new Live Assist section added in our Settings area.

There we can click on Admin URL of Live Assist for further configuration.

Clicking on it opens the Admin Center.

Click on Confirm and Authorize.

The Dashboard of the admin center.

The Get Started page.

Code Snippet that we can use to enable Live Assist in web site.

Live Assist adds a new panel on the right inside CRM.

To test it we can make use of Demo Site provided along with Live Assist.

The agent within CRM can click on Conversation Icon and “Grab a chat” to start conversation.

Now suppose we want to configure our CRM Portal to use it. For this we need to copy the code snippet provided earlier. Go to the Header web template of our Web Site and paste the JavaScript code to our Header’s source code.

This enables Live Assist in the portal.

Communication between the CRM user and the Portal user.

The helpful links and video

https://neilparkhurst.com/2017/04/09/cafex-live-assist-my-initial-install-with-usd/

https://blogs.technet.microsoft.com/lystavlen/2017/03/16/live-assist-for-dynamics-365-first-look/

Hope it helps..

Setting Regarding of a record in Automatic Record Creation and Update Rules in Dynamics 365


Hi,

While implementing a scenario i.e. automatic case creation on phone call create using Automatic Record Creation and Updating Rules, we found that whenever we were setting the Regarding Object in the Phone Call activity, the case record was not getting created.

Create Case Rule Item –

Creating a Phone Call record using Case as Regarding object.

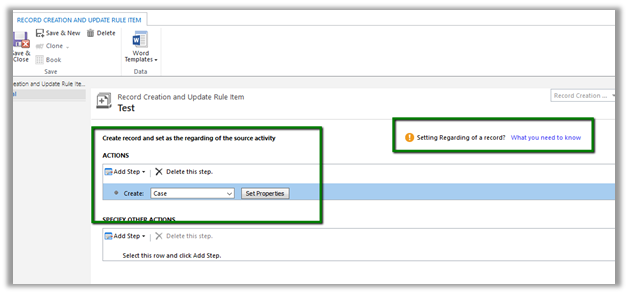
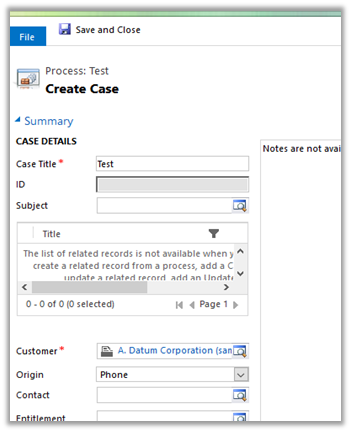
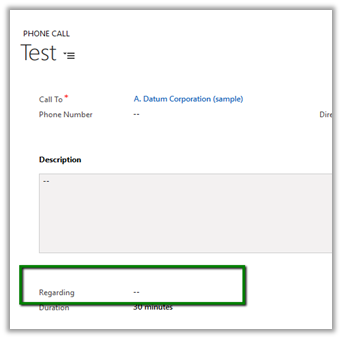
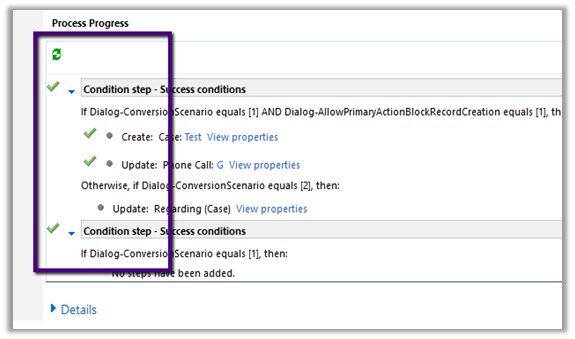
Workflow ran but the case record was not created.

Then we created phone call activity record without setting the regarding object. This time workflow ran and created the case record.

Basically, the workflow creates the case record and updates the Regarding Object in the Phone call record with this newly created case record.

However, if we check the Official documentation

https://www.microsoft.com/en-us/dynamics/crm-customer-center/set-up-rules-to-automatically-create-or-update-records-in-dynamics-365-customer-service.aspx#bkmk_RuleAndQueues

we have this mentioned

However, in our case we created a phone call record with case as regarding object and had case as the entity selected in the Create Record step, in this case also the Action were not executed.

Hope it helps..

List of all blog posts on CRM and Azure Integration


Advertisements

Configure Product Recommendations using Recommendations API in Dynamics 365


For configuring Product Recommendations first we need to enable the preview –

Go to Settings – Administration – System Settings – Previews

Select Yes and Click on OK.

As a next step, we need to create Cognitive Services for Recommendation API and connect it to CRM.

Go to Portal

https://portal.azure.com

Search and select Cognitive Services Accounts

Click on Add

Select Recommendation API and provide other details and click on Create.

From Overview, note down the Endpoint which will be used to configure the connection in CRM.

From Keys, copy value of the Key which will be used for configuring connection to CRM.

In CRM, go to Settings – Administration and click on Azure Machine Learning Recommendation Service Configuration.

Specify the value for the URL and Key we had noted down earlier, save the record and click on Test Connection to test the connection.

On Successful connection, we’d see Success message for Last Connection Status. Click on Activate to enable the connection.

Now we need to define\build the model for recommendations. For this go to Settings – Product Catalog and click on Product Recommendations.

We’d see a recommendation model with default values

The model will have Basked Data Entities already defined. We can edit\add new\ delete these existing configuration records for Basked Data Entities. Basked Data Entities recommendations are based on which products appear together.

For e.g. in below Opportunity record we can see 27 inch and 12 inch monitor opportunity products appearing together. It will look for all such line items records.

Similarly we have recommendation entities records configured which we can update.

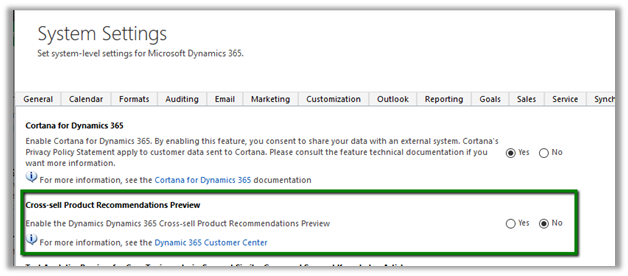
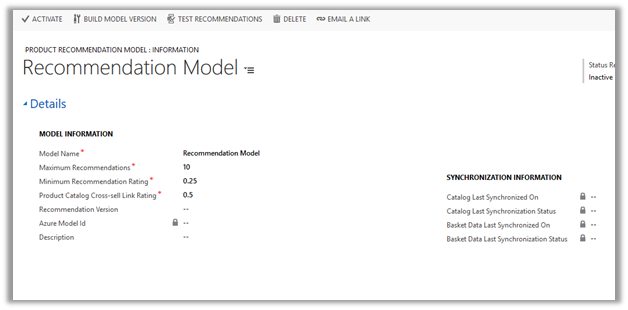
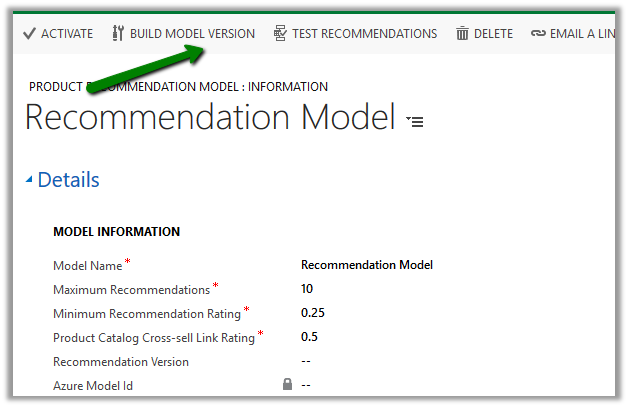
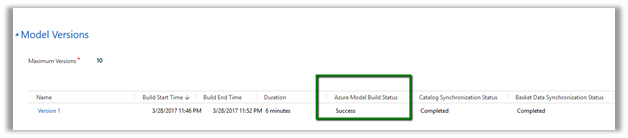
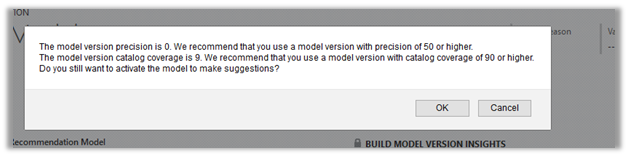
Once done with the configuration, we need to click on Build Model Version to build the model.

It will create a corresponding model version record.

We can check its progress by refreshing it.

Here the model that we had defined has successfully build and it took around 6 minutes.

We can click on the Model Version to open the record to get the further details.

Next step would be to check the recommendations. For this click on Test Recommendations.

Pop up opens wherein we can select the Products and model version and click on Show Result to see what are the product recommendations.

Once satisfied with the test result, click on Activate to enable the recommendations.

We might get the below message in case we do not have good enough data in our system.

To see it in action, open an existing opportunity record , go to product sub grid and select a product and select Suggest Products.

A dialog box opens up that shows the Cross-Sell products and other details.

Get all the details here

https://technet.microsoft.com/library/56b35229-72f8-46ca-bebf-eae023f633c2.aspx

Hope it helps..