Recently we were working on Facebook Leads integration with Dynamics 365. Webhook for Leads can be configured to send real-time notifications of the Leads ads changes.
The first step of setting up Webhook requires creating an HTTPS endpoint that can process 2 types of HTTP Requests – Verification and Event notifications.
Here we will see how to configure the Power Automate flow for verification.
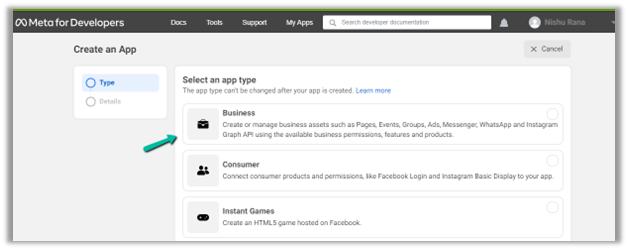
Login to Meta for Developers – Facebook and create an app.
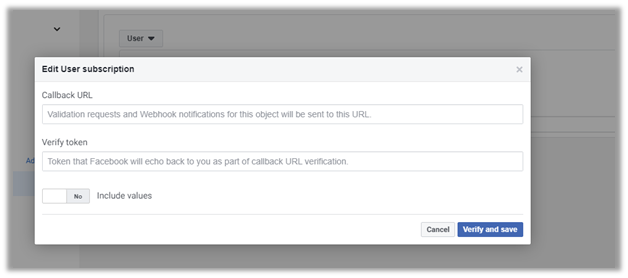
It asks us to specify the Callback URL and Verify token.
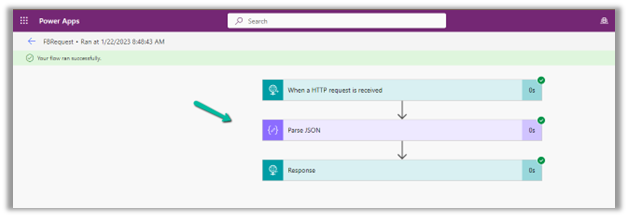
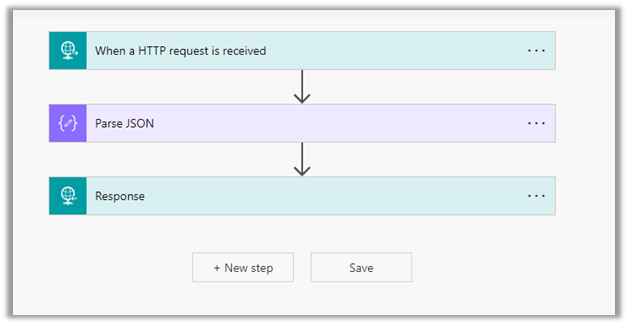
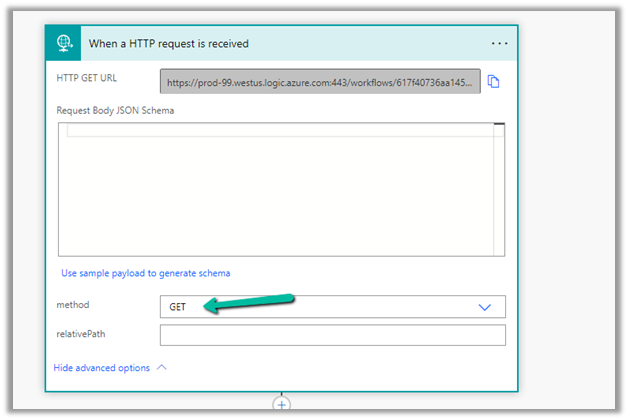
Back in Power Automate create a Flow with Request type Trigger, followed by Parse JSON and Response actions.
For HTTP Request, select GET as the method, as FB will send a GET request to the endpoint URL, with the verification requests included in the endpoint of the URL.
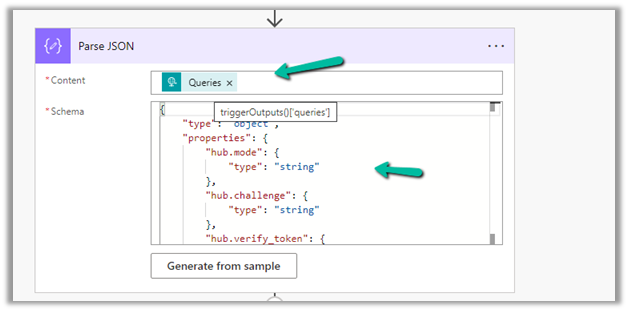
Next, Parse the JSON and specify the Content and Schema
Content –
triggerOutputs()['queries']
Schema –
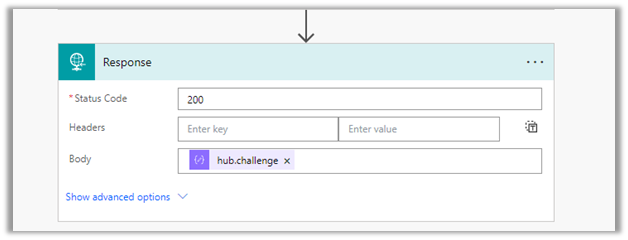
Lastly in Response, set Status Code as 200 and Body as hub.challenge.
Here FB expects the Endpoint to verify the hub.verify_token (which we haven’t set up yet) and respond with hub.challenge value after verification.
Save the Flow, and copy the URL generated for the HTTP Request trigger.
Back in Meta for Developers, in edit user subscription paste the Callback URL and for now in place of token specify any value and click on Verify and Save.
We should now have a Webhook endpoint (Flow) successfully configured
We can also see our Flow ran successfully.
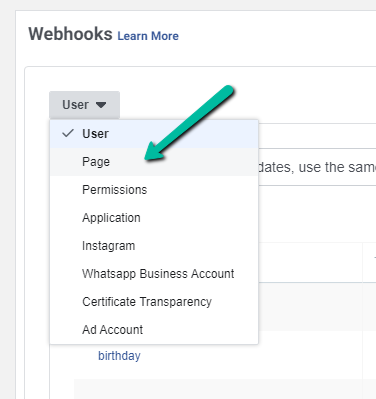
Here in the example we configured the webhook validation for User events, for Facebook Lead we need to configure it for Page, the other options available are Permissions, Application, Instagram etc.
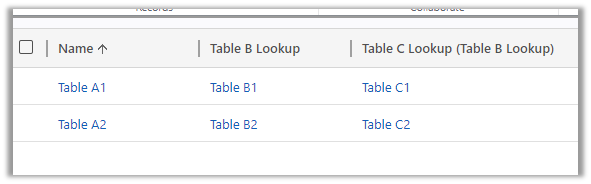
Suppose we have 3 tables, Table A, Table B, and Table C related to each other as
Table A (n-1) Table B (n-1) Table C i.e.
Table A has a lookup of Table B and Table B has a lookup of Table C.
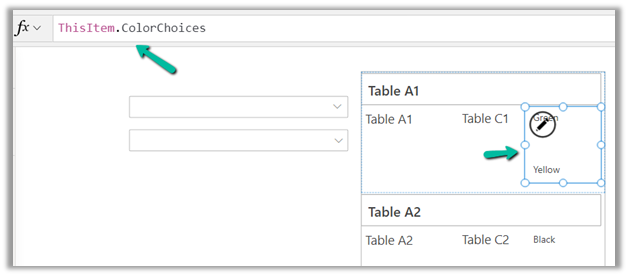
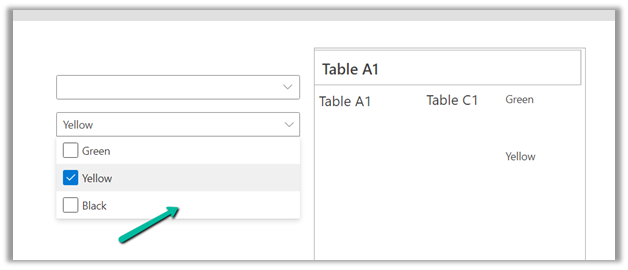
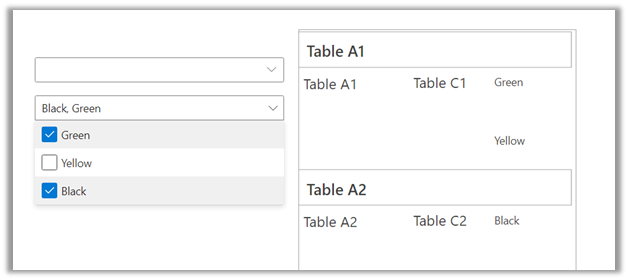
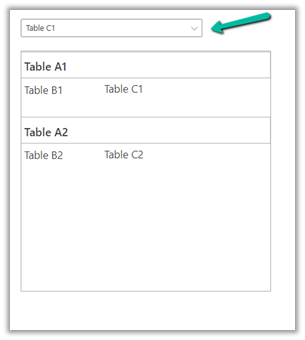
Below is our sample canvas app that has a gallery and a combo box.
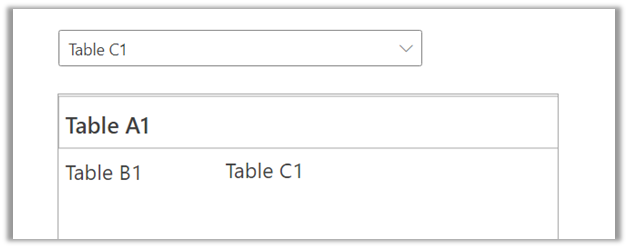
What we would want is based on the Table C record’s name selected in the combo box, we want to filter the collection to only show those records that are related to it.
One of the ways we could implement this is by using the AddColumns to add Table C data to Table A and apply the Filter to it.
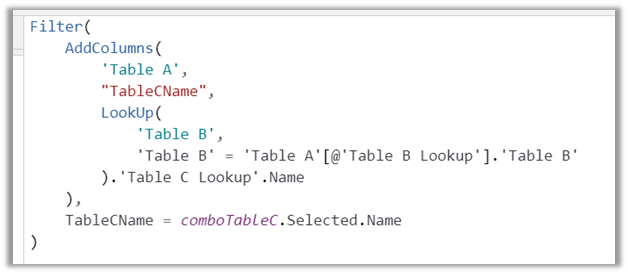
Below is the formula to achieve the same.
In Table A, add a column name “TableCName”.
To get the Table C name, perform a Lookup on Table B, where Table B GUID is equal to Table A’s Table B lookup field, and then fetch the Table C Lookup’s name from Table B.
And lastly, perform a Filter on this new column TableCName, based on the selected value in the combo box.












 We should now have a Webhook endpoint (Flow) successfully configured