Getting Started – Installation and Setup Kupp Code Analytics


In the previous post, we covered key features and capabilities of Kupp Code Analytics – the powerful Visual Studio Extension for Power Platform and Dynamics 365 Developers.

You can refer to it here

In this blog post, we’d cover the installation and setup of the Kupp Code Analytics extension.

To get the extension, inside Visual Studio Marketplace, we can search for it and download the appropriate extension.

Below we can see that there are 2 versions of the extension available, one for Visual Studio 2022 and the other for Visual Studio 2019.

Visual Studio 2022 – https://marketplace.visualstudio.com/items?itemName=KuppSoftware.kca2022

Visual Studio 2019https://marketplace.visualstudio.com/items?itemName=KuppSoftware.KuppCodeAnalytics2019

We can also install it from inside Visual Studio, navigate to Extension, search for Kupp Code Analytics, and download the extension.

Click on Install / Modify (if already existing) to start/modify the installation.
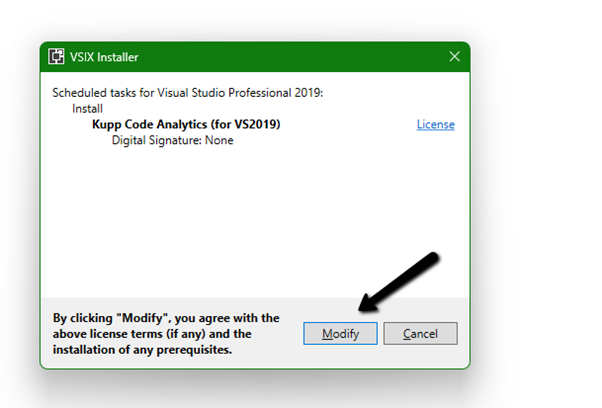
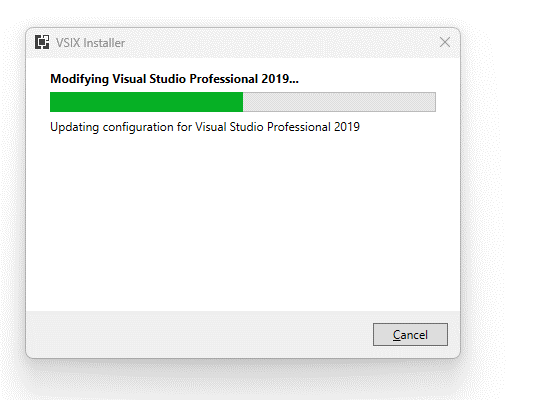
Below we have successfully installed the extension for Visual Studio 2019.

Next, we need to specify and activate the License

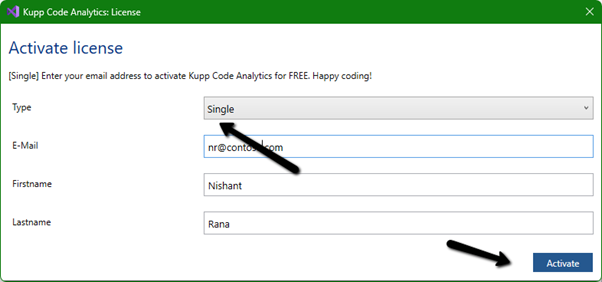
We have 2 types of licenses available for the extension.

Community License (free)– Select type Single, enter the contact details and click on Activate to apply for the community license. Clicking on Activate activates the license instantly.
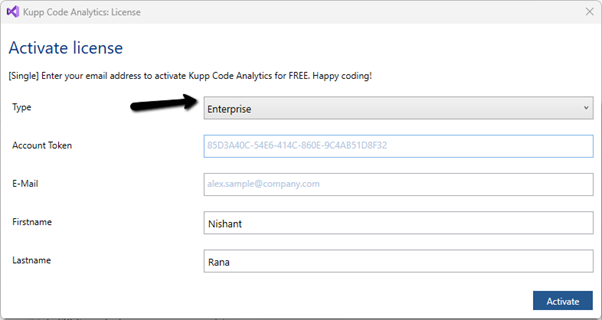
Enterprise License – This is paid license for the enterprise, that comes with additional features and capabilities not available in the Community license.

We can contact the sales team of Kupp for it – https://kuppsoft.com/contact/
Once added, we can see and manage the license information in Tools >> Options >> Kupp Code Analytics >> License

With Extension Installed, and the license activated, the next step is to configure the tool to connect to our Power Platform / Dynamics 365 Environment.

Navigate to Extensions >> Kupp Code Analytics >> Connection >> Configure

Select the appropriate connection or deployment type
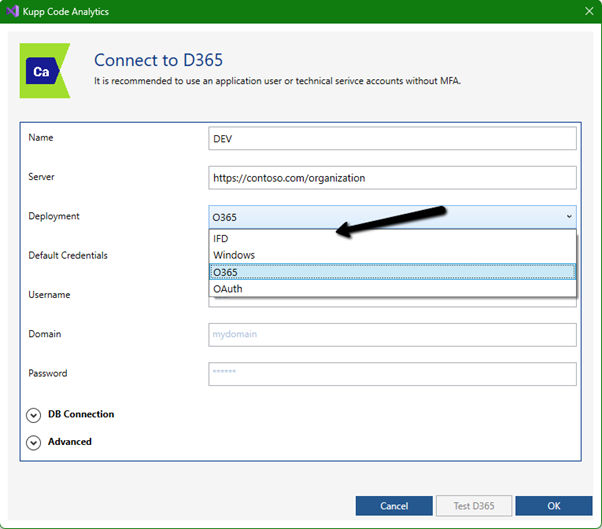
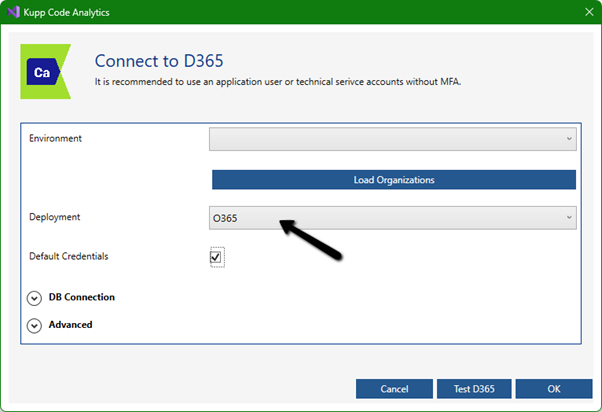
Here to connect to Dynamics 365 Online, we keep the Deployment type as O365 and click on Load Organization
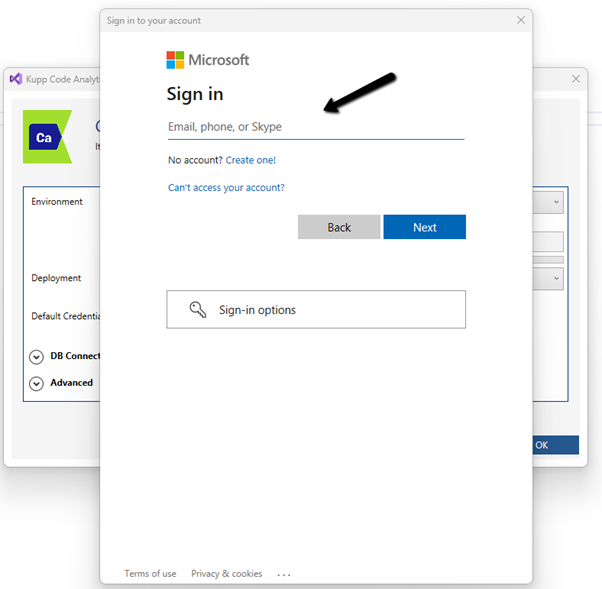
This opens the sign-in dialog where we can provide the appropriate account details.
After successful sign-in, we see all the environments populated to which the user has access. Select the environment, we want to connect to.
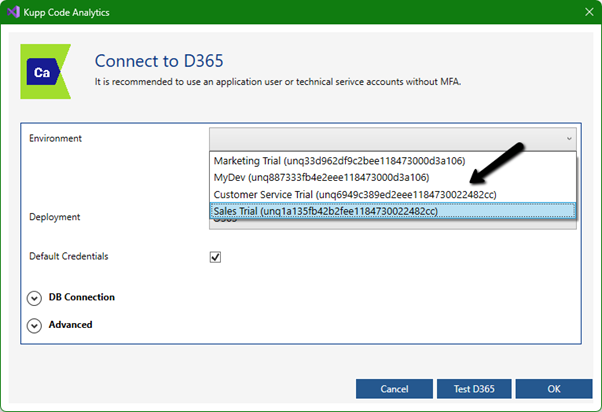
After selecting the environment, we can click on the Test D365 button and test the connection.

On a successful connection, we will get the success message as shown below.
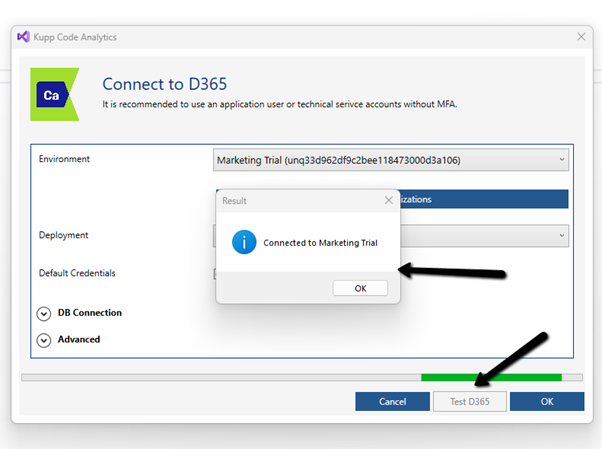
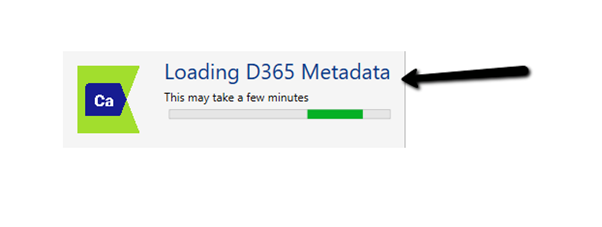
Clicking on OK will close the connection dialog box, and the tool will start the process of downloading the metadata for the environment connected. The download should be complete in a matter of a few seconds.
This completes the installation and configuration part of the extension. In the next blog post, we’d cover the key features of the extension in detail.

Also don’t forget to check out the other intuitive products developed by Kupp Software GmbH –https://kuppsoft.com/our-products/

Hope it helps..

Advertisements

Fixed – Power Automate flow not getting triggered


We had one flow on the creation of an account record, our flow was running fine, and then we made a few changes to it and saved it, after which it stopped getting triggered.

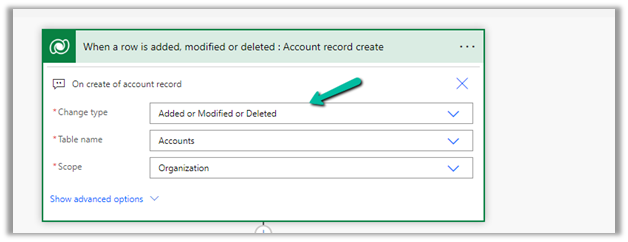
We could not figure out why it was not getting triggered so eventually we tried changing the Trigger Type to Added or Modified or Deleted, just to see if that will trigger it.

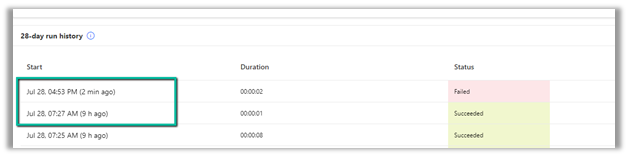
It ran this time on create of account record.

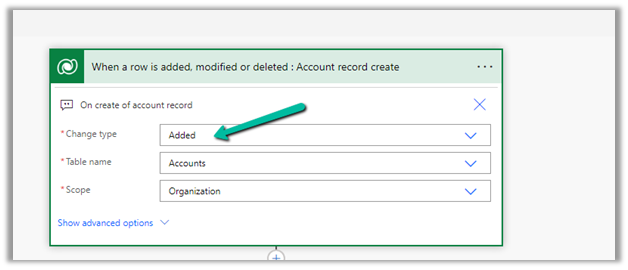
After which we changed it back to Added, the original definition.

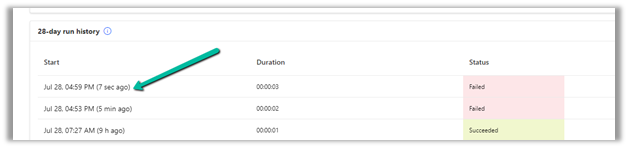
And from that point onwards it was getting triggered as expected.

Also make sure if the Admin mode is turned off.

https://learn.microsoft.com/en-us/power-automate/triggers-troubleshoot#verify-if-admin-mode-is-turned-on

Hope it helps..

Advertisements

Get RequiredAttendee (Required) from the Meeting (appointment) table – Power Automate / Dataverse


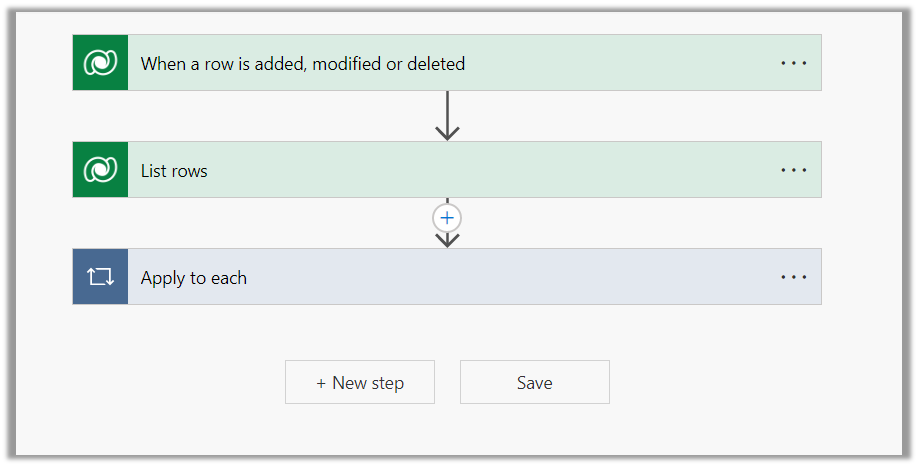
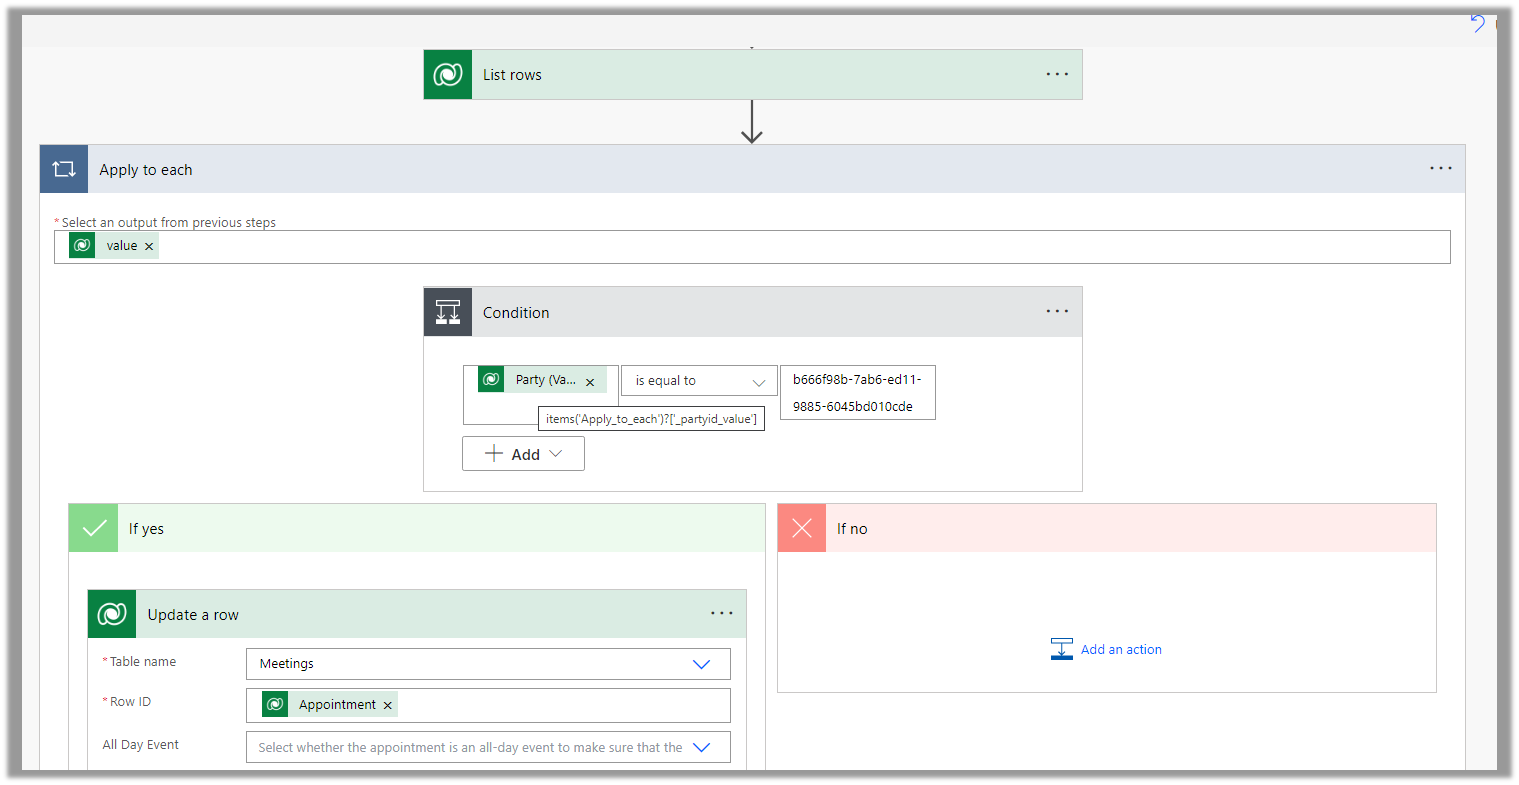
Below is the sample flow we can use to retrieve the Required (requiredattendees) field’s value from the Meeting table (on the update of the record).

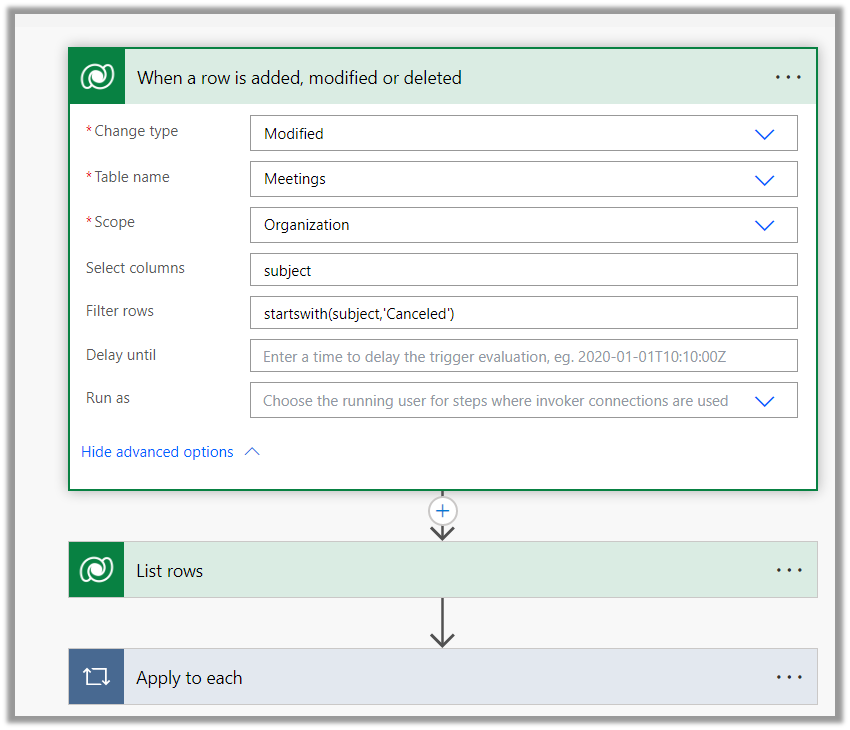
Here we are triggering the flow, if there is an update in the subject field of the meeting record.

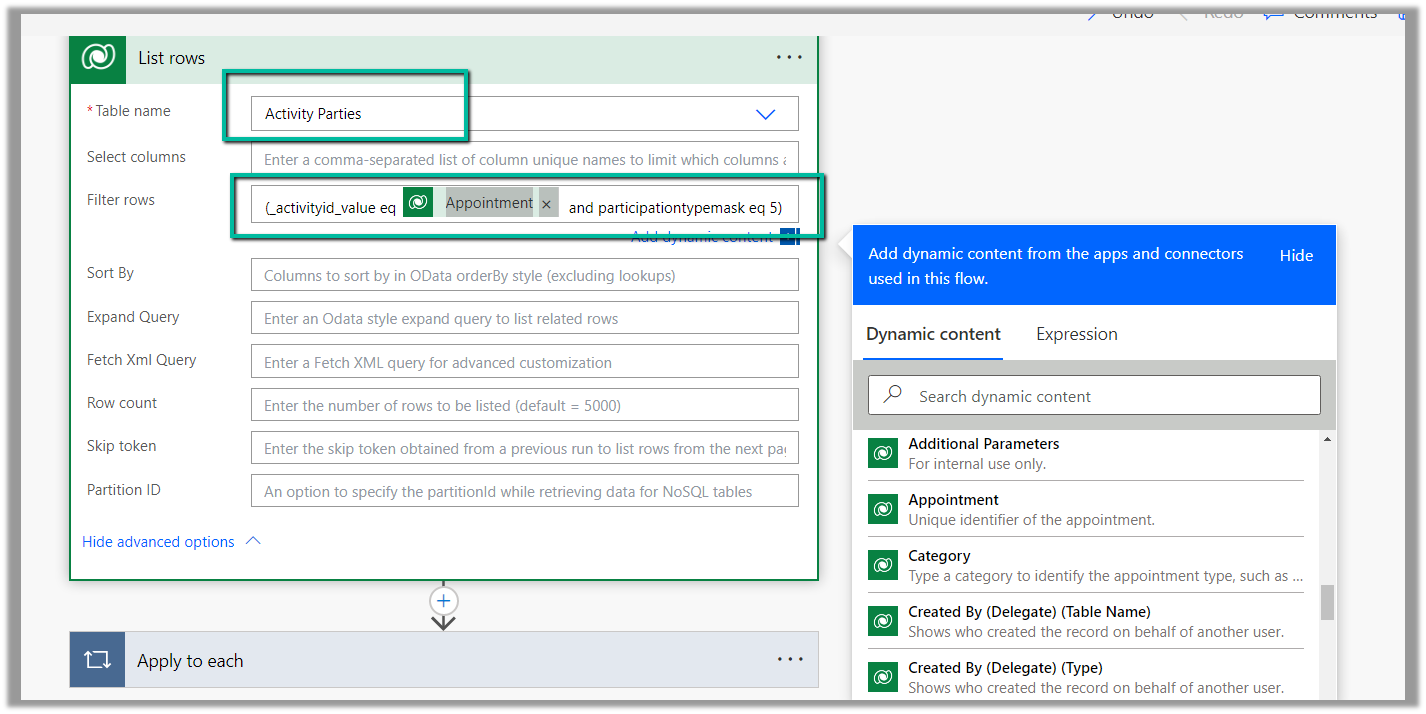
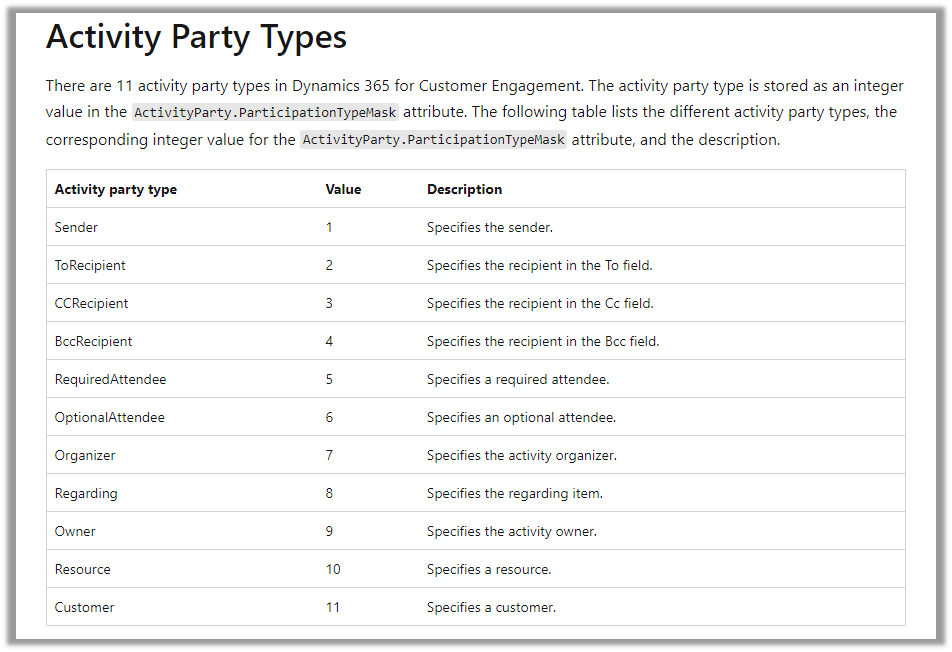
Then using the List rows action we are fetching the Activity Parties record associated using the Appointment’s unique identifier and participation mask as 5.

More on participation type mask

And in the last step, we are checking for all the associated Activity Party GUIDs for a specific GUID and then update the record or cancel the record.

Hope it helps..

Advertisements

Filter rows using contains, startswith and endwith Power Automate – Dataverse


Recently in one of our projects, we were using the Microsoft Bookings App for the users to book an appointment(outlook) and then were syncing this appointment back to Dynamics 365 through the category “Tracked to Dynamics 365” (Server Side Synchronization)

Get more details on it here – https://nishantrana.me/2022/03/22/how-to-synchronize-appointments-between-dynamics-365-and-outlook-using-server-side-synchronization/

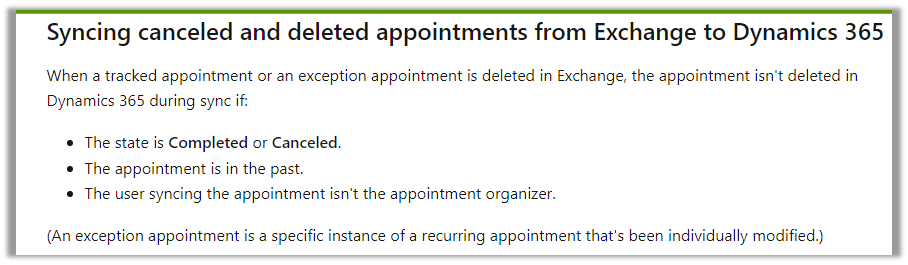
Here if the users were canceling the tracked appointment in Outlook, it will update the subject of the appointment record with the prefix – Canceled but will not cancel the record i.e. update the status of the record.

This would happen if the user canceling the appointment is not the organizer.

https://learn.microsoft.com/en-us/power-platform/admin/sync-logic#syncing-canceled-and-deleted-appointments-from-exchange-to-dynamics-365

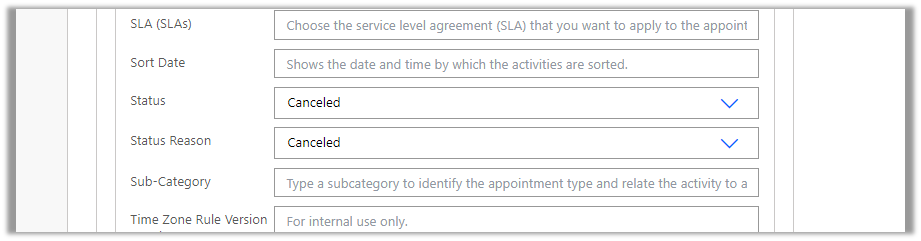
So here we were implementing a flow to check for updates in the Subject column with the word canceled and then updating the status of the appointment as canceled.

Here we can specify our select columns and filter conditions as follows – contains

Or startswith

https://learn.microsoft.com/en-us/power-apps/developer/data-platform/webapi/query-data-web-api#standard-query-functions

Hope it helps..

Advertisements

How to – Create Marketing form submission record through Flow (Power Automate) – Dynamics 365 Marketing


Recently we were exploring the possibility of creating a marketing form submission record through flow/custom code. Here simply creating the marketing form submission record is not enough, for it to be processed by the platform, we need to call the bound action – msdyncrm_UpdateMarketingFormSubmission with Step = Retry. (And it’s all not an officially supported scenario, so be careful)

Below is how the flow looks like

First, we create a form submission record –

After creating the form submission record, we are creating and associating the marketing field submission records with the values that we want to pass for the form – email, first name, and last name in this case.

And then eventually calling the action –msdyncrm_UpdateMarketingFormSubmission to trigger the submission (resubmit) of the form submission record.

On running the flow, we can see the record created with the status as pending.

Within a few seconds, if the input is correct, we can see the status updated as success

and the corresponding contact/lead created or updated.

Hope it helps..

Advertisements

Using addProperty to dynamically add a custom property to a JSON object – Power Automate


Recently while working on the integration of Facebook Lead Ads with CRM, through Webhooks / Power Automate we had to process the lead data and create lead and contact records.

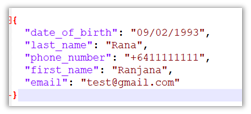
Below is a sample format in which we’d get the lead data for the FB form having a first name, last name, date of birth, and email fields in it.

Now we want to create an object having name as proprety and value from values like below from the above response, which will make it easy for use to refer in add a new row / update a row Dataverse step.

For this we will be using addProperty function.

Below is our sample flow –

First we are initializing varJSON – string variable with the JSON response

Than intializing the another variable varFieldData as type Object

Parse JSON action using the sample response.

Here we are interested in field_data property

So in the next step, we loop through each field_data, than use addProperty function in Compose to add name and value to the varFieldData object, and use the outputs of compose to set the varFieldData variable.

addProperty function – addProperty(variables(‘myObject’), ‘newProperty’, ‘propertyValue’)

In the next step, we can see the varFieldData and the way we can access the property last_name added to it.

On running the flow we can see the result as expected –

Hope it helps..

Advertisements