Recently we were getting the below issue for our Marketing Forms hosted on an external website on a particular authenticated domain. The pages were working fine in other authenticated domains.
“The domain where this form is embedded might not be enlisted as a domain record for externally hosted forms. Otherwise, a browser extension or plugin may be blocking this form from loading. Review and reload form to continue.”
This particular domain was also shown as authenticated in our Dynamics 365 marketing.
Our website was e.g. https://www.domain.kiwi/ so we had domain.kiwi authenticated in Dynamics 365 Marketing.
Eventually, we had to raise a Microsoft Support Ticket and were instructed to add/ authenticate www.domain.kiwi (with www.) also, doing so resolved the issue for us.
Also, there seemed like a UI bug in the Marketing which will cut out “www.” automatically when trying to authenticate the domains.
Recently while trying to import one of the solutions we got the below error
Missing dependencies. You’ll need to import the following items to this environment.
It was referring to one of the Managed Solutions – DynamicsMKT_PushNotification, managed by Microsoft, for Microsoft Dynamics 365 Marketing.
We realized that the source environment had a higher version installed than the destination environment.
Source – 1.1.25335.61 and destination environment – 1.1.22667.44
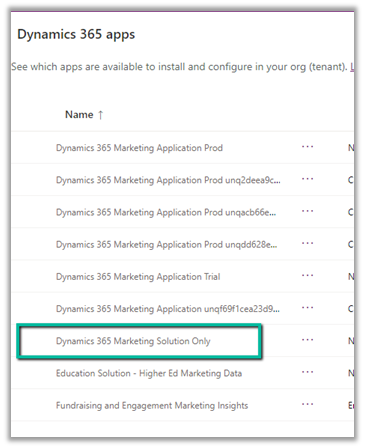
Initially, we thought the error is because the Dev had full marketing app configured i.e. both Solution and Services app configured and the destination had only Dynamics 365 Marketing Solution Only app.
The marketing apps –
After raising the Microsoft Support, we got guidance/advice from the Microsoft Support / Product team that the Dynamics 365 Marketing Solution Only app was not installed in the destination environment and it was a copy of some other environment that had marketing installed. They suggested installing the Dynamics 365 Marketing Solution Only app in the destination environment. After installing the app, we could see the version of the DynamicsMKT_PushNotification solution increased and were able to install our custom solution successfully.
Recently we had to disable plugin steps as part of data migration, below is the sample code we can use, either specify the name of the assembly, plugin, or plugin step as we are using the “begins with” condition or make changes as required.
 class Program
    {
        static void Main(string[] args)
        {

            const string ConnectionString = "AuthType = OAuth; " +
                                            "Username = Nishant.Rana@xyz.com; " +
                                            "Password = testxyz; " +
                                            "Url = https://orgname.crm6.dynamics.com;" +
                                            "AppId=51f81489-12ee-4a9e-aaae-a2591f45987d;" +
                                            "RedirectUri=app://58145B91-0C36-4500-8554-080854F2AC97;" +
                                            "LoginPrompt=Auto";


            CrmServiceClient svc = new CrmServiceClient(ConnectionString);

            if (svc.IsReady)
            {
                try
                {
                    // we can specify step / plugin / assembly name
                    var pluginStepAssemblyName = "MyD365.Plugins.Core.Plugin.AssignOwner";
                    // 0 for active and 1 for inactive
                    var pluginStateCode = 0;

                    var query = new QueryExpression("sdkmessageprocessingstep");
                    query.ColumnSet = new ColumnSet("name", "sdkmessageprocessingstepid");
                    query.Criteria.AddCondition(new ConditionExpression("name", ConditionOperator.BeginsWith, pluginStepAssemblyName));
                    var sdkMsgProcessStepCollection = svc.RetrieveMultiple(query);

                    foreach (var sdkMsgProcessStep in sdkMsgProcessStepCollection.Entities)
                    {
                        var setStateRequest = new SetStateRequest();
                        setStateRequest.EntityMoniker = new EntityReference("sdkmessageprocessingstep", sdkMsgProcessStep.Id);
                        setStateRequest.State = new OptionSetValue(pluginStateCode);
                        setStateRequest.Status = new OptionSetValue(-1);
                        svc.Execute(setStateRequest);
                    }
                }
                catch (Exception ex)
                {
                    Console.WriteLine("Exception Messainge : {0} ", ex.Message);
                }

            }
        }
    }
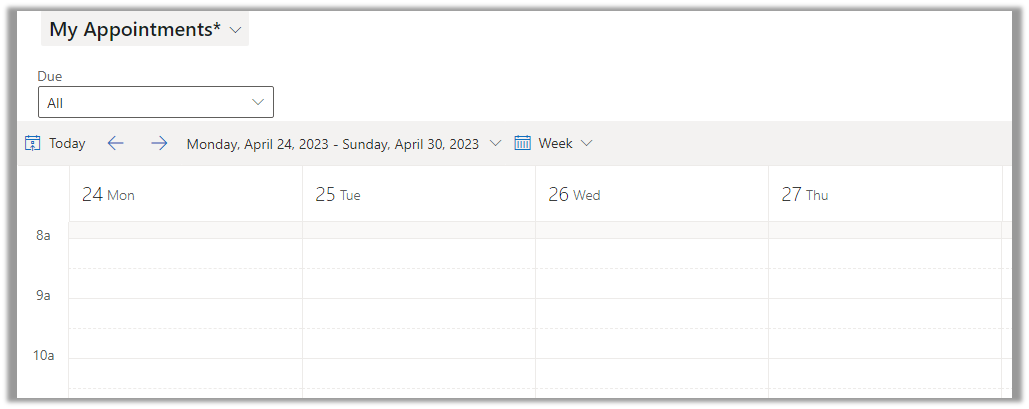
By default, if the calendar view is starting on Sunday for the week as shown below, we can update the system settings, to start it on Monday or any other day
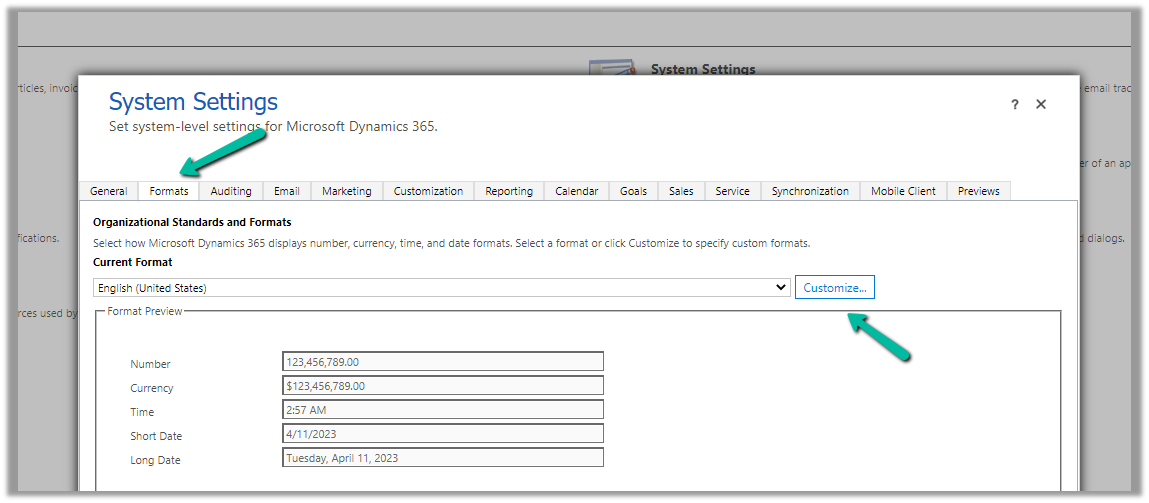
From Administration >> System Settings > > Formats >> Customize (Current Format)
Specify the First Day of Week
On update, we can see the view updated to show the week starting from Monday.
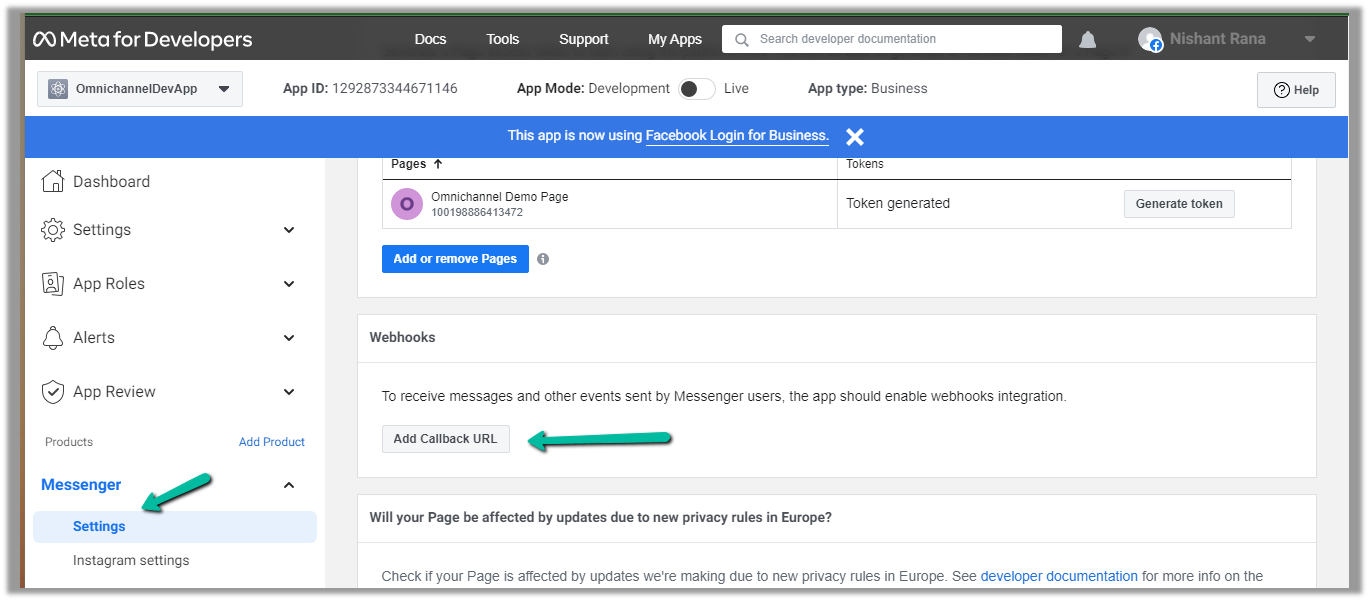
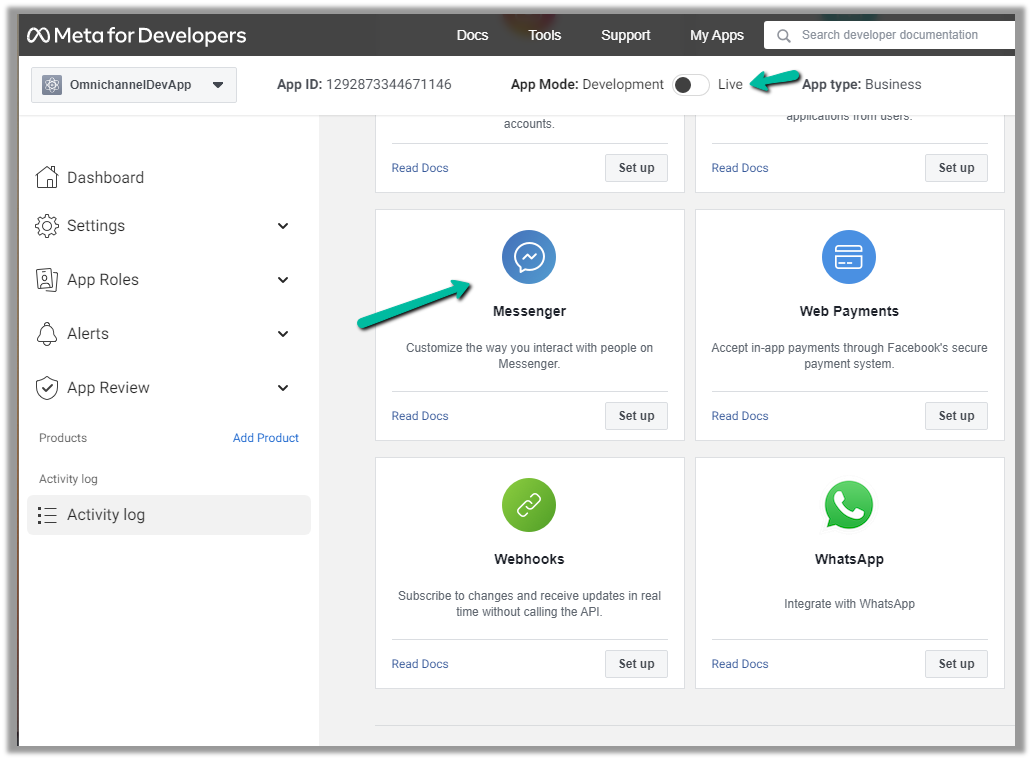
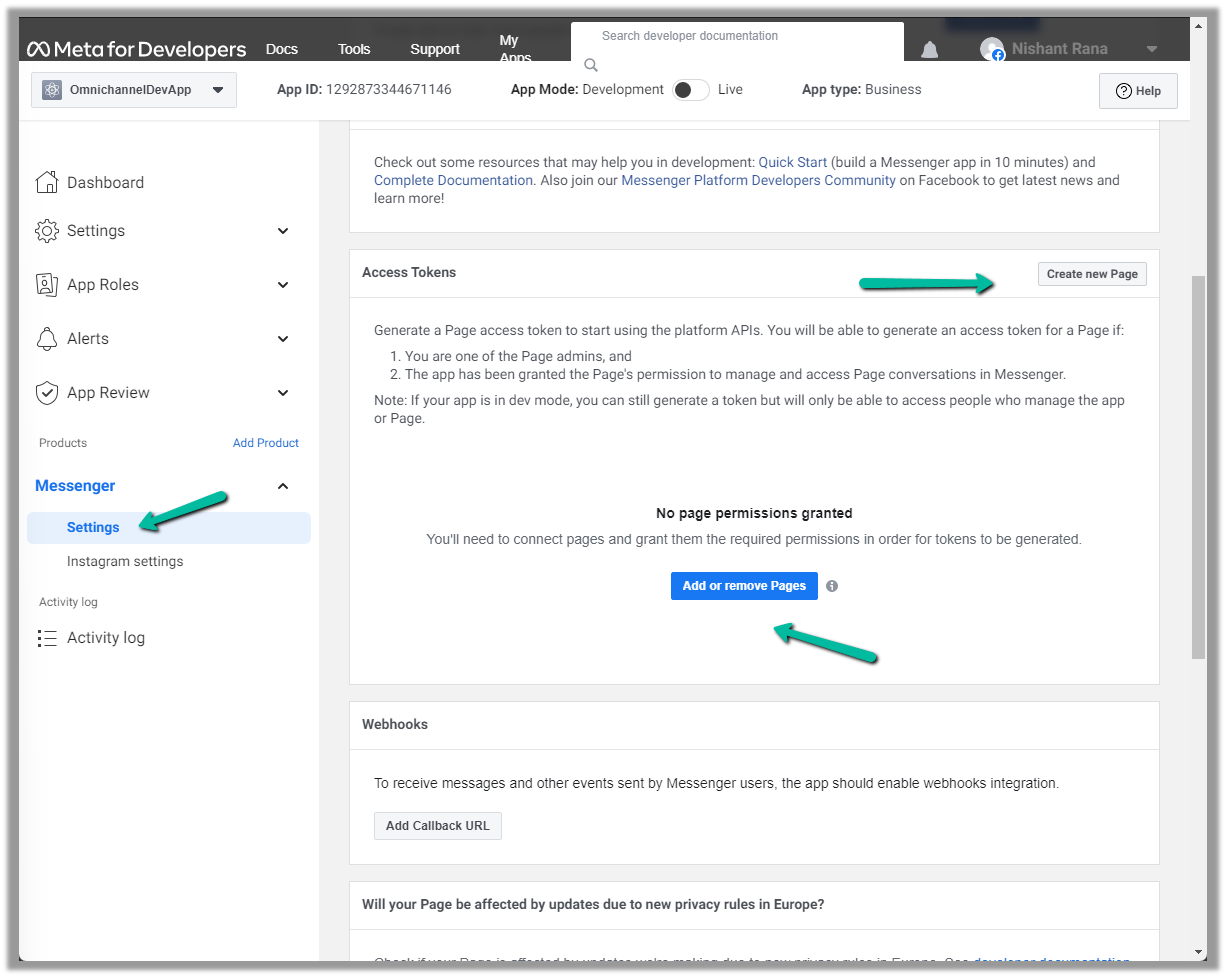
Next either add an existing page or create a new one and then add the newly created page in the Messenger >> Settings
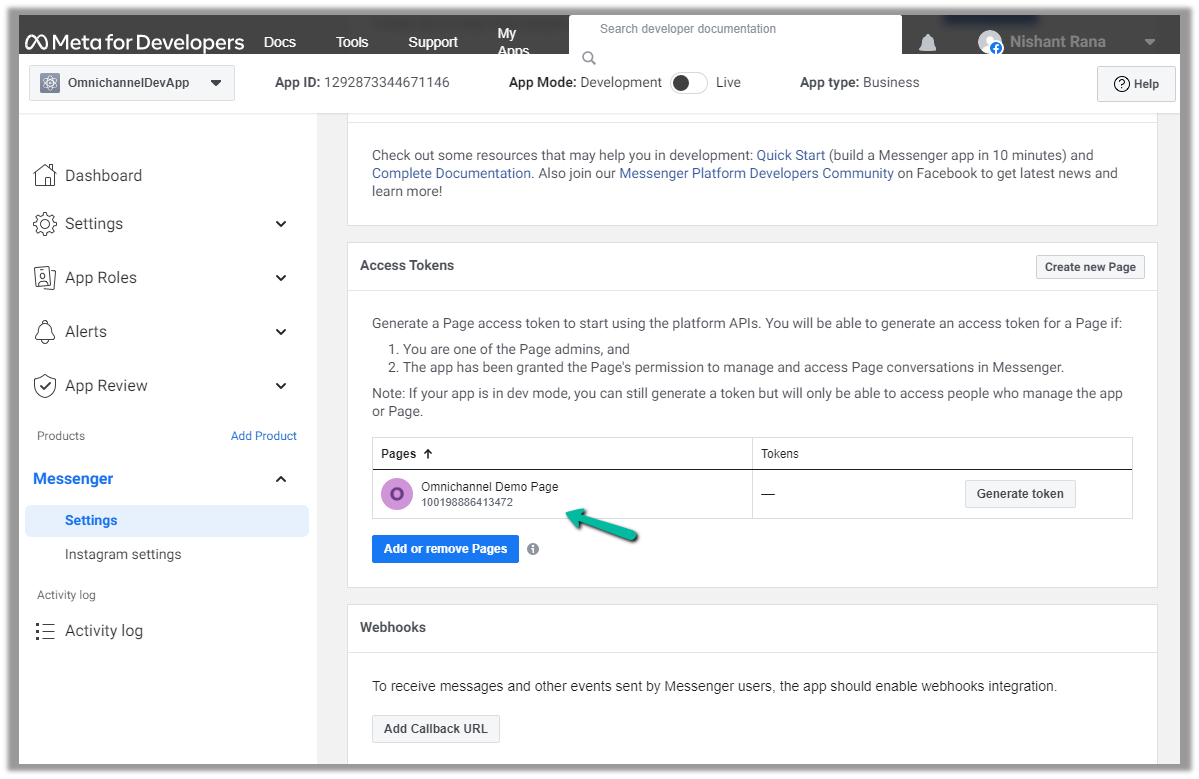
Here we created a new page and have added that page.
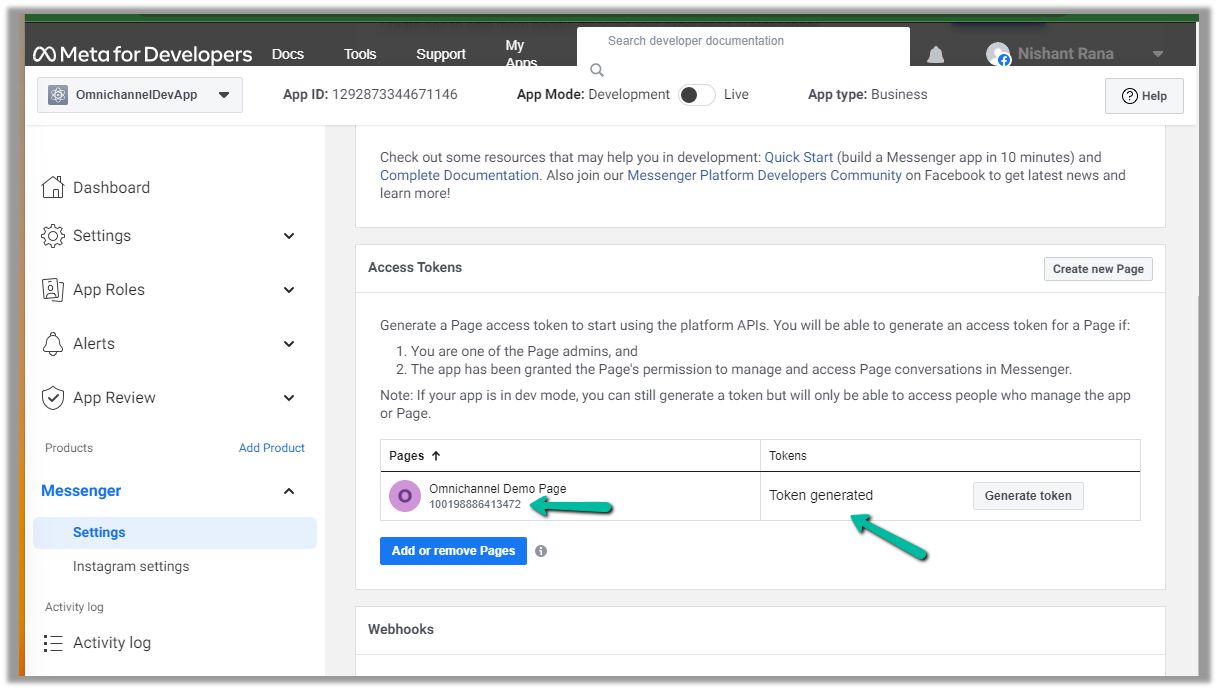
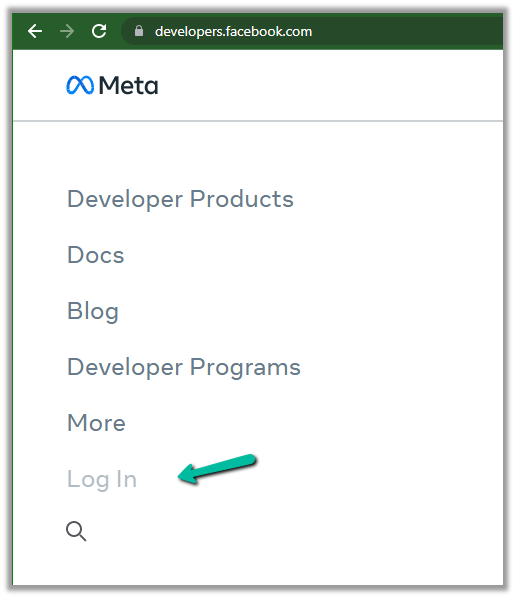
We can also Generate token for the page, which we will use while configuring Facebook Channel in Dynamics 365.
Click on Generate token and copy the token. Also, save the Page Id below the name of the page.
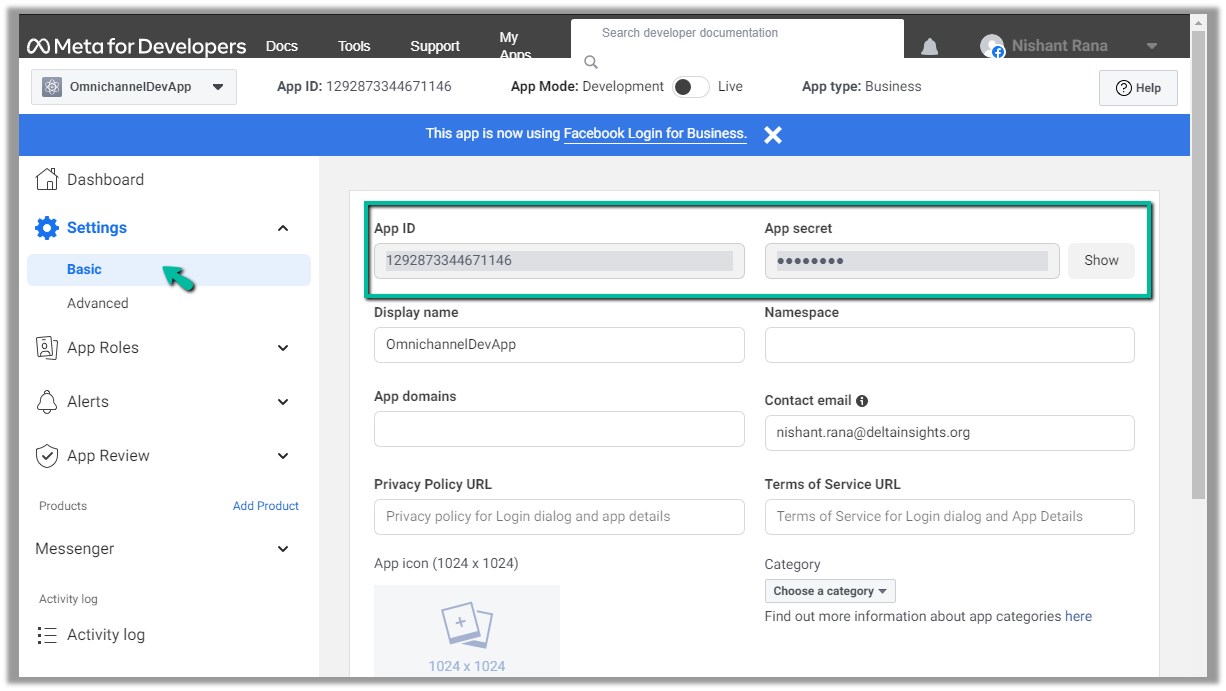
We will also need App ID and App Secret, which we can get from – Settings >> Basic
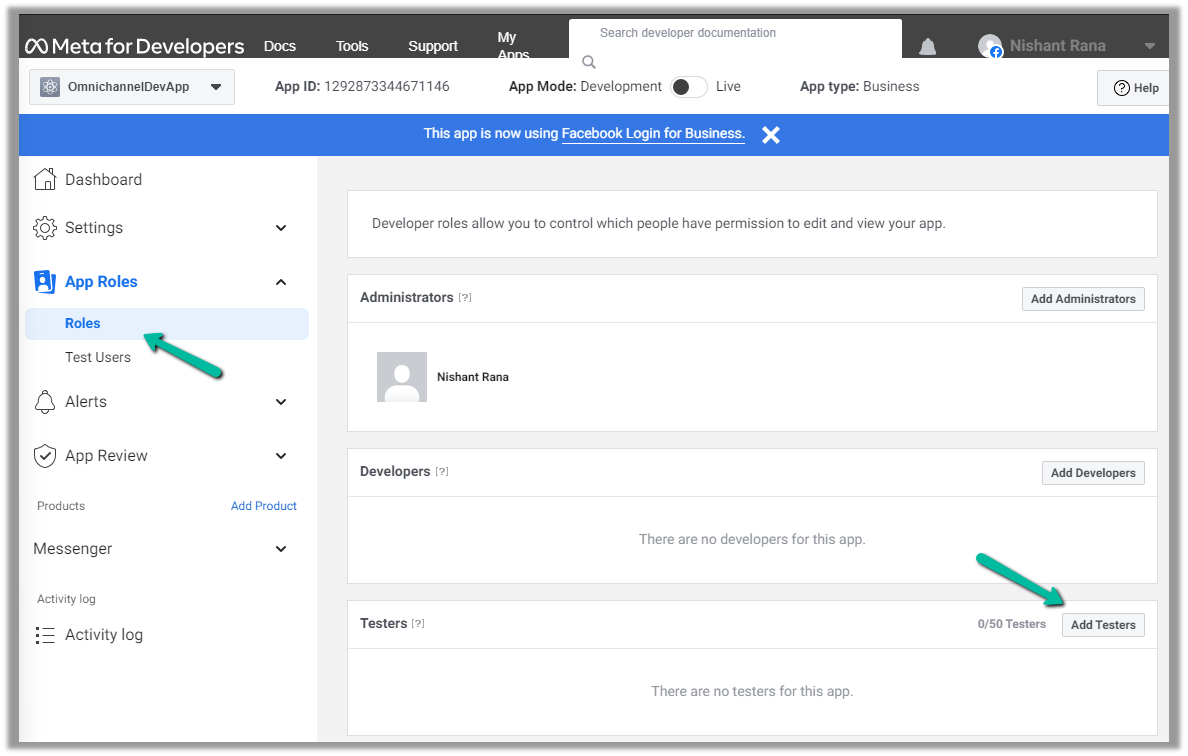
Next, we add a few test accounts to the app for testing/using the app. (we are not making the app publicly available or live, which would require and approval process)
Navigate to App Roles >> Roles >> Testers (Add Testers)
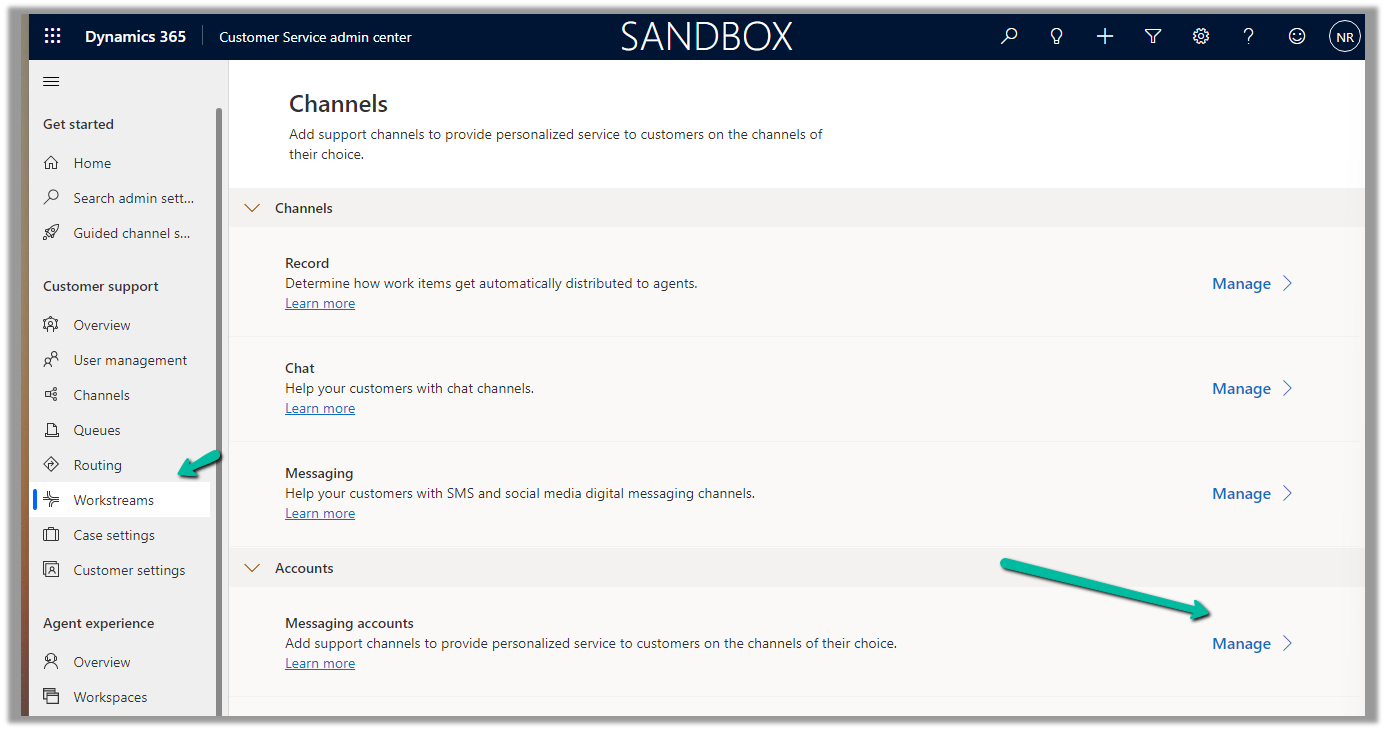
Back in Customer Service Admin Center, navigate to Customer Support >> Channels >> Messaging Accounts (Manage)
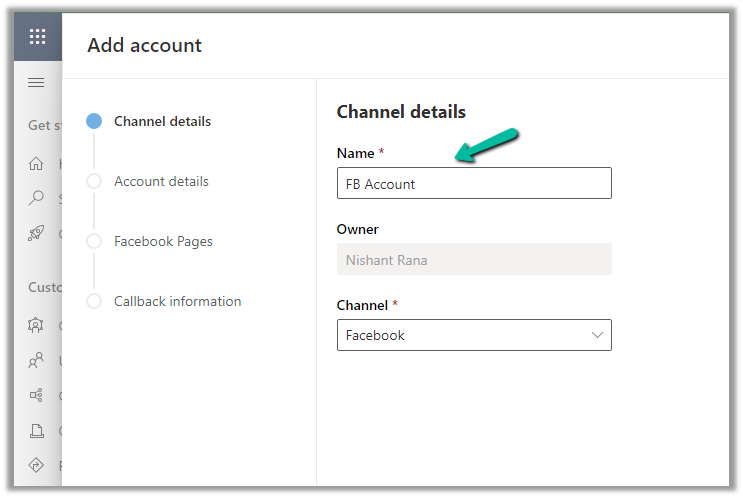
Add a New Account
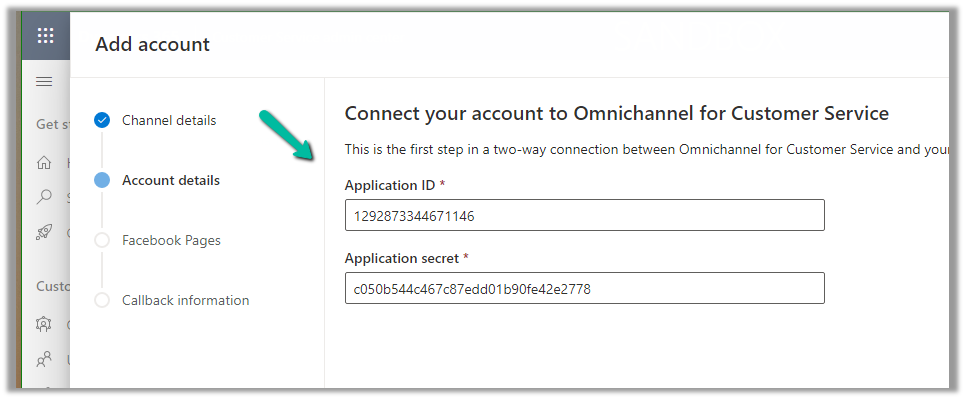
Click Next and provide the App ID and Application Secret
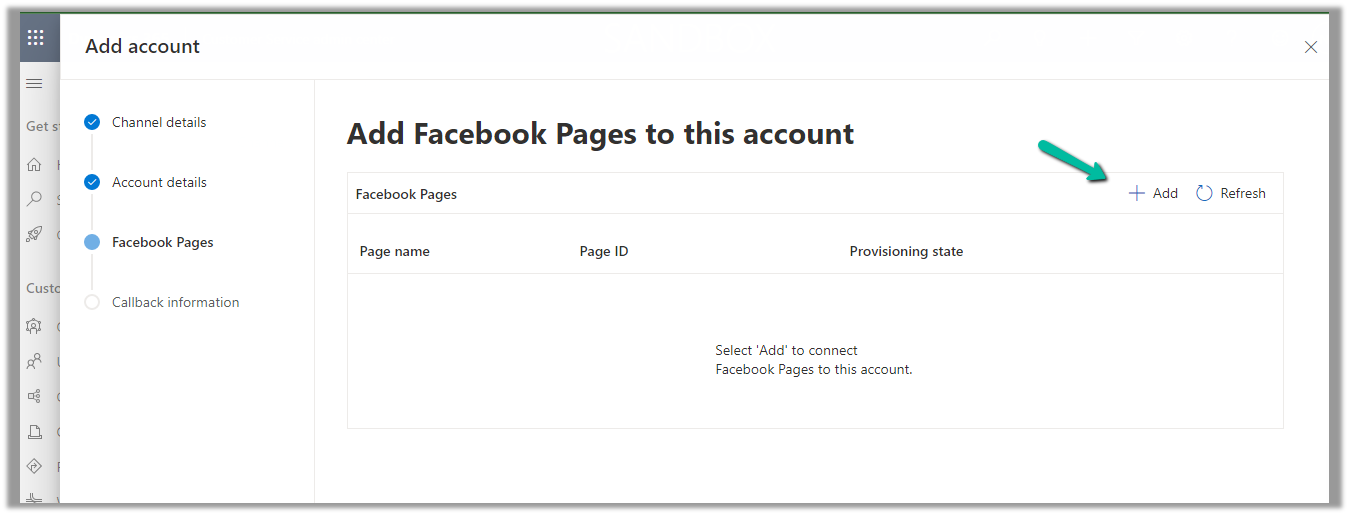
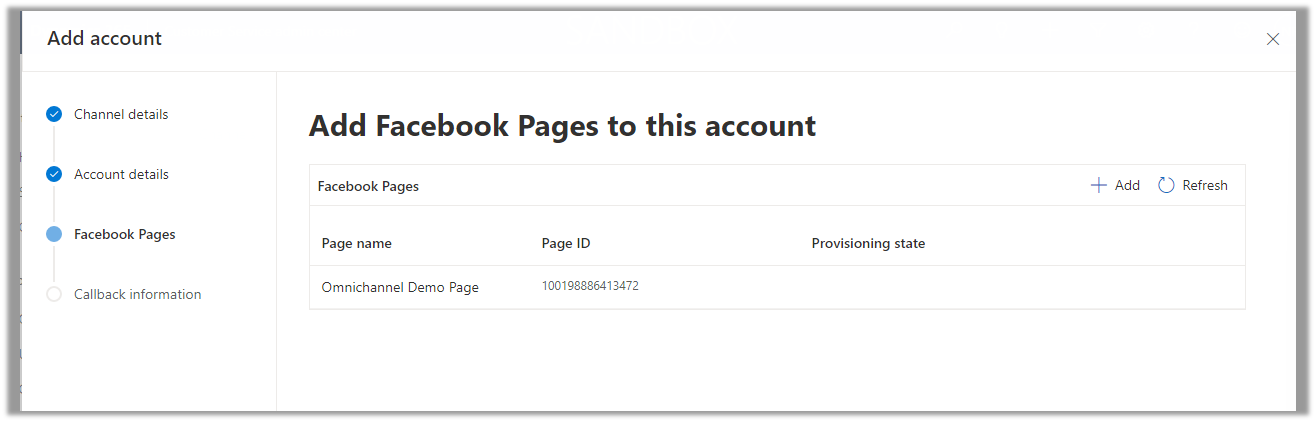
Add Facebook Page to the account
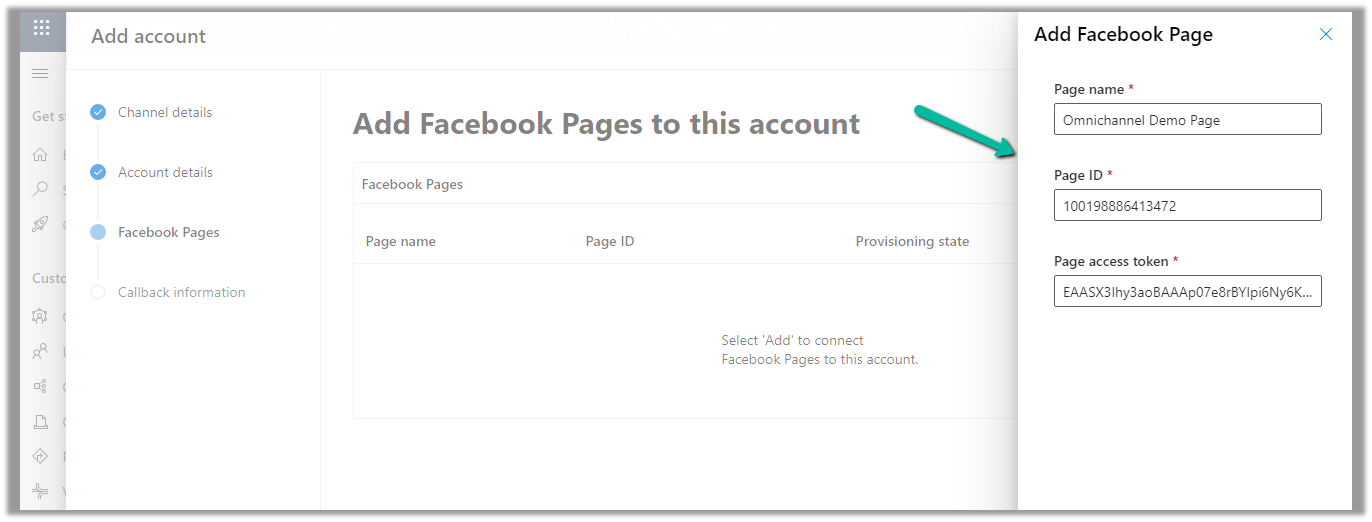
Provide the Page name, Page ID, and the Page access token.
With the page successfully added, click on Next
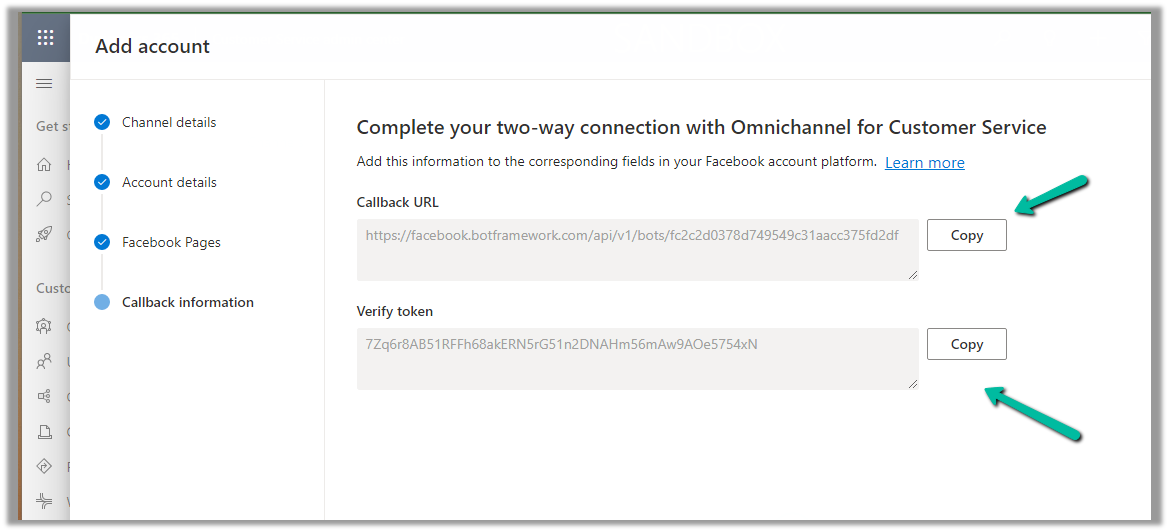
Copy the Callback URL and the Token.
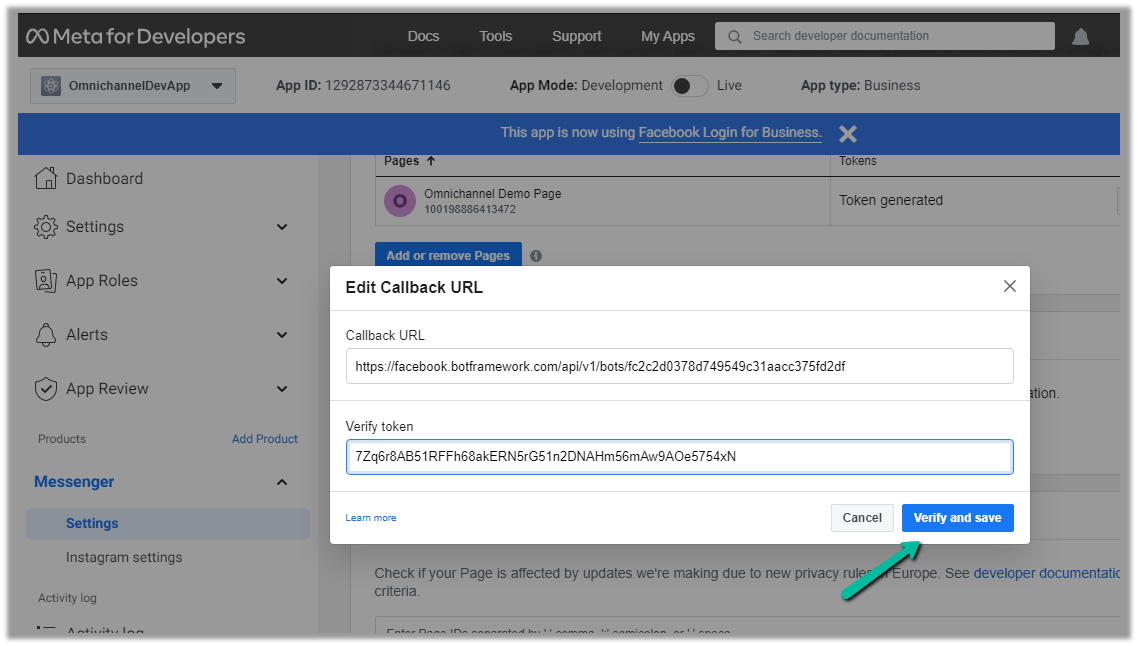
Paste this information in the Messenger product added.
Click on Add Callback URL.
Click on Verify and save
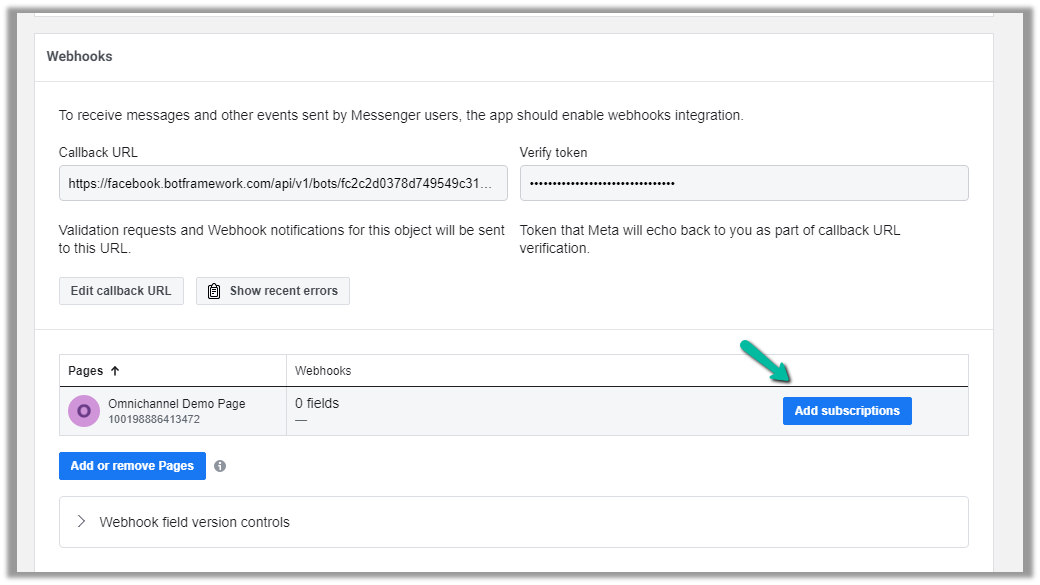
This adds the Webhooks details, click on Add Subscriptions for the Page added.
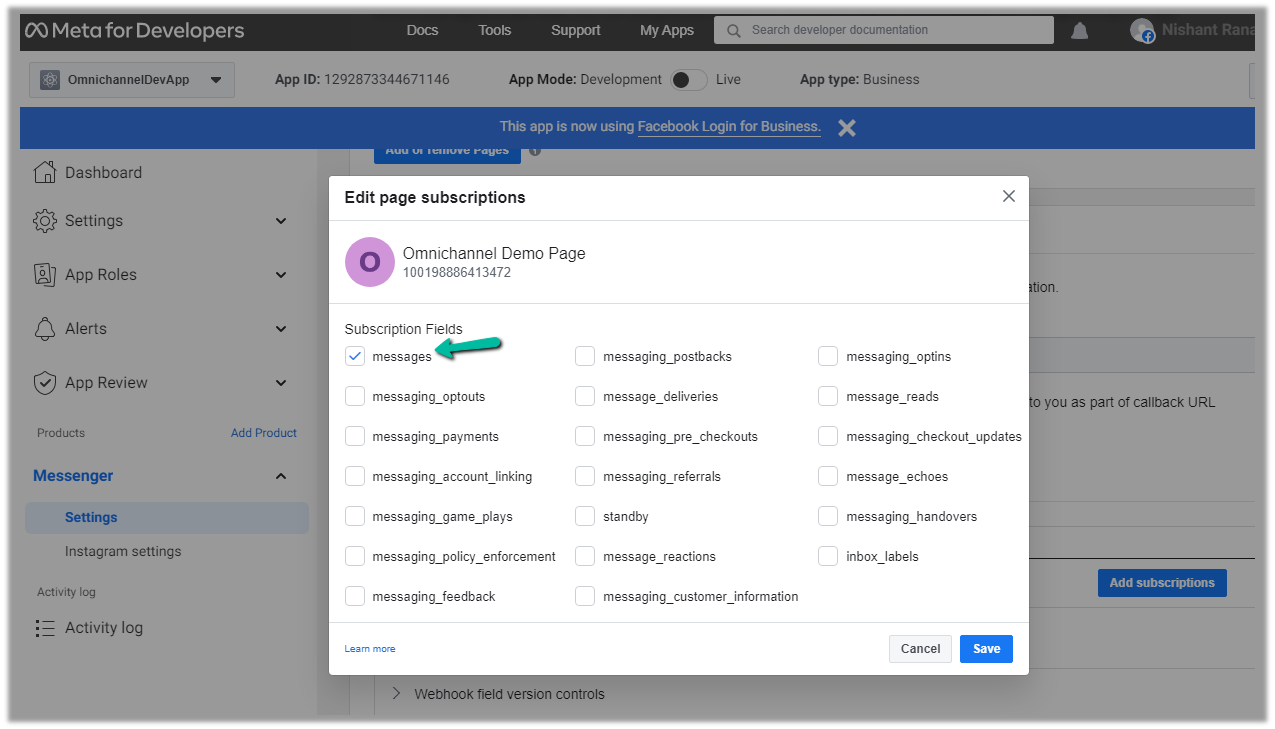
Select messages
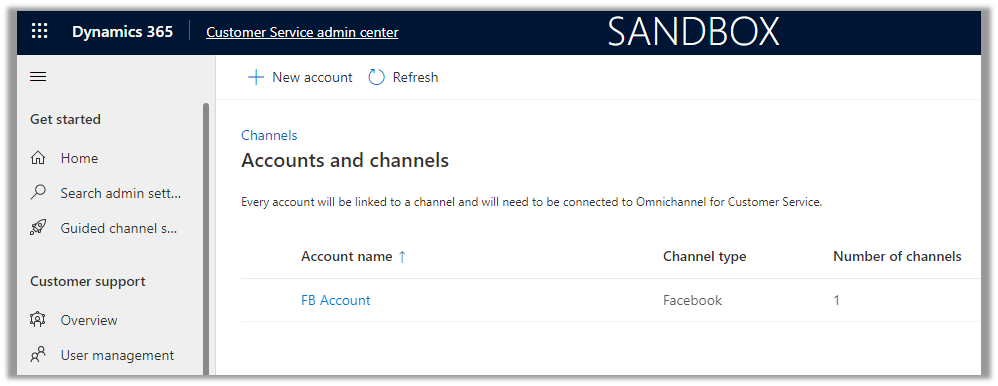
We can see the account added.
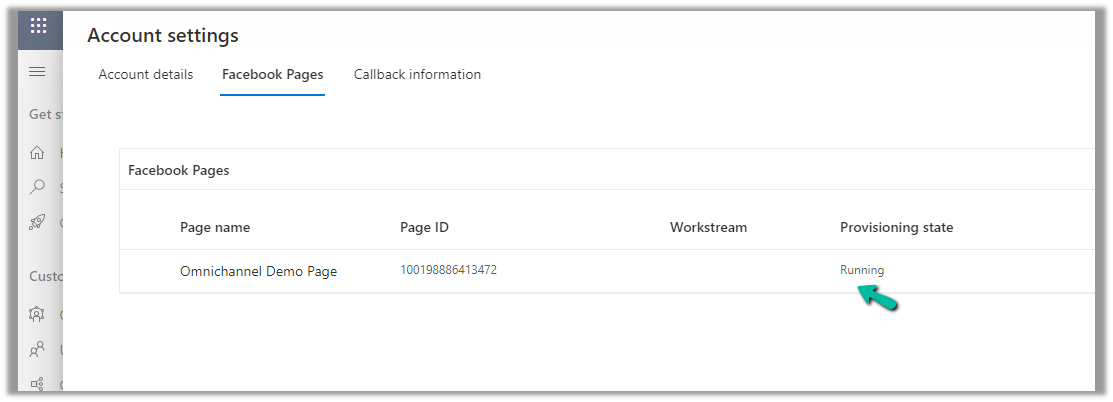
Open the record, and navigate to the Facebook Pages tab, there we can see the Provisioning state as Running.
Next, we will create a Channel for this Facebook Account.
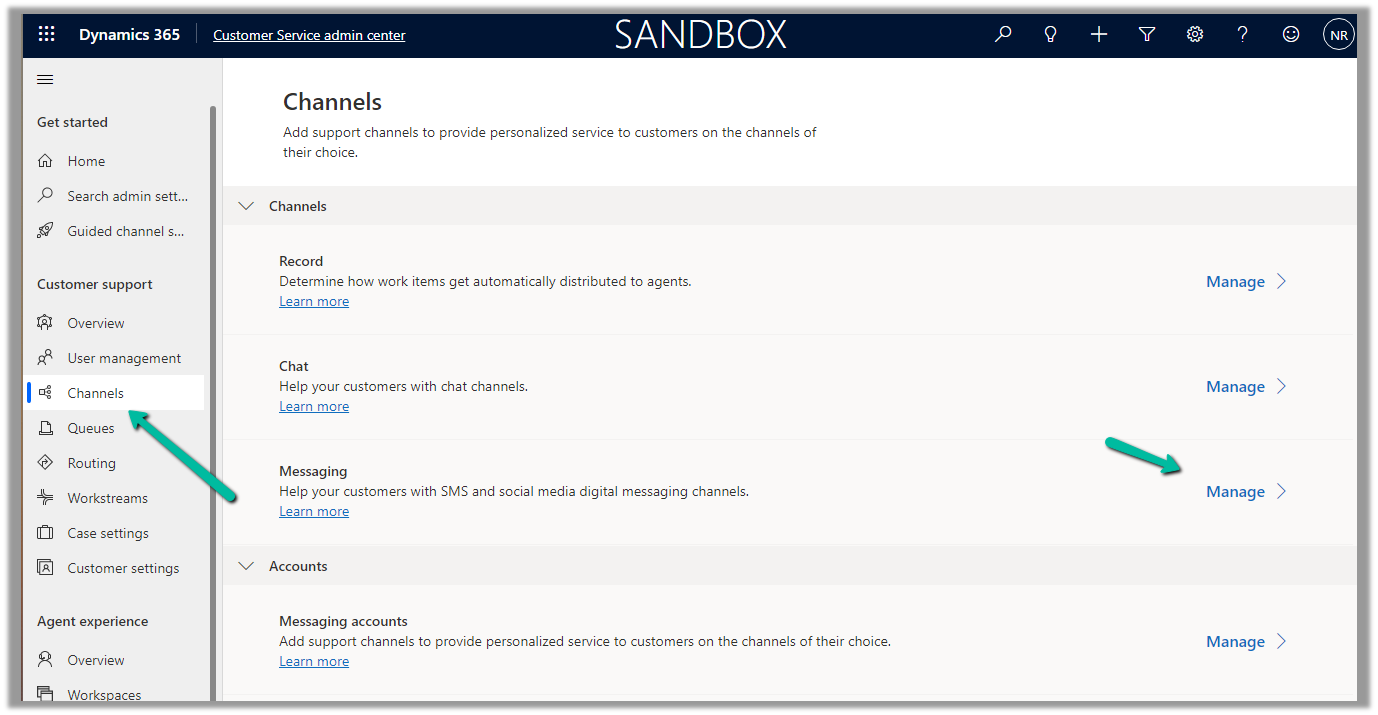
Navigate to Customer Support >> Channels >> Messaging (Manage) >> Add Channel
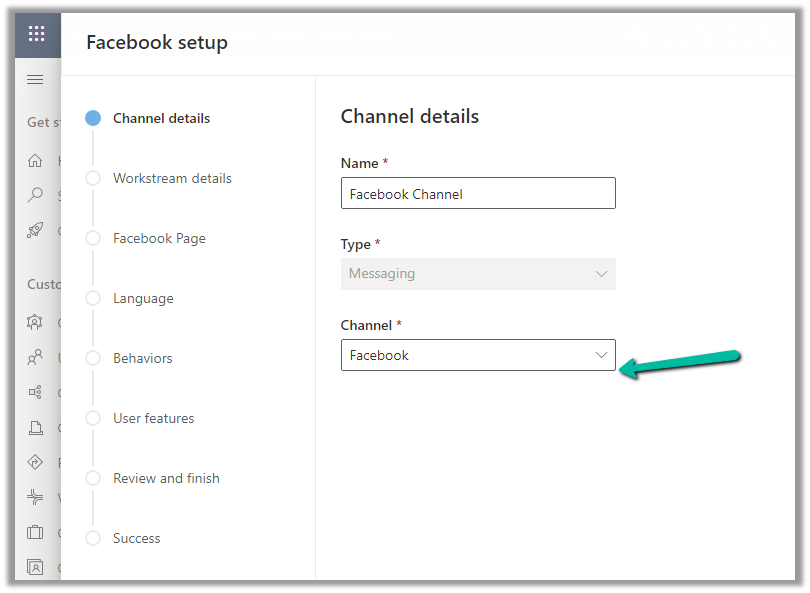
Select Channel as Facebook.
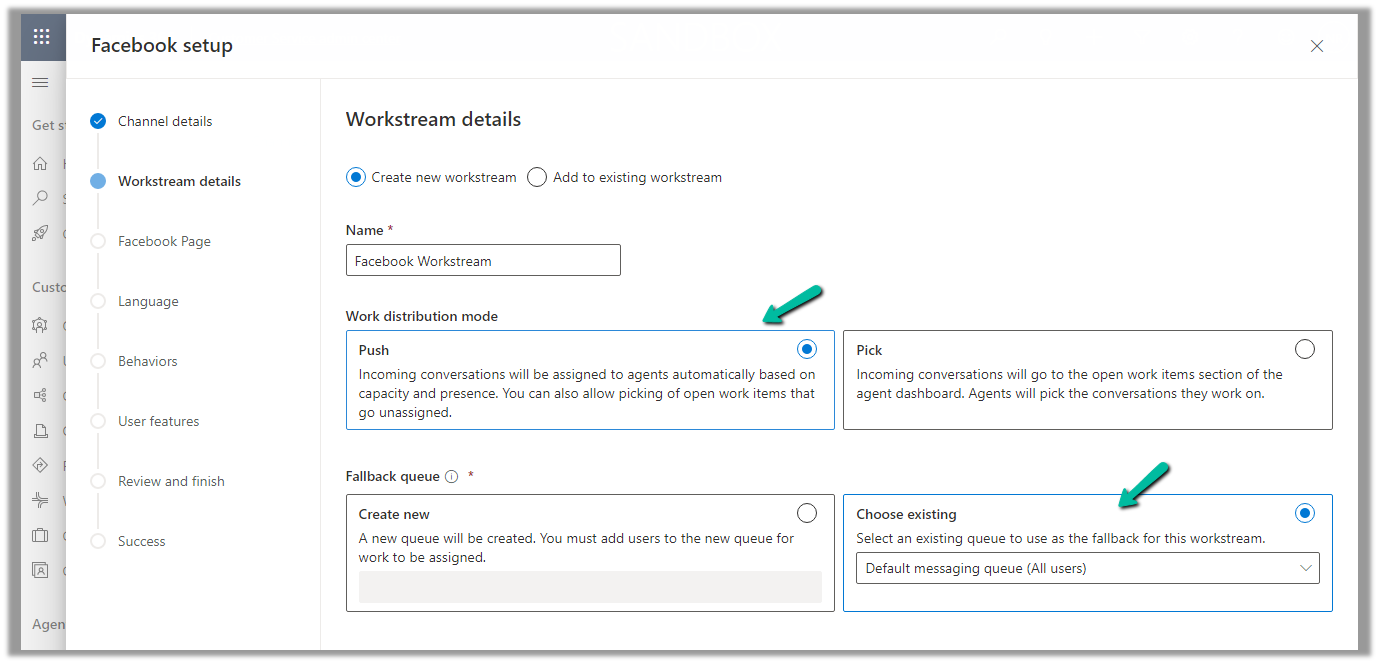
Add an existing workstream or create a new workstream.
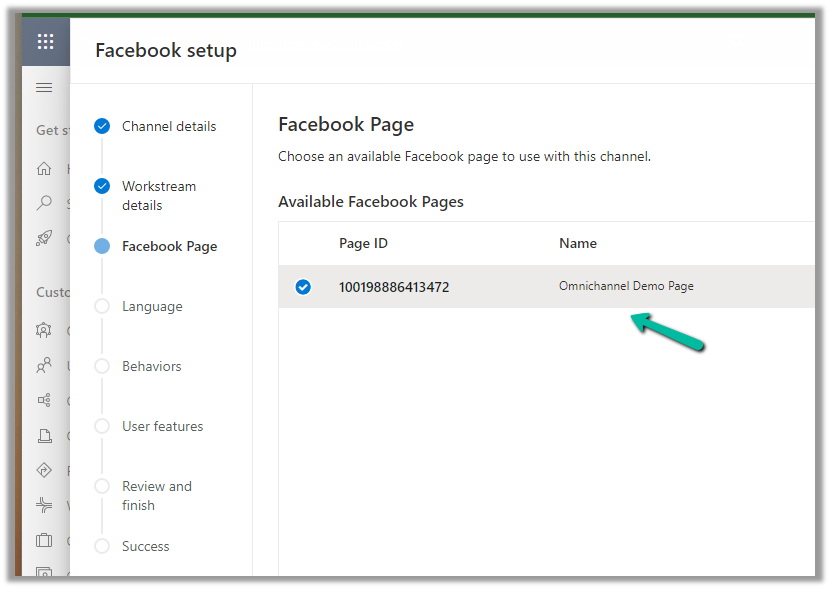
Next, select the Facebook Page configured in the previous steps.
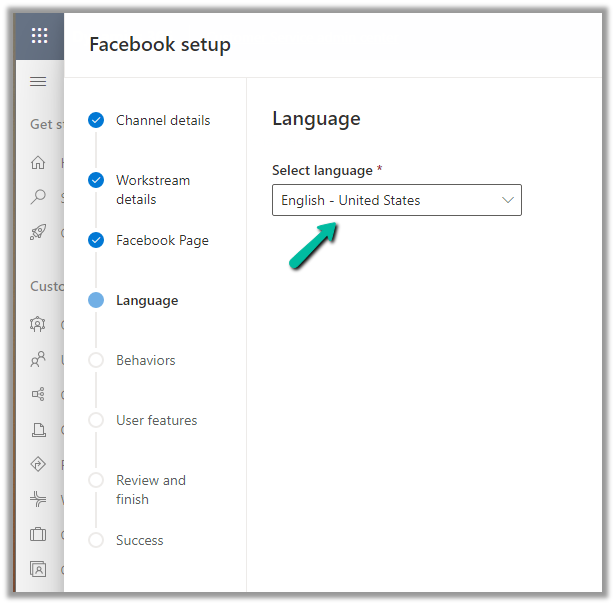
Language as English.
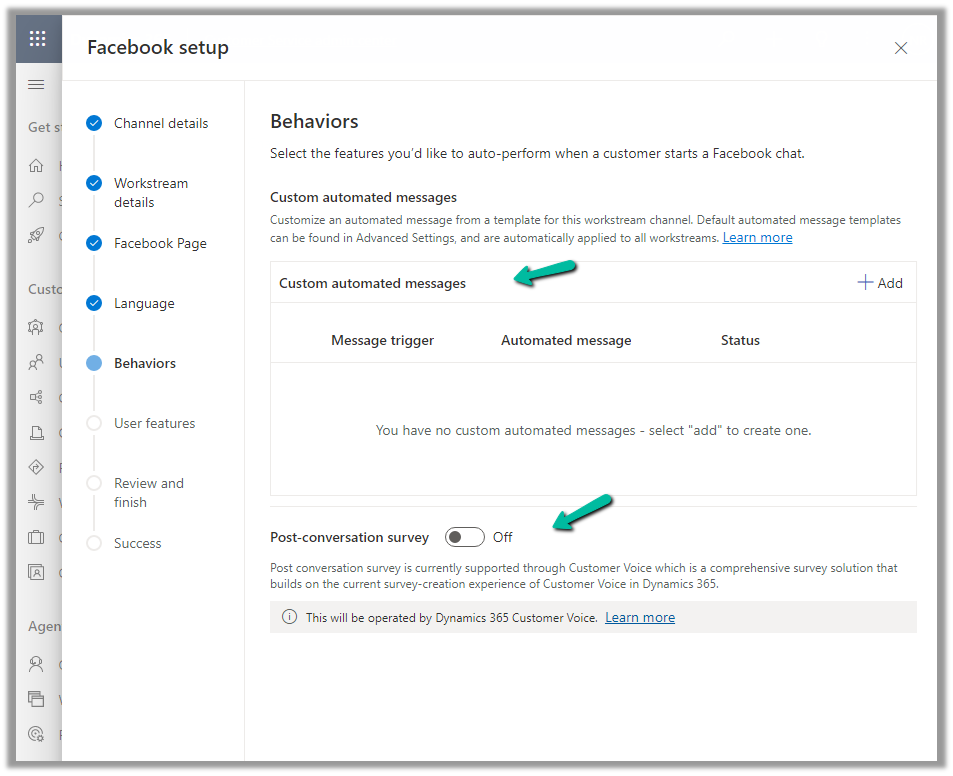
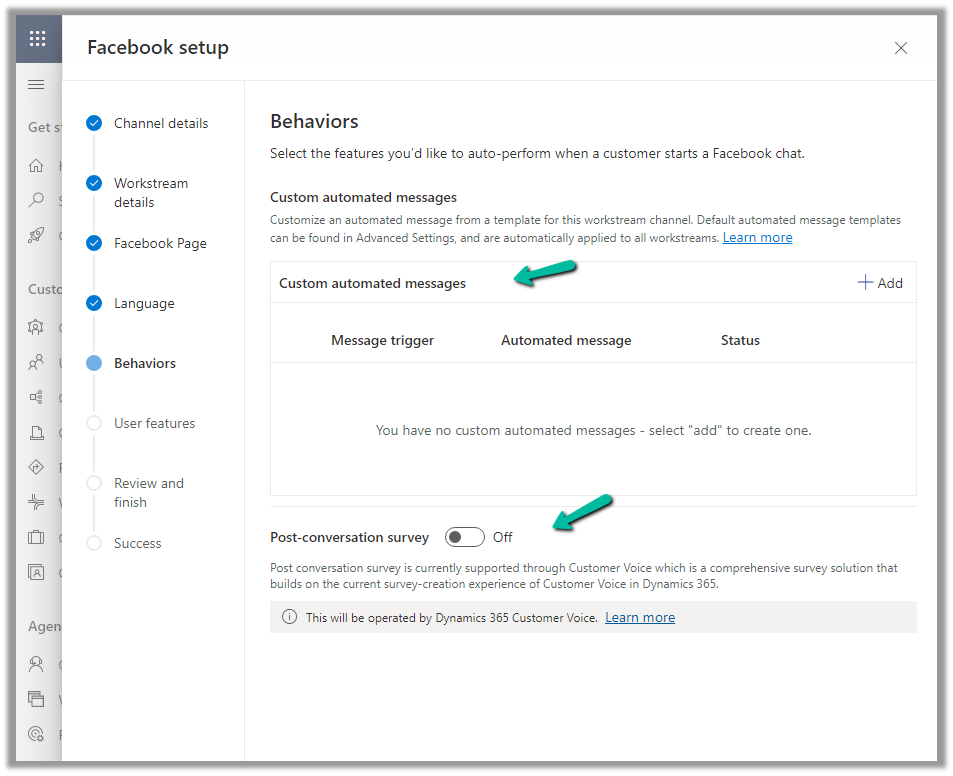
We can specify custom automated messages and Post Conversation survey settings here.
Specify the File attachments setting and message tag.
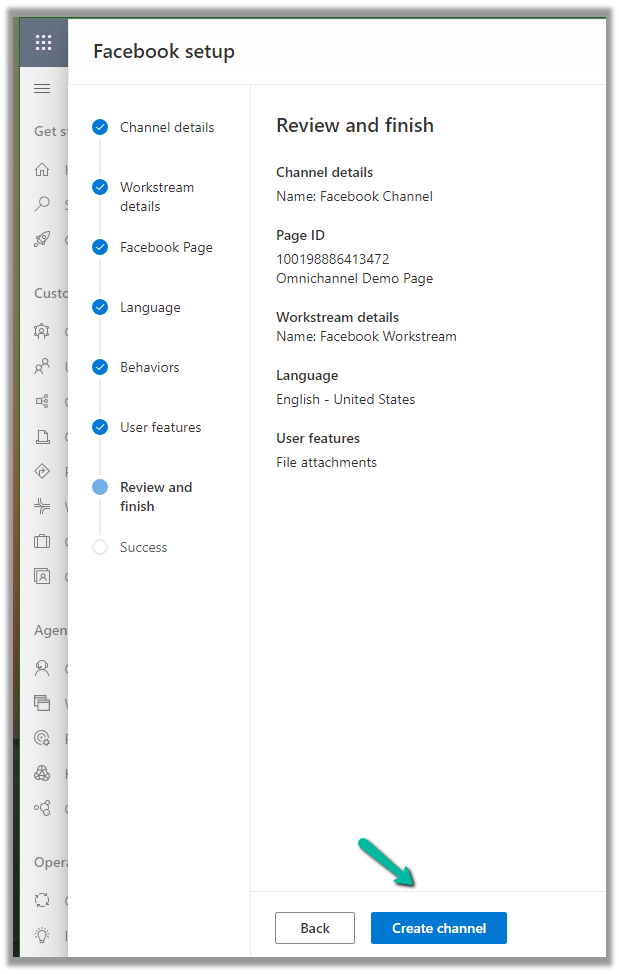
Review and if required edit the details and finally click on Create channel to create the Facebook channel
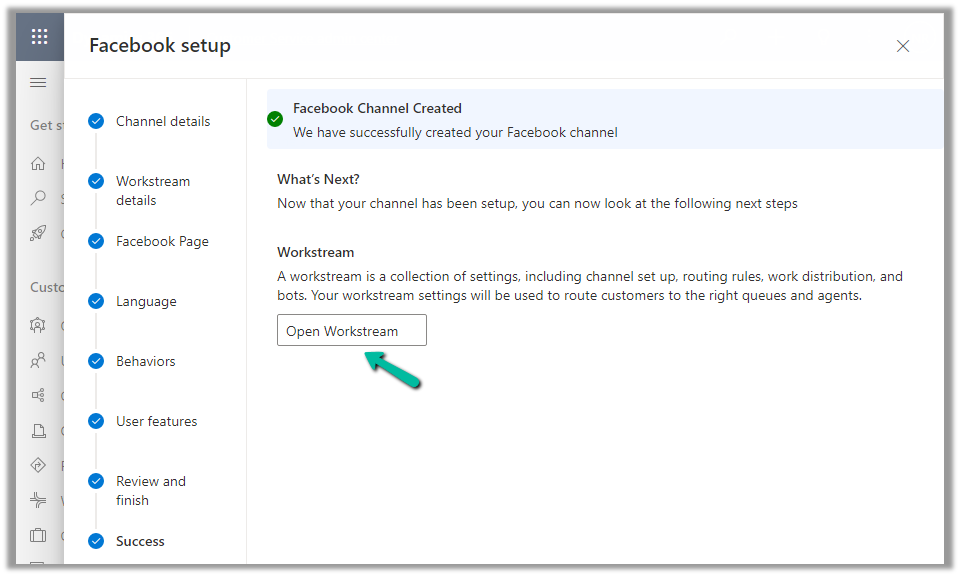
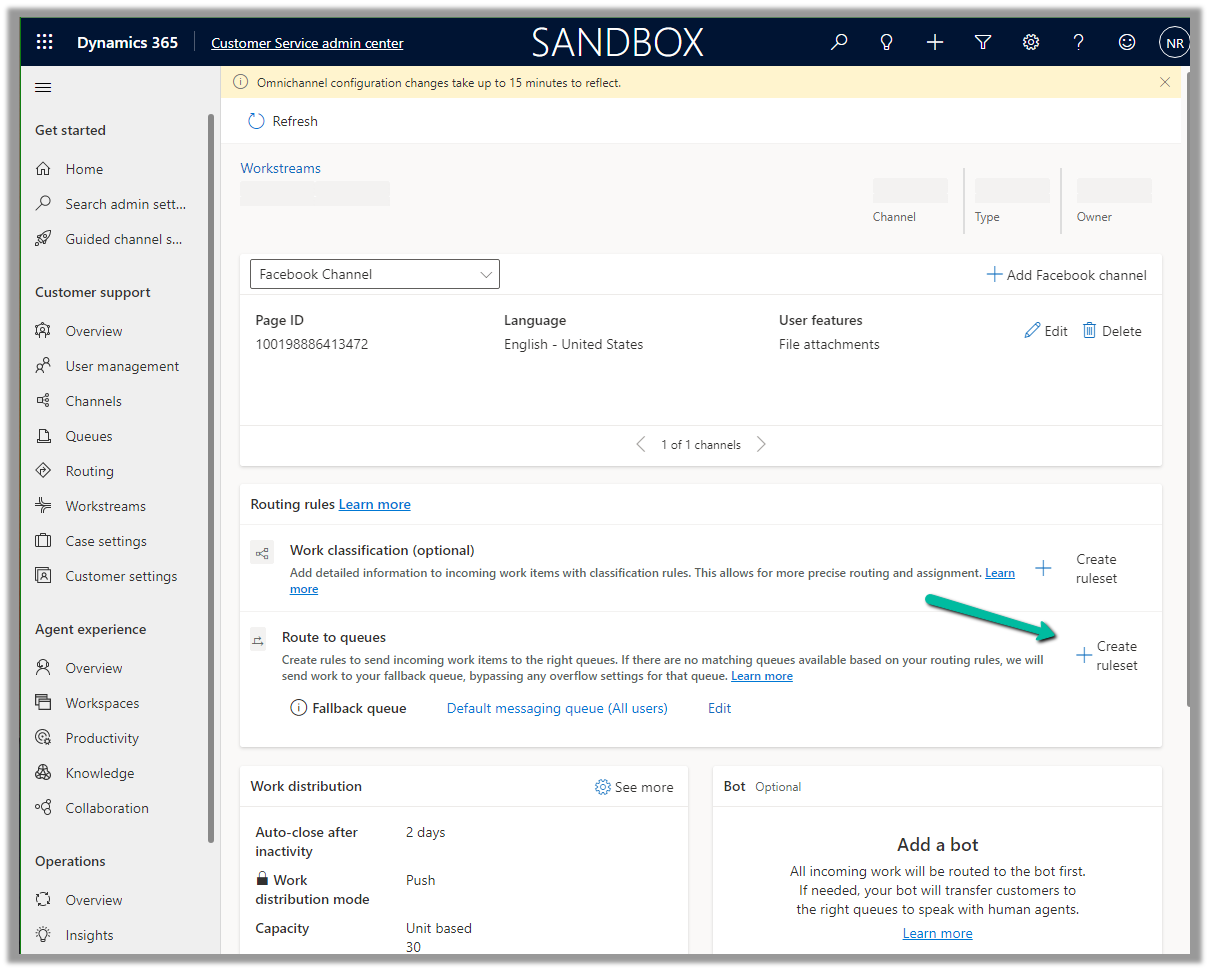
Next open the workstream created, to specify routing rules, work distribution, bot, etc. to route the customers to the queues/agents.
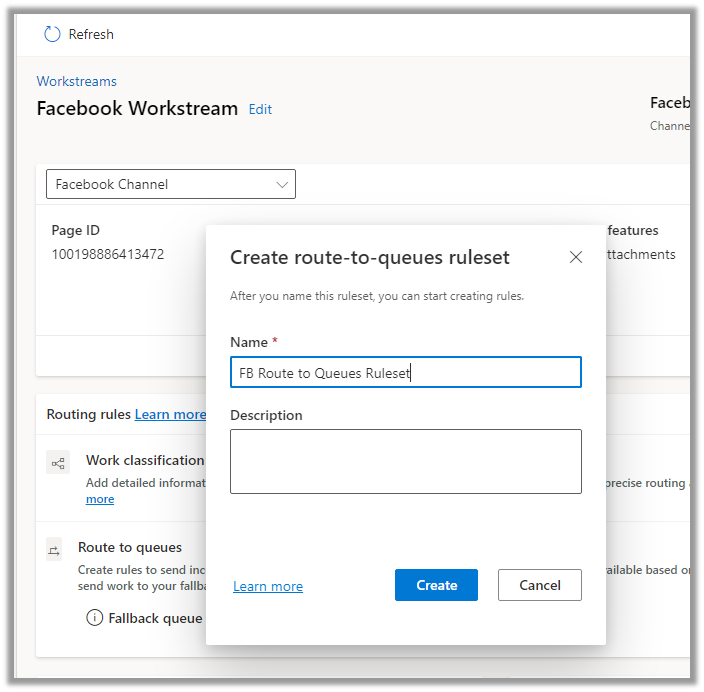
Here we can create a Route to Queue ruleset to route the messages on the Facebook page to a specific Queue.
Create the ruleset record.
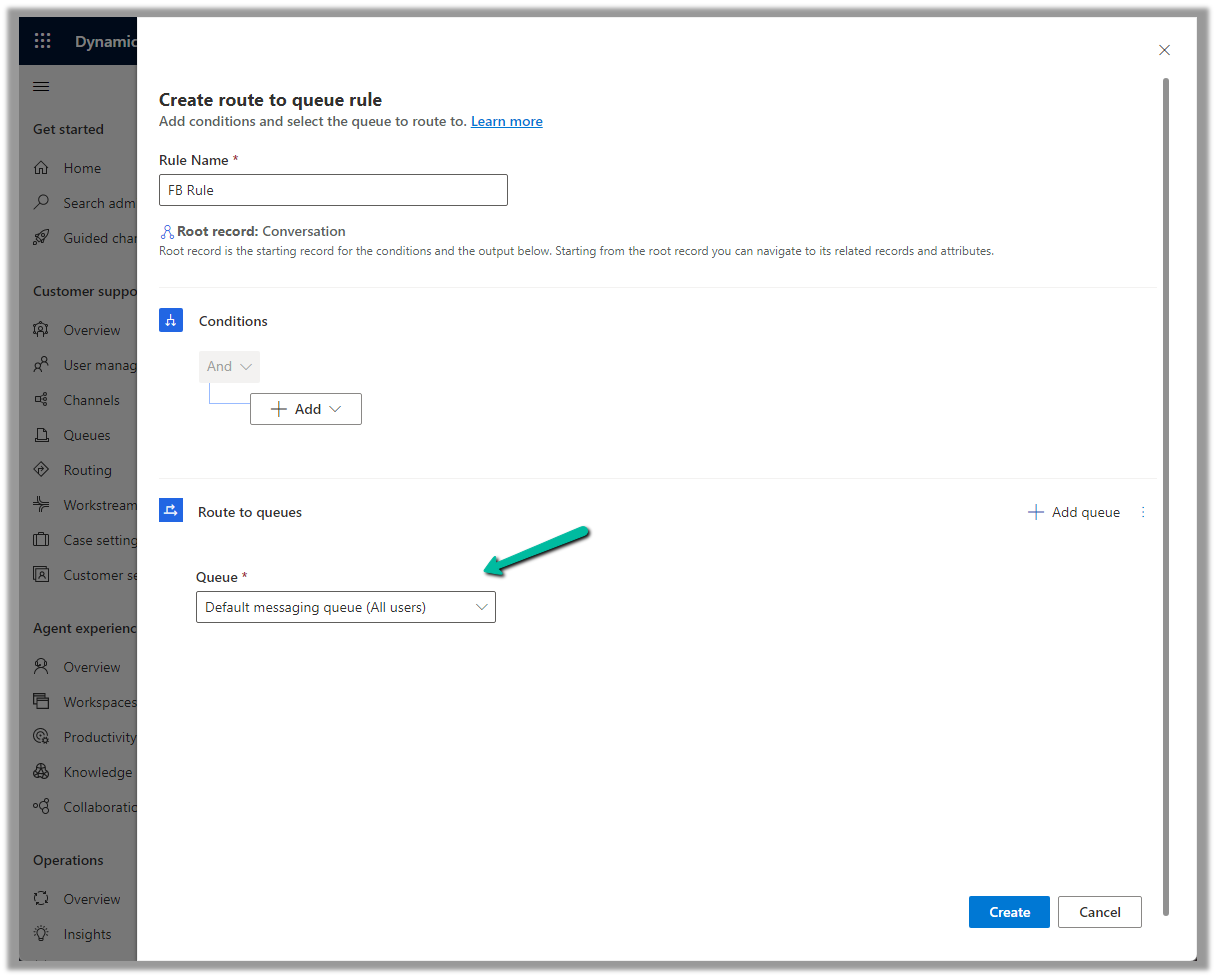
Next, Create a rule. We can define the conditions here (right now we are keeping it blank) and routing to the Default messaging Queue (we can create a specific queue and add only the required users).
Make sure you have added users to the Queue and assigned Omnichannel Agent security roles.
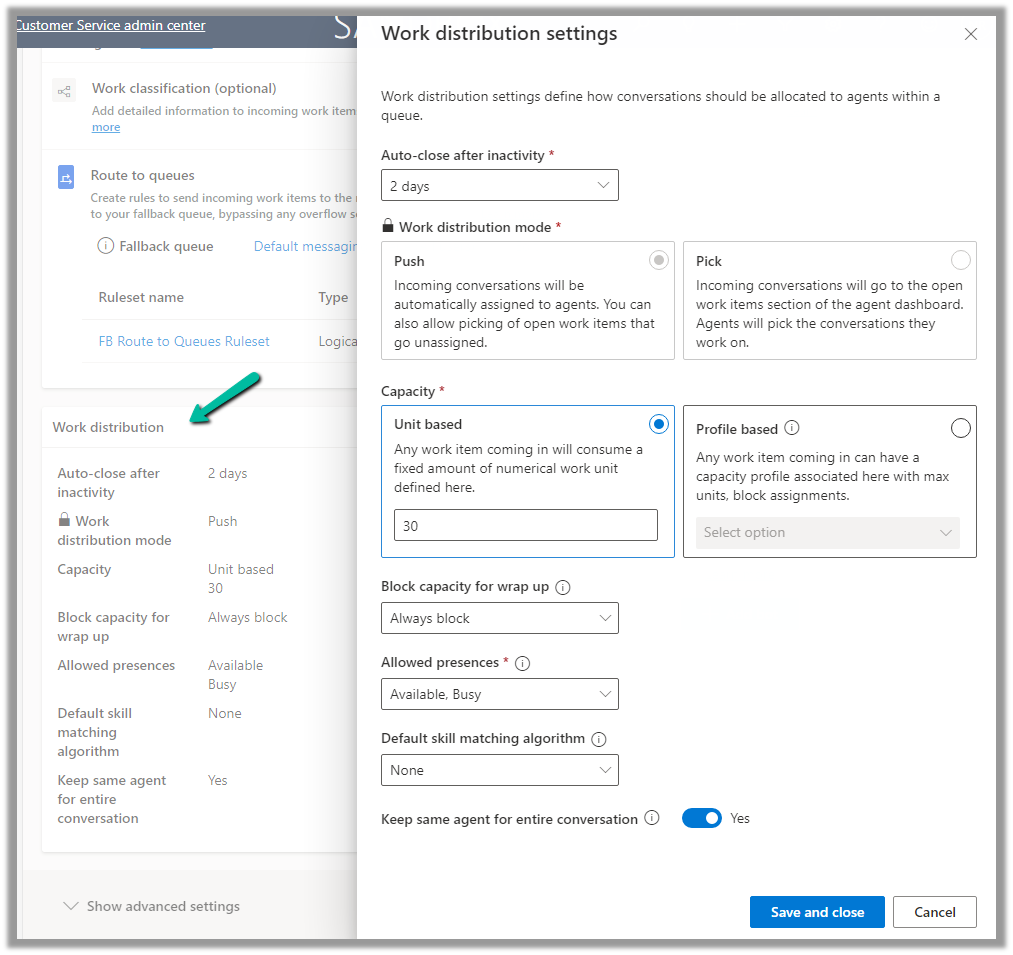
We can update the default Work distribution properties.
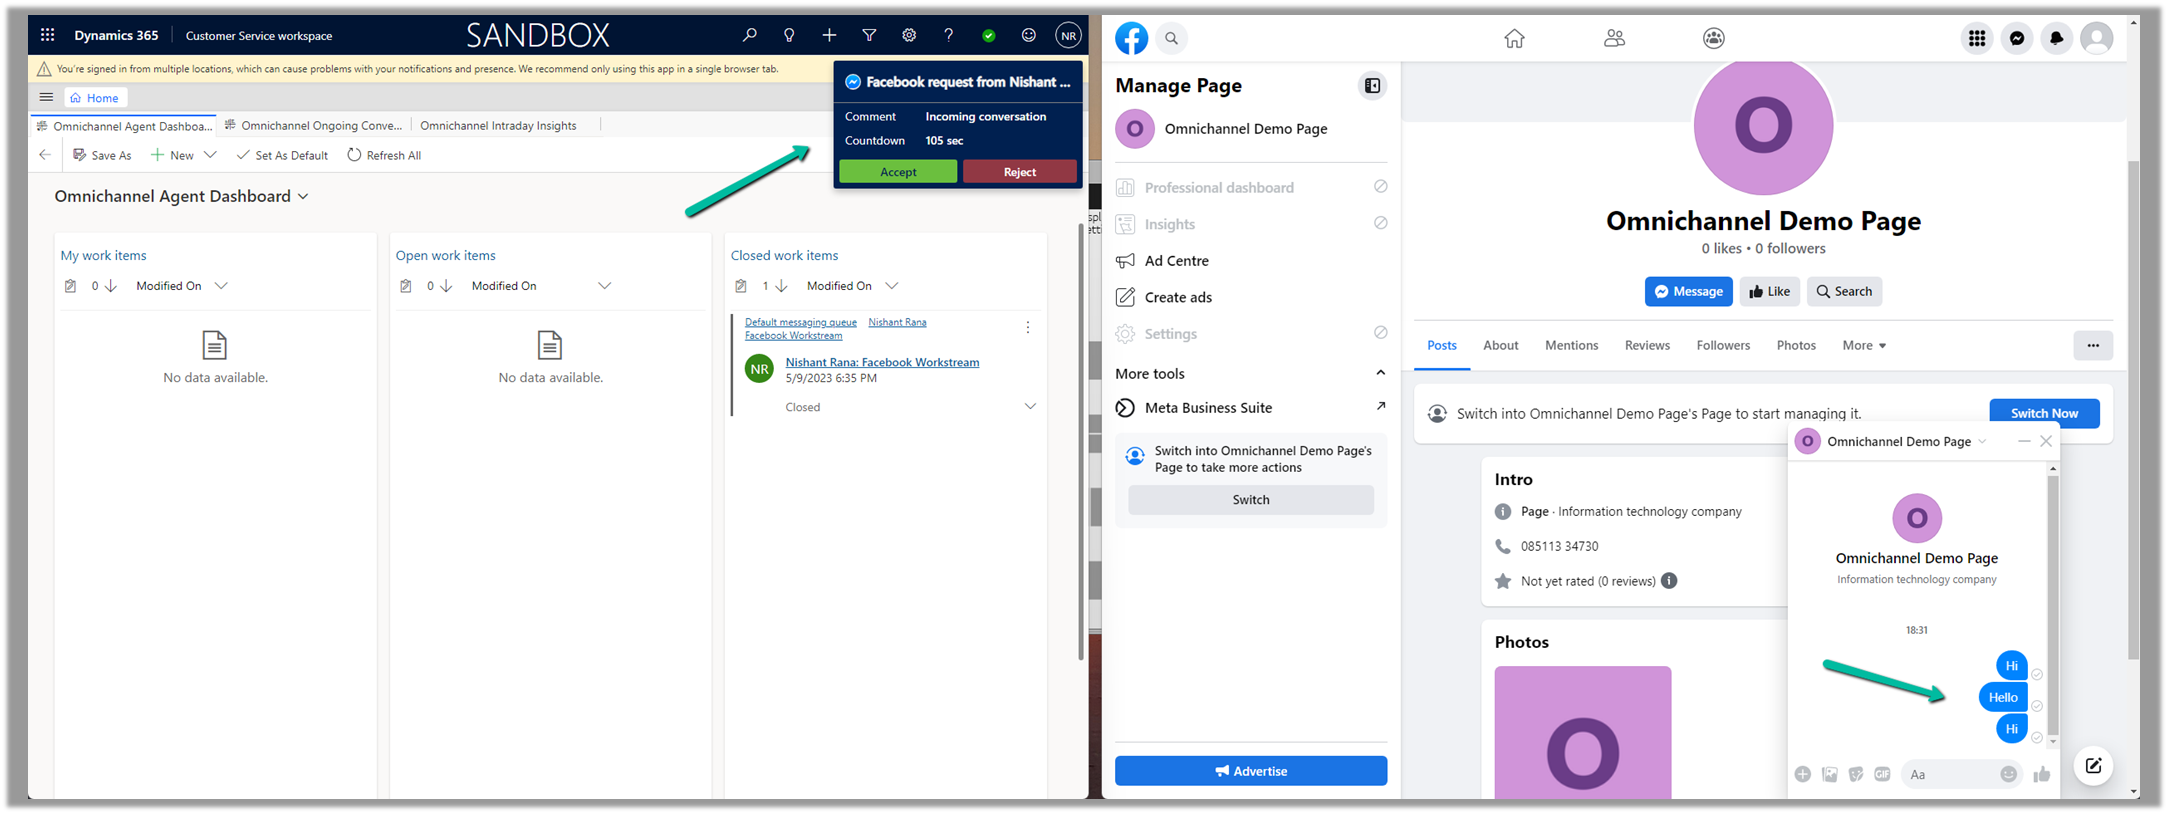
Now sending the message from the Facebook Messenger, will pop up the notification for the agent logged into Customer Service Workspace.
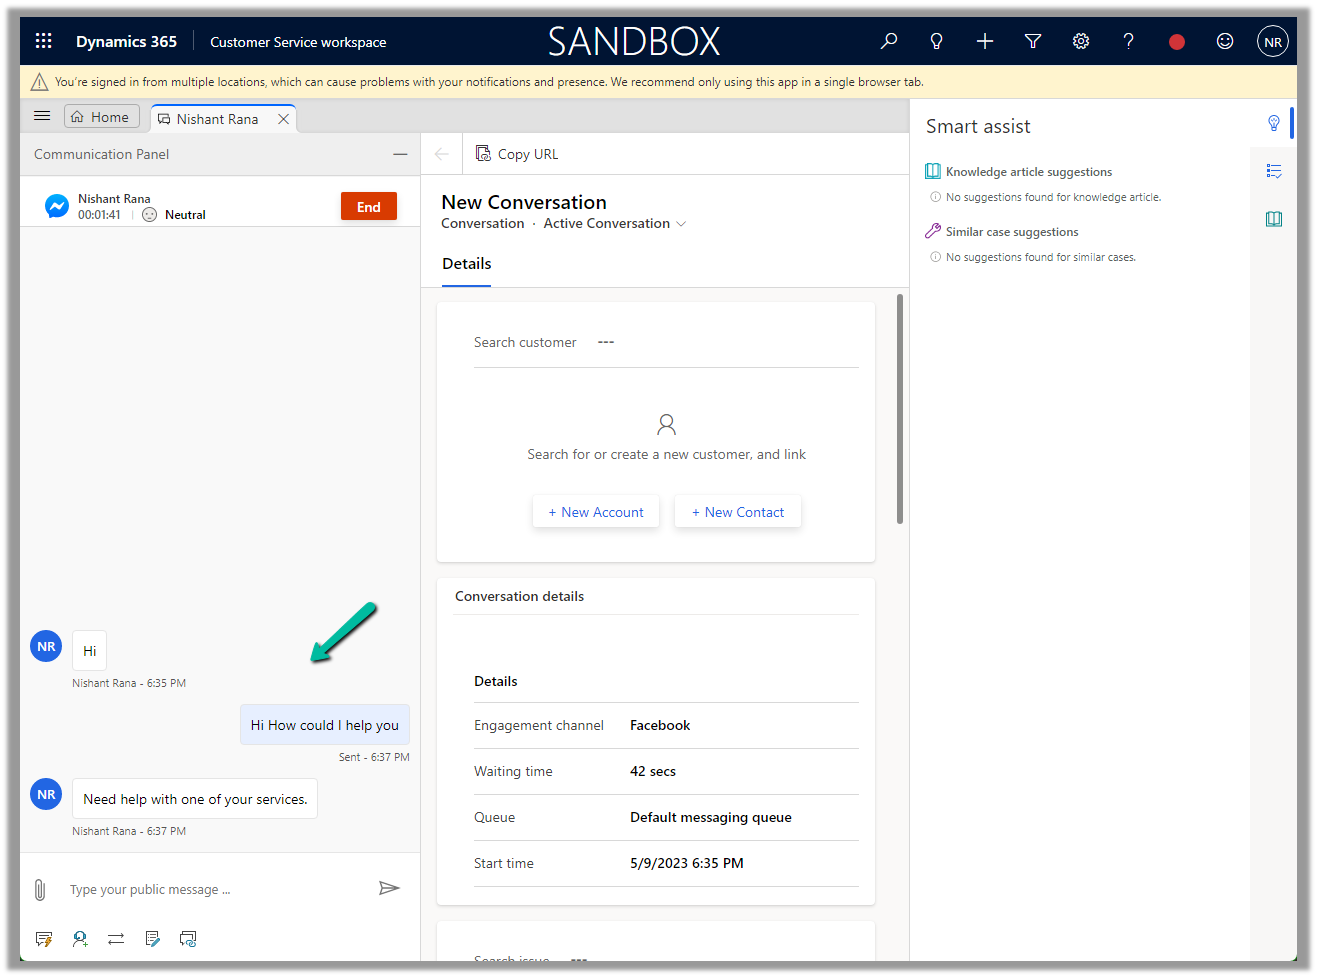
Accept the notification to start the conversation.










 We can also Generate token for the page, which we will use while configuring Facebook Channel in Dynamics 365.