Publishing Bot to Azure and adding it to Skype (Microsoft Bot Framework)


Let us continue with our previous posts on using Microsoft Bot Framework to create a simple bot application that creates a lead in CRM.

In this post, we will be publishing our Bot application to Azure and also test it on Skype. Skype is one of the channel already configured for us.

Open the Azure Portal (Create a free trial if you do not have an account)

https://portal.azure.com

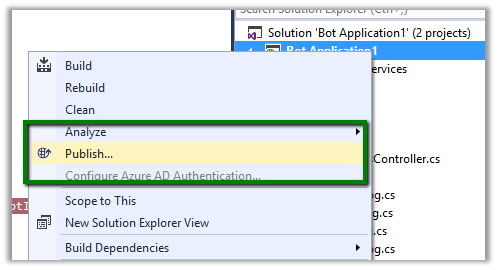
Right click on the application and select Publish.
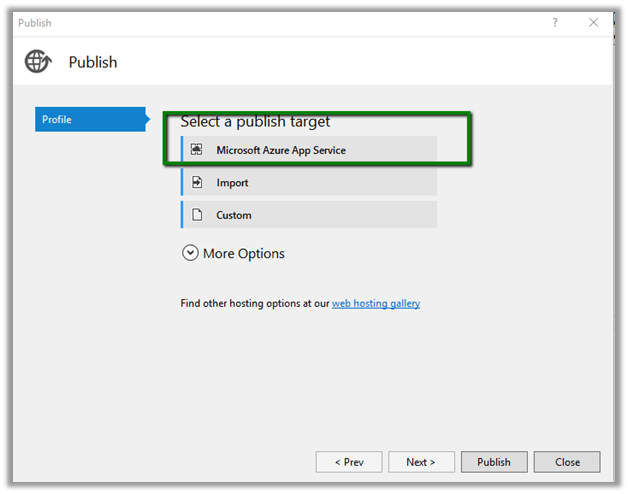
Select Microsoft Azure App Service as the publish target.
Create the app service

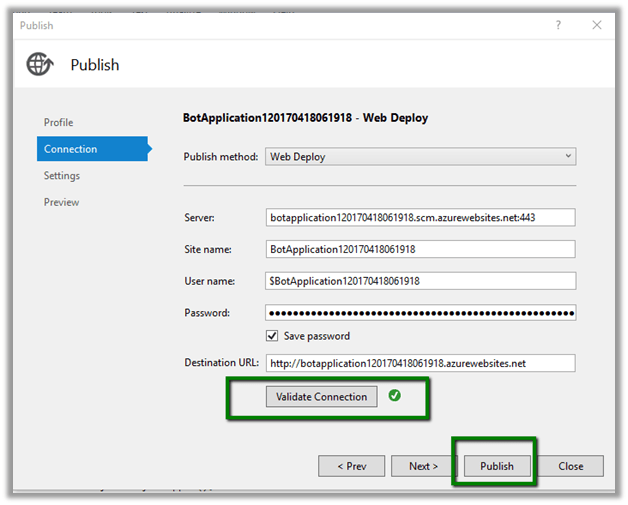
Validate the connection and on successful connection click on Publish.
The published Bot Application –
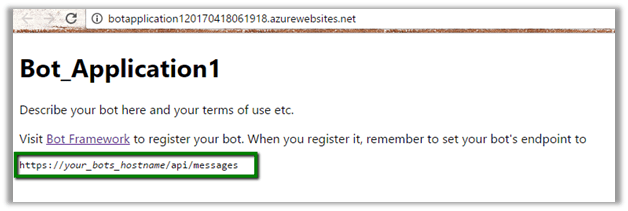
Now to register our bot go to bot framework developer site

https://dev.botframework.com/

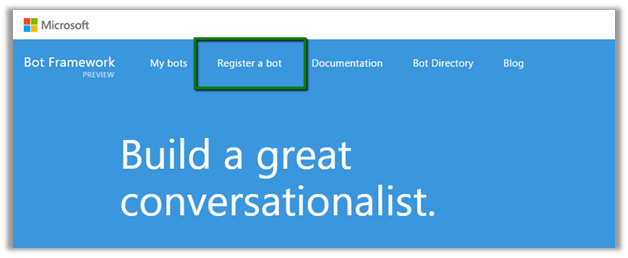
Sign in and Click on Register a bot

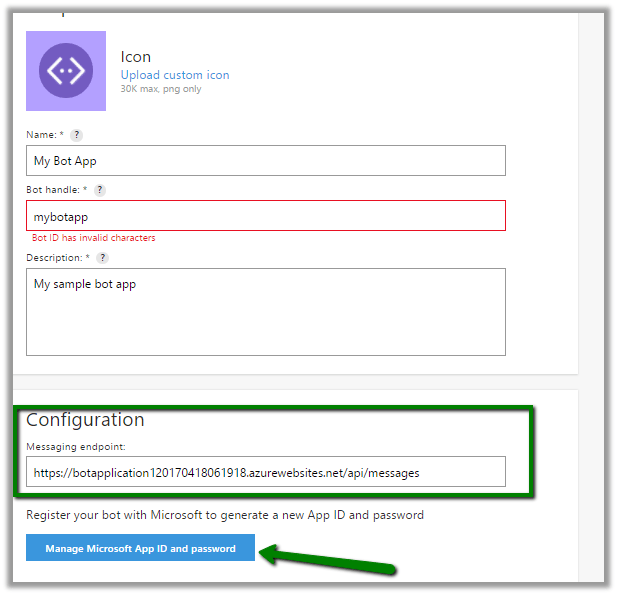
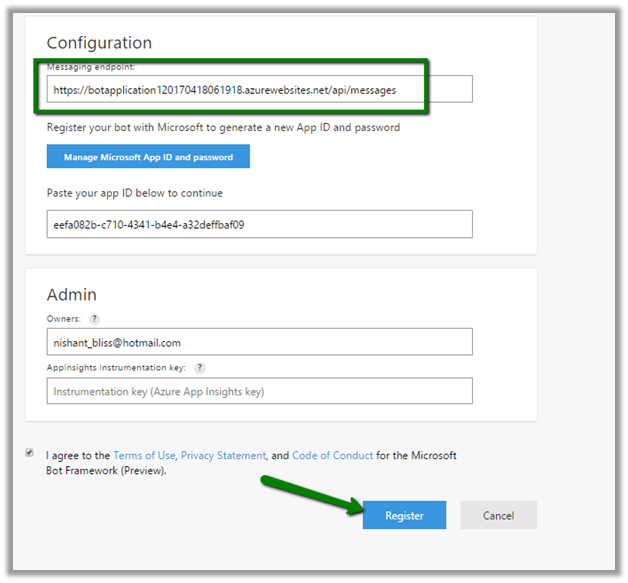
Enter all the required details.

Here URL will be the Destination URL of Azure where the Bot Application was published.

Click on Manage Microsoft App ID and Password
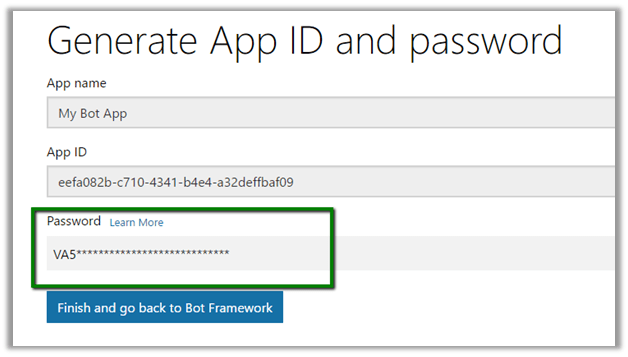
Click on Generate an Microsoft App ID and password.
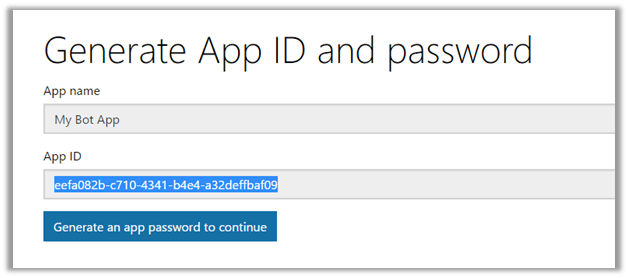
Save the password and app id which will be used for configuration later.
Enter the App Id and click on Register to register the Bot.
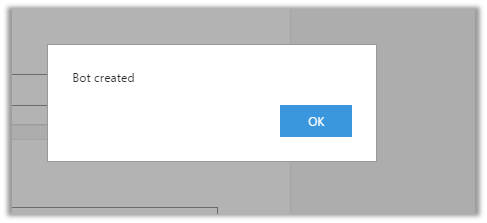
We will get the message “Bot created” on successful registration.
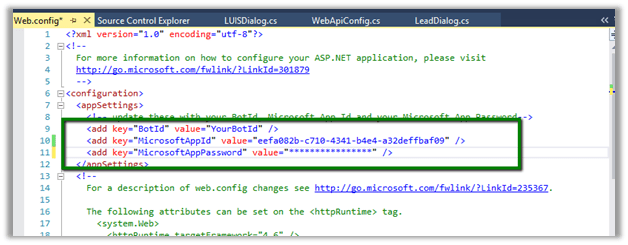
Back in our bot application, open its web.config and specify value for app id and password and republish the app.
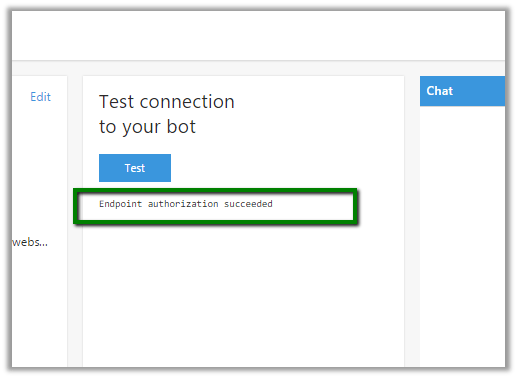
Once it is published successfully, inside our bot we can click on Test to check the connection.

We’d get the message “Endpoint authorization succeeded”.
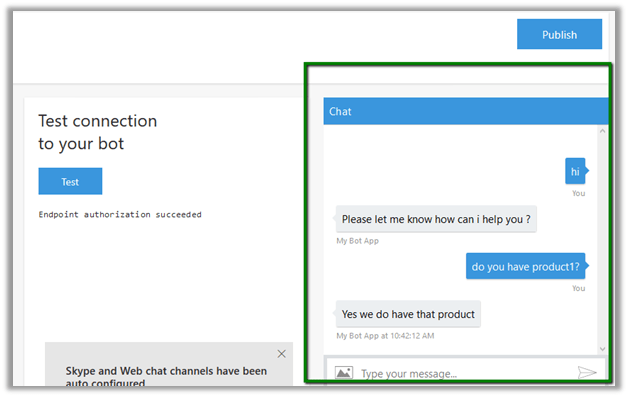
Scrolling down we can see two channels web and skype already configured.
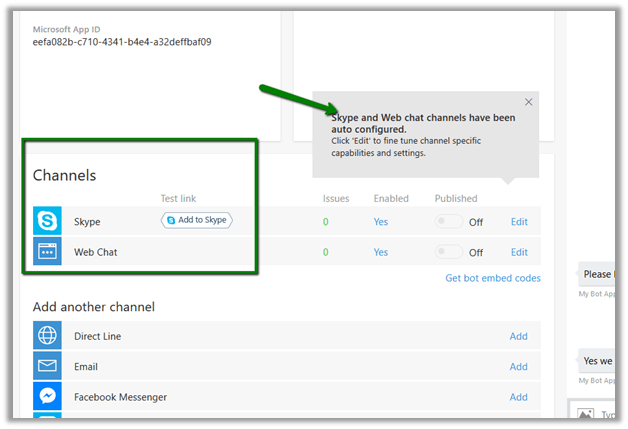
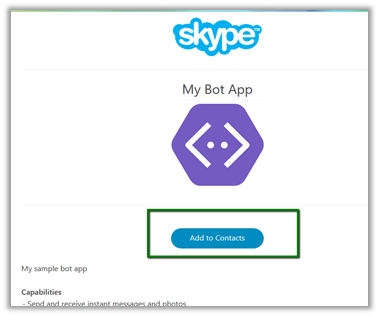
Click on Add to Skype to add the bot as a contact to skype.

‘
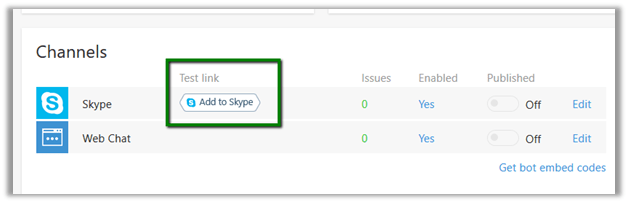
Click on “Add to Contacts”
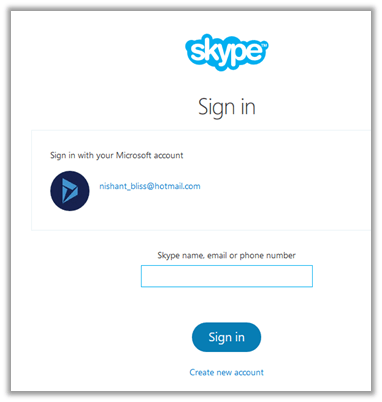
Sign in with your Skype Credentials.
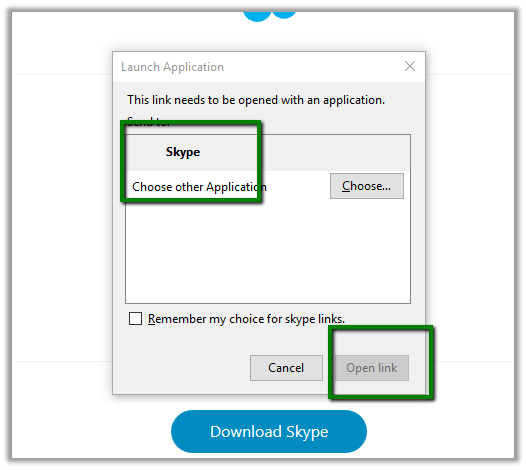
Launch Skype.
We can see the Bot added to our contacts.
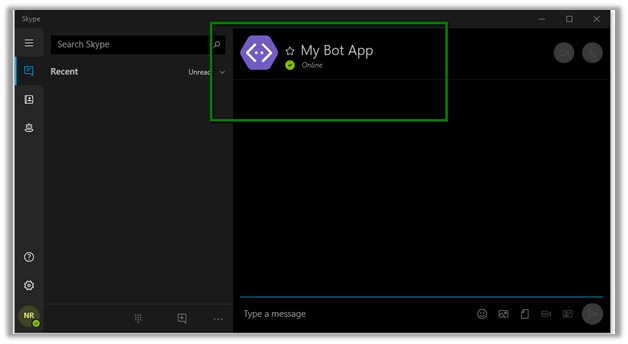
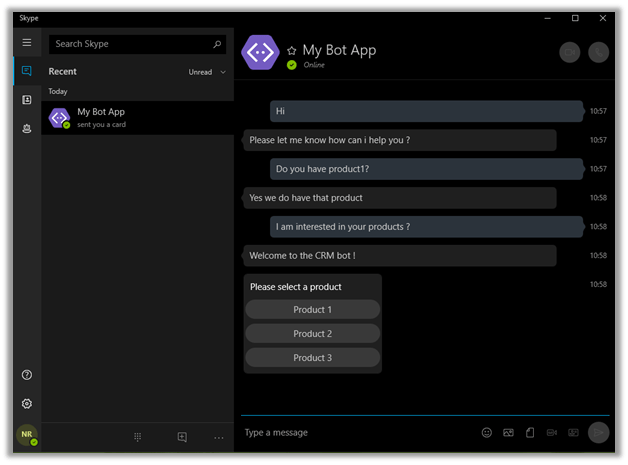
This is how we can easily publish the Bot to azure and add it to Skype.

Hope it helps..

Step by step – Upload files to Azure Blob storage


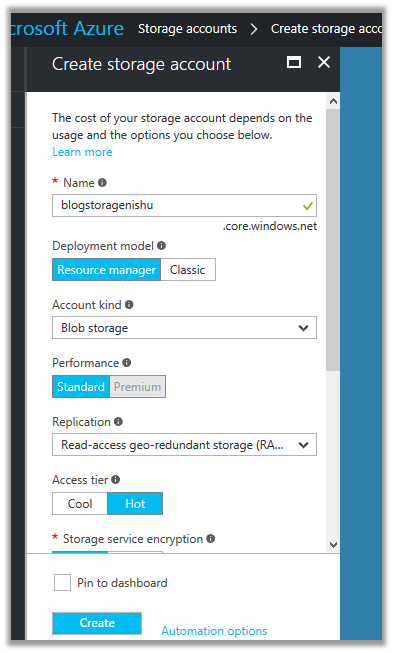
Here we will be creating a storage account of type blob storage and a container inside it. Then we will create a console application, add required nuget packages and upload a file to the container.

Log in to Azure Portal

https://portal.azure.com

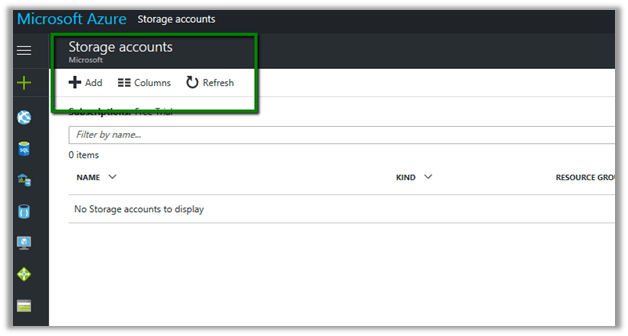
Click on Add to add a new storage account.

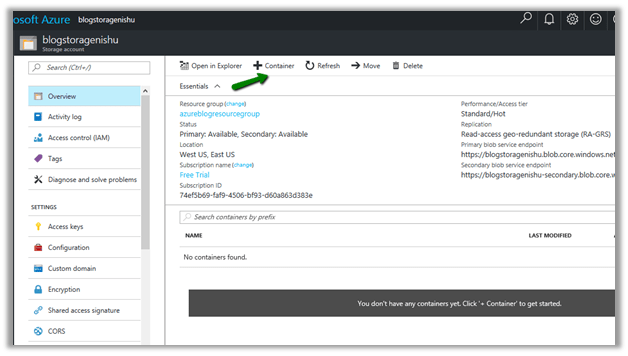
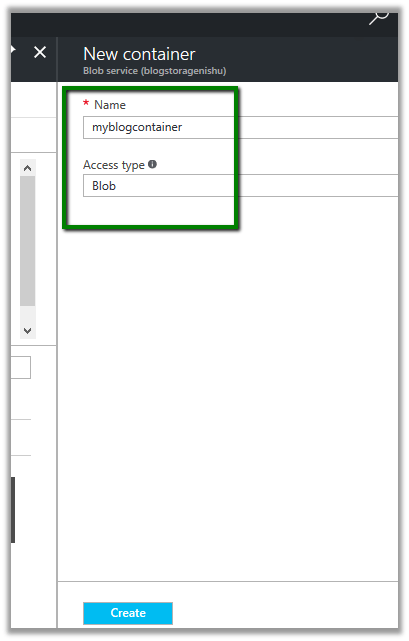
Create a new container in it to store the blob files

Now we’d write a console app to connect to this container and upload a file.

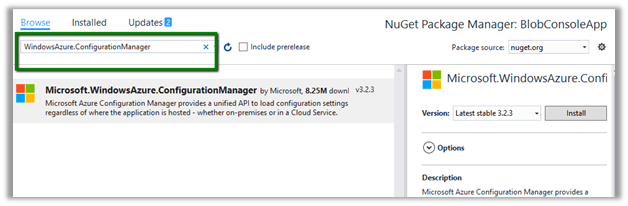
Create a new console application and add references to below Nuget Packages.

  • Windows.Azure.Storage
  • Windows.Azure.ConfigurationManager

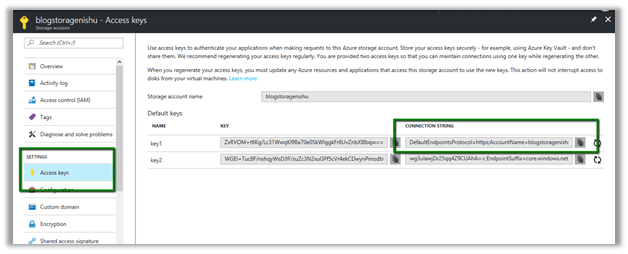
In Azure Portal – Storage Account, go to Access Keys and copy the connection strings for the storage account.

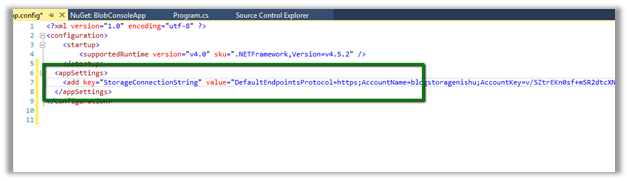
Inside console application add an appSettings section and add a key and paste the above copied connection string there.

The source code to upload the Blob file

// Retrieve storage account from connection string.
CloudStorageAccount storageAccount = CloudStorageAccount.Parse(
CloudConfigurationManager.GetSetting("StorageConnectionString"));

// Create the blob client.
CloudBlobClient blobClient = storageAccount.CreateCloudBlobClient();

// Retrieve a reference to a container.
CloudBlobContainer container = blobClient.GetContainerReference("myblogcontainer");

// Retrieve reference to a blob named "myblob".
CloudBlockBlob blockBlob = container.GetBlockBlobReference("WeekendChamps.jpg");

// Create or overwrite the "myblob" blob with contents from a local file.
using (var fileStream = System.IO.File.OpenRead(@"C:\Users\Bliss\Downloads\WeekendChamps.jpg"))
{
blockBlob.UploadFromStream(fileStream);
}

The file uploaded in the container

Hope it helps..
List of all blog posts on CRM and Azure Integration


Advertisements

Configure Product Recommendations using Recommendations API in Dynamics 365


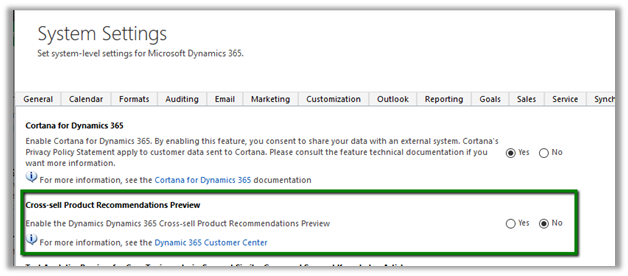
For configuring Product Recommendations first we need to enable the preview –

Go to Settings – Administration – System Settings – Previews

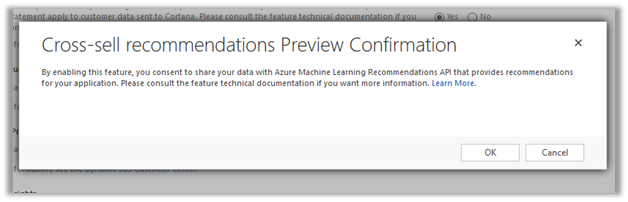
Select Yes and Click on OK.

As a next step, we need to create Cognitive Services for Recommendation API and connect it to CRM.

Go to Portal

https://portal.azure.com

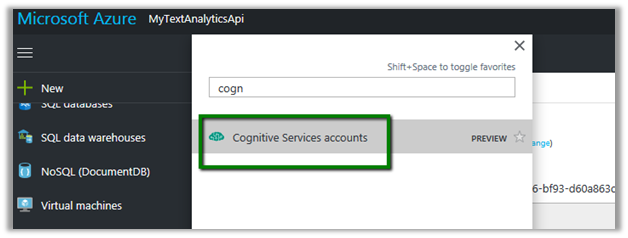
Search and select Cognitive Services Accounts

Click on Add

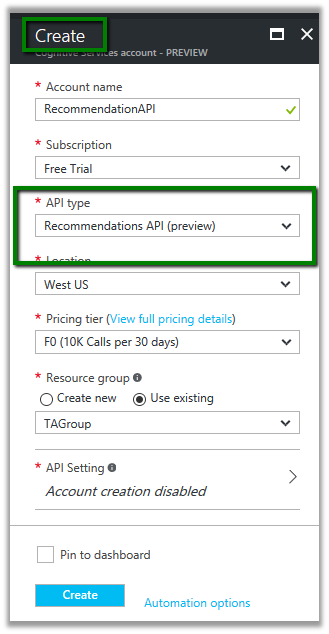
Select Recommendation API and provide other details and click on Create.

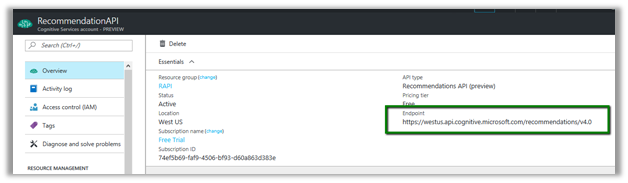
From Overview, note down the Endpoint which will be used to configure the connection in CRM.

From Keys, copy value of the Key which will be used for configuring connection to CRM.

In CRM, go to Settings – Administration and click on Azure Machine Learning Recommendation Service Configuration.

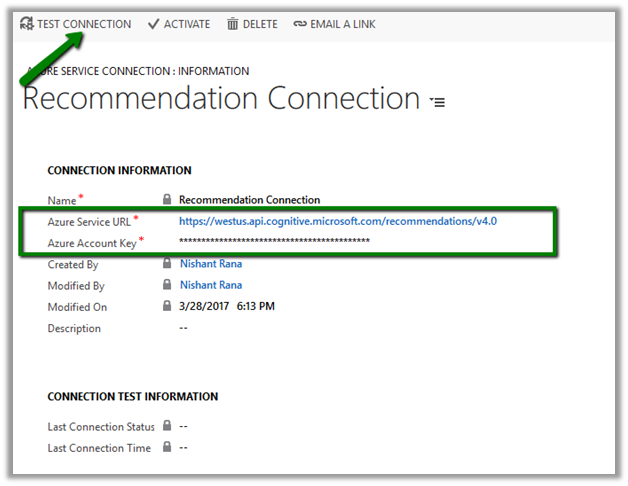
Specify the value for the URL and Key we had noted down earlier, save the record and click on Test Connection to test the connection.

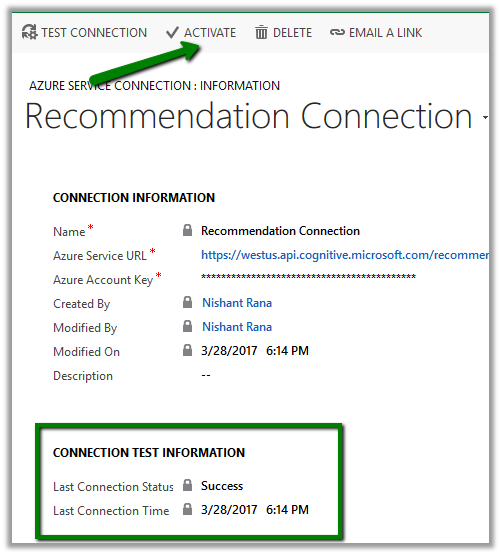
On Successful connection, we’d see Success message for Last Connection Status. Click on Activate to enable the connection.

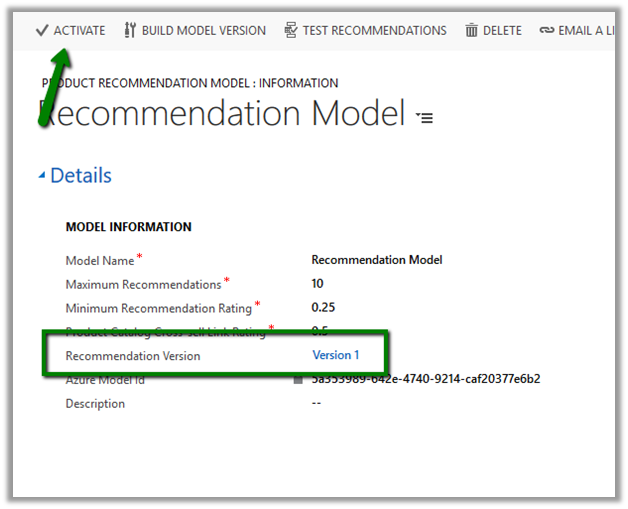
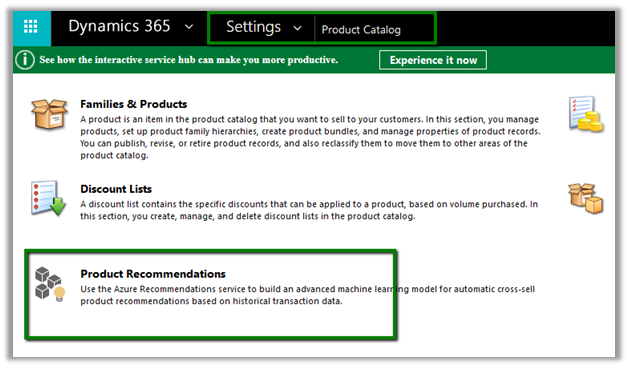
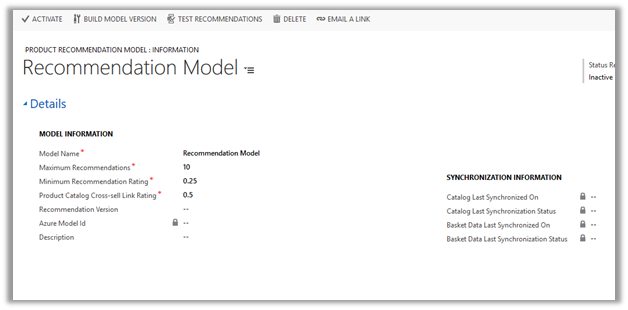
Now we need to define\build the model for recommendations. For this go to Settings – Product Catalog and click on Product Recommendations.

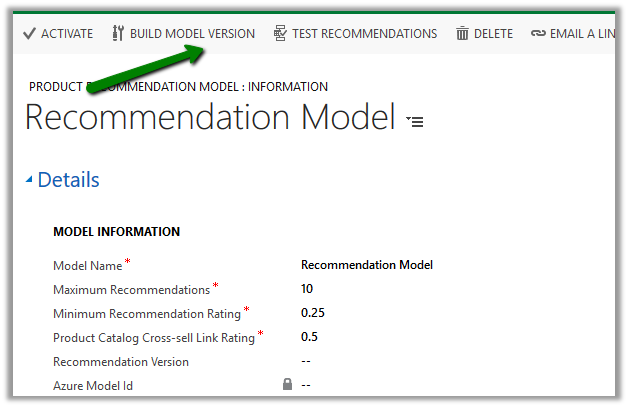
We’d see a recommendation model with default values

The model will have Basked Data Entities already defined. We can edit\add new\ delete these existing configuration records for Basked Data Entities. Basked Data Entities recommendations are based on which products appear together.

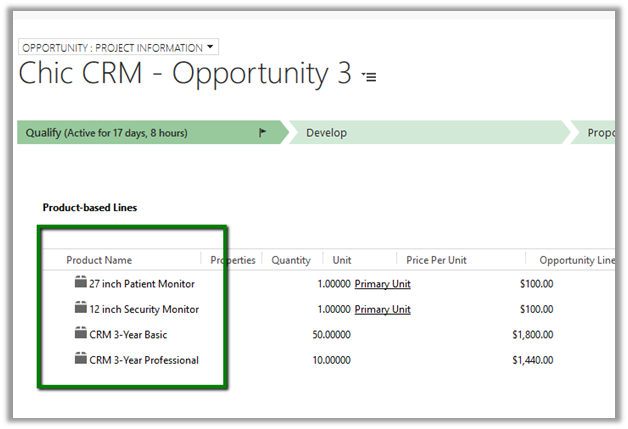
For e.g. in below Opportunity record we can see 27 inch and 12 inch monitor opportunity products appearing together. It will look for all such line items records.

Similarly we have recommendation entities records configured which we can update.

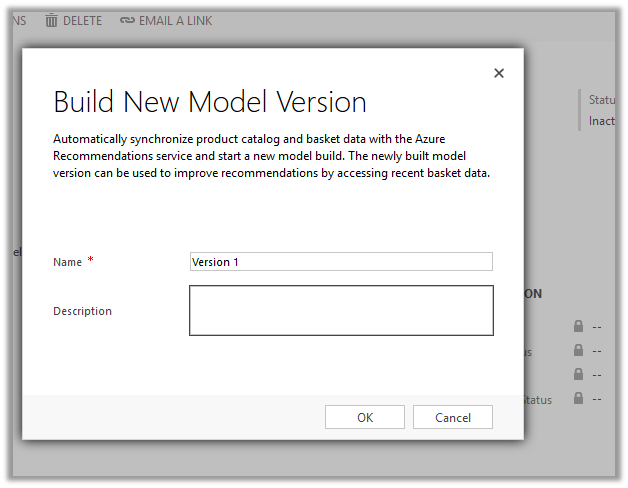
Once done with the configuration, we need to click on Build Model Version to build the model.

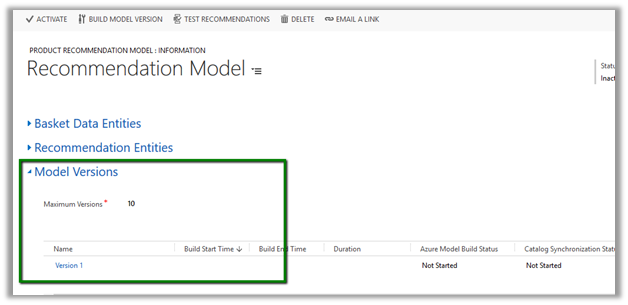
It will create a corresponding model version record.

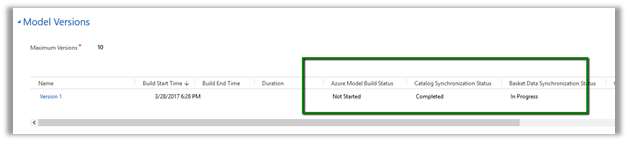
We can check its progress by refreshing it.

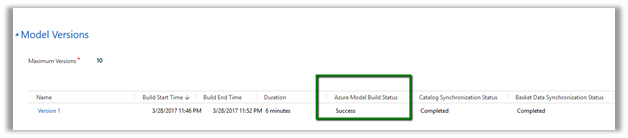
Here the model that we had defined has successfully build and it took around 6 minutes.

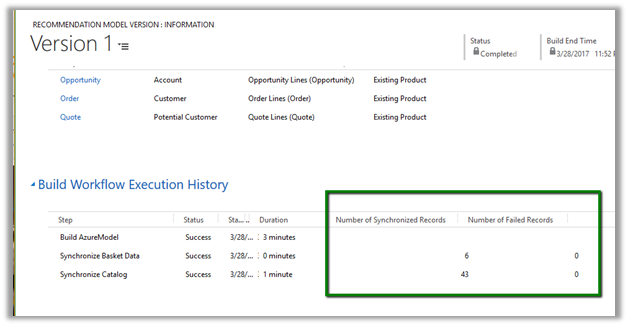
We can click on the Model Version to open the record to get the further details.

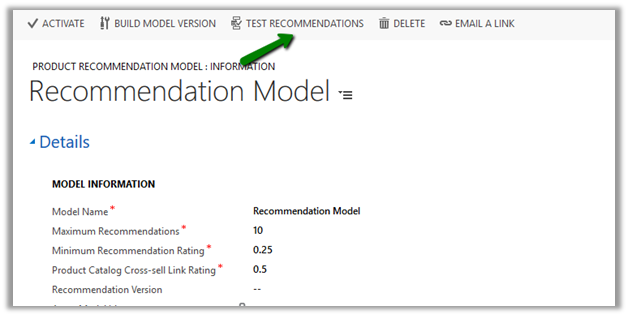
Next step would be to check the recommendations. For this click on Test Recommendations.

Pop up opens wherein we can select the Products and model version and click on Show Result to see what are the product recommendations.

Once satisfied with the test result, click on Activate to enable the recommendations.

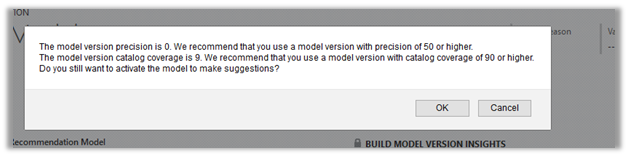
We might get the below message in case we do not have good enough data in our system.

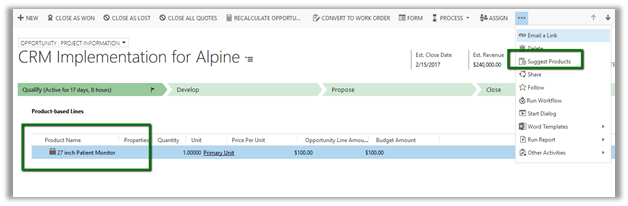
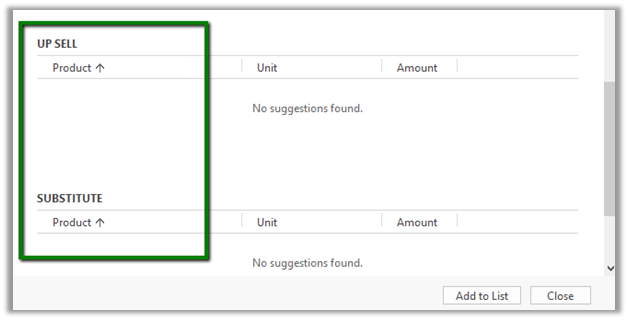
To see it in action, open an existing opportunity record , go to product sub grid and select a product and select Suggest Products.

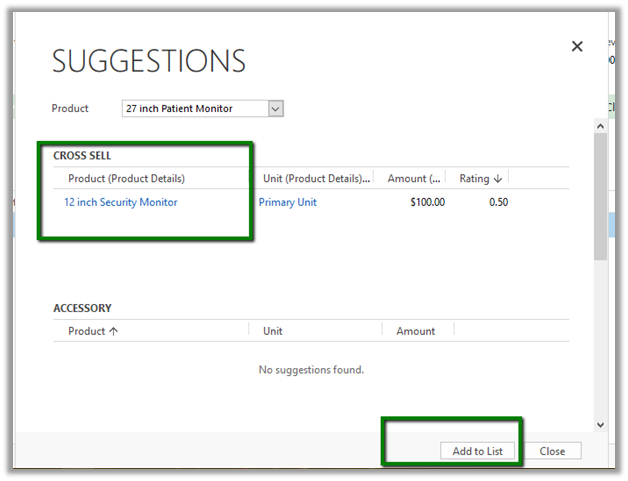
A dialog box opens up that shows the Cross-Sell products and other details.

Get all the details here

https://technet.microsoft.com/library/56b35229-72f8-46ca-bebf-eae023f633c2.aspx

Hope it helps..
Configure Automatically suggest knowledge articles using Cognitive Services Text Analytics (Preview) in Dynamics 365 (online)


As a first step, we need to set up Text Analytics Service and connect it to our CRM Online. Follow the below post for that

https://nishantrana.me/2017/03/24/configure-case-topic-analysis-using-cognitive-services-text-analytics-preview-in-dynamics-365-online/

Next, we need to set up Knowledge Search field settings

For this go to Settings – Service Management and click on Knowledge Search field Settings

There click on New to create a new Search Model record.

Below we have specified case as our source entity. Click on Save.

Next, we need to define Keyword fields for our model, click on + to create a new text analytics entity mapping record.

To keep things simple, we have selected entity as Case and Field as Case Title based on which suggestions will be made. Save the record.

Click on Activate to activate the model.

Next, we need to modify the Case form to include knowledge base suggestions

Open the Conversation Tabs, go to Knowledge Base Search and select Text Analytics for Give Knowledge base suggestions as described below and publish the form

Open any of the case record, go to KB Records. Here based on the Case Title, the text analytics picks up the keyword “Delay” and shows/suggests the corresponding KB Articles matching that keyword.

Get all the details here

https://technet.microsoft.com/en-us/library/mt703319.aspx

Hope it helps..

Configure Document Suggestions using Cognitive Services Text Analytics (Preview) in Dynamics 365 (online)


Let us take a simple example to understand how to configure Document Suggestion preview feature.

To do so first we need to enable Text Analytics Service, Connect it to our CRM Online and configure similar record suggestions. Please follow the below post for all the details.

https://nishantrana.me/2017/03/27/configure-similar-record-suggestion-using-cognitive-services-text-analytics-preview-in-dynamics-365-online/

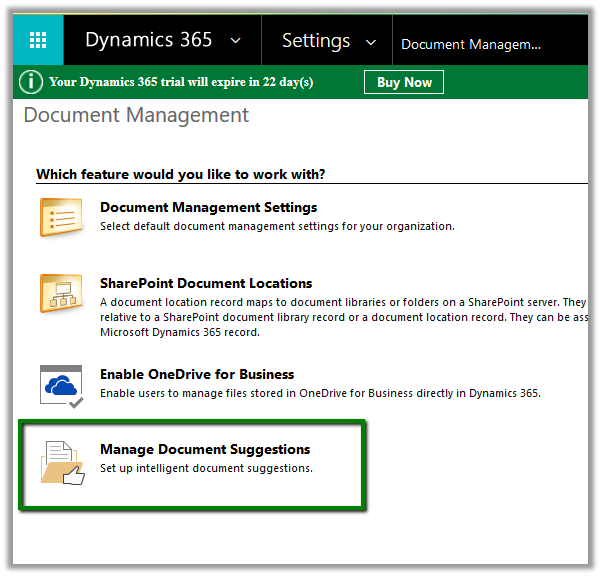
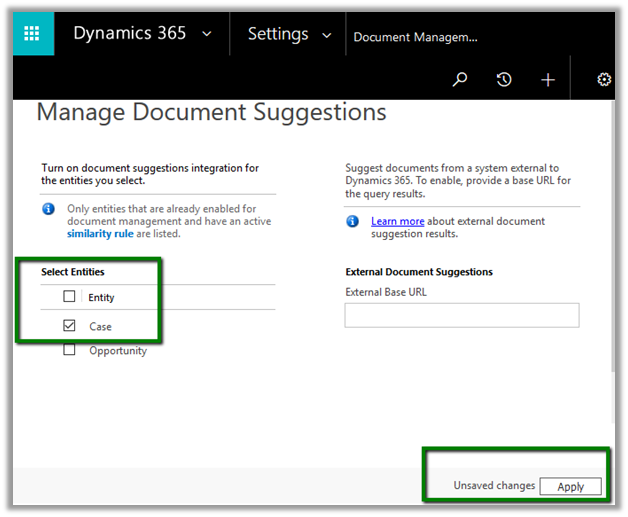
Go to Settings – Document Management – Manage Document Suggetions

Select the entity for which we want to enable it, as we had our similar record suggestions enabled for Case we select the Case entity here.

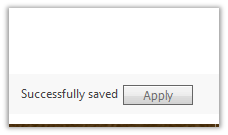
Click on Apply.

Now as we already have Similar Record Suggestions configured for Case entity, for a case record with Delay keyword in its title we get the below suggestions

So, for Delay in Dispatch record we are getting Delay in service, delivery and shipment as suggestions as similar cases.

Now what we have done over here next is that we have attached document(s) to each of these case records.

For Delay in Dispatch case record –

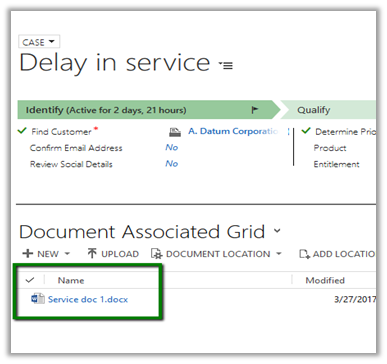
For Delay in Service case record –

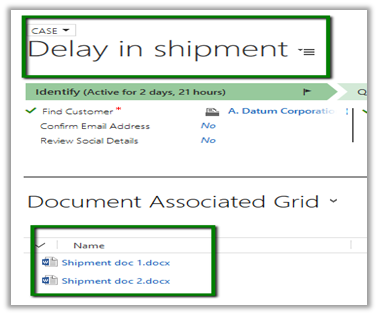
For Delay in Shipment record we have 2 document attached.

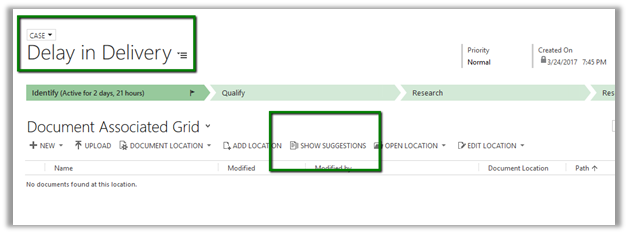
For Dispatch in Delivery case record we do not have any document attached yet.

Now let us open case with title “Dispatch in Delivery” and go to its Documents related records and click on Show Suggestions button

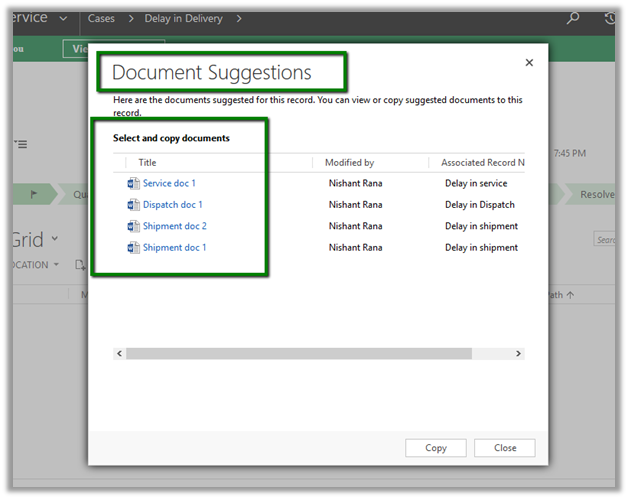
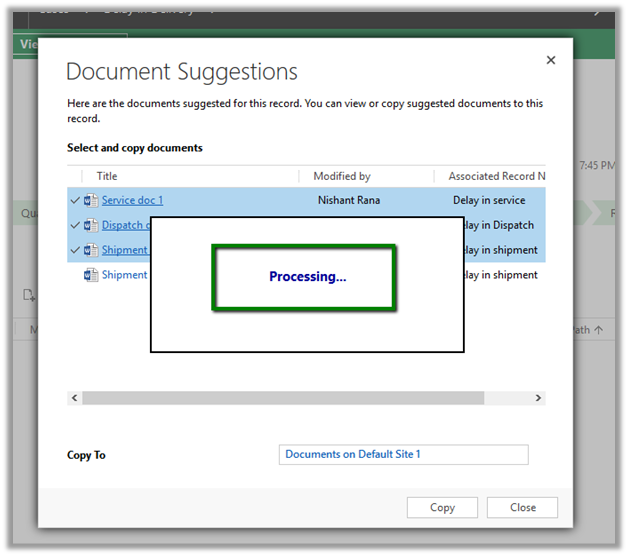
A dialog opens which list all the documents that are associated to the case records similar to the Delay in Delivery record i.e. all the remaining case records having delay keyword in its title.

Select documents and click on Copy.

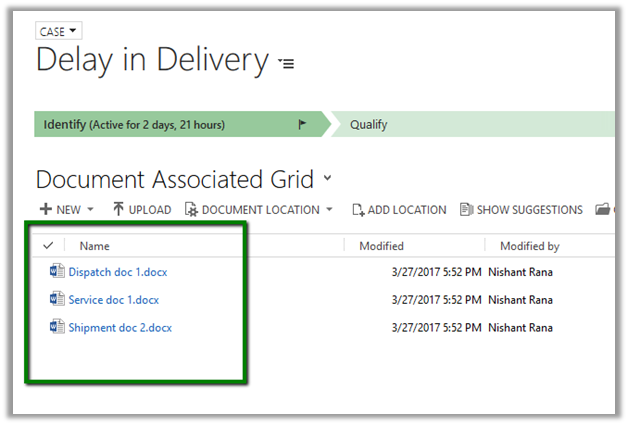
Documents Copied to the Delay in Delivery record.

Hope it helps..