How to – Extract attachments from Notes in Dynamics 365 / Dataverse


There are different ways we can extract attachments from notes.

  • We can write an SSIS Package using the Premium Derived Column component of KingswaySoft

https://nishantrana.me/2020/11/09/extract-attachment-from-notes-in-dynamics-365-ce-cds-ssis-kingswaysoft/

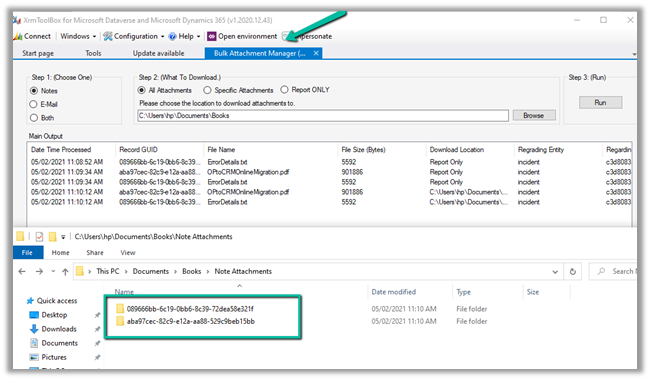
  • XrmToolBox has a wonderful plugin – Bulk Attachment Manager

https://www.livingintech.com/2018/02/xrmtoolbox-bulk-attachment-manager.html

The tool can download attachments from both Note and Email, using note’s GUID as the folder name.

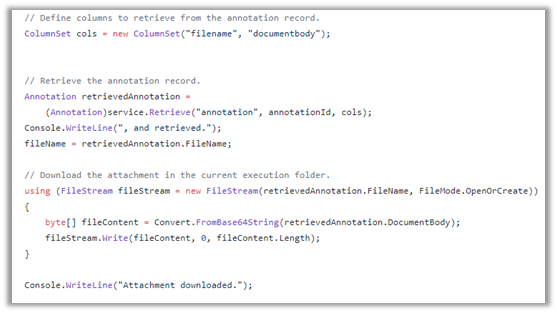
  • We can use SDK and write console app or tool.

https://github.com/microsoft/PowerApps-Samples/blob/master/cds/orgsvc/C%23/URDAttachment/URDAttachment/SampleProgram.cs

https://www.c-sharpcorner.com/article/downloading-notes-attachments-using-paginghis-artcile/

Or use the CRM SDK within the script component of SSIS if we are not using KingswaySoft’s CDS Component.

https://nishantrana.me/2020/10/19/connect-to-dynamics-365-through-script-component-ssis/

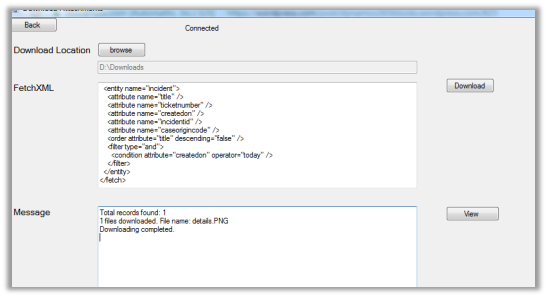
  • Attachment Downloader Tool –

https://vishalgrade.com/2018/01/22/ms-crm-attachment-downloader/

https://github.com/vgrade/MSCRMAttachmentDownloader

We can update the tool as per our requirement.

  • Use LINQPad for extracting attachment

https://dreamingincrm.com/2018/01/18/export-all-attachments-using-linqpad/

Hope it helps..

Advertisements

Improved search experience now adds Quick Actions – 2021 Release Wave 1 – Dynamics 365


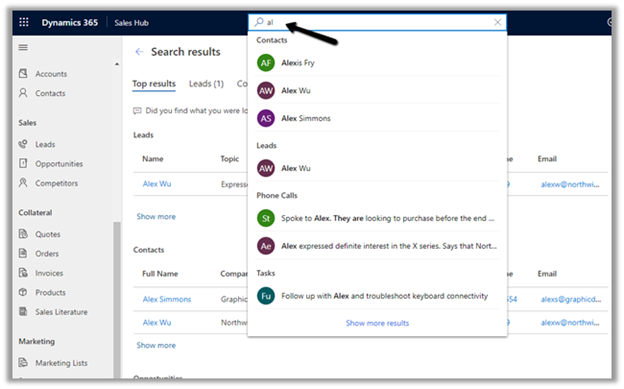
Improved search experience added features like easy access of search from within the header

https://nishantrana.me/2021/01/12/improved-search-experience-in-dynamics-365-powerapps/

More details and filters option

Incremental search or real time suggestions while performing the search

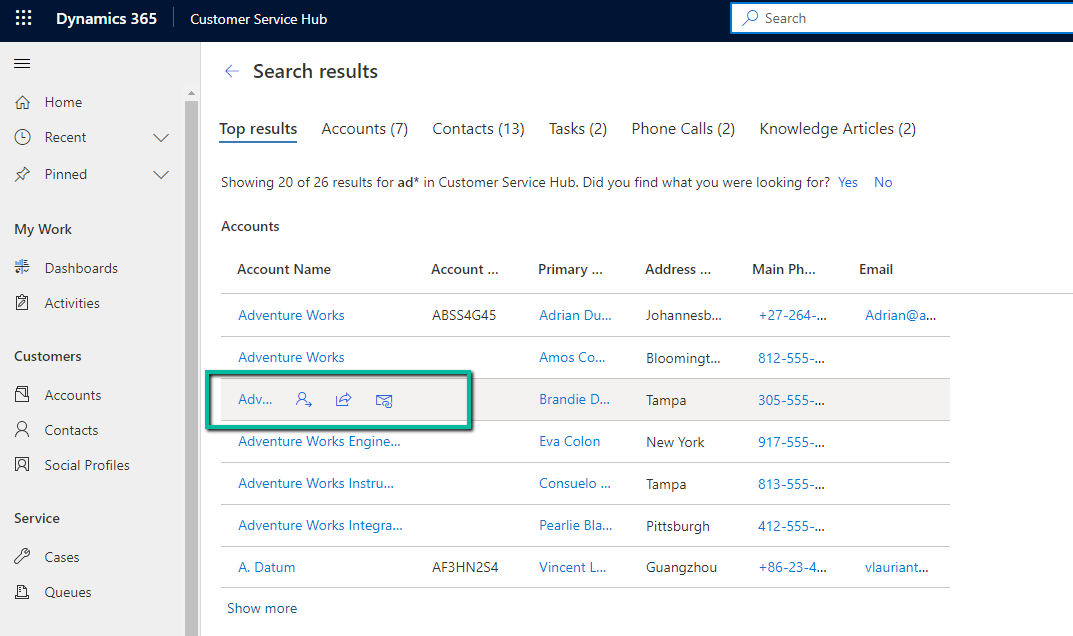
Now the 2021 Release Wave 1 adds Quick actions to the search results as shown below.

The quick actions available for accounts, contacts, etc. are

  • Assign
  • Share
  • Email

For the Phone call or activity entity, the options available are

  • Mark Complete
  • Cancel
  • Set Regarding
  • Assign
  • Email a Link.

The quick action are also available within the search results

Search

Read more about 2021 Release Wave 1

https://docs.microsoft.com/en-gb/power-platform-release-plan/2021wave1/

For Posts on

  • 2020 Release Wave 2

https://nishantrana.me/2020/08/14/posts-on-2020-release-wave-2-dynamics-365/

  • 2020 Release Wave 1

https://nishantrana.me/2020-release-wave-1/

Blog posts on 2021 Release Wave 1 – Dynamics 365

Hope it helps

Advertisements

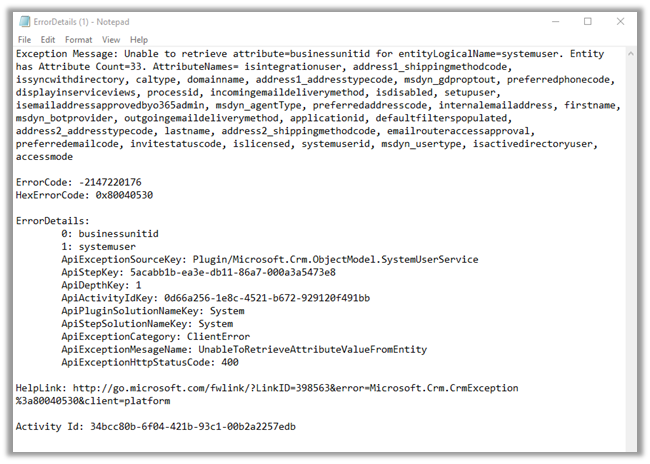
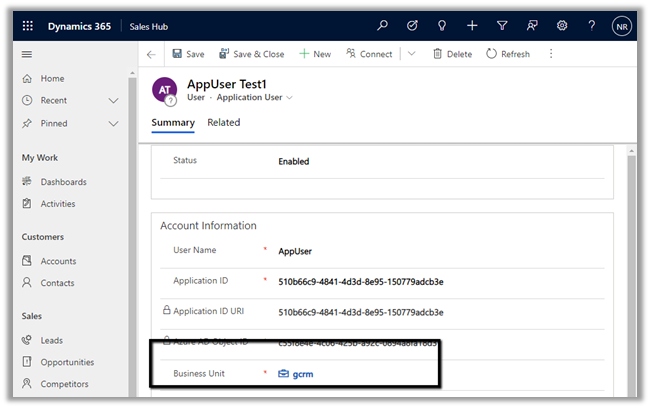
Unable to retrieve attribute=businessunitid for entityLogicalName=systemuser exception while creating Application User in Dynamics 365


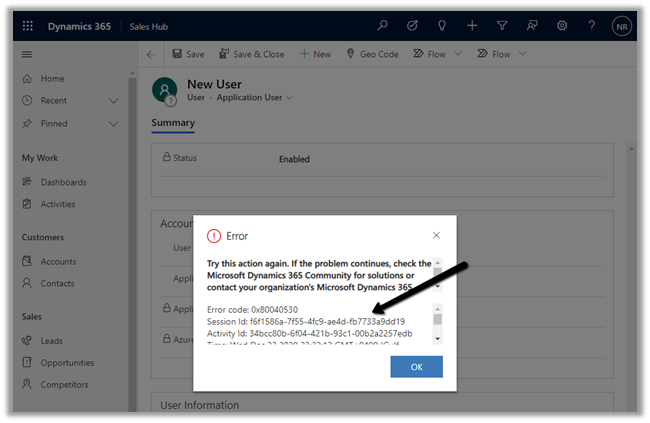
Recently while trying to add a new application user we got the below error message

More on Application User –

https://nishantrana.me/2020/12/24/application-user-form-missing-in-dynamics-365/

https://nishantrana.me/2020/12/23/d365-the-user-is-not-a-member-of-the-organization-error-while-connecting-to-ce/

Adding the missing Business Unit field in the form fixed it.

Hope it helps..

Power Platform for Admins connector (preview) in Power Automate


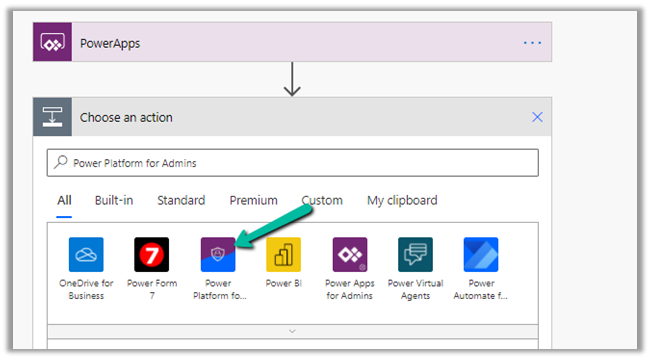
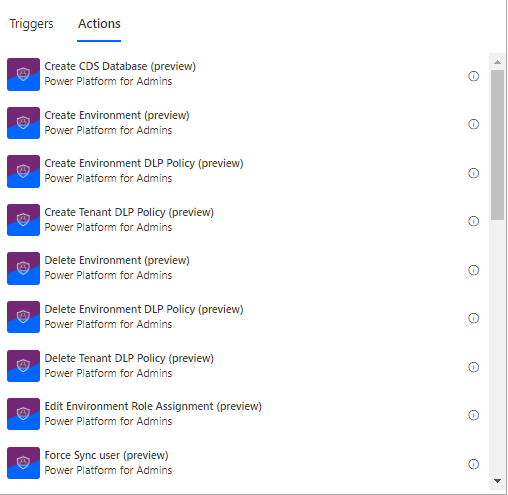
The Power Platform for Admins connector (preview)

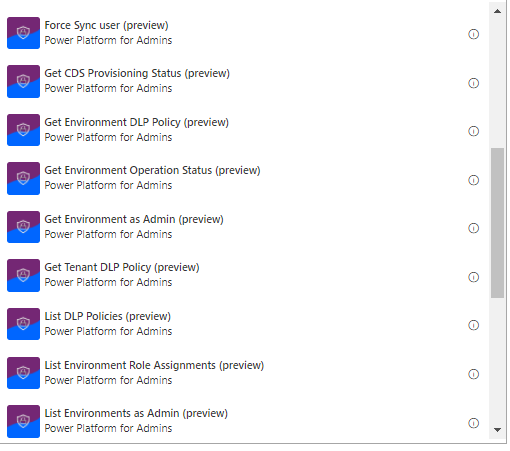
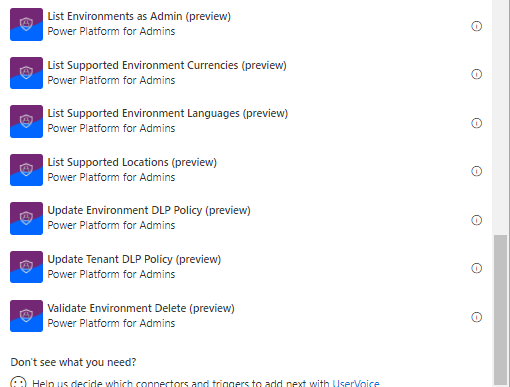
let’s us perform following Actions


The connector allows us to access the Business Applications Platform (BAP) API.

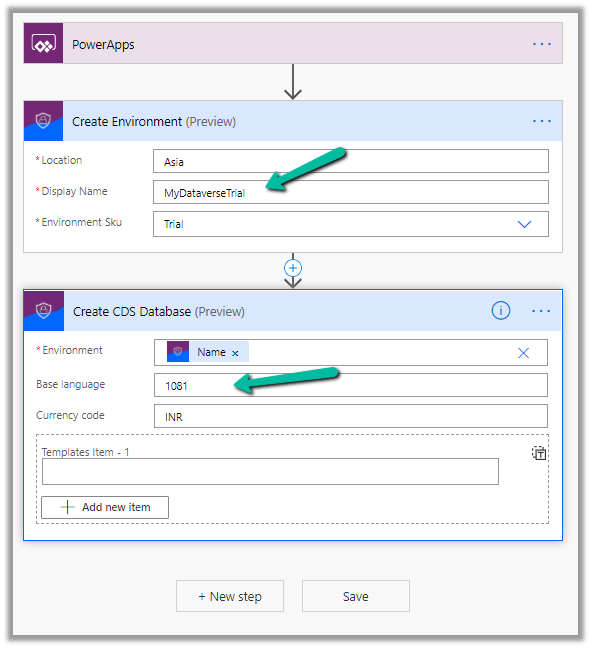
Below is the example of the Create Environment action, followed by Create CDS Database.

Here we are creating a trial environment in Asia region followed by a CDS database in it with base language – Hindi and currency code as INR

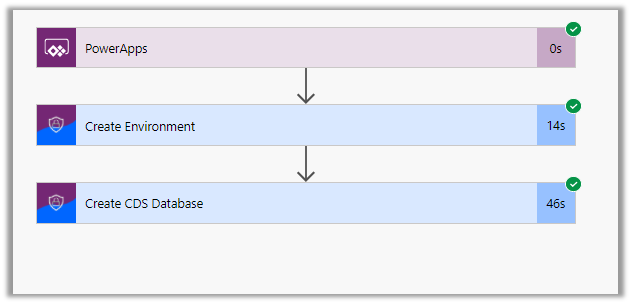
Let us run the flow and see the results

In Power Platform admin center can see the environment created along with the database specified.

All the key URL(s) for Power Platform Admin

Get all the details below –

Power Platform for Admins (Preview)

Power Apps and Power Automate Administration and Governance – Tools and Labs

Hope it helps..

Synchronize (Bi-Directional) Dynamics 365 CRM Cloud data with SQL Azure using Skyvia’s Synchronization Package


Continuing our previous post where we used the replication package

https://nishantrana.me/2019/11/13/easily-set-up-dynamics-365-ce-crm-replication-incremental-to-azure-sql-sql-on-premise-using-skyvias-data-integration-services/

here we will see how we can use the synchronization service for bi-directional sync.

Below of the prerequisites of synchronization package to perform bi-directional sync –

  • We need to use the created on and modified on fields of the Entity
  • The synchronized tables to have an auto-generated primary key.

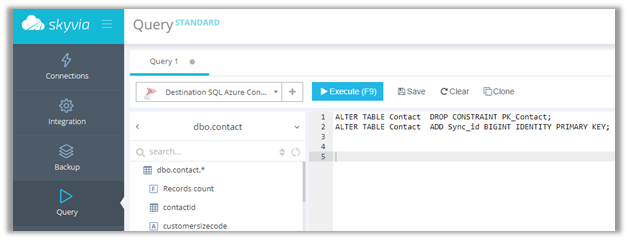
So here we need to alter the SQL Azure’s Contact table that was auto-created earlier by the Replication package to have the auto-generated primary key.

Connect to the SQL Azure database using Skyvia’s Query service and perform the alter operation

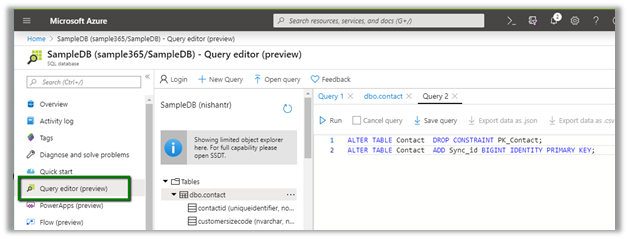
Or use the Query Editor (preview) of Azure

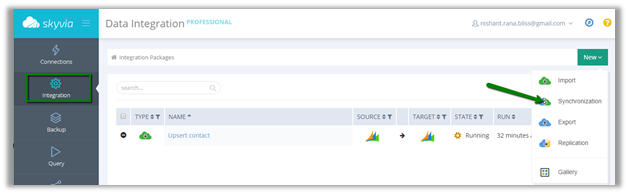
With necessary changes made, let us create a new Synchronization package

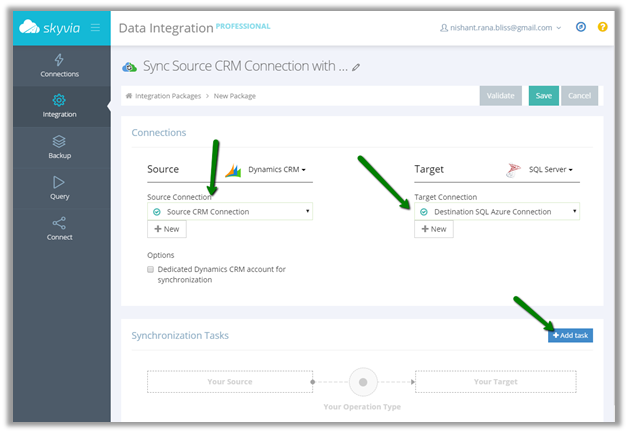
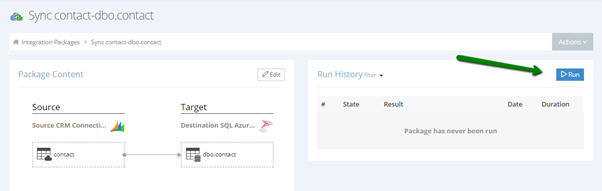
Specify the connection and click on Add Task to create the synchronization task.

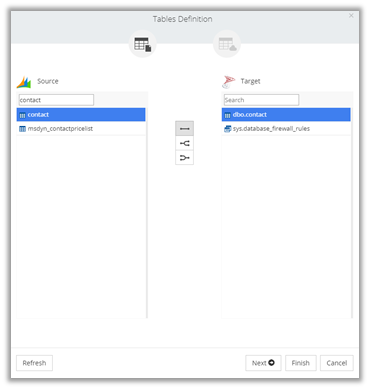
We have specified contact entity from Dynamics CRM Source and contact table in SQL Azure which was earlier created for us by the replication package.

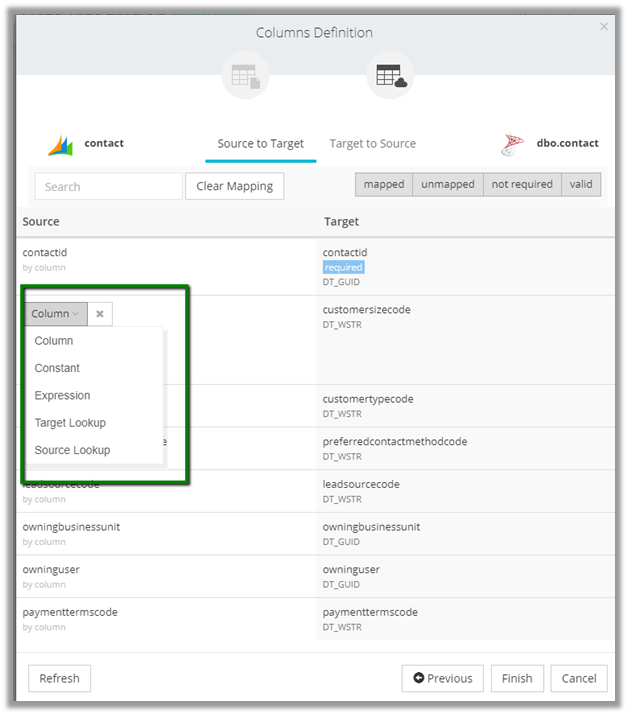
It automatically maps all the columns here based on the column name.

We can also manually specify mapping here for both Source To Target and Target to Source fields to be used for sync.

Click on Finish once done with the mapping.

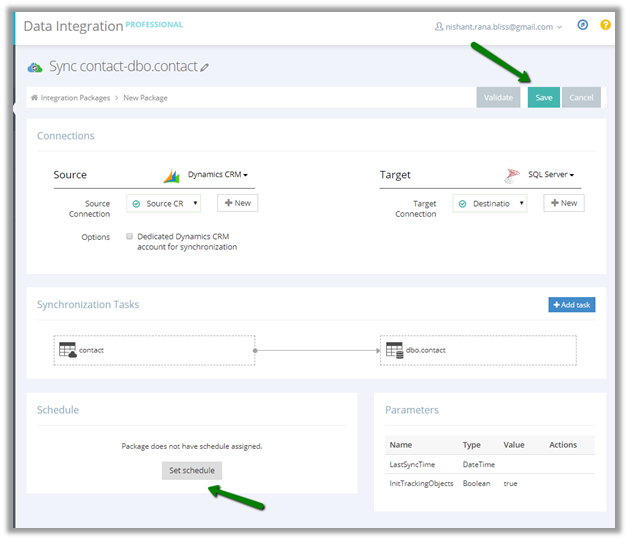
Similarly to replication packages, the synchronization packages can be scheduled.

Click on Save to create the Task.

Click on Run

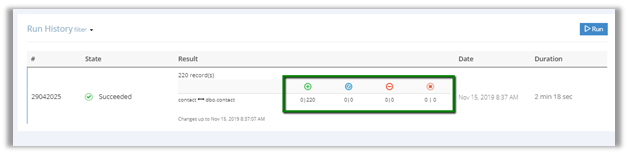
The run history shows the 220 records synced from Dynamics CRM to SQL Azure.

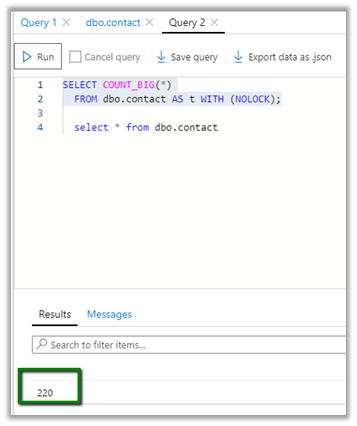
We can see the 220 records created in our SQL Azure DB

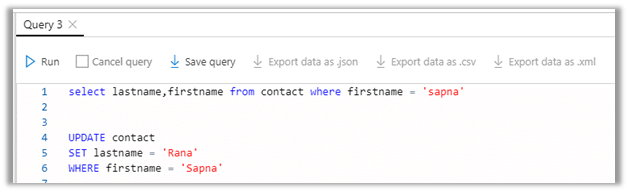
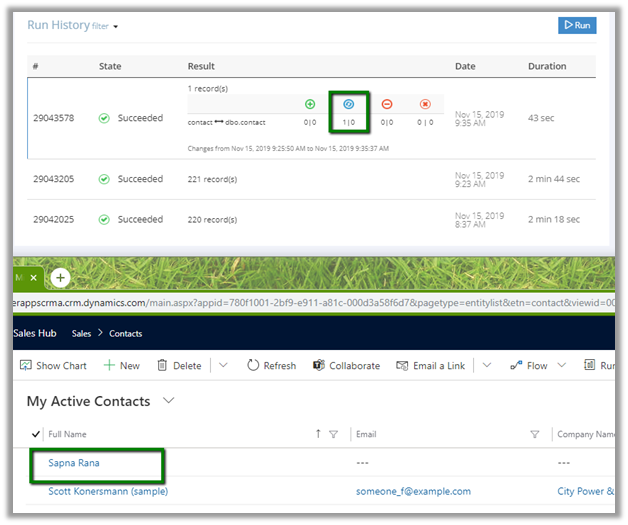
Now let us update a record in SQL Azure and run the package again.

We can see the record updated in Dynamics CRM

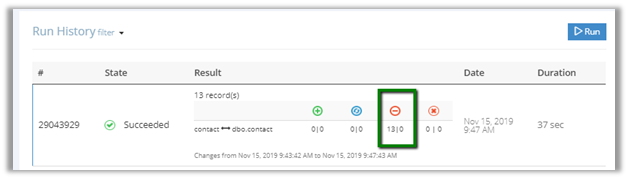
Now let us delete a few records from Azure SQL and run the package

We can see the records delete from Dynamics CRM

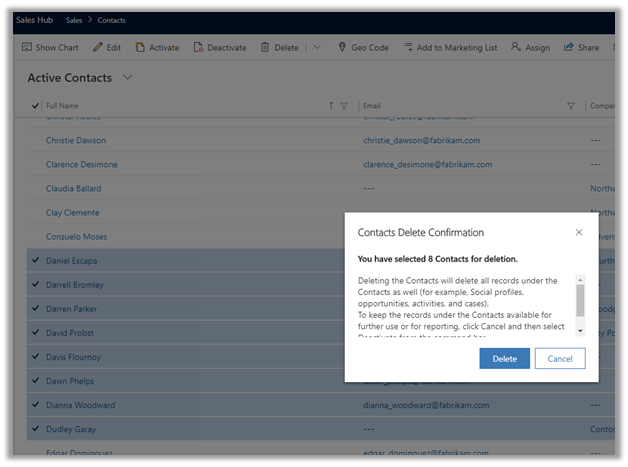
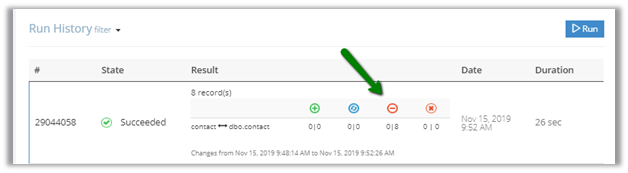
Similarly, let us delete a couple of records from Dynamics CRM and run the package

We can see the 8 records deleted in the destination SQL Azure

Thus, we saw how easy it is to do bi-directional sync using Skyvia’s Synchronization package.

Hope it helps..

Easily set up Dynamics 365 CE \ CRM replication (incremental) to Azure SQL / SQL On-Premise using Skyvia’s Data Integration services


In the earlier post, we saw how we can use Skyvia’s query feature to execute SQL command against our Dynamics 365 CE

https://nishantrana.me/2019/10/25/execute-sql-select-insert-update-and-delete-command-on-dynamics-365-customer-engagement-data-using-skyvia-query/

In this post, we will cover how we can use Skyvia’s replication feature to create a copy of our cloud data i.e. Dynamics 365 Online data in a relational database like SQL Server and most interestingly keep it up to date automatically with basic configuration steps.

Creating replication of cloud data can be useful in different data integration scenarios and most importantly for reporting and data analysis need as with online we are limited with the use of Fetch XML.

The Skyvia’s replication service takes care of syncing Create, Update and Delete operation performed on Dynamics 365 Entity records with the destination SQL Database.

For this we need to Skyvia expects an object’s key as well as modifiedon, createdon fields to be included for replication.

For delete to work it expects, audit history to be enabled on that Entity.

In this post, we will take a simple example of replicating Contact entity records from Dynamics 365 Online to SQL Azure.

Login to Skyvia

https://app.skyvia.com/#/packages

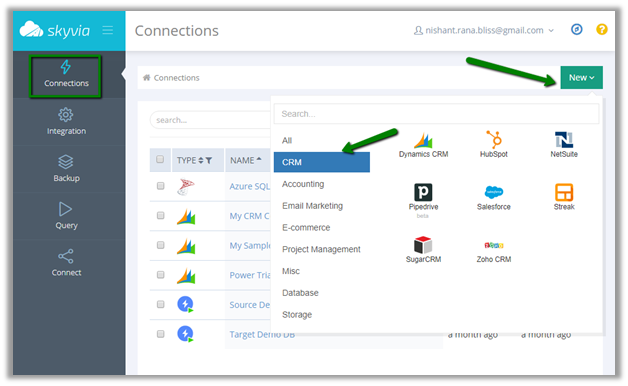
Create the connections

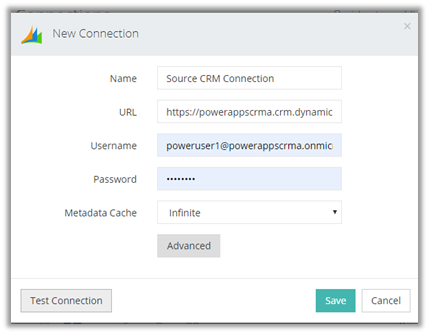
Source Dynamics CRM Connection:
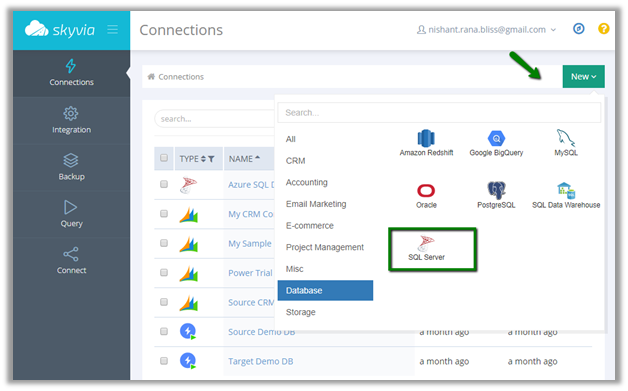
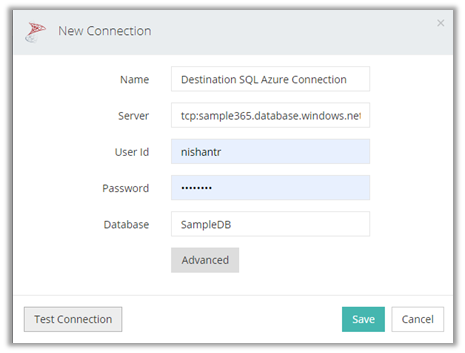
Destination SQL Azure Connection:
We have a database named SampleDB already created in SQL Azure.
With connections created, now let us create a new package of type replication
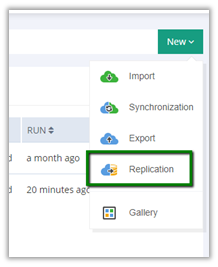
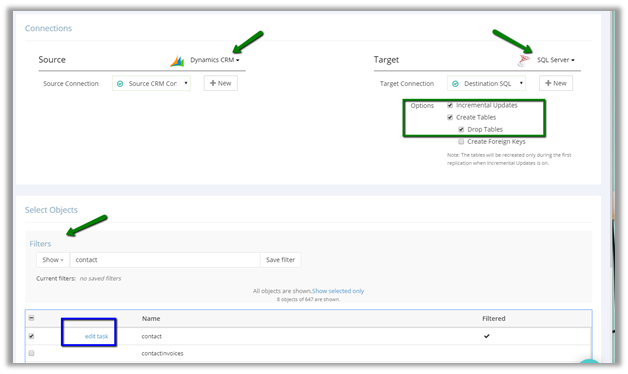
For the replication, we have specified source connection as the CRM connection and destination as the SQL Azure.

We have selected the option of Incremental Updates along with Create Tables and Drop Tables option which will delete if there is an existing table of the same name as the entity and will create a new one.

In the Select Objects section, we have a specified Contact entity. We can also select multiple entities for replication.
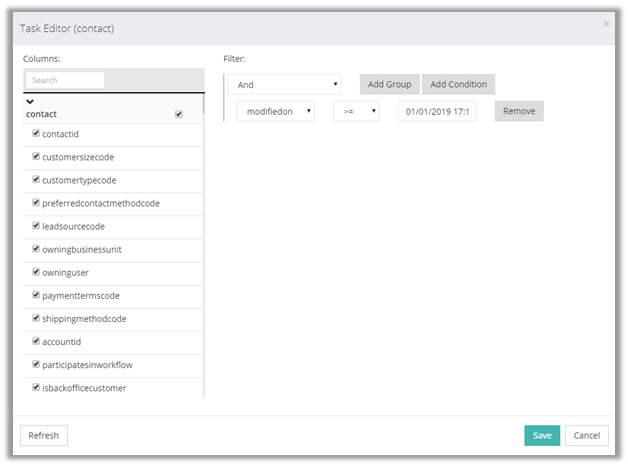
Edit task option in the selected entity let us specify the fields and filter criteria on the source.
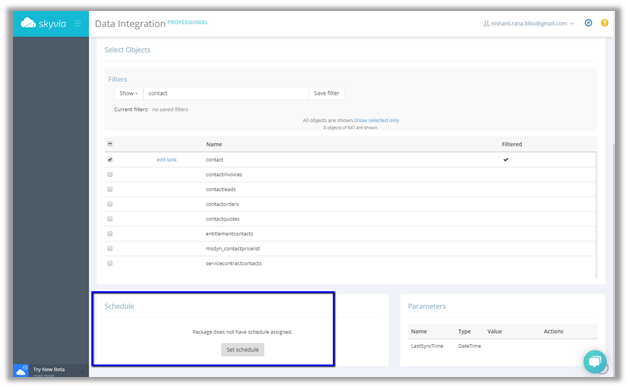
We also have the option of scheduling that we will look at in the end of the post.
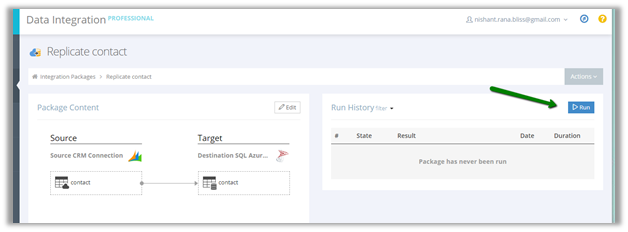
Save the package and click on Run to see it in action.
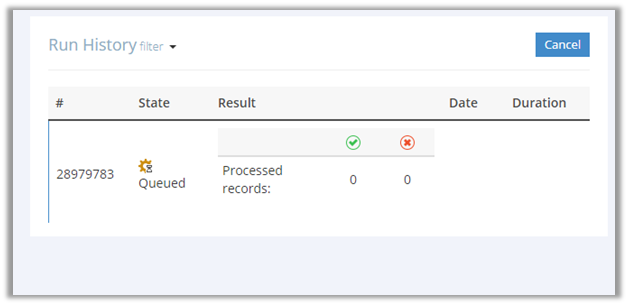
While it is running, the Run History section shows the details
It auto refreshes with all the details.
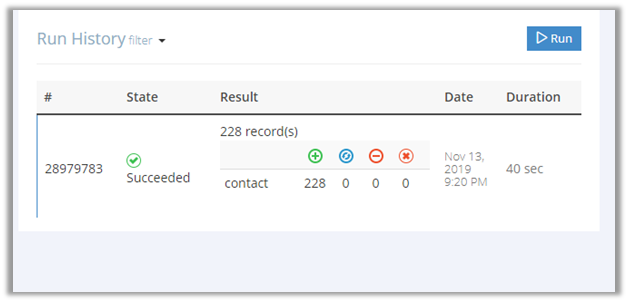
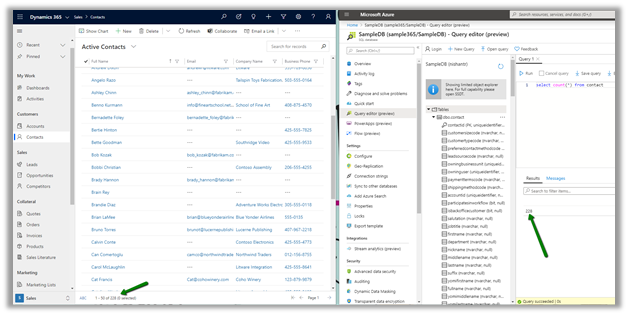
We can see the 228 records of contact records replicated in SQL Azure.
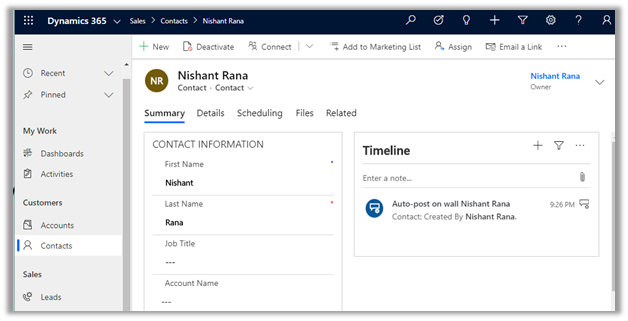
Now let us create a new contact and run the package again.

Here we have created a contact record as shown below in CRM.
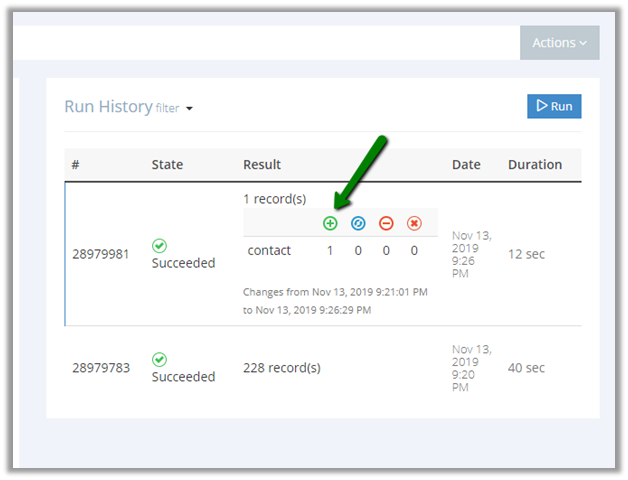
On running the package, we can see that it has added a new record in the Run History
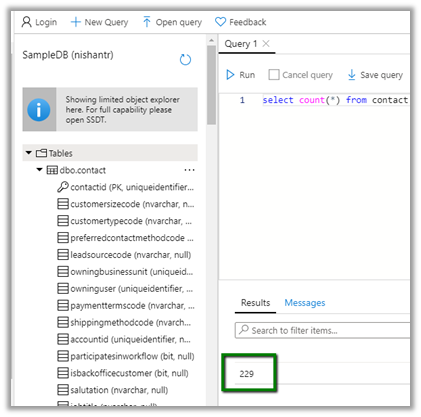
Back in SQL Azure also our count has increased to 229.
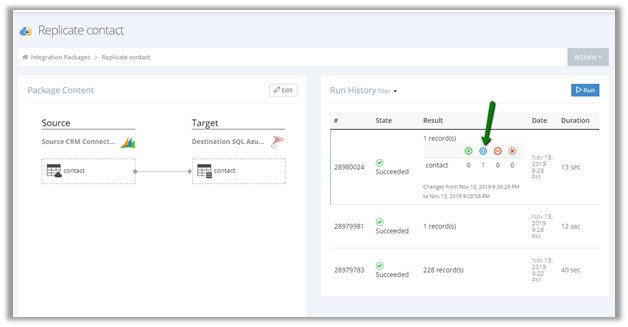
Now let us update one of the records in the source and run the package. The run history shows one of the records being updated.
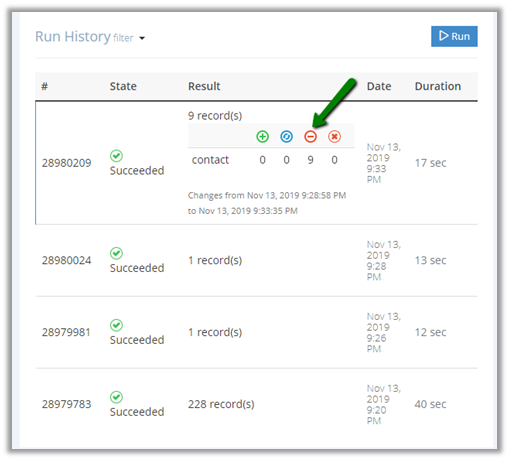
Finally, let us delete a couple of records (9) from the source and run the package. (We need to make sure we have enabled Audit on Contact entity for delete to work)
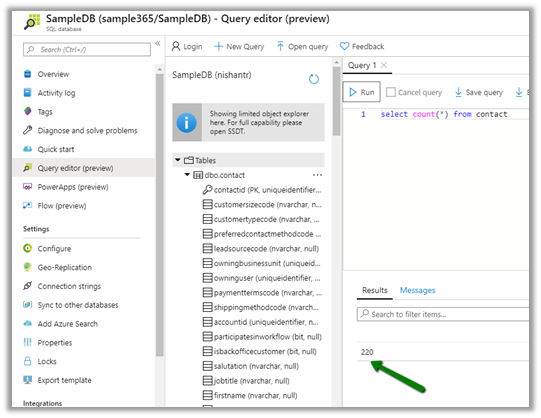
Back in SQL Azure, we can see total record count decreased
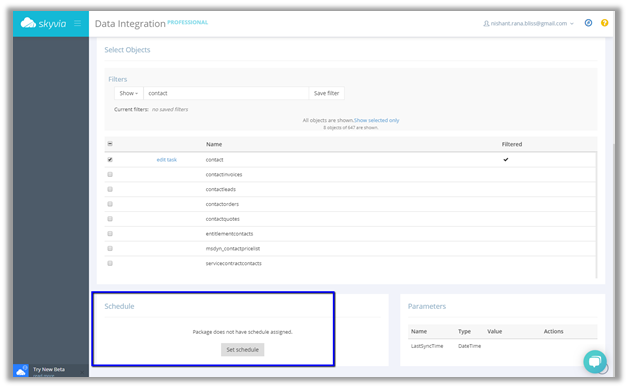
Here we were running the package manually, however, in real-world scenarios we would be scheduling it.

For this, we can edit our package and navigate to the Schedule section and click on Set Schedule.
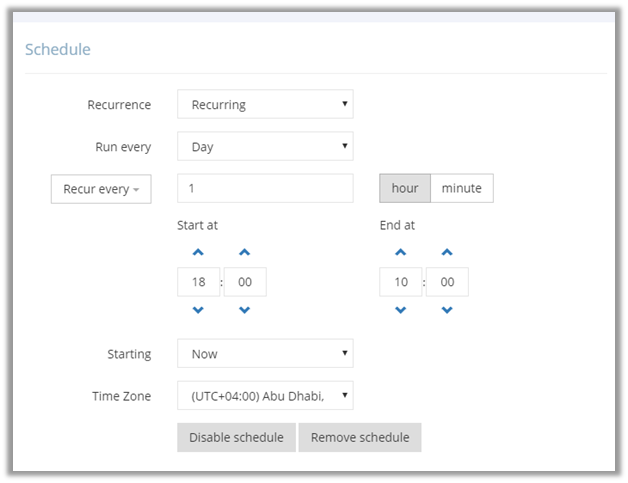
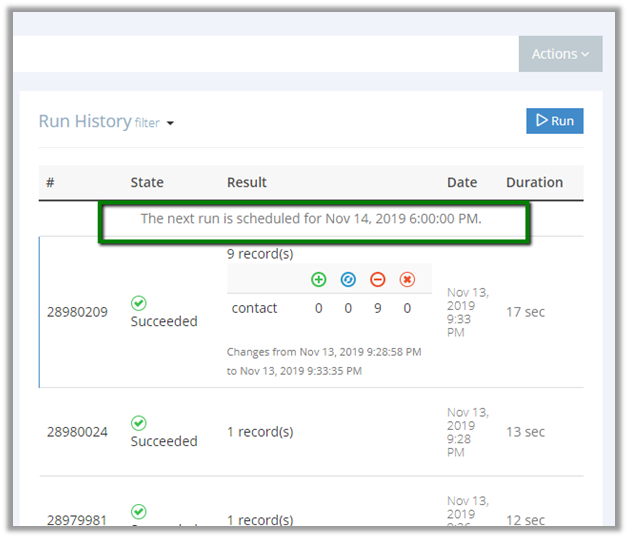
For e.g. we have scheduled here it to run every hour starting from 6 p.m. till 10 a.m.
On save, we can check the run history
Thus, we saw how easy it is to replicate the data from Dynamics 365 CE to our SQL Database using Skyvia’s Integration service.

To achieve the same using Scribe Online Replication Service

https://nishantrana.me/2019/01/09/using-scribe-online-replication-services-rs-to-replicate-dynamics-ce-data/

and KingswaySoft 

http://www.kingswaysoft.com/blog/2017/04/04/How-to-Retrieve-Incremental-Changes-from-CRM-in-your-ETL-Process

Hope it helps..