Tracking email and automatic record creation – Personal Options in Dynamics 365


Let us have a look at the different options provided in the Email Tab for Tracking and Automatic creation of records.

Also check – https://crmkeeper.com/2020/04/20/dynamics-365-queue-setup-with-shared-mailbox/

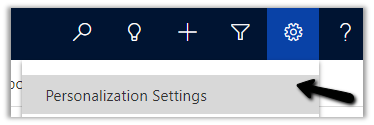
Select Personalization Settings in the Settings icon within the app.

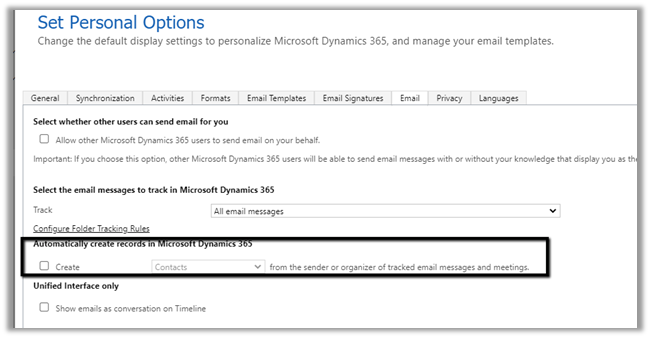
Select Email tab within Set Personal Options Dialog box.

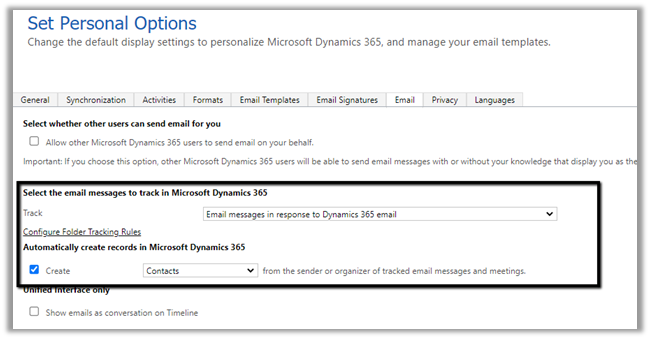
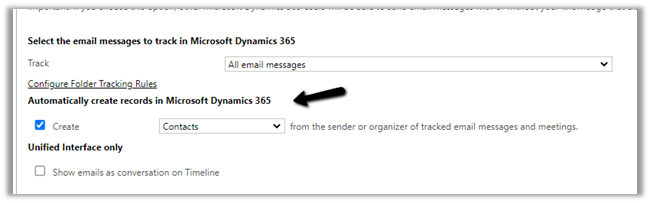
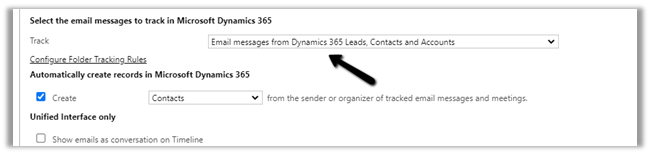
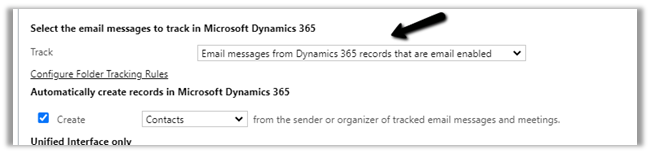
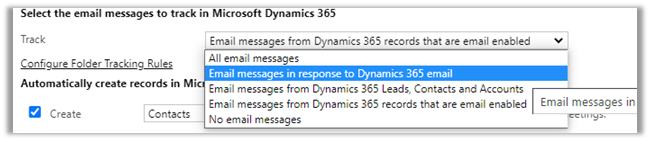
Select the email messages to track in Microsoft Dynamics 365 option has the following values

Email messages in response to Dynamics 365
email is the default option.

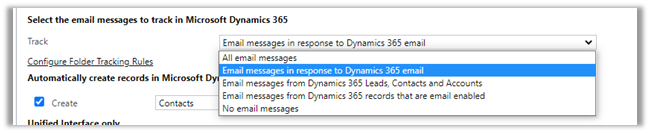
Let us start with the All email messages option.

  • All email messages – In the case of all email messages, all email messages will be tracked in Dynamics 365, including the junk mail.

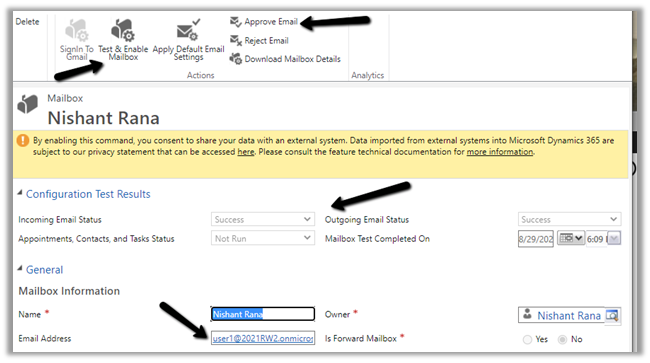
Here we have sent a test email to the CRM User with Track All email messages selected

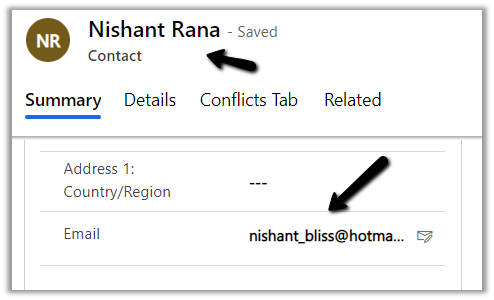
The CRM user has his mailbox already configured.

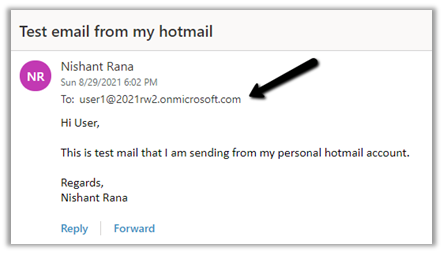
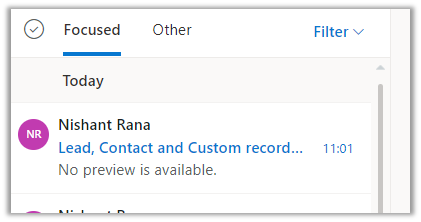
Sample mail sent to the CRM user from the personal Hotmail account.

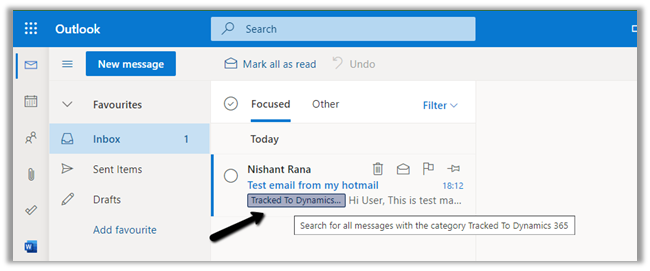
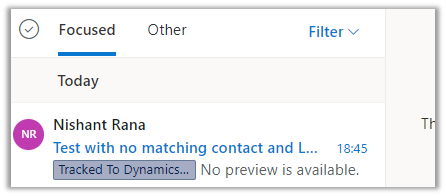
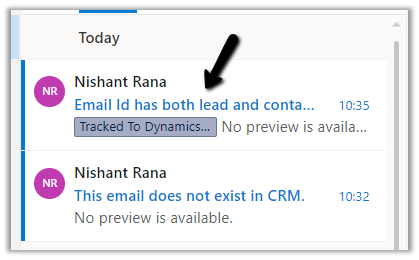
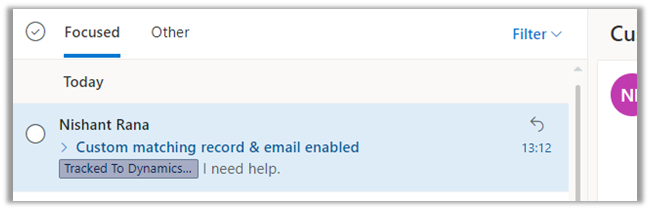
Inside Outlook Office, we can see the same mail received and marked as Tracked to Dynamics 365.

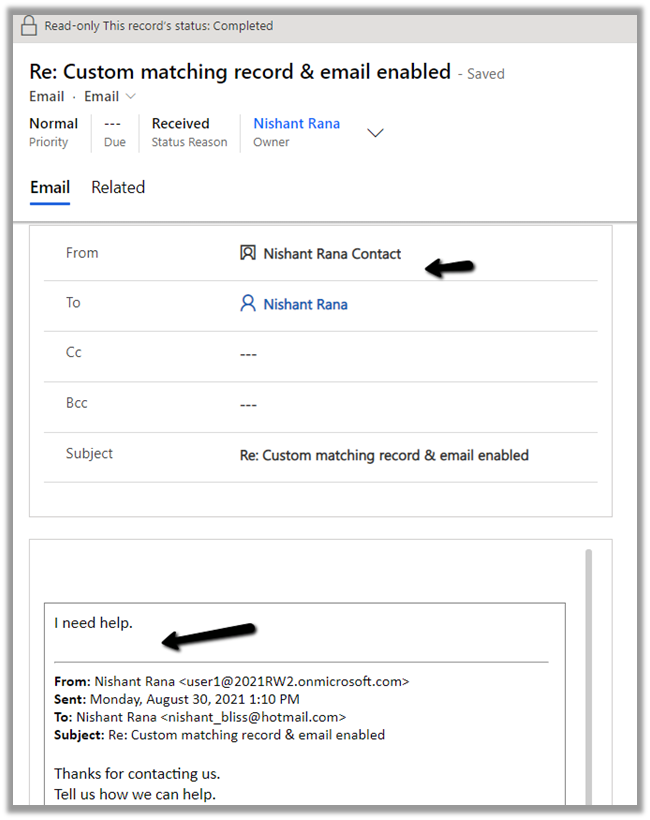
And an email activity created inside CRM.

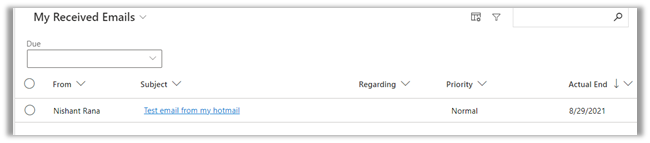
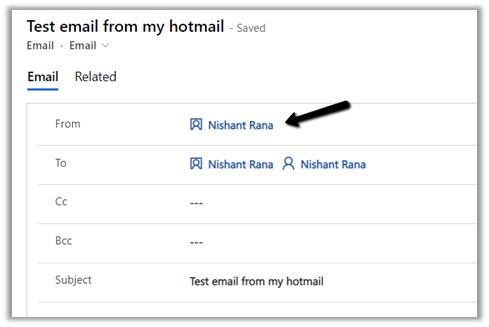
We can see the existing contact record having the matching email id being set as from for the email.

If no contact record is found with the same email id, then a new contact record will be created for the tracked email, if the below setting “automatically create record” is enabled.

Here I am now sending an email to the CRM user through my Gmail id. (This email id doesn’t exist in CRM for any records)

We can see the mail tracked, and the email activity created along with the new contact record.

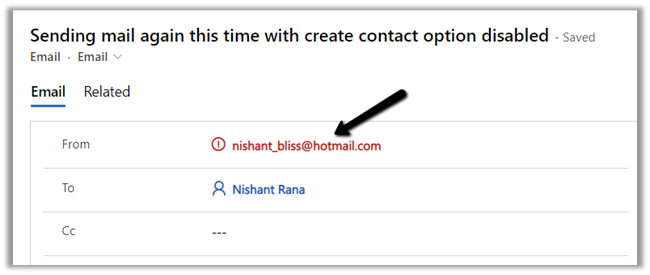
Let us just disable create record option and also delete the existing contact records (both Hotmail and Gmail) with matching email id, so that no match is found.

Let us again send an email from the Hotmail account to the CRM user

This time in the email activity created, we see the email id marked as red as there were no matching records in CRM.

Also as we had disabled contact creation so no contact record was created.

  • What if we enable Lead Creation instead?

Remember we still do not have any existing matching contacts in CRM as we have deleted them.

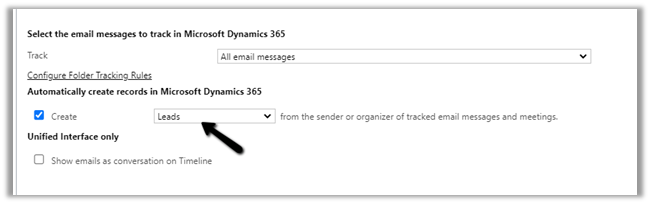
Let us sent a test mail and check.

The email activity inside CRM will have the From part set as the lead record created as part of tracking.

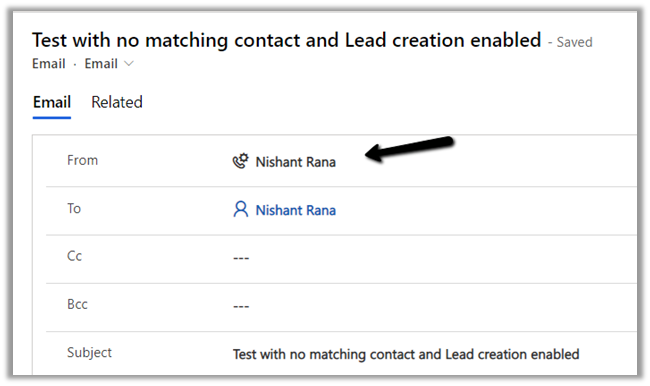
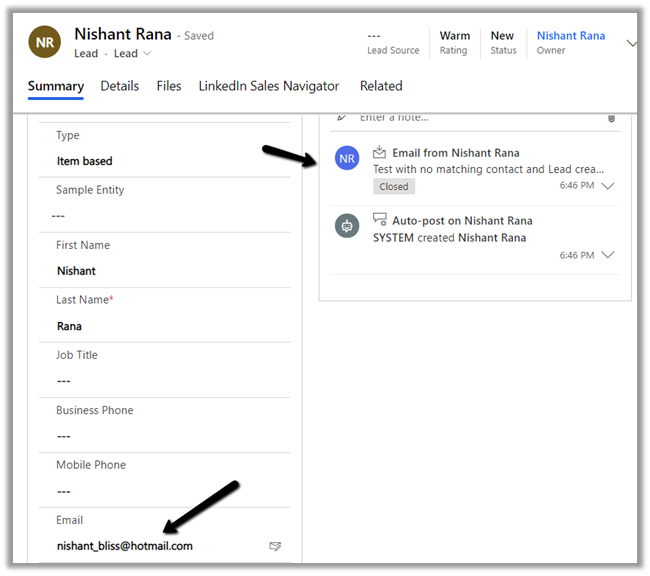
Below is the lead record created with associated email

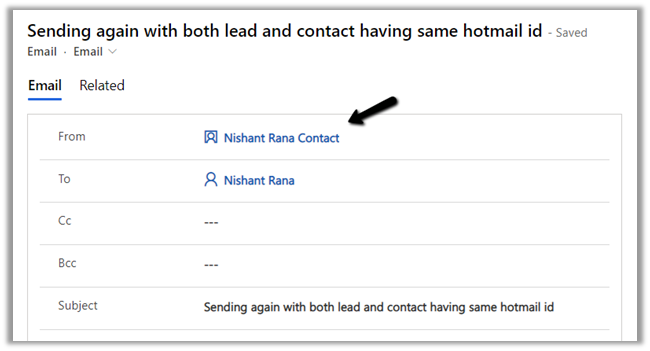
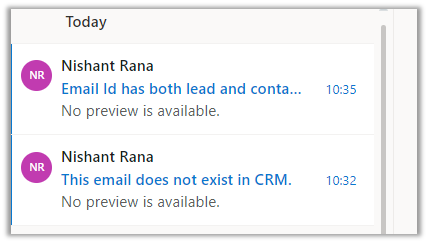
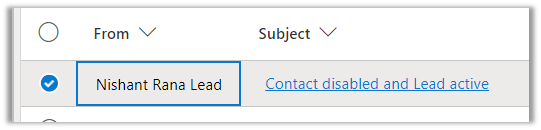
  • What if we have both lead and contact records with the matching email id, to which record will the tracked email be associated?

The answer is the contact record.

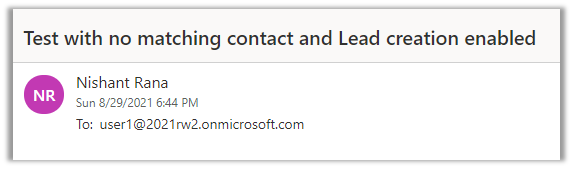
  • Now let us look at the other tracking option – Email messages from Dynamics 365 Leads, Contacts, and Accounts – In this case only if the email is originated from the user having an existing lead, contact, or account record will be tracked.

  • Let us send an email from an account that doesn’t have any lead, contact, or account record created inside CRM.

And also email from an account that has both lead and contact records.

After a couple of minutes, we can see the mail from the account having lead and contact records being tracked and the other email from an account that doesn’t have any matching records not being tracked.

The email activity is associated with the contact record as expected.

  • Now let us send the mail from an account with matching lead and contact, this time we have disabled the matching contact record.

So now the system has only a matching lead record.

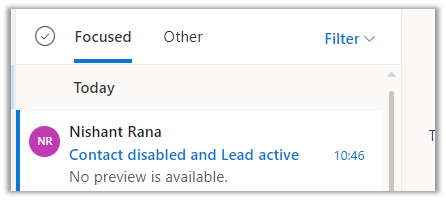
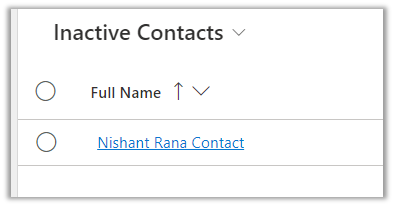
We have disabled the matching contact record.

Result – We can see the email activity associated with the lead in this case as the contact was disabled.

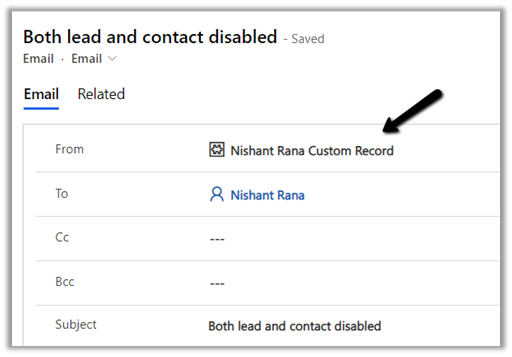
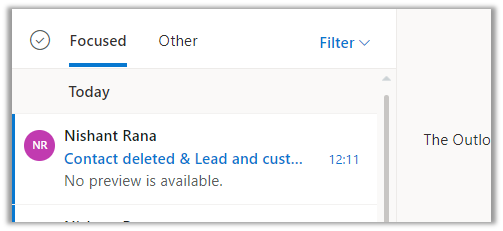
  • Now let us disable and both matching lead and contact see the result.

And create one more custom entity record with email enabled having matching email id.

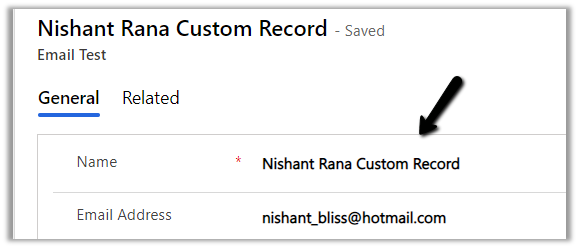
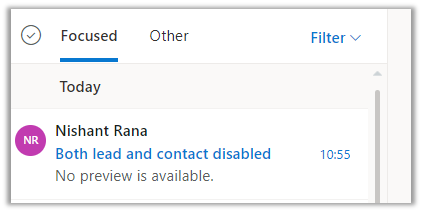
In this case, the email activity is associated with an active custom entity record having the matching email id


Now let us try the same by disabling this custom record as well i.e. now we have all the matching records lead, contact, and the custom entity one disabled.

Result – As no matching record was found it creates it against an email and highlights it in red.

It is tracked the email even though the record were inactive.

Now let us delete that inactive contact record and send the same mail from the same account. We have the create contact option enabled right now.

Result – The mail was tracked but no contact record was created.

  • Now let us delete the matching inactive lead record from CRM, and keep the matching inactive custom entity record as it is.

Result – Now as we do not have any lead or contact record, the email as expected is not tracked as we have opted for tracking – Email messages from leads, contact, and accounts.


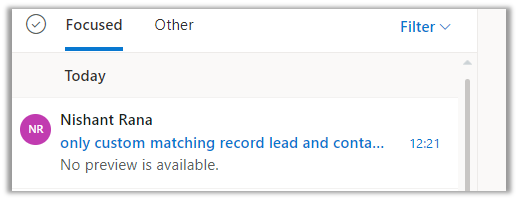
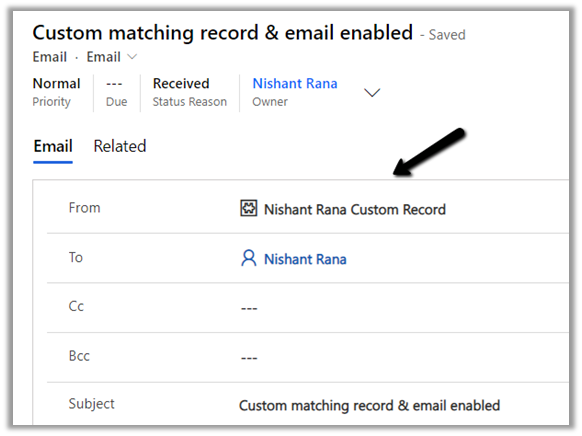
  • Let us change the tracking option to Email messages from Dynamics 365 records that are email enabled – In this case, all email messages will be tracked for those entities having email-enabled (including custom entities)


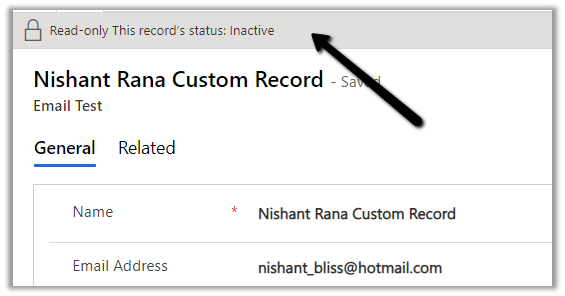
We can see the email tracked even though the custom matching record is inactive.

  • Now let us set the tracking option as Email messages in response to Dynamics 365 email


This will track replies or forwards of email messages that have already been tracked.

Let us send a new mail, we only have an inactive matching custom entity record in CRM right now.

As expected the email is not traced as it is a new email, not a response.

  • Let us send another email, this time we have created a matching contact record in CRM.

As expected the emails are not tracked as they are not the responses.

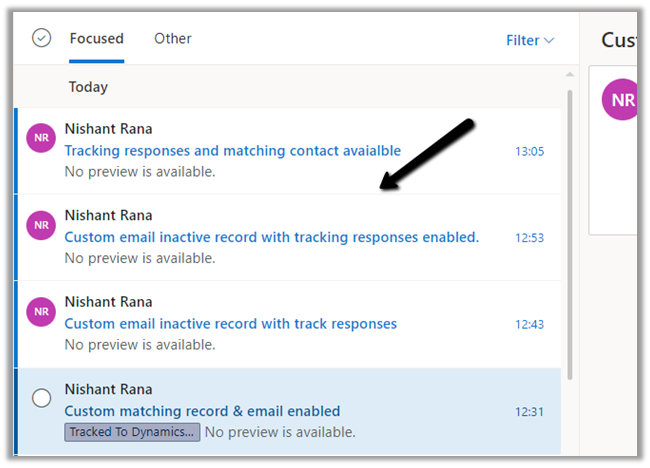
  • Now let us respond to an existing tracked email.

Reply Sent From Outlook :

Reply From within CRM :

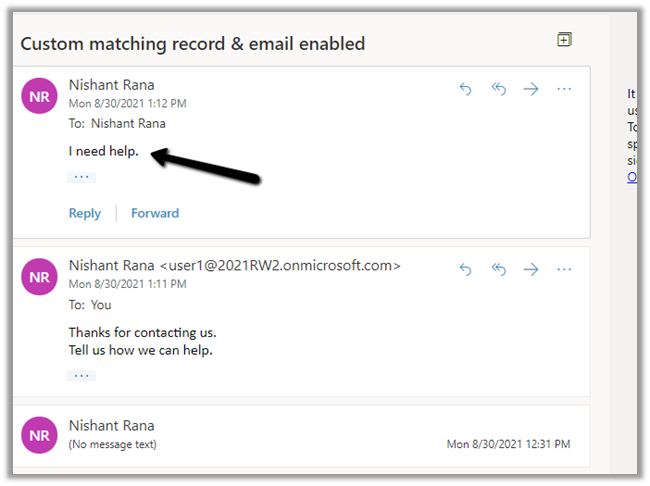
We can see it tracked in CRM.

  • And finally the last option No email messages is self-explanatory

In a nutshell

Tracking  
All Email Messages Email tracked, email activity created.


If an existing contact record is found, it is associated.

If no contact record is found, it will be created if Create contact record option is enabled. Here if for Create Option we have selected Lead then lead will be created instead.

If no existing record is found and create contact is disabled, then it is associated with an unknown email address (marked as red)

If both matching lead and contact records are found, then the contact record is associated with the email activity.

 
Email messages from Dynamics 365 Lead, Contact, and Account The email from only matching lead, contact, or account will be tracked.


Even if the matching record is disabled, the email is tracked.

Here even if the create option is enabled, no lead or contact records are created.

Email messages from Dynamics 365 records that are email enabled. It considers all the entities with email enabled not just lead, contact and account.
Email messages in response to Dynamics 365 email Only replies or forwards of email messages that have been already tracked will be considered for tracking.
No email messages No email messages are tracked.

Check the details here –

https://docs.microsoft.com/en-us/dynamics365/outlook-addin/user-guide/set-option-automatically-track-incoming-outlook-email#automatically-track-email-messages

Hope it helps..

Advertisements

Audit Entity / Table – Few key points (Dynamics 365 / Power Apps)


In the earlier post we looked at different ways of extracting Audit History data.

Extract Audit Historyhttps://nishantrana.me/2021/05/17/how-to-export-the-audit-history-values-from-dynamics-365/

We can use Microsoft 365 Security and Compliance Center for the same, though it is limited to the Production environment only.

https://docs.microsoft.com/en-us/power-platform/admin/enable-use-comprehensive-auditing#requirements

Then we have Audit History Extractor, and we can also write SSIS Packages as well as Custom Code.

Let us just revisit some of the key points with regards to the Audit entity.

  • Do we have the Audit entity available for Advanced Find? >> No.

  • Do we have it available inside Report Wizard? >> No.

  • Can we write SSRS Report against the Audit entity using the TDS endpoint?

Let us create the Data Source.

Select the authentication as Active Directory Password Authentication for the TDS endpoint.

Enter the database name manually.

The final connection string >>

Data Source=orgnamae.crm.dynamics.com;Initial Catalog=orgname.crm.dynamics.com;Encrypt=True;TrustServerCertificate=False;Authentication=”Active Directory Password”

Within SQL4CDS the following query works

However, the same query doesn’t work inside SSRS.

It will give the below error message >>

Table audit is not available for reports

  • Do we have the Audit entity in the Power BI Dataverse connector? >> No

However, we can use the OData endpoint to create the report against the Audit entity.

https://www.365knowledge.com/2019/03/06/dynamics-365-user-access-report-with-fetchxml-and-power-bi/

  • Do we have the Audit entity available in Azure Synapse Link (Export to Data Lake)? >> No

How to set up Azure Synapse Link >>

https://nishantrana.me/2021/06/16/how-to-setup-azure-synapse-link-microsoft-dataverse/

  • Cannot we write a Fetch XML Based SSRS report?

Writing a Fetch XML based-report would be challenging, because of the way information is saved.

Check the below article to understand how the audit table stores the information.

https://mahadeomatre.blogspot.com/2015/02/ms-crm-audit-database-table-details.html

http://makdns.blogspot.com/2014/06/dynamics-crm-audit-entity.html

  • How about SQL Based SSRS Report if we are using SQL – for On-Premise?

Refer to the below article that provides the steps to do so.

http://makdns.blogspot.com/2014/06/dynamic-crm-20112013-audit-report-in.html

Hope it helps..

Advertisements

Quick Reference – Dynamics 365 Field Service


  • Setup the free trial of Dynamics 365 Field Service

https://dynamics.microsoft.com/en-us/dynamics-365-free-trial/

  • Security Roles

Below are the roles specific to Dynamics 365 Field Service app.

  • Field Service – Administrator = The user with full rights on Field Service Entities.
  • Field Service – Dispatcher = The users who will create, assign, and schedule Work Orders.
  • Field Service – Inventory Purchase = The user with full rights on Inventory specific entities.
  • Field Service – Resource = The user who would be executing the work order, at the customer’s site.
  • Field Service – Salesperson = The user who along with work order need access to sales-specific entities like Lead, Opportunities, Quotes, etc.

For the Field Service Mobile app, we have Field Service – Resource as the default security role.

The corresponding field service-specific security profile needs to be added to the user.

https://docs.microsoft.com/en-us/dynamics365/field-service/view-user-accounts-security-roles

  • Mobile App

For the mobile app, we have 2 options

  • Field Service (Dynamics 365)
  • Field Service Mobile

Microsoft recommends using Field Service (Dynamics 365) app, which is based on the corresponding Field Service Model-driven app and will be continuously updated with new features.

The support for the old Field Service Mobile app will end in June 2022.

https://docs.microsoft.com/en-us/dynamics365/field-service/mobile-2020-power-platform#implementation-and-migration

To customize the Field Service (Dynamics 365) app, we need to use the App Designer.

To customize the Field Service Mobile App, we need to use the Woodford mobile configuration tool, i.e. installing the Woodford solution, import the mobile project template (HTML 5), etc.

https://docs.microsoft.com/en-us/dynamics365/field-service/field-service-mobile-app-user-guide#step-2-install-the-field-service-mobile-configuration-tool-woodford

For the user or the Bookable Resource in terms of Field Service to log in, the Enable for Field Service Mobile (legacy Xamarin app) option should be set to Yes.

  • Work Order Life Cycle

  • Work Order is the primary entity of Dynamics Field Service.
  • CSR or Sales agent will CREATE the work order (convert case, opportunity to work order, or agreements can generate work order automatically)
  • DISPATCHER will schedule the work order.
  • FIELD AGENT / RESOURCE gets notified and performs the work and updates the status of the work order through the mobile app.
  • FIELD MANAGER will verify work order entities

Eventually followed by sending the invoice to the customer, where an ERP system like Dynamics 365 Finance and Operations can be integrated.

Work Order – holds the information about the work to be performed.

Work Order Type – is used for categorizing the work order. The incident required field specifies if the incident type is mandatory for the work order or not. The price list can be associated with the word order type.

Incident
Type acts as a template for the work order. On associating an Incident Type with a work order, the work order details get auto-populated from the incident type.

Details tab holds the information like work order type, estimated duration, linked articles, etc.

Products can be associated with an incident type. These incident type products will create the work order products automatically if the incident type is associated with the work order.

Below is the sequence of defining products inside Dynamics 365.

  1. Create Discount Lists (optional)
  2. Define Unit Groups and Units.
  3. Create Product
  4. Create price lists and discount lists (optional) and associate them with Products.
  5. Set default price list for the product.

The work order will have a price list associated with it. It can be derived from the Work Order Type record selected for the work order.

Services are the records that are billed to the customer.

Service Tasks list down the tasks and the order in which they need to be performed.

Characteristics information will be used while scheduling the work order to the appropriate field service agent.

We can specify a primary incident type for the work order which acts as a template and populates all the required details in the work order.

The Service Account is where the work is performed and the billing account is the customer/organization who will be billed or will be sent the invoice of the work order. This field is auto-populated on the selection of Service Account. An organization can have multiple locations for services but would have only one account which handles the payment.

The work order entity has the additional settings, location, and record log tab.

The location holds the address details with latitude and longitude used for location tracking. We can move the pin and the latitude and longitude values are updated accordingly. (Make sure to enable Bing map from System Settings >> General >> Enable Bing Maps)

The record log tab holds the work order details like first arrived, completed, and closed.

Bookable Resources can be defined as any resource that can be scheduled.

We have the following bookable resource.

User is the most common, who would be accessing Dynamics 365 Field Service and the Field Service Mobile app.

The facility can be the location/rooms.

Equipment would be any tools required.

Contact / Account would be contractors here, they are used when the work order is delegated to the external contractors and not the users.

The crew could be multiple resources grouped together. Some work order in case if they need more than one resource can use crew instead of creating separate work orders for each resource.

  • Crew Leader Management = There is one designated person who manages the work.
  • Crew Member Self-Management = Multiple resources are performing different tasks and would be billed separately.
  • Cascade and Accept Cascade Completely = All resources on a crew can manage all the work. Useful for the scenario when there is just one user and the rest crew is equipment.

A pool is a grouping of similar types of resources.

For the user type bookable resource, we can define Hourly Rate, Warehouse, Characteristics (skills), etc.

Scheduling specifies the location for the user, whether to display the user on the schedule board etc.

Start location and End location can be –

  • Location Agnostic – The resource performs its day-to-day activity remotely and the location information is not to be considered during scheduling.
  • Resource Address – The address needs will be considered while scheduling the work orders.
  • Organizational Unit Address – The address of the resource is the same as the organization.

Work hours is where we can define work hours for the user.

When a work order record is created it also creates a Resource Requirement record, which is used for scheduling.

Resource requirement records are created for each bookable resource that is required to perform the job.

In the case of bookable resource type Crew, then resource requirement records are created for each resource children record.

We can create a booking record from the resource requirements record

The scheduling tab holds the information like the time promised and location details

When the work order is scheduled it creates the bookable resource booking records, it holds the information about the work order and the resource assigned.

Field Service Dispatcher or Admin can access the Schedule Board to schedule the work order activities.

Navigate to Service >> Schedule Board to access it.

Filters – allows us to filter resources displayed on the schedule board based on a characteristic (skills), resource type, territories, etc.

The Hourly view can be changed to Daily, Weekly, Monthly. We can specify the date range using the calendar control.

Book button allows manual creation of the Booking record.

The map view shows the work order and the resources. We can drag the unscheduled map pin from the map and assign it to one of the resources in the center.

The bottom of the schedule board shows Open Requirements, Unscheduled Service Activities, and Work Orders, which can be dragged to the schedule board.

Right-clicking on the resource and selecting View Resource Card displays the skills and roles of the resources.

To automate the resource scheduling, Microsoft provides a paid add-on Resource Scheduling Optimization (RSO)

https://docs.microsoft.com/en-us/dynamics365/field-service/rso-overview

As part of Inventory, we have the below tables in Field Service

First is the Warehouse, which specifies the location where the inventory is stored.

The warehouse will have products, for which there is a Product Inventory table that links Product with Warehouse.

If we would need to move products from one warehouse to another, for this we have an Inventory Transfer table, having source warehouse and destination warehouse details.

The Inventory Adjustment table allows for adjustment of the product as part of inventory transfer. The Inventory Adjustment table has the Inventory Adjustment Product table for associating the products.

As soon as the inventory adjustment product is added to the Inventory Transfer record, the inventory of the source and the destination warehouse gets updated. The product will be created if doesn’t exist in the destination.

The purchase order is for buying products for the inventory/warehouse or can be linked with a work order if a product has to be purchased for fulfilling it.

Purchase Order Product allows associating products to the purchase order.

The purchase order has to be approved and then submitted as part of the Purchase Order Business Process.


Purchase Order Receipts are for managing the receipts for the product purchased or received at the warehouse. Purchase Order Receipt
Products hold the products information.

Similar Purchase Order Bills is for managing the invoice received from the vendors.

RMA stands for Return Merchandise Authorization and RTV stands for Return to Vendor.

RMA is for managing the products returned by the customer.

RTV is for managing the scenarios where the returned products are directly sent to the Vendor, without adding those items to the inventory.

Field Service Mobile also supports offline mode.

Navigate to Settings >> Mobile Offline >> Mobile Offline Profiles >> Field Service Mobile – Offline Profile

The entity for offline sync can be added in the mobile offline profile item details along with the users for which offline mode needs to be enabled.

Different download filter options


In the case of a Custom data filter, we can specify our custom condition.

URS – Universal Resource Scheduling app can be used to schedule anything in Dynamics 365.

Within Settings, we can administrate entities that can be scheduled, change settings for Schedule Board, define resources, roles, skills, and other parameters.

The work order entity is enabled by default for scheduling.

Scheduling Parameters

Agreements are used to generate work orders automatically, it could be periodic visits as part of service and regular maintenance and could be sales visits as well.

The agreement record contains details like agreement number, account associated, price list, start date and end date of the agreement.

An agreement can have multiple Agreement Booking Setup records. It acts as a template for the work order that is generated automatically.

Products, Services, and Service tasks can also be defined as part of the Agreement Booking Setup record.

Setting the Auto Generate Work Order as true will generate the work order record automatically. Auto-generate booking will generate booking dates and automatically assign the work order on the booking dates to the resource. If both these settings are no, the work order will have to be generated and scheduled manually.

The booking recurrence defines the pattern for generating these records.

Based on the recurrence defined, the Agreement booking dates records will be generated. These are the dates used by the system to generate and assign the work order to the resource specified in the agreement booking setup.

The Field Service Resource when he logins into the Field Service Mobile app, is presented with Bookable Resource Bookings records as an Agenda view, which can be changed to Day or Map.

The agent can add and/or work on Work Order Products, Services, Service Tasks (Mark Complete) associated with the Bookable Resource Booking record.

The Booking Status can be set as Completed in the Bookable Resource Booking record to mark the job as completed.

This will also set the status of related Work Order as Open – Completed.

Marking work order as Close – Posted will generate the Invoice.

Download the word (.docx) format –Dynamics 365 Field Service

Hope it helps..

Advertisements

How to – Export Dataverse (Dynamics 365) data to Azure SQL using Azure Data Factory pipeline template


[Visual Guide to Azure Data Factory - https://acloudguru.com/blog/engineering/a-visual-guide-to-azure-data-factory]

Using the new Azure Data Factory pipeline template – Copy Dataverse data from Azure Data Lake to Azure SQL – we can now easily export the Dataverse data to Azure SQL Database.

https://docs.microsoft.com/en-us/power-platform-release-plan/2021wave1/data-platform/export-dataverse-data-azure-sql-database

Check other posts on Azure Data Factory

Select Pipeline from template option inside the Data Factory

Search for Dataverse and select the Copy Dataverse data from Azure Data Lake to Azure SQL template

Let us specify the User Inputs required by the template – i.e. Azure SQL Database and the Data Lake Storage.

First we have created the linked service for the Azure SQL Database.

We’d use it to connect to the below table MyContacts.

Similarly create a linked service to Azure Data Lake Gen 2, which holds our Dataverse data.

Get the URL from the Container’s property. (replace blob with dfs in the URL)

To get the storage account key, select Access Keys >> Show Keys >> Copy the Key for the Storage Account.

Here we have already configured Azure Synapse Link for Dataverse

https://nishantrana.me/2020/09/07/export-data-from-common-data-service-to-azure-data-lake-storage-gen2/

Now as we have defined the User Inputs, select Use this template.

Navigate to the data flow created – DataverseToAzureSQL

Select our source ADLS and check and configure its properties.

Source Settings

Here we have the Inline dataset type set to Common Data Model and the Linked service is the AzureDataLakeStorage1 we created earlier.

Source Option

Specify the Dataverse folder for the Root Location.

Here we have specified the contact entity from our Data Lake Storage.

Projection

In the projection we have cleared the generated schema using Clear Schema, also selected Schema options >> Allow schema drift


We have enabled Allow schema drift option which will create the required columns in the destination Azure SQL Table.

Optimize

Inspect

Data preview

As we have not turned on Debug mode, there is nothing to preview

Now let us move to our Destination – SQL.

Sink

Here we have AzureSQLTable dataset connected to contact table in Azure SQL and have checked Allow schema drift option.


Below is our AzureSQLTable Dataset connected to the MyContacts table.

Settings

Here we have selected Allow Insert as the Update Method and Table
action as Recreate table – as we want the destination table to be re-created dynamically based on the source.

Mapping

We have left it to Auto mapping.

Optimize

Inspect

Data preview

Let us Publish All our changes and Debug our pipeline.

Let us monitor our pipeline run.

We can see that pipeline has run successfully and took around 4 minutes.

We can see the contact’s data copied to our Azure SQL successfully.

So here we covered the insert operation, in the next posts we’d see how we can configure update, upsert and delete operation.

Also, check

Posts on Azure Data Factory

Posts on Azure Data Lake

Hope it helps..

How to – Get the size of tables in Dataverse / Dynamics 365


Using the Capacity page in the Power Platform Admin Center we can extract the details of size occupied by table (in MB) within a particular environment.

Login to the admin portal and navigate to Capacity

https://admin.powerplatform.microsoft.com/resources/capacity

Select the Dataverse tab and click on Details or in case of trial click on the Trial tab

Here we have selected the details (graph) option for one of the environments.

Select Download all tables option for the Top database capacity use, by table chart


We can see the details within the extracted CSV file.

Get all the details here

https://docs.microsoft.com/en-us/power-platform/admin/capacity-storage#environment-storage-capacity-details

Hope it helps..

Advertisements

Solved- Currently, Dynamics 365 apps can only be enabled for your default region error


While trying to add a new Trial (subscription-based) on a Dynamics 365 Trial environment, we were getting the below error

Currently, Dynamics 365 apps can only be enabled for your default region

The default region was UAE for the other environments 

Even for the Azure Synapse Link – it was showing the default region as UAE North

In our case selecting the Region to Europe allowed us to create a Trial (subscription-based).

Get all the details herehttps://docs.microsoft.com/en-us/power-platform/admin/create-environment

https://community.dynamics.com/365/f/dynamics-365-general-forum/395813/dynamics-365-apps-can-only-be-activated-for-your-default-region

Hope it helps..

Advertisements
Advertisements