As the error message suggests “An application user’s access mode cannot be changed “, it is not possible to change the Access mode of an application user from Non-interactive to either administrative or Read-write.
While trying to change the Application User’s Access Mode to Read-Write, the error message –
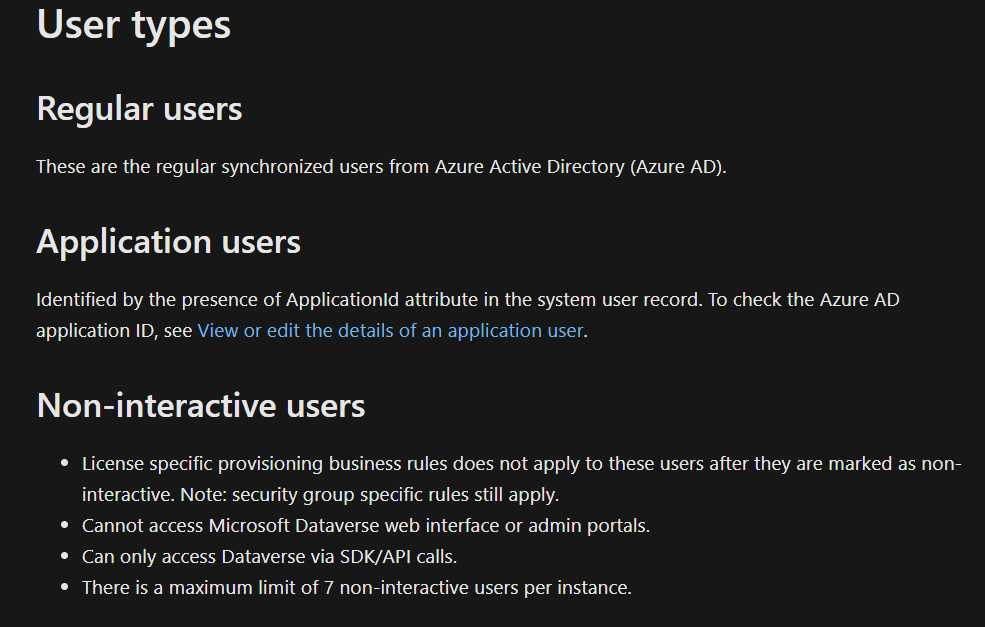
Get all the details about different type of users –
Power Apps grid control is a new read-only control, now auto-enabled as part of 2022 Release Wave 1 for Model-driven apps.
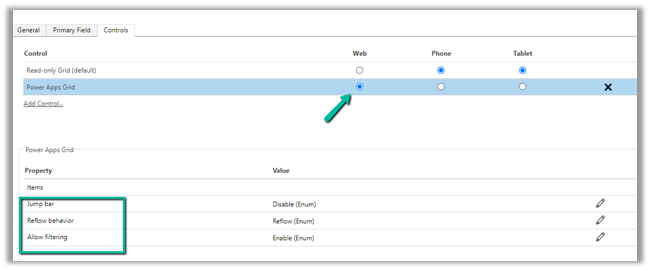
We can also enable it by navigating to Customization, selecting the entity, then the Controls tab, and clicking on Add Control option.
Select the Power Apps Grid control.
Here we have enabled it for the Web.
The different properties that can be set for the control are –
Jump bar – this will be disabled by default.
Reflow behavior
Allow filtering
With Jump bar disabled –
Enable the jump bar.
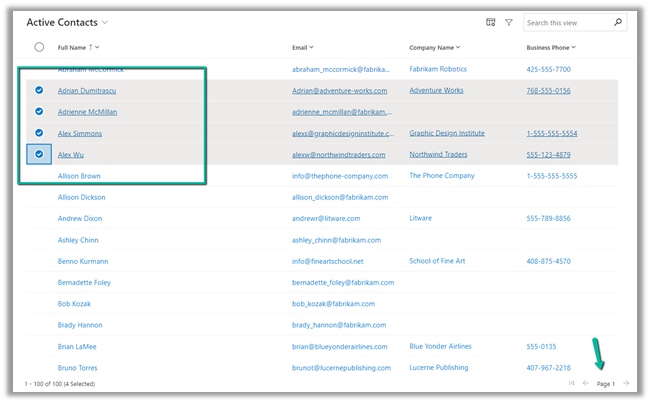
After enabling the jump bar, we get the option to filter by alphabets.
It will also support Infinite Scrolling
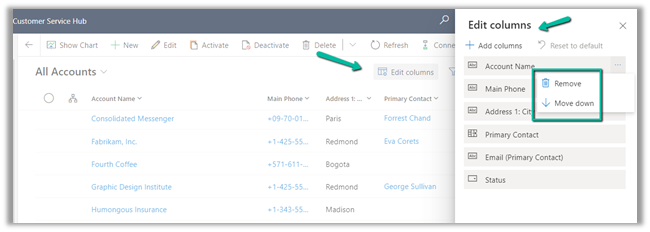
We can use Edit Columns to add, remove and order the columns for the view
Edit Filters allows us to edit the filters.
Any changes made to the column or filter can be saved as a personal view.
Also, Grid remembers the context, here we have filtered the record by search text = “Blue”
Let us open the first record.
On navigating back, the context is retained.
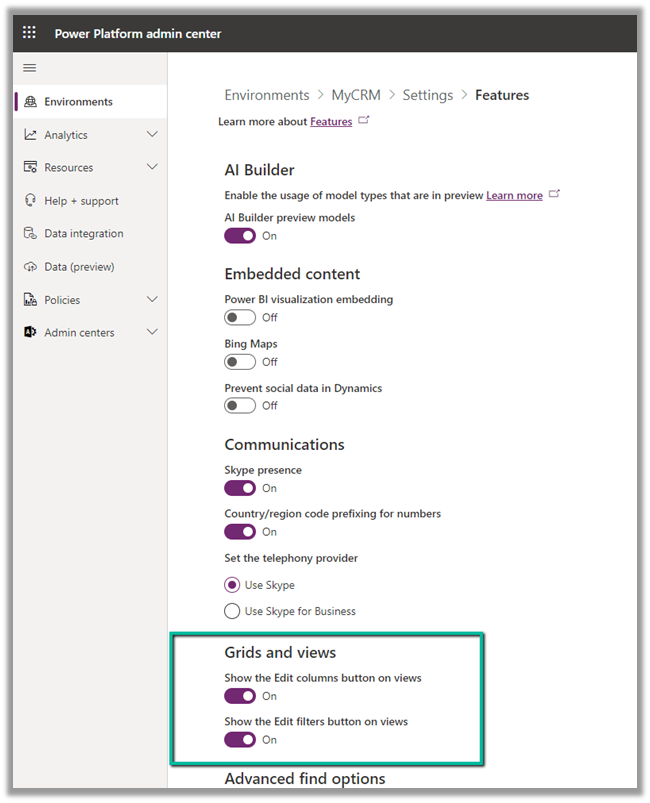
We can also show and hide the Edit Columns and Edit filters option on views from Power Platform Admin Center >> [Environment] >> Settings >> Features >> Grid and Views section
Let us change the Authentication kind to Organization account (followed by sign-in) and Privacy Level as Public and click on Next.
After successful sign-in, click on Next.
We can also see the file uploaded in the one drive.
Now within the Power Query editor, we have set the first row as a header.
Also, we need to remove the space from the column name (if any).
Save the query and click on Next.
For now, we have set the Refresh Settings as Refresh manually.
We can see the new data source added and being refreshed.
We have just 10 records in our Contact excel file.
It took around 2 hours for refresh to complete.
We can see the contact entity from the excel file added in Entities.
Click on it to see the Attributes.
And the Data
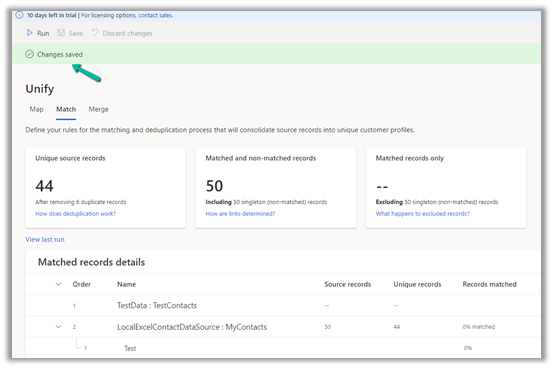
Now we have our contacts data ready from 2 different data sources ready, one from Dataverse and another from excel for the map, match, and merge, which we would do in the next post.
Below we can see the auto number set as 1007 on creating a new contact record.
Now to set it back to 1000 we can run the following code –
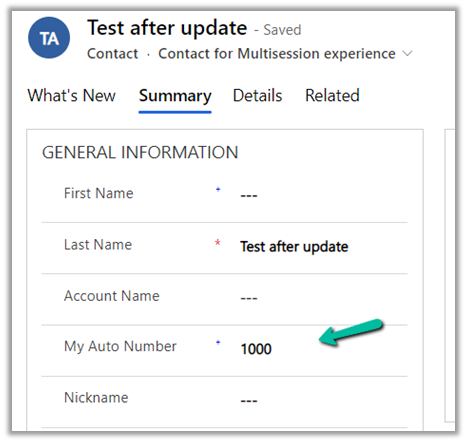
On executing the action, we can see the next contact record having autonumber field set as 1000.
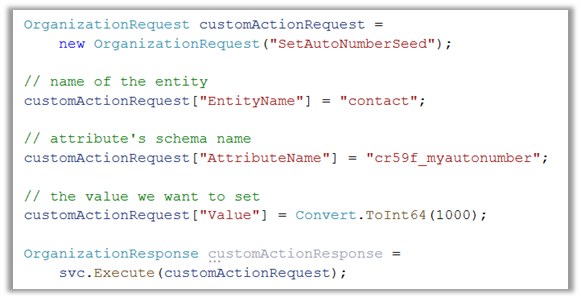
Another example –
On updating the value to 888, and creating a new contact record
Sample code –
                OrganizationRequest customActionRequest =
                    new OrganizationRequest("SetAutoNumberSeed");

                // name of the entity
                customActionRequest["EntityName"] = "contact";

                // attribute's schema name
                customActionRequest["AttributeName"] = "cr59f_myautonumber";

                // the value we want to set
                customActionRequest["Value"] = Convert.ToInt64(888);

                OrganizationResponse customActionResponse =
                    svc.Execute(customActionRequest);
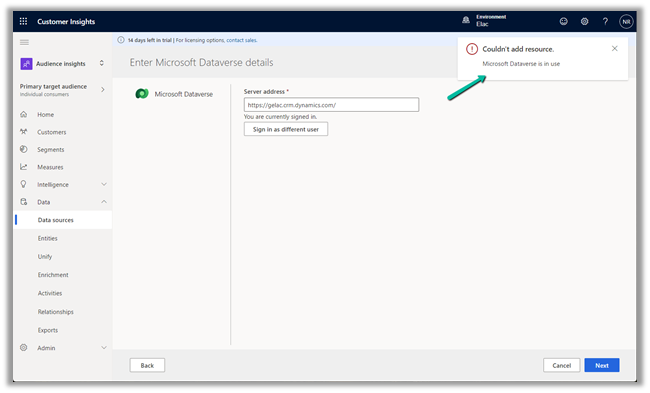
While trying to delete a data source we might below error if we have already used it for Match and Merge for defining the customer profile.
“Couldn’t delete data source. To process, remove its entities from: Match, Merge.”
Click on Enrichment
Navigate to Match.
Here also we cannot remove the entities in Unify as we have already used them in Merge.
So let us navigate to Merge.
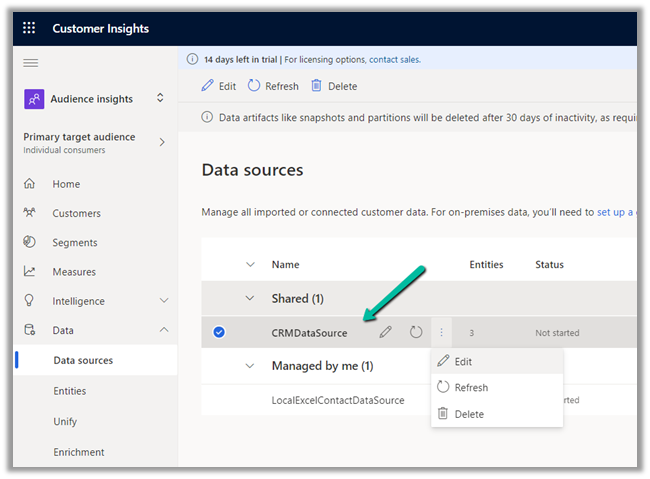
Select all the fields from the DataSource (CRMDataSource in our case) which we want to delete, and click on Exclude.
Save the changes.
Now navigate back to Match and we will get the option to remove the CRMDataSource.
However, we will still not see the option to save the change as we just have 2 entities there.
Here we can add a different data source’s entity, e.g. we added the contact from our test data source.
And saved the changes.
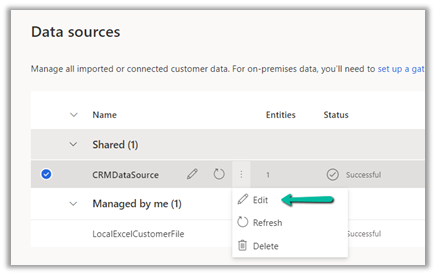
Now as the last step we need to remove the entity from the Map also.
Click on Edit fields and unselect the entity, followed by Apply.
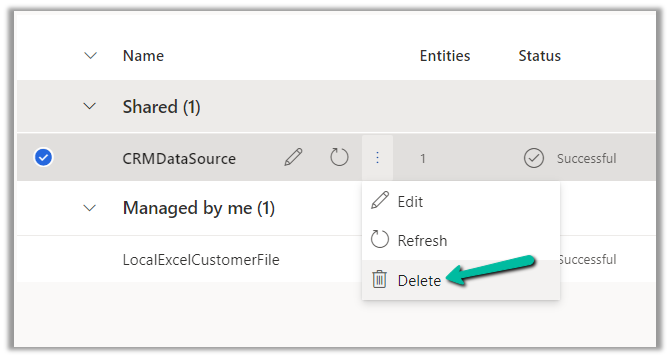
Navigating back to Data Sources, we were able to delete the Data Source successfully now.
So in short, if we need to delete a data source, which we have configured for customer profile, we need to first remove its references from Merge, Match and than Map.