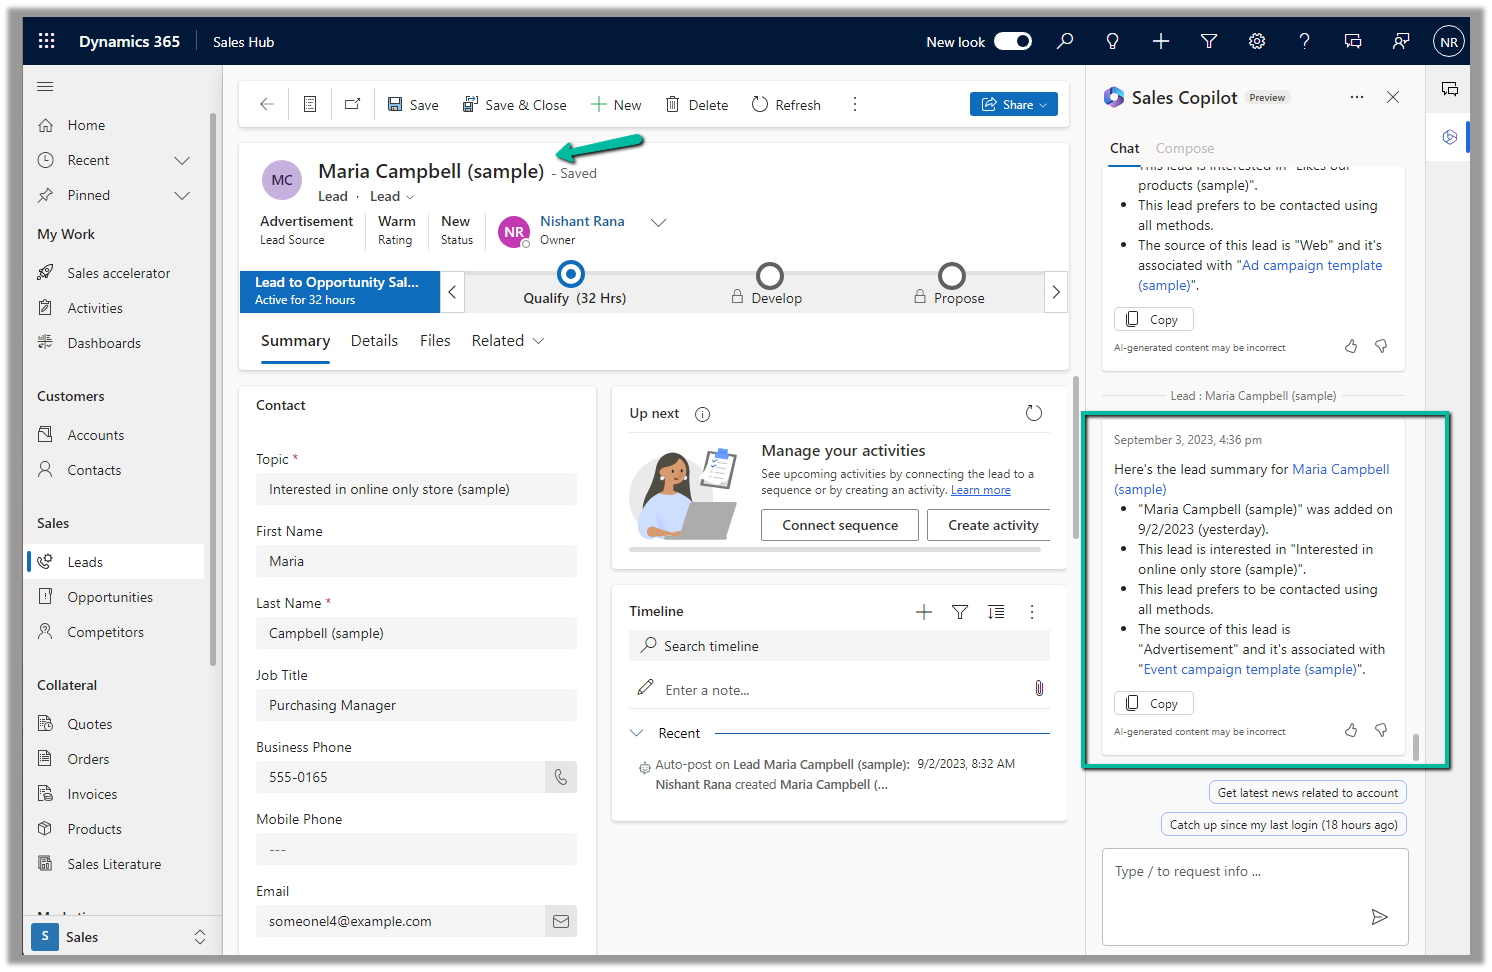
Sales Copilot can generate a quick summary of a lead and opportunity record, based on the fields defined in a view.
Allow data movement across regions in the Power Platform Admin Center using Enable copilots and generative AI features outside United States and Switzerland – Power Platform | Microsoft Learn
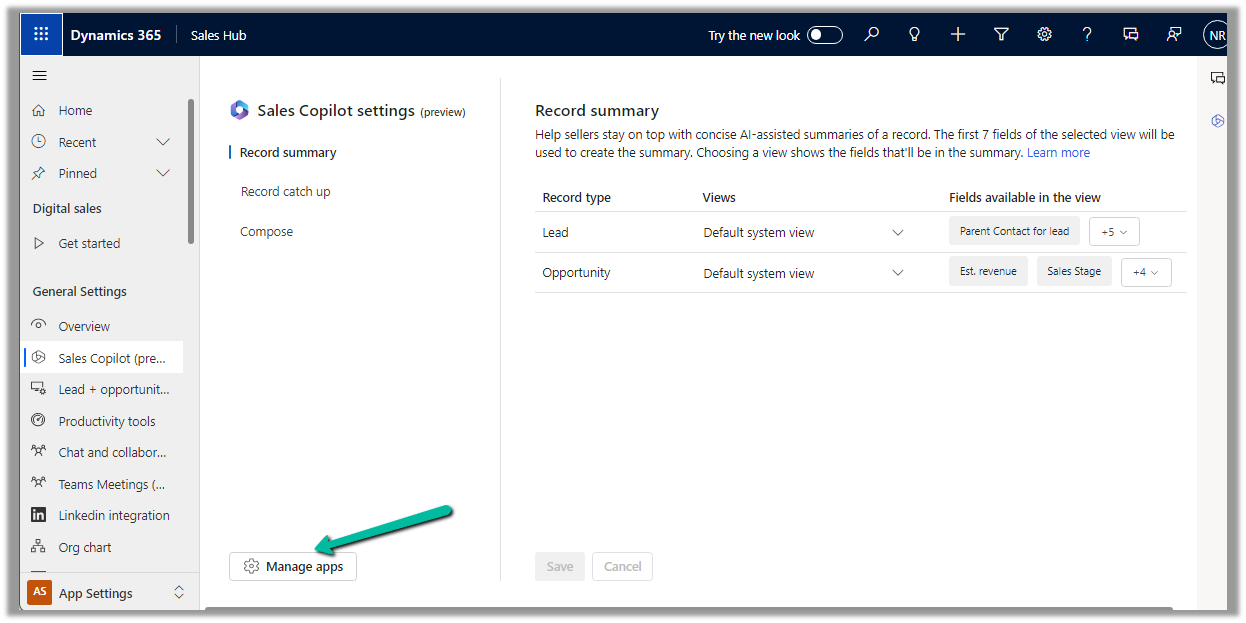
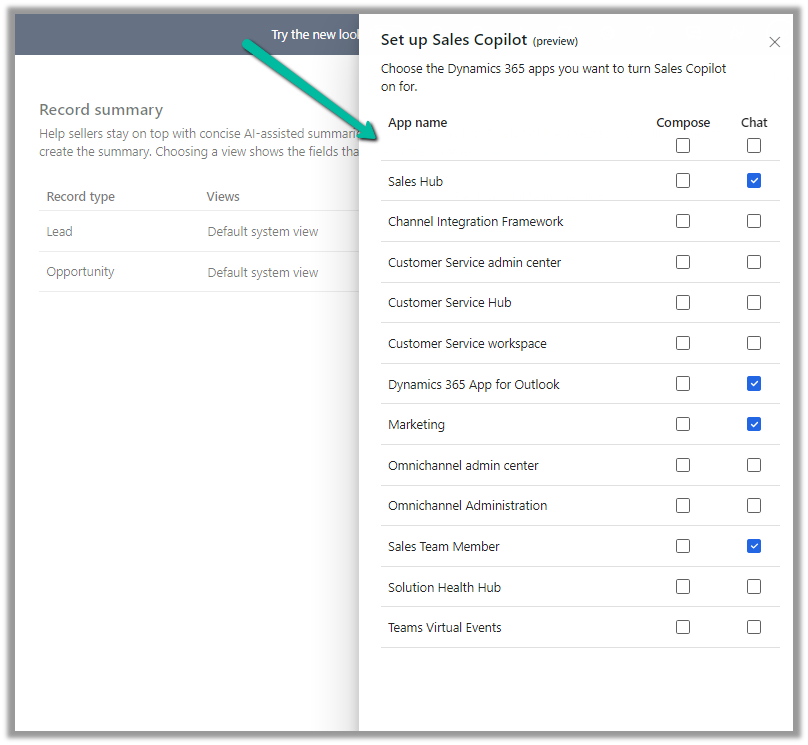
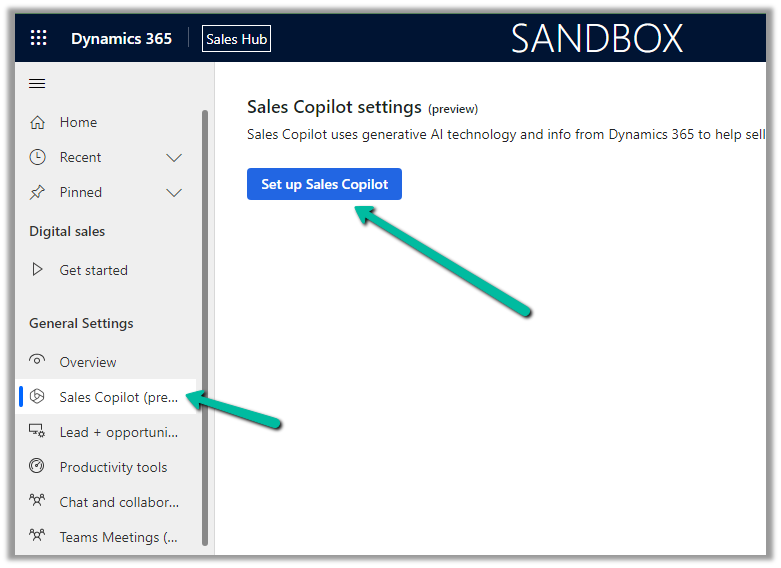
To enable Sales Copilot, navigate to
Sales Hub >> App Settings >> Sales Copilot (preview) >> Set up Sales Copilot
Or if we have already enabled it, we can manage the features provided along with the different apps we want to apply the Sales Copilot using the Manage apps option.

Here we can specify to which apps we want to enable the Compose and Chat feature

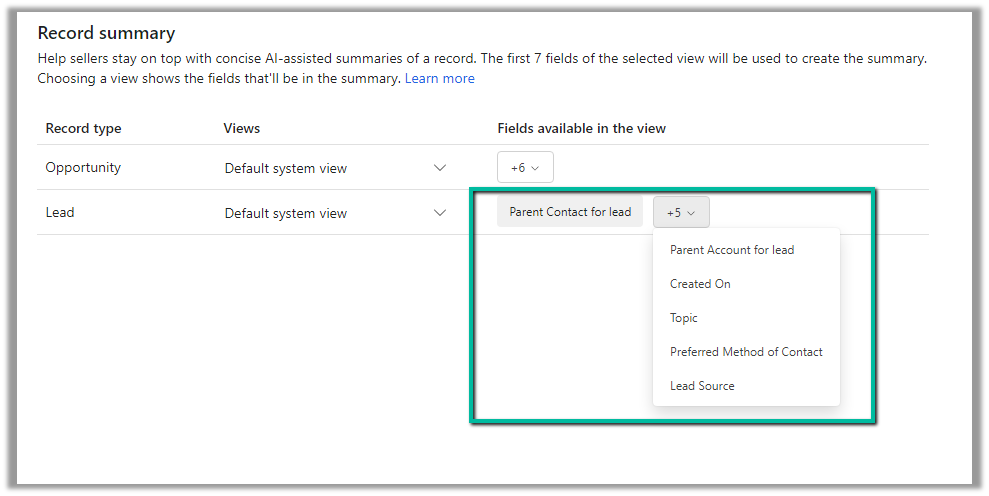
For the Record summary feature, the first 7 fields of the view are considered. We can see “Default System View” selected by default.
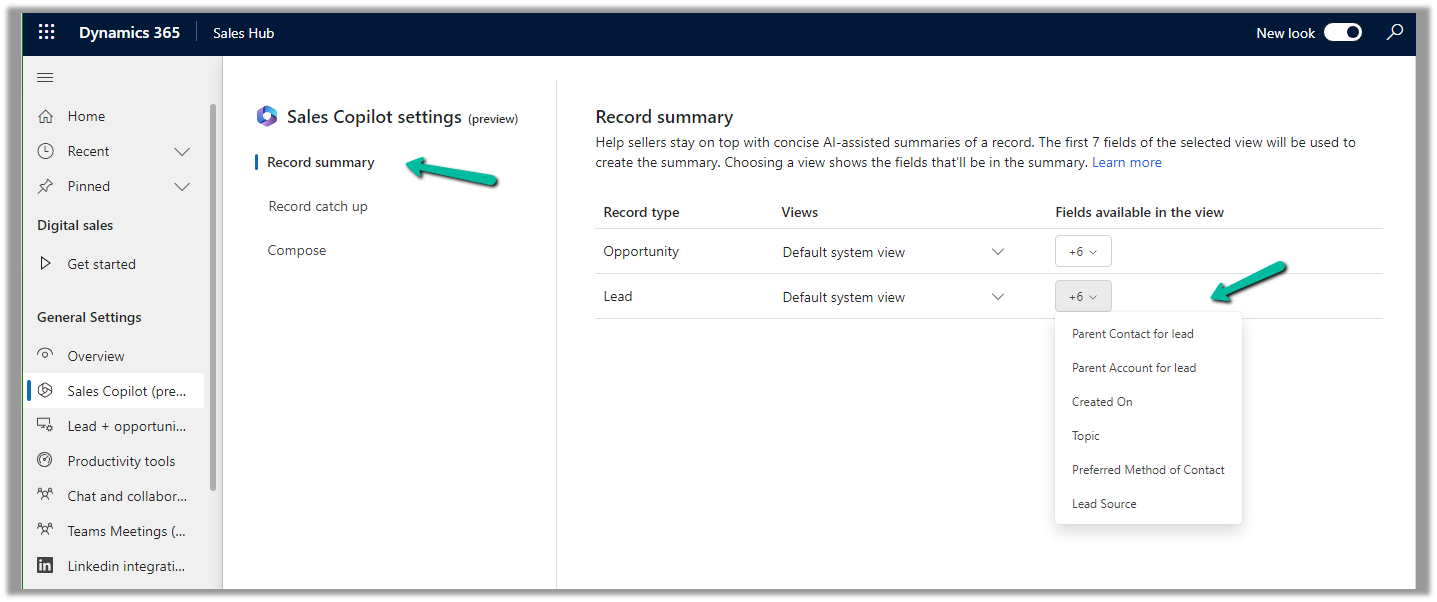
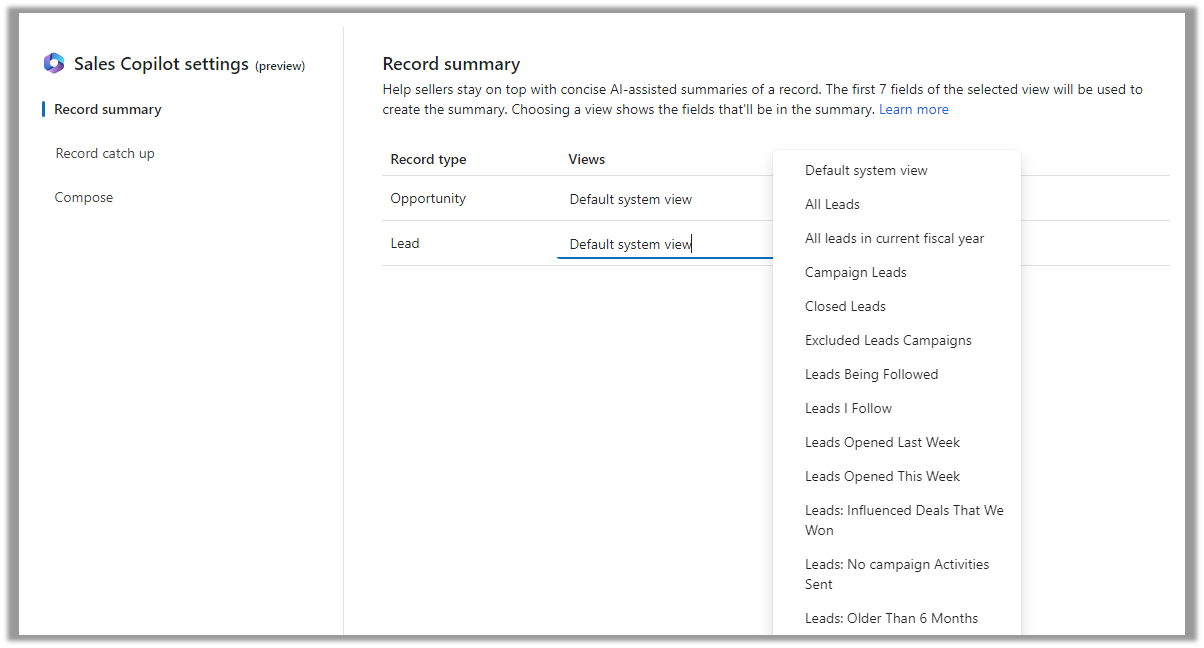
However, we have the option to select a different view, and then the fields of the selected view will be used for the summaries.
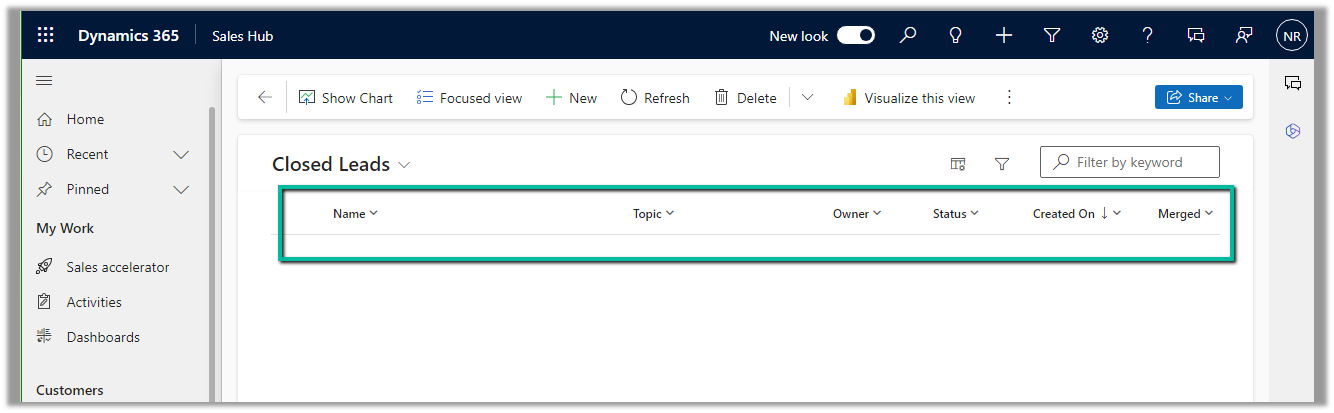
Below if we select the Closed Leads view and we can see it corresponding fields that will be considered for the summaries.
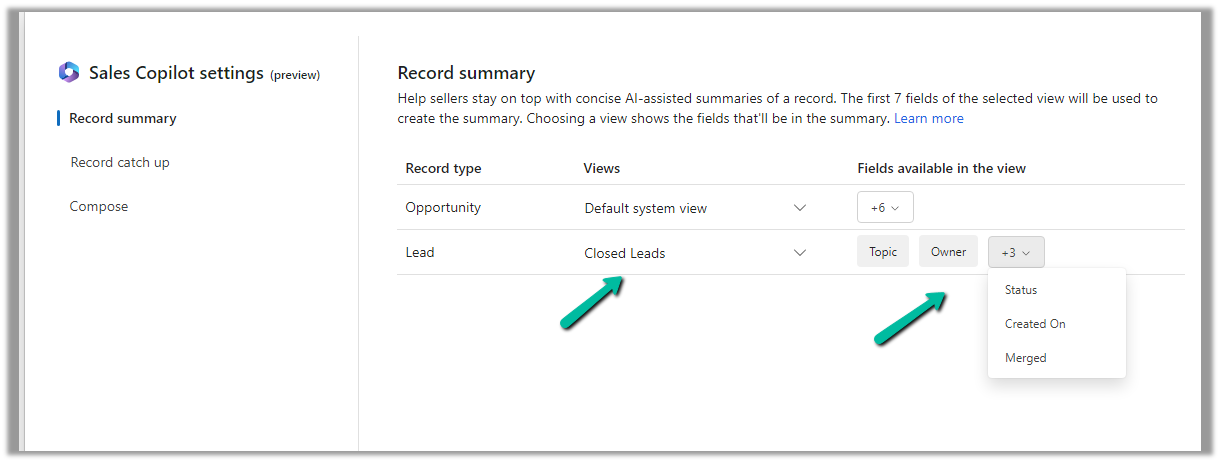
The Closed Leads view
We can open an existing lead or opportunity record, and the Sales Copilot automatically generates the summary for that record.
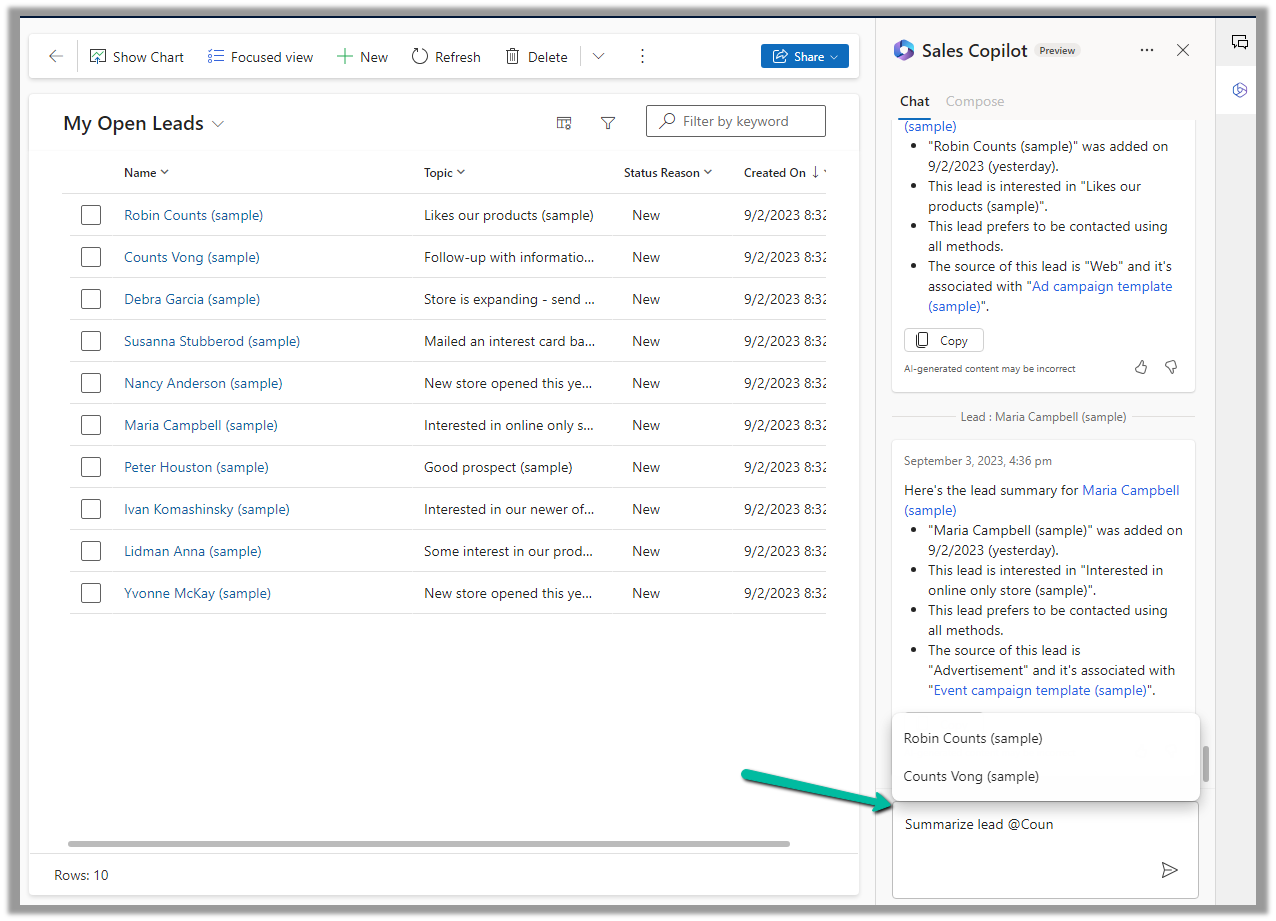
Or if we want to generate summary for a specific lead or opportunity we can use the below prompt.
Summarize lead or Summarize opportunity followed by @ and the record’s name.
Below is the summary for Counts Vong (sample) lead record.
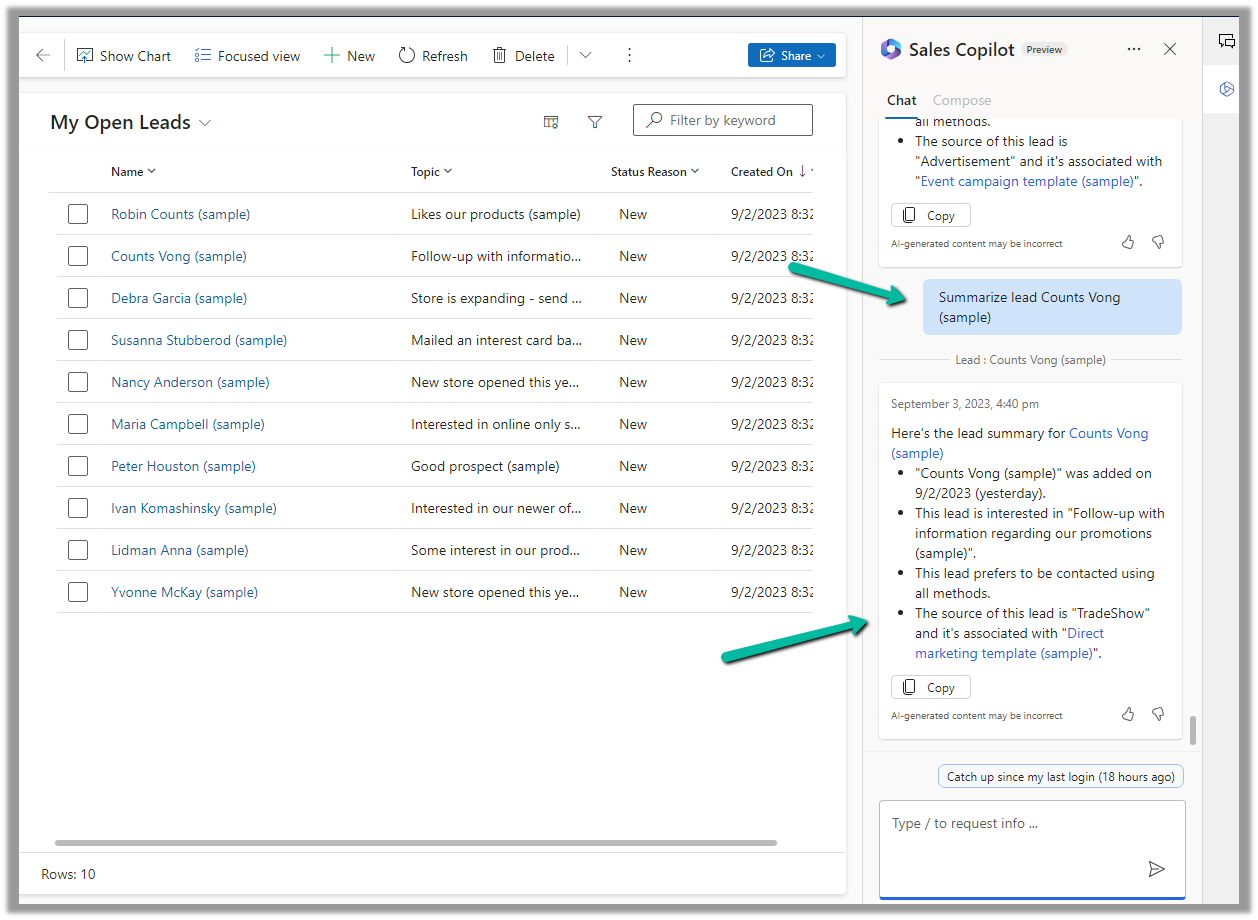
Here we can see the AI-generated summary making use of Created On, Topic, Preferred Method of contacct, Lead source field etc of Default system view.
Get more details here.
Hope it helps..