Check out the below articles explaining in detail the Reparent behavior.
About the reparent action

Advertisements
Check out the below articles explaining in detail the Reparent behavior.

In the previous post, we covered key features and capabilities of Kupp Code Analytics – the powerful Visual Studio Extension for Power Platform and Dynamics 365 Developers.
You can refer to it here
In this blog post, we’d cover the installation and setup of the Kupp Code Analytics extension.
To get the extension, inside Visual Studio Marketplace, we can search for it and download the appropriate extension.
Below we can see that there are 2 versions of the extension available, one for Visual Studio 2022 and the other for Visual Studio 2019.

Visual Studio 2022 – https://marketplace.visualstudio.com/items?itemName=KuppSoftware.kca2022
Visual Studio 2019 – https://marketplace.visualstudio.com/items?itemName=KuppSoftware.KuppCodeAnalytics2019
We can also install it from inside Visual Studio, navigate to Extension, search for Kupp Code Analytics, and download the extension.

Click on Install / Modify (if already existing) to start/modify the installation.
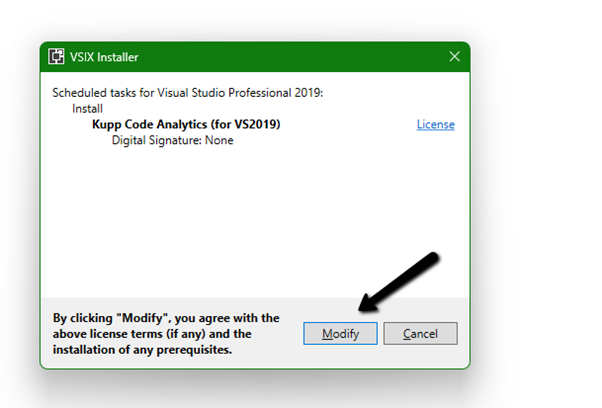
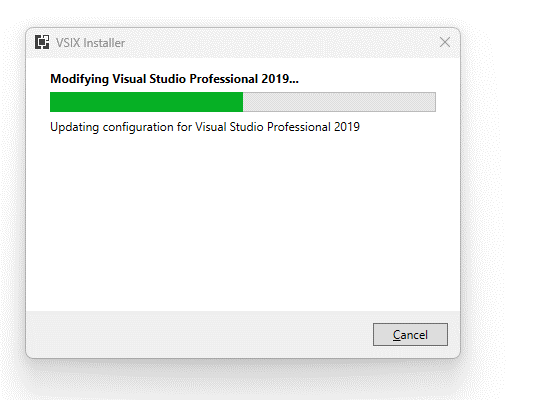
Below we have successfully installed the extension for Visual Studio 2019.

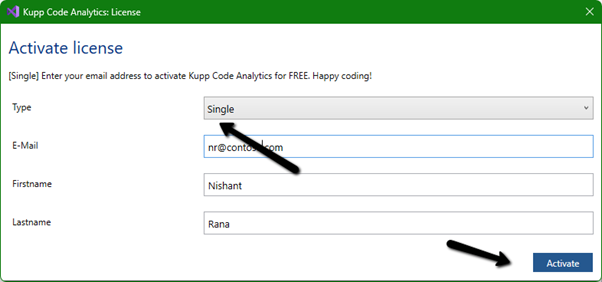
Next, we need to specify and activate the License
We have 2 types of licenses available for the extension.
Community License (free)– Select type Single, enter the contact details and click on Activate to apply for the community license. Clicking on Activate activates the license instantly.
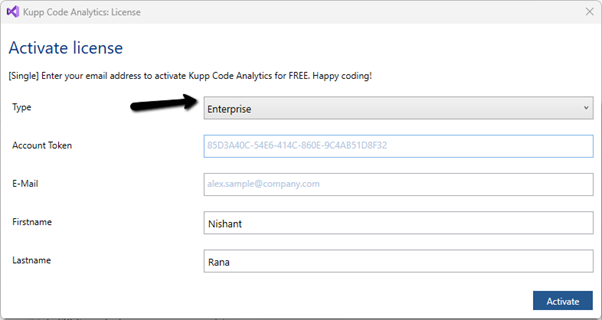
Enterprise License – This is paid license for the enterprise, that comes with additional features and capabilities not available in the Community license.
We can contact the sales team of Kupp for it – https://kuppsoft.com/contact/
Once added, we can see and manage the license information in Tools >> Options >> Kupp Code Analytics >> License

With Extension Installed, and the license activated, the next step is to configure the tool to connect to our Power Platform / Dynamics 365 Environment.
Navigate to Extensions >> Kupp Code Analytics >> Connection >> Configure

Select the appropriate connection or deployment type
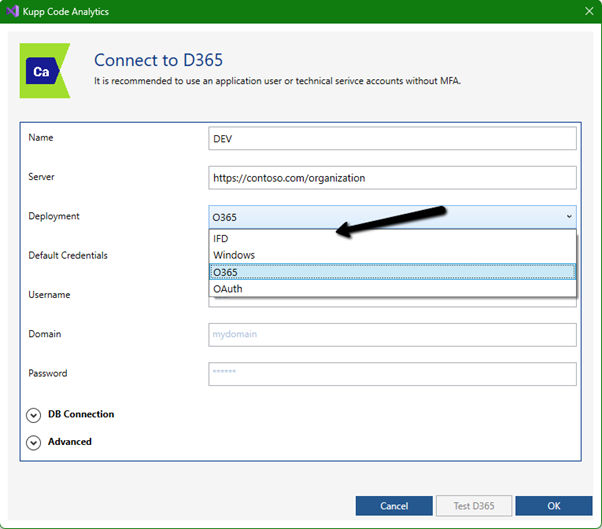
Here to connect to Dynamics 365 Online, we keep the Deployment type as O365 and click on Load Organization

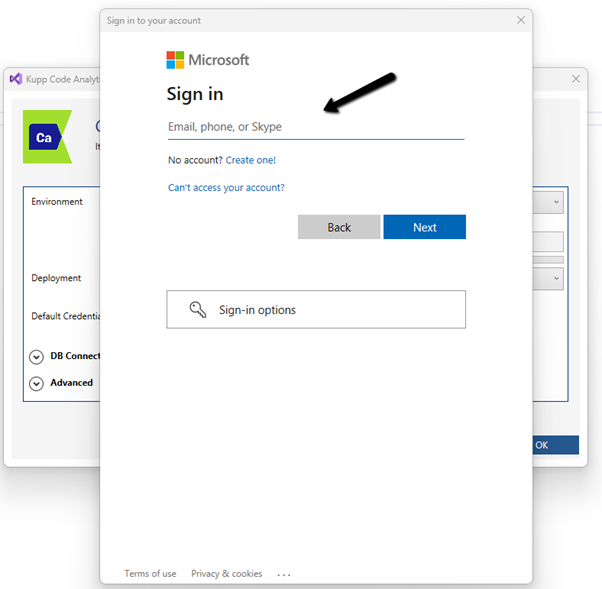
This opens the sign-in dialog where we can provide the appropriate account details.
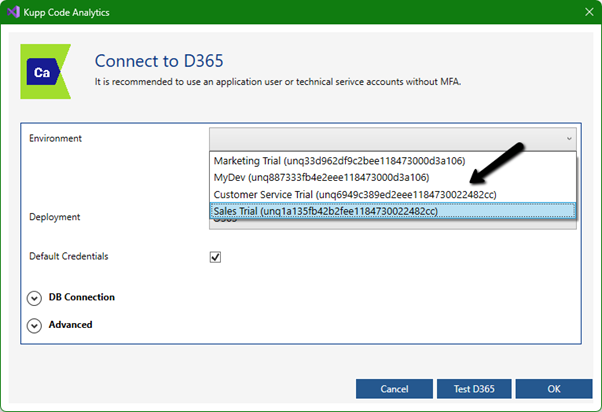
After successful sign-in, we see all the environments populated to which the user has access. Select the environment, we want to connect to.
After selecting the environment, we can click on the Test D365 button and test the connection.
On a successful connection, we will get the success message as shown below.
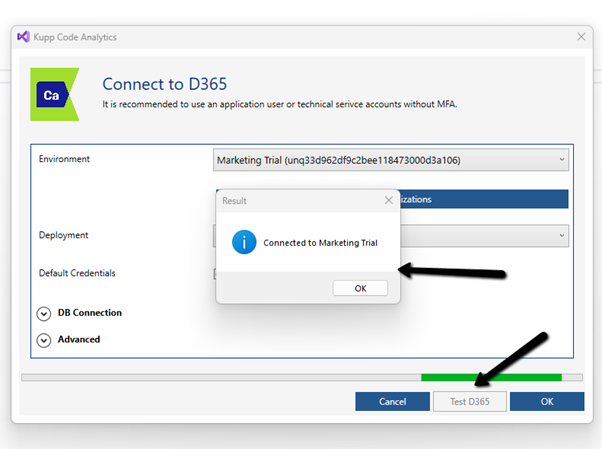
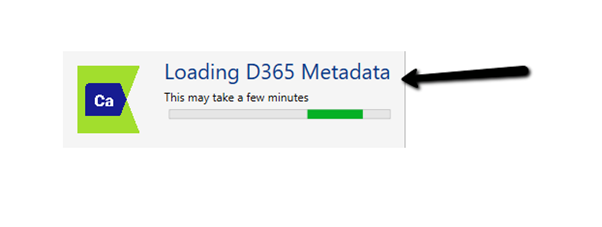
Clicking on OK will close the connection dialog box, and the tool will start the process of downloading the metadata for the environment connected. The download should be complete in a matter of a few seconds.
This completes the installation and configuration part of the extension. In the next blog post, we’d cover the key features of the extension in detail.
Also don’t forget to check out the other intuitive products developed by Kupp Software GmbH –https://kuppsoft.com/our-products/
Hope it helps..

Recently while trying to configure “Azure Synapse Link for
Dataverse” for one of our environments, we faced an issue, where it got stuck as shown below.
Also, there were no files/folders created inside the Storage Account.

Posts on Azure Data Lake
The accounts were properly setup – https://docs.microsoft.com/en-us/power-apps/maker/data-platform/azure-synapse-link-synapse#prerequisites
Here we had only selected contact table for sync initially, and it had around 2.5 million records.
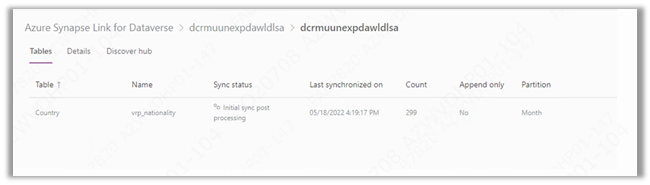
To fix this, we unlinked (using Unlink Option) and created the link again and this time we selected a table having very few record for e.g. country table as shown below.
This time the sync started immediately.
Than through Manage tables option, we added our contact table also, and it also started syncing properly as shown below-

Hope it helps..

Recently while trying to provision Unified Routing from Dynamics 365 Customer Service Hub in one of our trial environments (Service Management >> Service Configuration >> Unified Routing – Turn on unified routing.),

even after providing the consent multiple times (by clicking on Provide consent, with Global Admin role)

it kept coming as disabled and kept asking for providing the consent.

Opening in in-private browsing or a different browser didn’t fix it.
Clearing the cache also didn’t help – Empty Cache and Hard Reload
https://nishantrana.me/2018/02/28/empty-or-disable-cache-while-working-with-web-resources-in-dynamics-365-chrome/

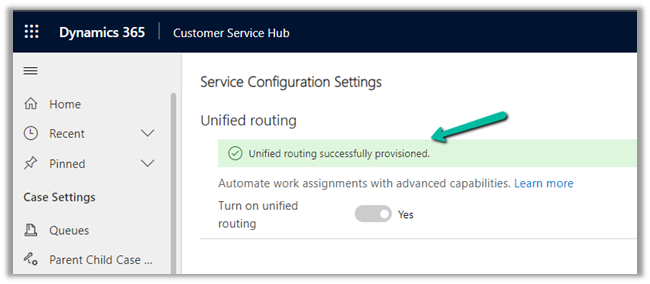
The trick that worked here was creating a workstream record
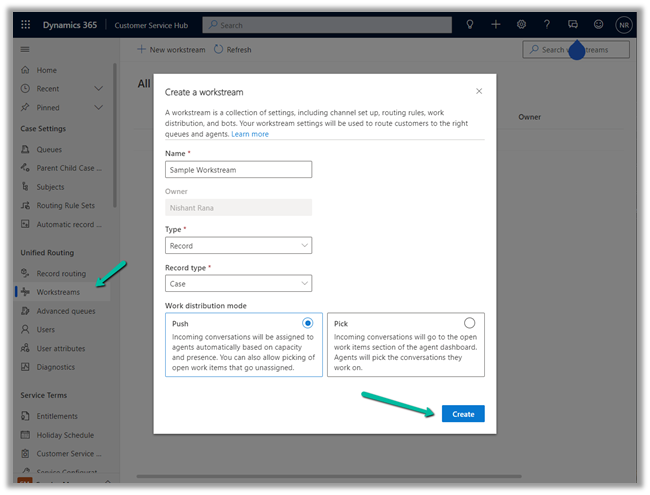
which also triggered the provision of Unified Routing
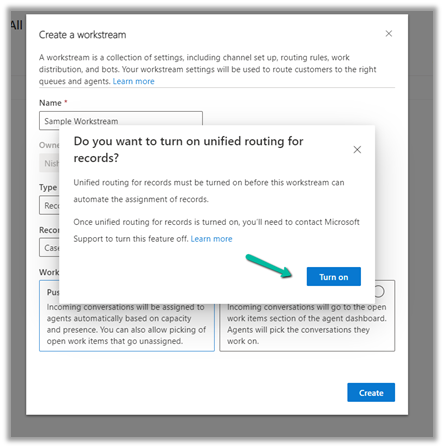
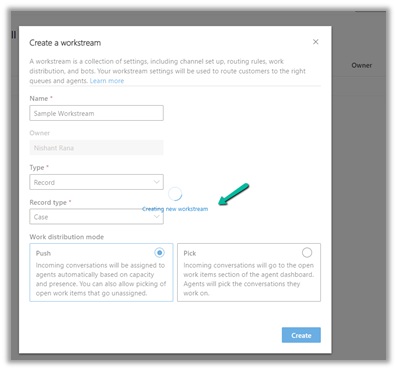
And after our workstream record got created,

we could see the unified routing enabled successfully.
Hope it helps..

Hi,
Sharing a sample code to retrieve more than 5000 records using the Fetch XML.
Version 1 :
private List<Entity> GetTotalRecordsfromFetch(string fetchXML, IOrganizationService orgService)
{
List<Entity> lstEntity = new List<Entity>();

int fetchCount = 5000;
int pageNumber = 1;
string pagingCookie = null;

while (true)
{
// Build fetchXml string with the placeholders.
string xml = this.CreateXml(fetchXML, pagingCookie, pageNumber, fetchCount);
RetrieveMultipleRequest fetchRequest = new RetrieveMultipleRequest
{
Query = new FetchExpression(xml)
};

var returnCollections = ((RetrieveMultipleResponse)orgService.Execute(fetchRequest)).EntityCollection;

if (returnCollections.Entities.Count >= 1)
{
lstEntity.AddRange(returnCollections.Entities);
}

if (returnCollections.MoreRecords)
{
pageNumber++;

results.pagingCookie = returnCollections.PagingCookie;
}
else
{
// If no more records in the result nodes, exit the loop.
break;
}
}

return lstEntity;
}

public string CreateXml(string xml, string cookie, int page, int count)
{
StringReader stringReader = new StringReader(xml);
XmlTextReader reader = new XmlTextReader(stringReader);

XmlDocument doc = new XmlDocument();
doc.Load(reader);

XmlAttributeCollection attrs = doc.DocumentElement.Attributes;

if (cookie != null)
{
XmlAttribute pagingAttr = doc.CreateAttribute("paging-cookie");
pagingAttr.Value = cookie;
attrs.Append(pagingAttr);
}

XmlAttribute pageAttr = doc.CreateAttribute("page");
pageAttr.Value = System.Convert.ToString(page);
attrs.Append(pageAttr);

XmlAttribute countAttr = doc.CreateAttribute("count");
countAttr.Value = System.Convert.ToString(count);
attrs.Append(countAttr);

StringBuilder sb = new StringBuilder(1024);
StringWriter stringWriter = new StringWriter(sb);

XmlTextWriter writer = new XmlTextWriter(stringWriter);
doc.WriteTo(writer);
writer.Close();

return sb.ToString();
}
Version 2 –
private static List<Entity> GetTotalRecordsFetchXML(OrganizationServiceProxy orgProxy, string fetchXML)
{
XDocument xDocument = XDocument.Parse(fetchXML);
var fetchXmlEntity = xDocument.Root.Element("entity").ToString();

EntityCollection entityColl = new EntityCollection();
List<Entity> lstEntity = new List<Entity>();
int page = 1;
do
{

entityColl = orgProxy.RetrieveMultiple(new FetchExpression(
string.Format("<fetch version='1.0' page='{1}' paging-cookie='{0}'>" + fetchXmlEntity + "</fetch>",
SecurityElement.Escape(entityColl.PagingCookie), page++)));

lstEntity.AddRange(entityColl.Entities);
}
while (entityColl.MoreRecords);

return lstEntity;
}
Hope it helps..

Hi,
We got the below error in one of our Sandboxed Plugins
“System.Security.SecurityException: That assembly does not allow partially trusted callers”.
We realised it was because of using System.Web.HttpUtility class

We replaced it with EscapeDataString method and this fixed the issue.
System.Uri.EscapeDataString()
Helpful thread
https://stackoverflow.com/questions/3840762/how-do-you-urlencode-without-using-system-web
Hope it helps..