Let us continue with our previous posts on understanding and implementing a simple bot that interact with Dynamics CRM using Microsoft Bot Framework
Till now we had hard coded our connection to CRM inside the bot application which was used to create lead records in CRM.
In this post, we will use OAuth2 authentication to connect to CRM Service (Web API).
We’d update our bot to use Sign-In Card. It will launch a web browser (web site which redirects user to authenticate to office 365) where user will enter the credentials and on successful authentication it will get the authentication token which it would then use to interact with CRM.
Here we would be using Web Site deployed in Azure that takes care of all the plumbing part.
We will be using Bot State Service here for saving Bot State. User can save bot state in this bot state service and can retrieve it. So, we would be passing the user id to the web site hosted to the azure and after we get the authentication token on successful authorization, we save this information in the bot in the bot state using SetUserData method. Back in our Bot app we will retrieve this authentication token saved in session state using GetUserData method and use it for interacting with CRM Web API.
Let us first create a ASP.NET Web Application which would be use for redirecting the user to authentication and saves the authentication token to the Bot State Service.

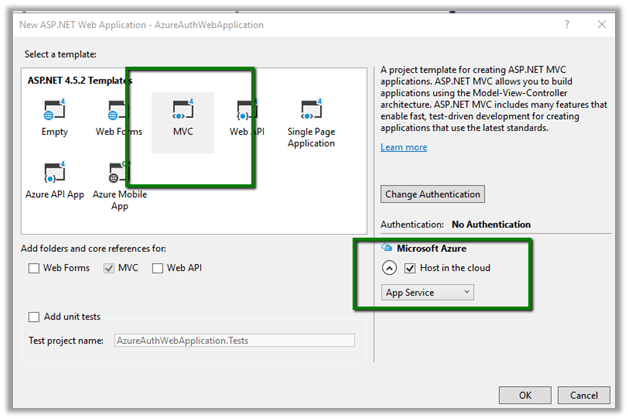
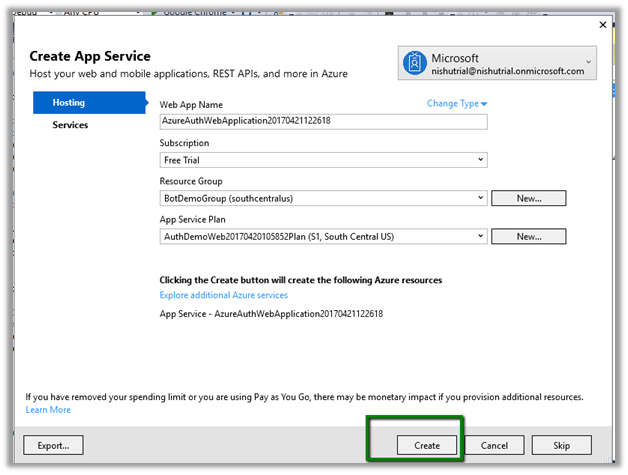
This creates our Web Application.
Add the following Microsoft.Bot.Builder Nuget Package in the project.
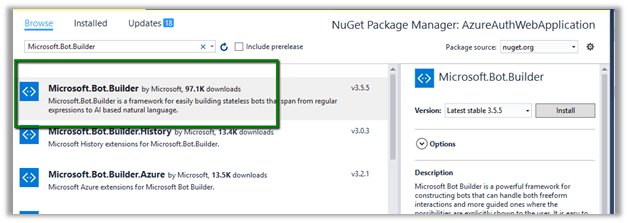
Also add a View named Authorize, which we will use are redirect URI for our Dynamics 365 App that will be registered to Azure Active Directory.

Before we start writing the code in our controller, we need to register dynamics 365 app with Azure Active Directory.
Follow the below post for that.
https://nishantrana.me/2016/11/13/register-a-dynamics-365-app-with-azure-active-directory/


Now we have our required values i.e. client id, client key and end point URL

Add the following keys in web.config.

Here Client Id, Client Secret and EndPoint Url are the one we got when we registered our Dynamics 365 App. Here Microsoft App Id and Password are for our Bot Application.
https://dev.botframework.com
Update the HomeController.cs and add below action methods Login and Authorize.
</p>
using Microsoft.Bot.Connector;
using Microsoft.IdentityModel.Clients.ActiveDirectory;
using System;
using System.Configuration;
using System.Threading.Tasks;
using System.Web.Mvc;

namespace AzureAuthWebApplication.Controllers
{
public class HomeController : Controller
{
public ActionResult Index()
{
return View();
}
public ActionResult Login(string userid)
{
// string userid in session
Session["botuserid"] = userid;
// CRM Url
string Resource = "https://nishutrial.crm.dynamics.com";

AuthenticationContext authContext = new AuthenticationContext(ConfigurationManager.AppSettings["Authority"]);
var authUri = authContext.GetAuthorizationRequestUrlAsync(Resource, ConfigurationManager.AppSettings["ClientId"],
new Uri(ConfigurationManager.AppSettings["RedirectUri"]), UserIdentifier.AnyUser, null);
return Redirect(authUri.Result.ToString());
}

public async Task<ActionResult> Authorize(string code)
{
AuthenticationContext authContext = new AuthenticationContext(ConfigurationManager.AppSettings["Authority"]);
var authResult = await authContext.AcquireTokenByAuthorizationCodeAsync(
code, new Uri(ConfigurationManager.AppSettings["RedirectUri"]),
new ClientCredential(ConfigurationManager.AppSettings["ClientId"],
ConfigurationManager.AppSettings["ClientSecret"]));

// Saving token in Bot State
var botCredentials = new MicrosoftAppCredentials(ConfigurationManager.AppSettings["MicrosoftAppId"],
ConfigurationManager.AppSettings["MicrosoftAppPassword"]);
var stateClient = new StateClient(botCredentials);
BotState botState = new BotState(stateClient);
BotData botData = new BotData(eTag: "*");
botData.SetProperty<string>("AccessToken", authResult.AccessToken);

// webchat is the channel id. Make sure it is same in the bot application when we get the user data
await stateClient.BotState.SetUserDataAsync("webchat", Session["botuserid"].ToString(), botData);
ViewBag.Message = "Your Token -" + authResult.AccessToken + " User Id - " + Session["botuserid"].ToString();
return View();
}

public ActionResult About()
{
ViewBag.Message = "Your application description page.";

return View();
}

public ActionResult Contact()
{
ViewBag.Message = "Your contact page.";

return View();
}
}
}
<p style="text-align: justify;">
Publish the Web Application to Azure.
Now let us go back to our Bot Application and update the messagecontroller.cs class.
</p>
using System.Net;
using System.Net.Http;
using System.Threading.Tasks;
using System.Web.Http;
using Microsoft.Bot.Builder.Dialogs;
using Microsoft.Bot.Connector;
using Microsoft.Bot.Builder.FormFlow;
using Bot_Application1.Models;
using System;
using Bot_Application1.Dialogs;
using System.Collections.Generic;
using System.Web;
using System.Net.Http.Headers;
using Newtonsoft.Json;
using Newtonsoft.Json.Linq;

namespace Bot_Application1
{
[BotAuthentication]
public class MessagesController : ApiController
{
/// <summary>
/// POST: api/Messages
/// Receive a message from a user and reply to it
/// </summary>
public async Task<HttpResponseMessage> Post([FromBody]Activity activity)
{
if (activity.Type == ActivityTypes.Message)
{
if (activity.Text.ToUpper() == "LOGIN")
{
ConnectorClient connector = new ConnectorClient(new Uri(activity.ServiceUrl));
Activity replyToConversation = activity.CreateReply();
replyToConversation.Recipient = activity.From;
replyToConversation.Type = "message";
replyToConversation.Attachments = new List<Attachment>();

List<CardAction> cardButtons = new List<CardAction>();
CardAction plButton = new CardAction()
{
// ASP.NET Web Application Hosted in Azure
// Pass the user id
Value = "http://azureauthwebapplication20170421122618.azurewebsites.net/Home/Login?userid=" + HttpUtility.UrlEncode(activity.From.Id),
Type = "signin",
Title = "Connect"
};

cardButtons.Add(plButton);

SigninCard plCard = new SigninCard("Please login to Office 365", new List<CardAction>() { plButton });
Attachment plAttachment = plCard.ToAttachment();
replyToConversation.Attachments.Add(plAttachment);
var reply = await connector.Conversations.SendToConversationAsync(replyToConversation);
}
else if (activity.Text.ToUpper() == "GETUSERS")
{
// Get access token from bot state
ConnectorClient connector = new ConnectorClient(new Uri(activity.ServiceUrl));
StateClient stateClient = activity.GetStateClient();
BotState botState = new BotState(stateClient);
BotData botData = await botState.GetUserDataAsync(activity.ChannelId, activity.From.Id);
string token = botData.GetProperty<string>("AccessToken");

var httpClient = new HttpClient();
httpClient.DefaultRequestHeaders.Add("OData-MaxVersion", "4.0");
httpClient.DefaultRequestHeaders.Add("OData-Version", "4.0");
httpClient.DefaultRequestHeaders.Accept.Add(new MediaTypeWithQualityHeaderValue("application/json"));
httpClient.DefaultRequestHeaders.Authorization = new AuthenticationHeaderValue("Bearer", token);

var retrieveResponse =
await httpClient.GetAsync("https://nishutrial.crm.dynamics.com/api/data/v8.1/systemusers?$select=fullname");
if (retrieveResponse.IsSuccessStatusCode)
{
var jRetrieveResponse =
JObject.Parse(retrieveResponse.Content.ReadAsStringAsync().Result);

dynamic systemUserObject = JsonConvert.DeserializeObject(jRetrieveResponse.ToString());

foreach (var data in systemUserObject.value)
{
Activity jsonReply = activity.CreateReply($"System User = {data.fullname.Value}");
await connector.Conversations.ReplyToActivityAsync(jsonReply);
}
}
else
{
Activity reply = activity.CreateReply("Failed to get users.\n\nPlease type \"login\" before you get users.");
await connector.Conversations.ReplyToActivityAsync(reply);
}
}
else
{
ConnectorClient connector = new ConnectorClient(new Uri(activity.ServiceUrl));
Activity reply = activity.CreateReply("# CRM BOT Instructions \n\nlogin --> Login to Office 365\n\ngetusers --> Get all System Users in CRM");
await connector.Conversations.ReplyToActivityAsync(reply);
}
}
else
{
HandleSystemMessage(activity);
}

var response = Request.CreateResponse(HttpStatusCode.OK);
return response;
}

private IDialog<LeadModel> MakeLuisDialog()
{
return Chain.From(() => new LUISDialog(LeadModel.BuildForm));
}

internal static IDialog<LeadModel> MakeRootDialog()
{
return Chain.From(() => FormDialog.FromForm(LeadModel.BuildForm));
}

private Activity HandleSystemMessage(Activity message)
{
if (message.Type == ActivityTypes.DeleteUserData)
{
// Implement user deletion here
// If we handle user deletion, return a real message
}
else if (message.Type == ActivityTypes.ConversationUpdate)
{
// Handle conversation state changes, like members being added and removed
// Use Activity.MembersAdded and Activity.MembersRemoved and Activity.Action for info
// Not available in all channels
}
else if (message.Type == ActivityTypes.ContactRelationUpdate)
{
// Handle add/remove from contact lists
// Activity.From + Activity.Action represent what happened
}
else if (message.Type == ActivityTypes.Typing)
{
// Handle knowing tha the user is typing
}
else if (message.Type == ActivityTypes.Ping)
{
}

return null;
}
}
}
<p style="text-align: justify;">
Publish the Bot to Azure.
Now let us test the Bot.
Go to – https://dev.botframework.com/bots
Open the Bot and click on Test.

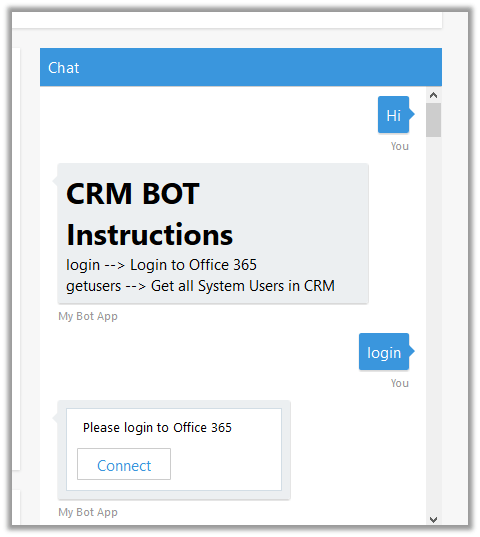
Let us start the Chat.
On typing login the bot presents User with the Sign In Card. Click on Connect.
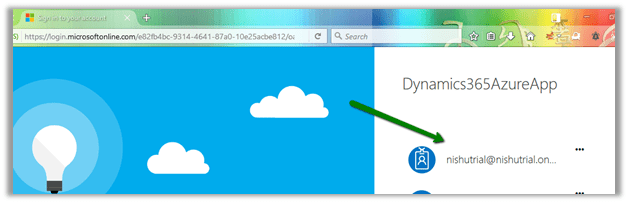
Sign in with your credentials.
Give permission to the app.

On successful sign-in –

Now type in getusers

It brings us all the System Users full name from our CRM Organization.
The extremely informative posts from which I learned about it
https://blogs.msdn.microsoft.com/tsmatsuz/2016/09/06/microsoft-bot-framework-bot-with-authentication-and-signin-login/
https://debajmecrm.com/2016/02/29/knowhow-how-to-execute-web-api-calls-to-microsoft-dynamics-crm-from-an-external-asp-net-web-application/
and following pluralsight training that helped in understanding OAuth and JWT concept.
https://www.pluralsight.com/courses/oauth2-json-web-tokens-openid-connect-introduction
Hope it helps..