Fixed – We are having trouble loading your form preview. Check to make sure you have access error in Power Apps


While trying to open a form for customization for a custom entity we were getting below error within the maker portal.

The user was an admin user.

The same was the case in both Chrome and Edge browsers.

The only way we could proceed was by switching to classic experience.

Switching to Classic worked

After updating the form in classic and publishing the changes, the form started working properly in the maker portal also.

We were able to customize the form in both Chrome and Edge.

Hope it helps..

Fixed – AuthorizationFailed. The client with object id does not have authorization to perform action ‘’Microsoft.Authorization/roleAssignments/write’ over scope ‘storageaccount’ – Azure Data Lake


While configuring the Azure Synapse Link/ Export to Data Lake service, we were getting below error for one of the users.

{“code”:”AuthorizationFailed”,”message”:”The client ‘nishantr@pmaurua105.onmicrosoft.com’ with object id ‘d56d5fbb-0d46-4814-afaa-e429e5f252c8’ does not have authorization to perform action ‘Microsoft.Authorization/roleAssignments/write’ over scope ‘/subscriptions/30ed4d5c-4377-4df1-a341-8f801a7943ad/resourceGroups/RG/providers/Microsoft.Storage/storageAccounts/saazuredatalakecrm/providers/Microsoft.Authorization/roleAssignments/2eb81813-3b38-4b2e-bc14-f649263b5fcf’ or the scope is invalid. If access was recently granted, please refresh your credentials.”}

The current Role assignments of the user were as below.

To resolve it we need to give the Owner role to the user configuring the Export to Data lake service on the Storage account. (apart from System Admin role within Dynamics 365)

https://docs.microsoft.com/en-us/powerapps/maker/data-platform/export-to-data-lake#prerequisites

After assigning the Owner Role (and removing the other roles), it worked successfully.

Check other posts on Azure Data Lake/ Azure Synapse Link

Posts on Azure Data Lake

Hope it helps..

Advertisements

Set Up Your Workstation to Create SSRS Reports for Dataverse, Model-Driven Power Apps and Dynamics 365


Nick Doelman's avatarThe ReadyXRM Blog by Nick Doelman

Despite all the cool stuff you can do with the Power Platform, one of my most popular blog posts is Set Up Your Workstation to Create SQL Server Reporting Services Reports for Dynamics 365.

The post was likely popular because there were different components in the setup process and Microsoft never did a great job explaining all the pieces and steps.

Another challenge installing the tools was that it required SQL Server Data Tools 2015, even after there were newer versions, and many started the process assuming the latest version would work (it didn’t).

Microsoft has finally updated the tools that can run on the latest versions of Visual Studio (2019) so here is an all-new, all-fresh version of how to install the tools you need to create SQL Server Reporting Services Reports that will run on model-driven Power Apps and Dynamics 365 (Customer Engagement Apps).

As a bonus, at…

View original post 1,810 more words

Create Power BI Report to analyze Dataverse / Dynamics 365 data in Azure Data Lake


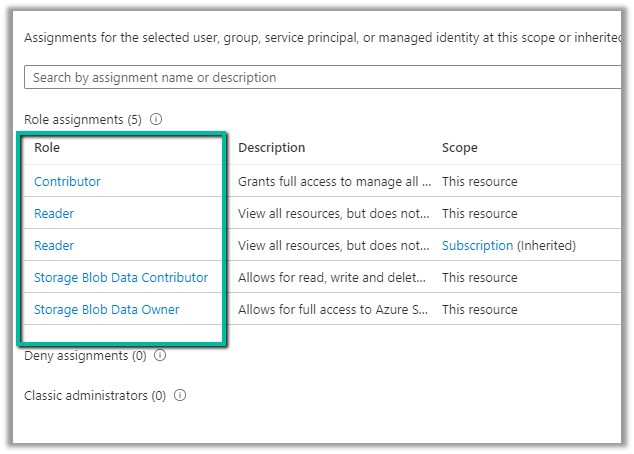
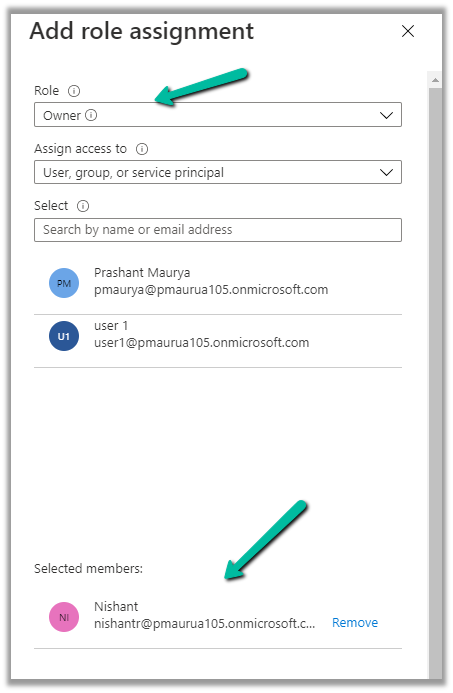
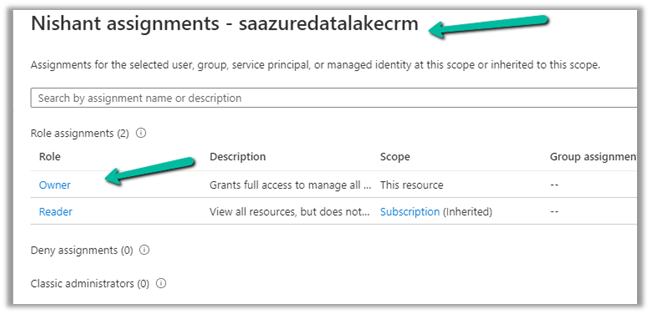
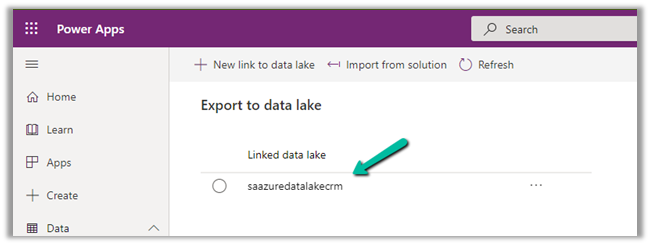
To begin with, here we have already configured the Azure Synapse Link /Export to Data Lake service and have configured Account, Contact and User table for the sync.

Check posts on Azure Synapse Link/  Export to Data Lake service:

https://nishantrana.me/2020/12/10/posts-on-azure-data-lake/

Let us now create the Power BI report on the exported data –>

Sign in to Power BI Desktop.

Click in Get Data and select Azure >> Azure Data Lake Gen 2 connector and click on connect.

Navigate to the storage account and the container within it and click on Container properties.

Copy the URL

Replace the blob part https://saazuredatalakecrm.blob.core.windows.net/dataverse-pmaurya105-unqdc8ed1c1df824188bbe2225de96f0

with the dfs

https://saazuredatalakecrm.dfs.core.windows.net/dataverse-pmaurya105-unqdc8ed1c1df824188bbe2225de96f0

Enter the URL and select CDM Folder View


Sign in with the Azure Active Directory account or with an Account key.

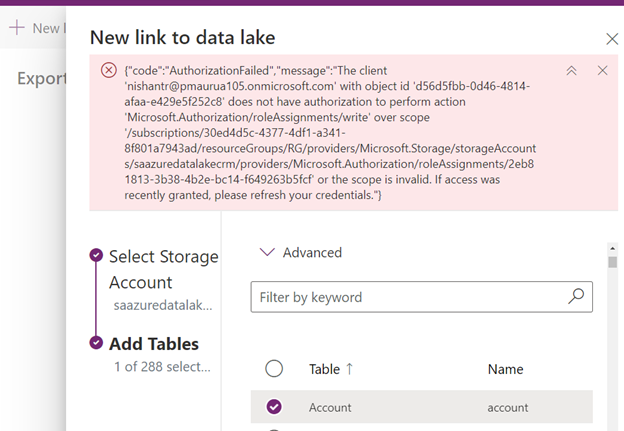
In case if you get the “Access to the resource is forbidden” error.

https://nishantrana.me/2020/09/07/error-access-to-the-resource-is-forbidden-while-trying-to-connect-to-azure-data-lake-storage-gen2-using-power-bi-desktop/

Here we have selected the Contact, Account, and System User table.

Click on Load.


Here we’d create a basic report that shows Contact’s full name, email, along with Account Name (left join with Account) and Owning User Full Name (left join with System user)

Let us choose the appropriate columns from the contact table.

fullname, emailaddress1, owninguser, ownerid_entitytype, parentcustomerid, parentcutsomerid_entitytype, parentcustomeridname


Now to get the full name of the owning user and the Account’s name, let us left join the contact table with the system user and account table.

Select Merge Queries as New in the Power Query Editor.


Merge Contact with Account


Merge with System User


Expand the account column and select the name field for the merged query.


Similarly, select fullname for the systemuser.


Close and apply the updates.


Below we have our report ready.


Save and publish the report.

More posts on Power BI – https://nishantrana.me/2018/11/24/power-bi-and-microsoft-dynamics-365/

Hope it helps..

Advertisements

How to – Use Advanced lookup in Model-driven Power Apps / Dynamics 365


To enabled Advanced Lookup, log into to Power Platform Admin Center, navigate to

Environment >> [Select Environment] >> Settings >> Behavior

Enable the Lookup behavior and Save.

This adds the Advanced Lookup option in the Lookup dialog.


Clicking on it opens the Advanced Lookup Grid 


We can perform SEARCH within a selected View, CHANGE a view, can FILTER it the results further to show only records owned, ADD a new record, SORT the grid.


The best part is we can open/edit an existing record as well as add new ones without losing the existing context.

Opening an existing record from the result opens the record in the new pop-up window as shown below.

Similarly, the Add new option opens the Quick Create form.

In case of special data type like Party List or Regarding, we can select multiple records of different entities we are presented with.

Similar the option to Add new records list all the tables/entities applicable to that lookup.

Thus the new advanced lookup makes working with Lookup much simpler and effective and we should start adapting / using it.

Blog posts on 2021 Release Wave 1 – Dynamics 365

Hope it helps..

Advertisements

Integrate the approval center into a model driven app/Dynamics 365 CE


One more insightful blog post by @Mehdi.

Mehdi El Amri's avatarXRM Tricks (Power Platform & Dynamics CRM )

Power Automate provides a standard solution to manage approvals in a Dataverse environment. Approval requests can be easily generated from cloud flows. Users have the ability to view and respond to approval requests from email, teams or the approval center which is accessible from the power automate website only.

Today, I will present a way to respond to approvals from a model driven app directly. Also, the approval requester will be able to cancel his request from the MDA in one click.


The approver can approve, reject, or assign the approval to a new approver in the organization:

The approval requestor can cancel his or her own approval request:


To implement this, we just need to use the widgets provided by the MsFlow js SDK. Yes, there is an SDK that allows us to generate some cool widgets. The approval center is one of them. Please refer to the documentation.

View original post 409 more words

Nishant Rana's Weblog

Everything related to Microsoft .NET Technology

Skip to content ↓