A common problem that many users report in CRM is that the system is automatically sending out e-mail notifications to recipients for CRM Appointments without the user’s permission. However, you know CRM doesn’t automatically send out Appointment e-mails and there are no background processes or workflows that are sending these notifications. So what are the users referring to?
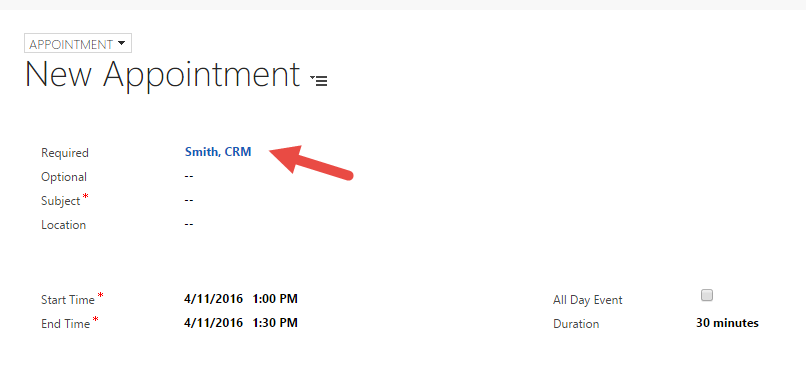
Since CRM 2013, most users have been creating appointments through the Social Pane. One nice thing about creating appointments from the Social Pane is that CRM automatically populates information onto the Appointment form. A major downside to this though is that one of the fields that gets populated is the “Required” field.
When an Appointment is saved with values in the “Required” field and it syncs to a user’s e-mail, it has the same effect as inviting attendees to an appointment in Outlook or Office 365. When attendees are on an Appointment, e-mail notifications are sent out…
We were getting this error in the submission of one of our outbound Marketing forms.
Activity id: e1ede147-efb6-457d-bc19-826c6176a2e4, Request id: jH7xRiEzGFTdZQTbE2fkh9_Z_WtjumCqJERuYZbGSL0_0, Exception: Entity ‘Contact’ With Id = 896b960d-c5d7-4c4d-95c7-a9e226afbf8e Does Not Exist
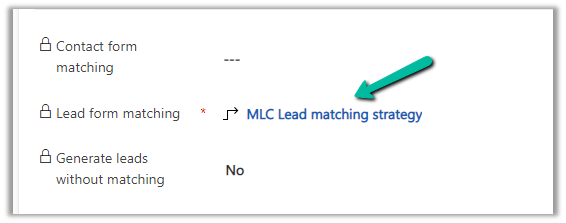
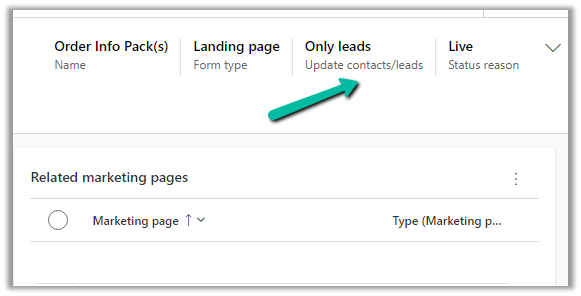
The form had only the Lead form matching defined and Only leads for Update contacts / leads.
So here because of some earlier multiple/different form submissions, a contact got created and stored in the browser’s cookie, which CRM was referring to, and trying to set a Parent Contact for the lead record even though we were having Only leads set for update contact/leads option.
While trying to import the solution (patch), we were getting the below error.
“Expected non-empty Guid”
There was hardly any detail in the log file also
We tried removing the solution component one by one in our source environment and trying the import again in the target environment.
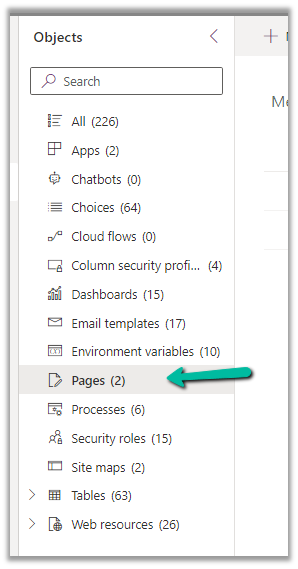
Eventually removing the Pages (custom page) allowed us to import the solution successfully into the target environment.
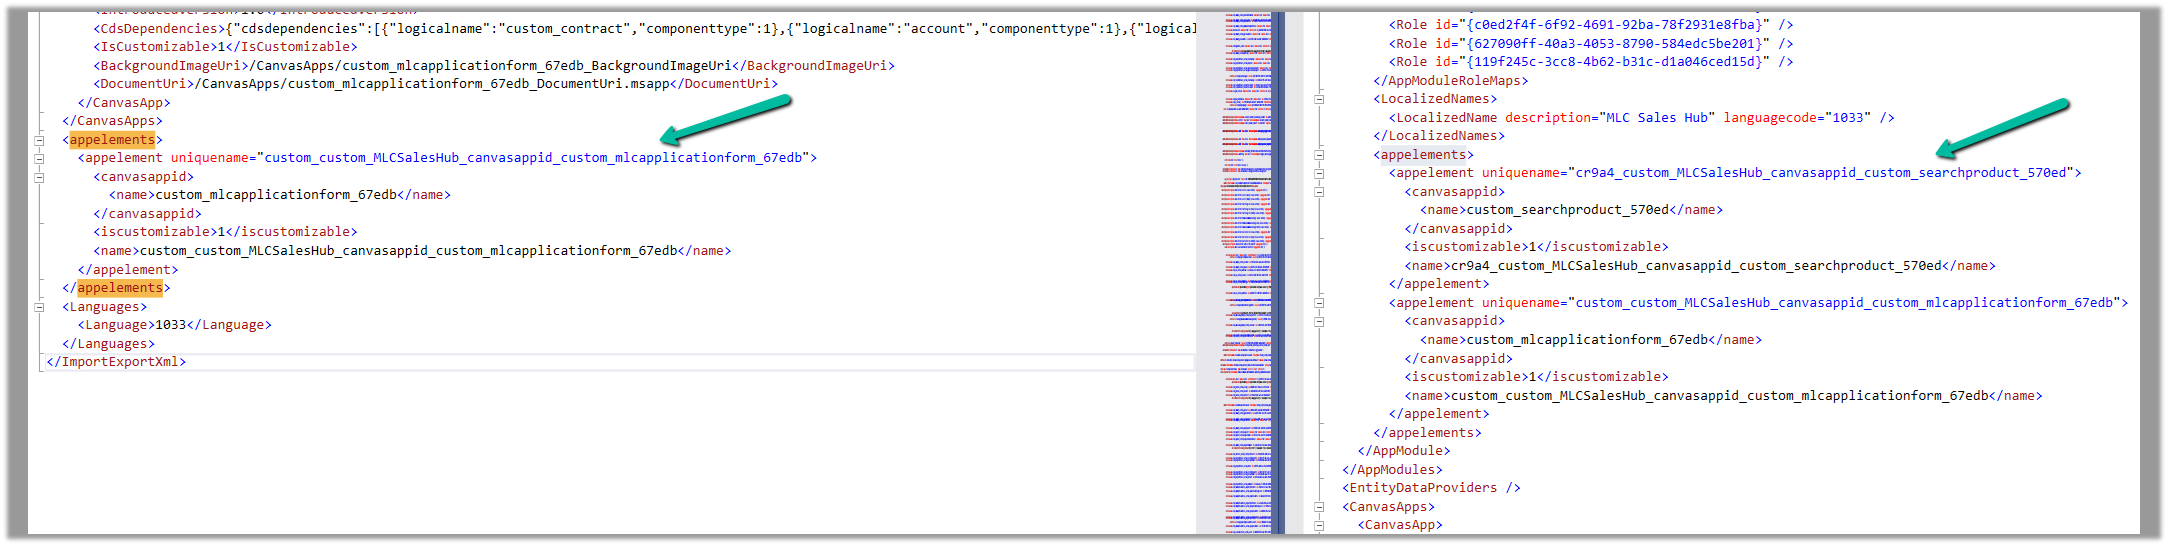
We then compared the customization.xml of the current solution with the backup solution of the Target and see the information missing in the current solution.
Left is – Current solution (giving error) and Right is the backup solution of the target.
Interestingly next time when we extracted the new patch after a couple of days, we could see the tag there and so no issues that time.
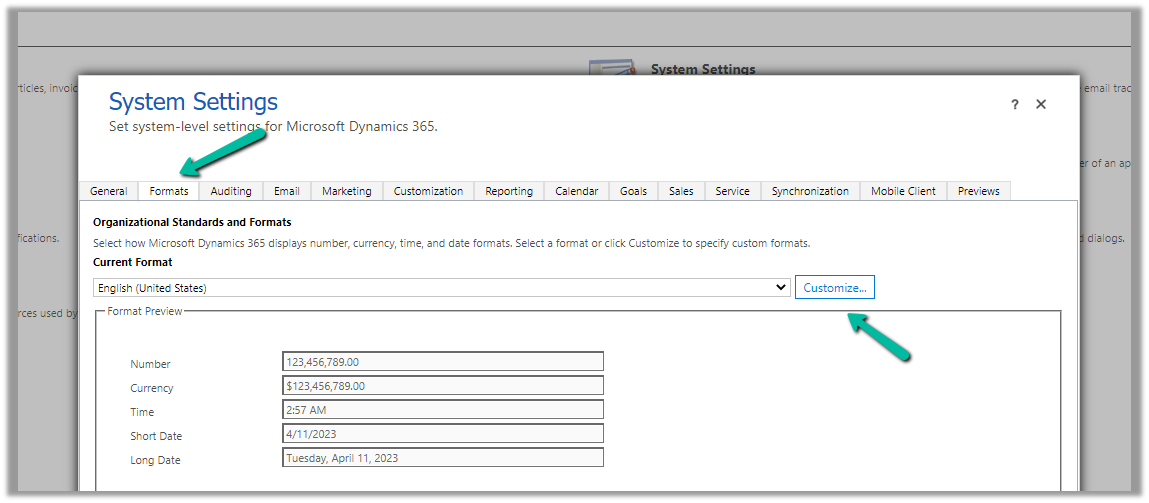
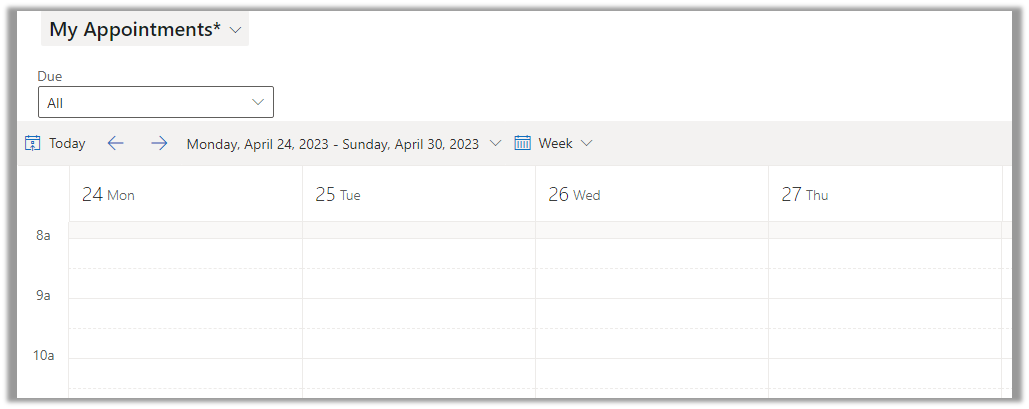
By default, if the calendar view is starting on Sunday for the week as shown below, we can update the system settings, to start it on Monday or any other day
From Administration >> System Settings > > Formats >> Customize (Current Format)
Specify the First Day of Week
On update, we can see the view updated to show the week starting from Monday.
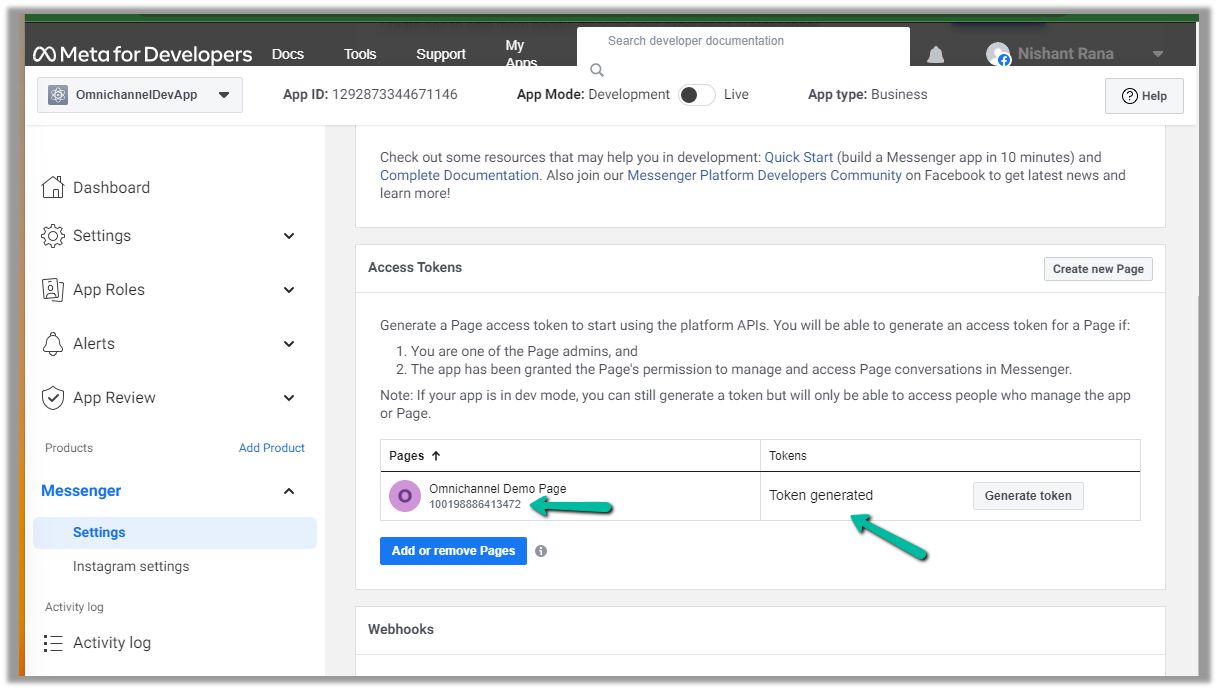
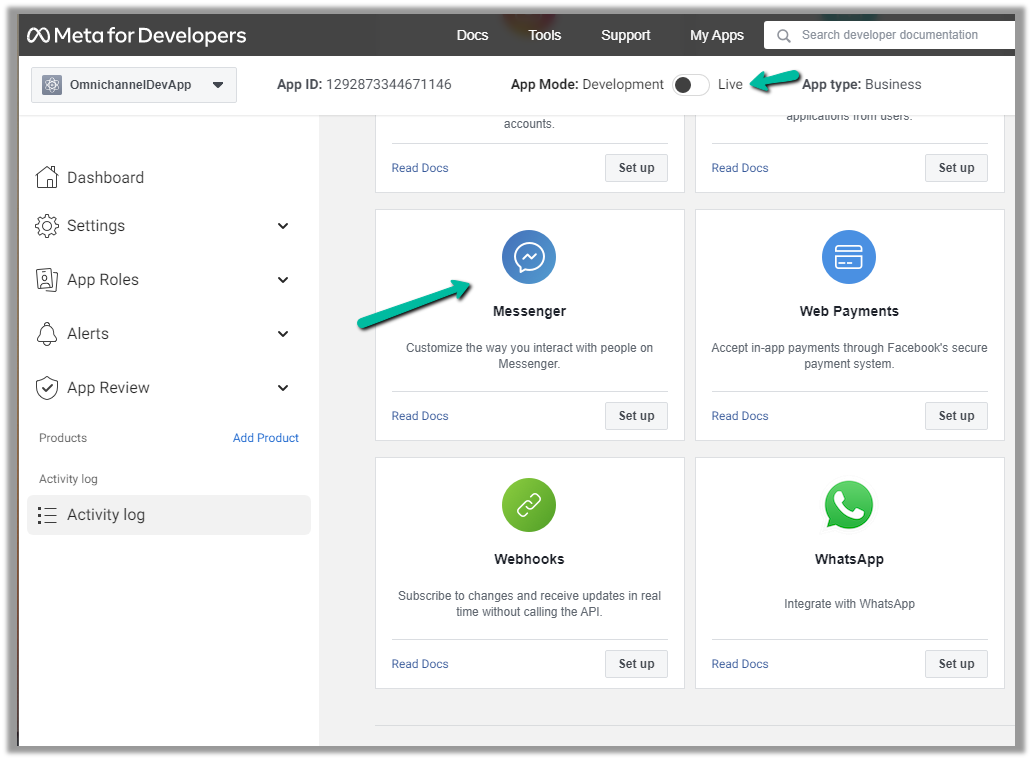
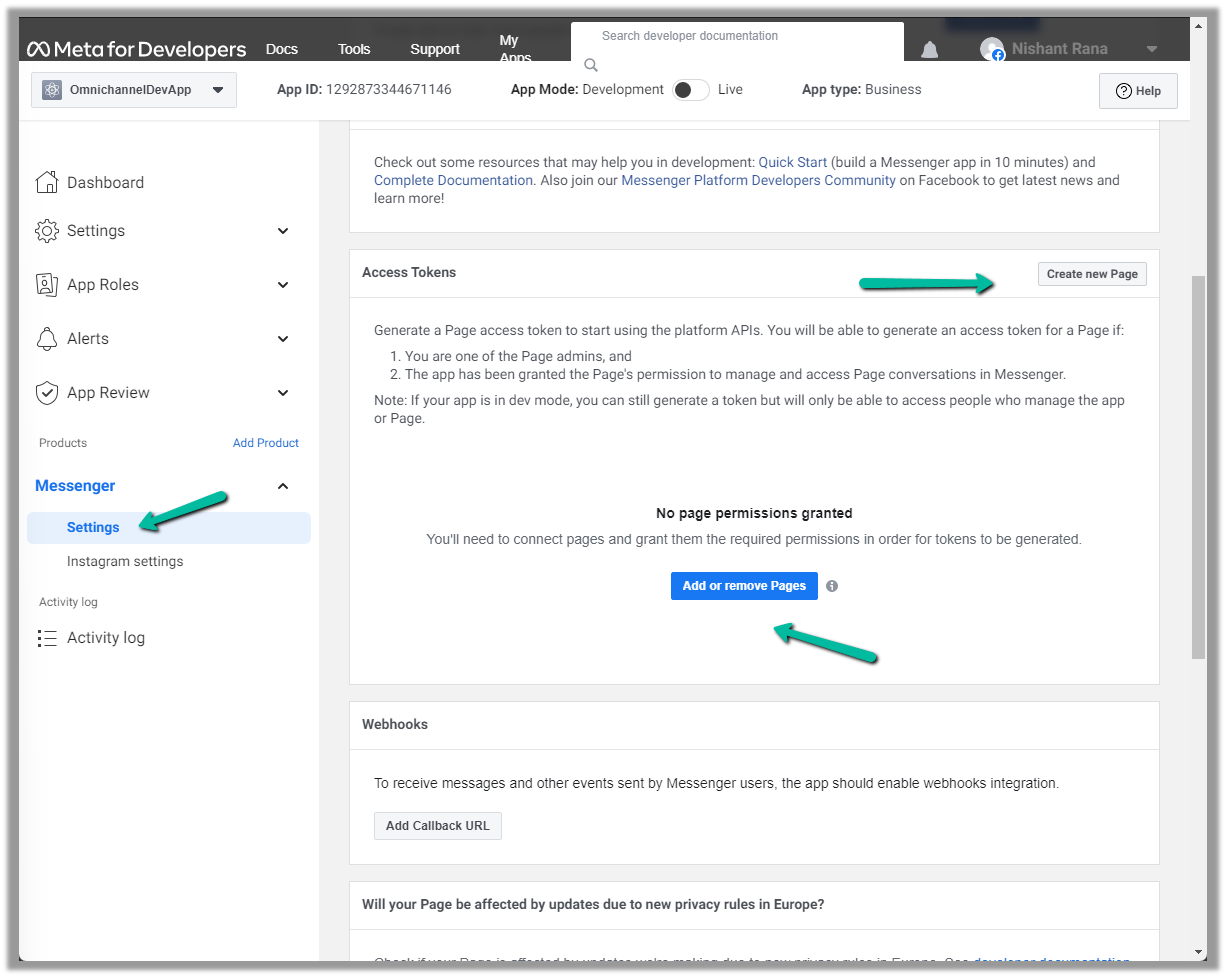
Next either add an existing page or create a new one and then add the newly created page in the Messenger >> Settings
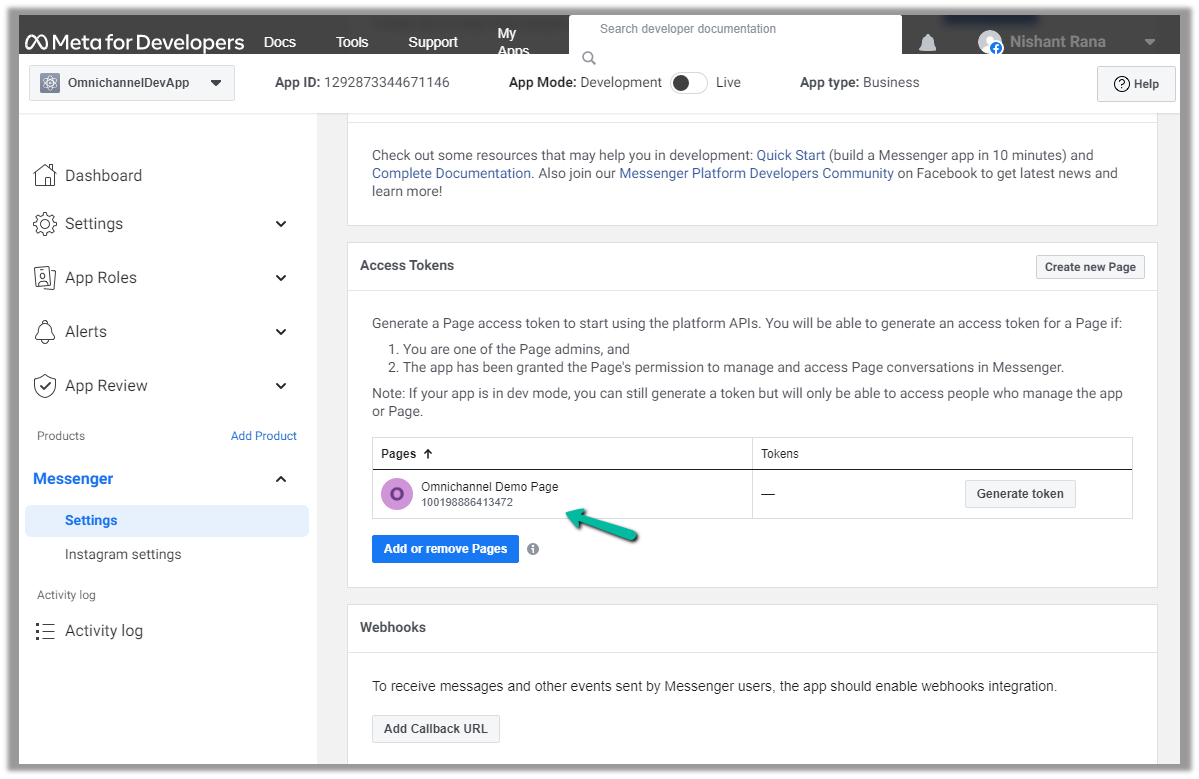
Here we created a new page and have added that page.
We can also Generate token for the page, which we will use while configuring Facebook Channel in Dynamics 365.
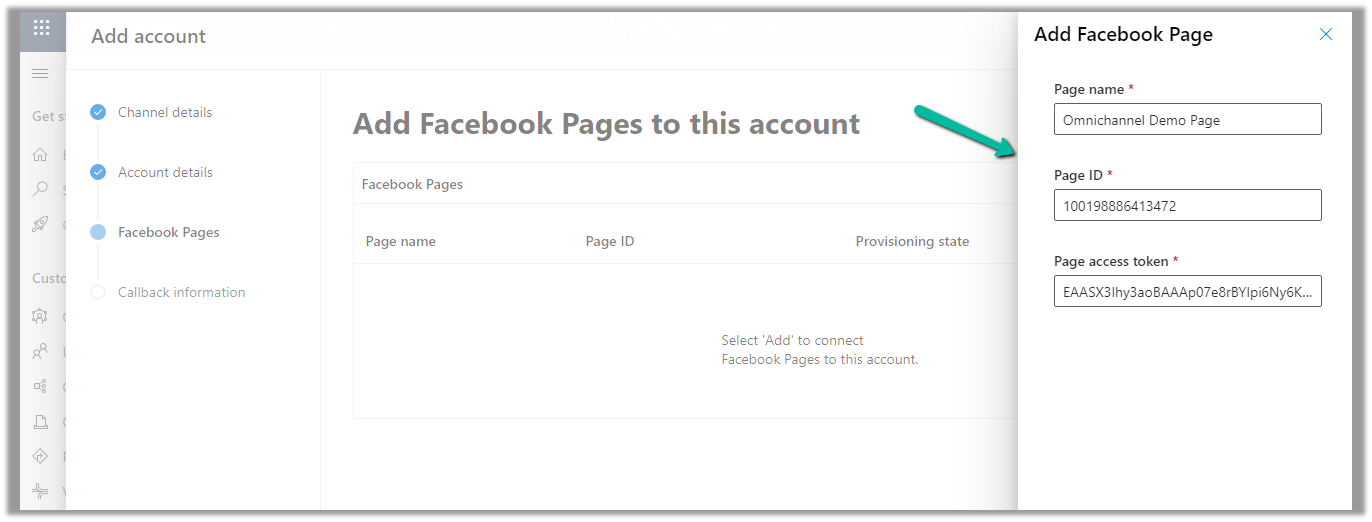
Click on Generate token and copy the token. Also, save the Page Id below the name of the page.
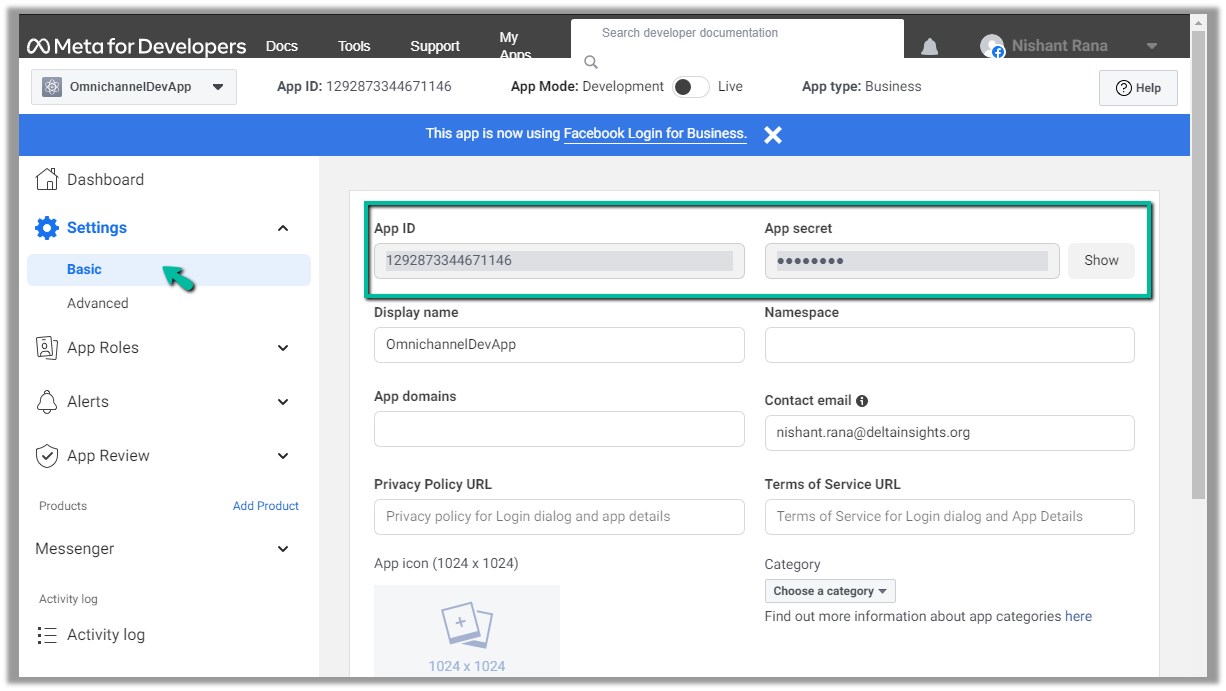
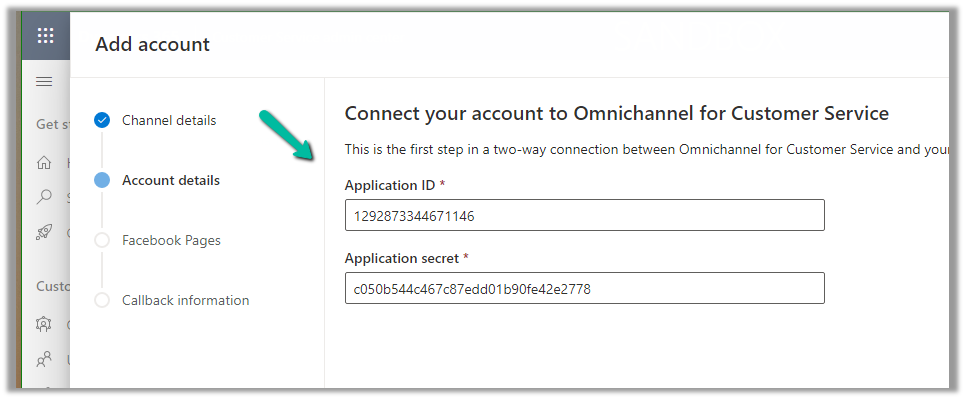
We will also need App ID and App Secret, which we can get from – Settings >> Basic
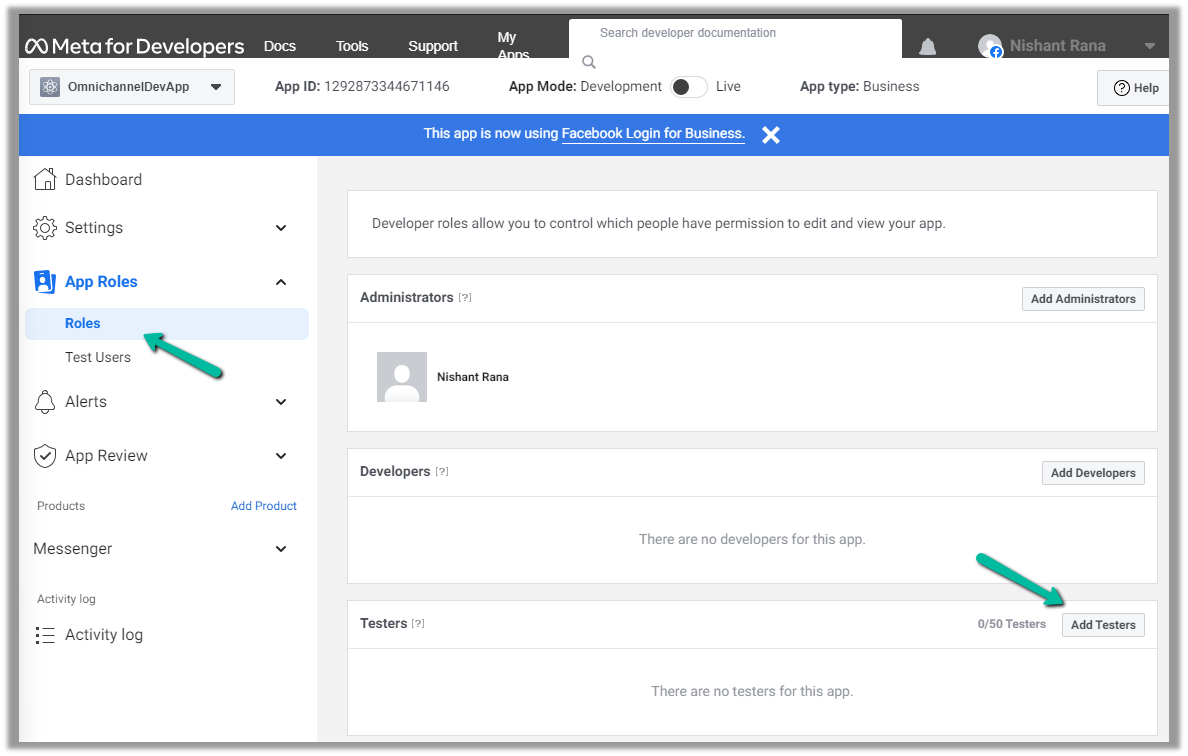
Next, we add a few test accounts to the app for testing/using the app. (we are not making the app publicly available or live, which would require and approval process)
Navigate to App Roles >> Roles >> Testers (Add Testers)
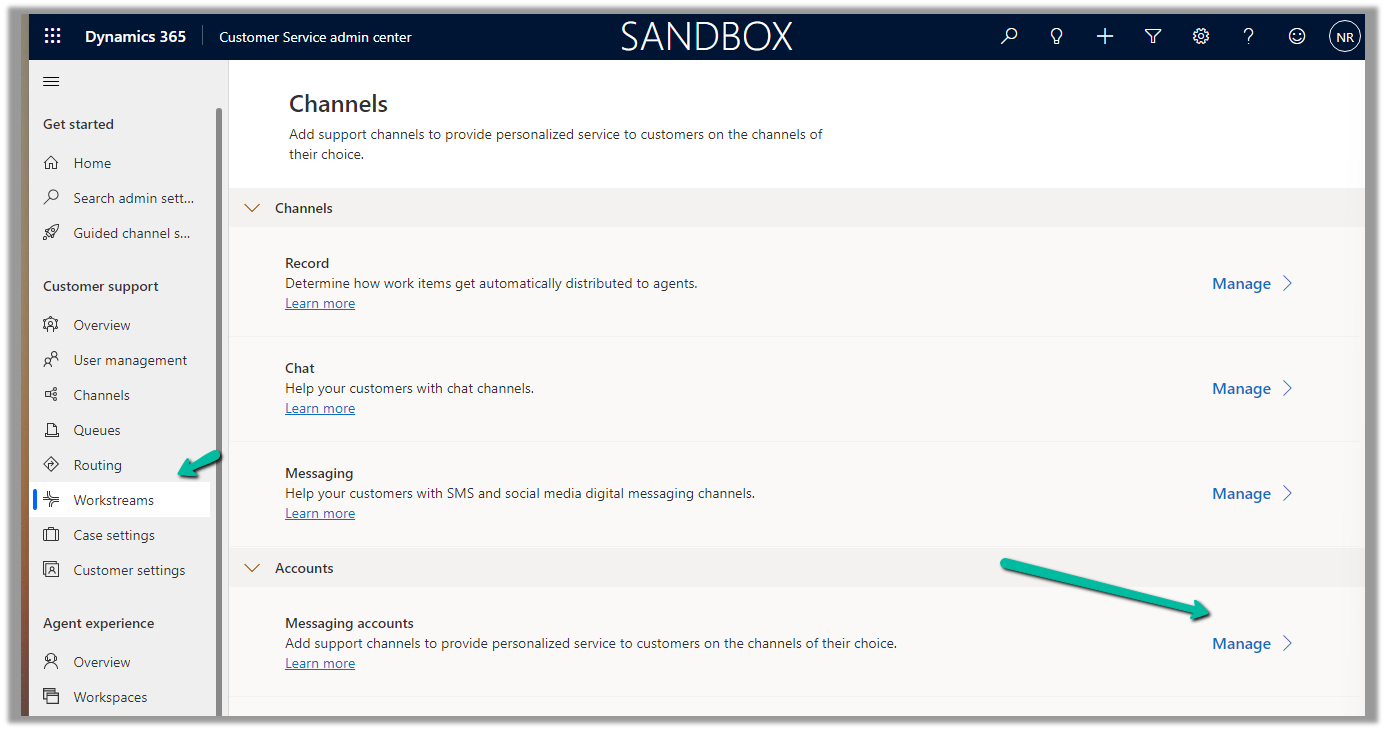
Back in Customer Service Admin Center, navigate to Customer Support >> Channels >> Messaging Accounts (Manage)
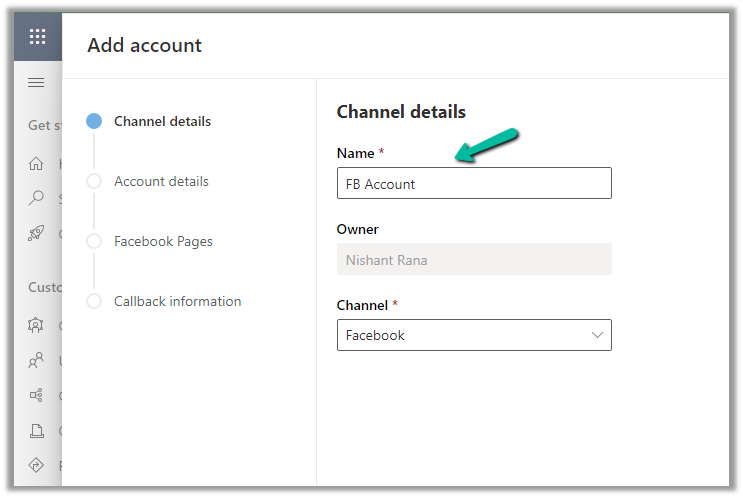
Add a New Account
Click Next and provide the App ID and Application Secret
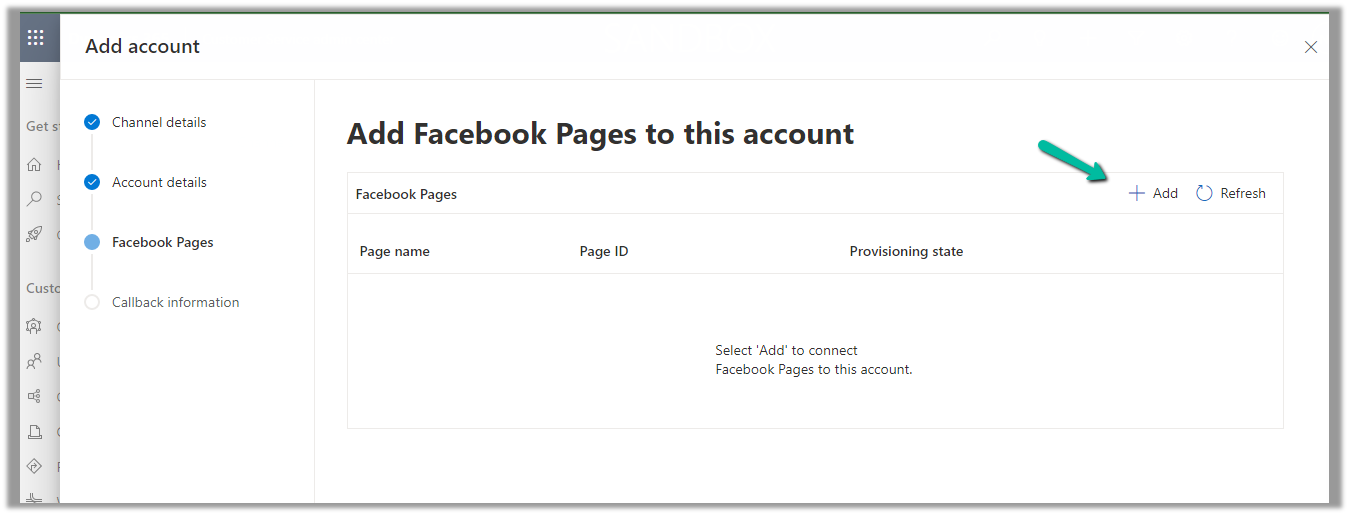
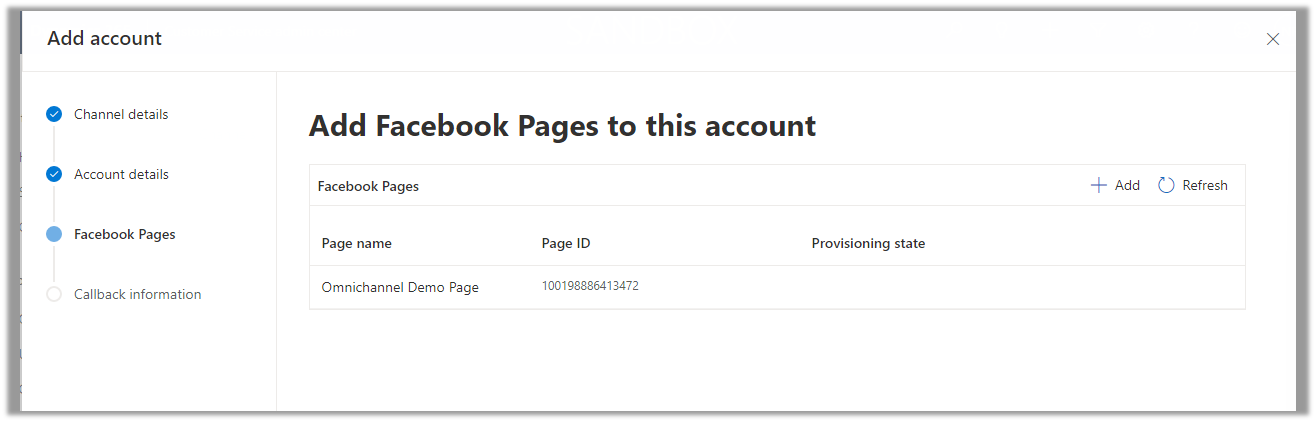
Add Facebook Page to the account
Provide the Page name, Page ID, and the Page access token.
With the page successfully added, click on Next
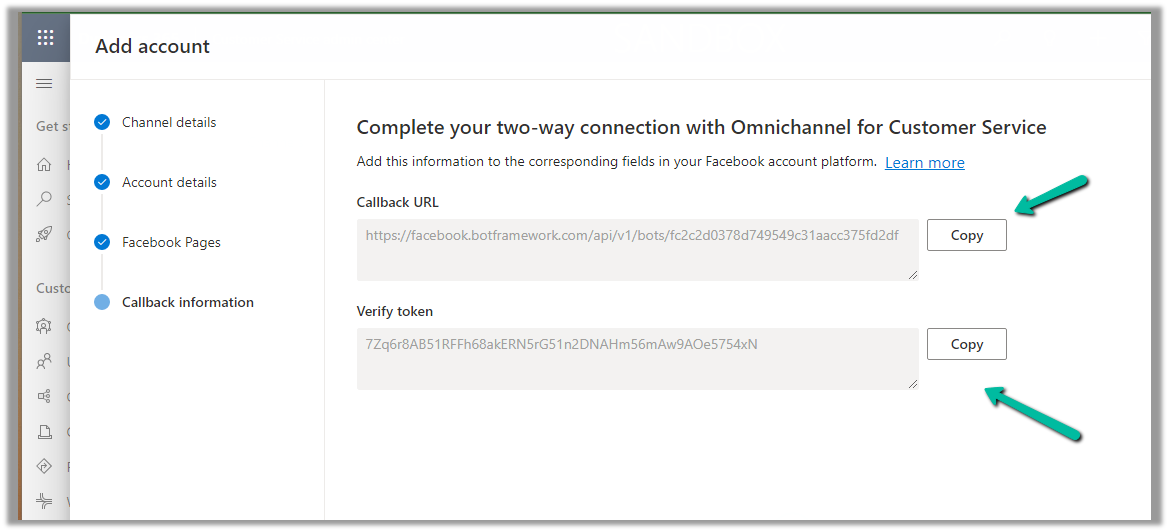
Copy the Callback URL and the Token.
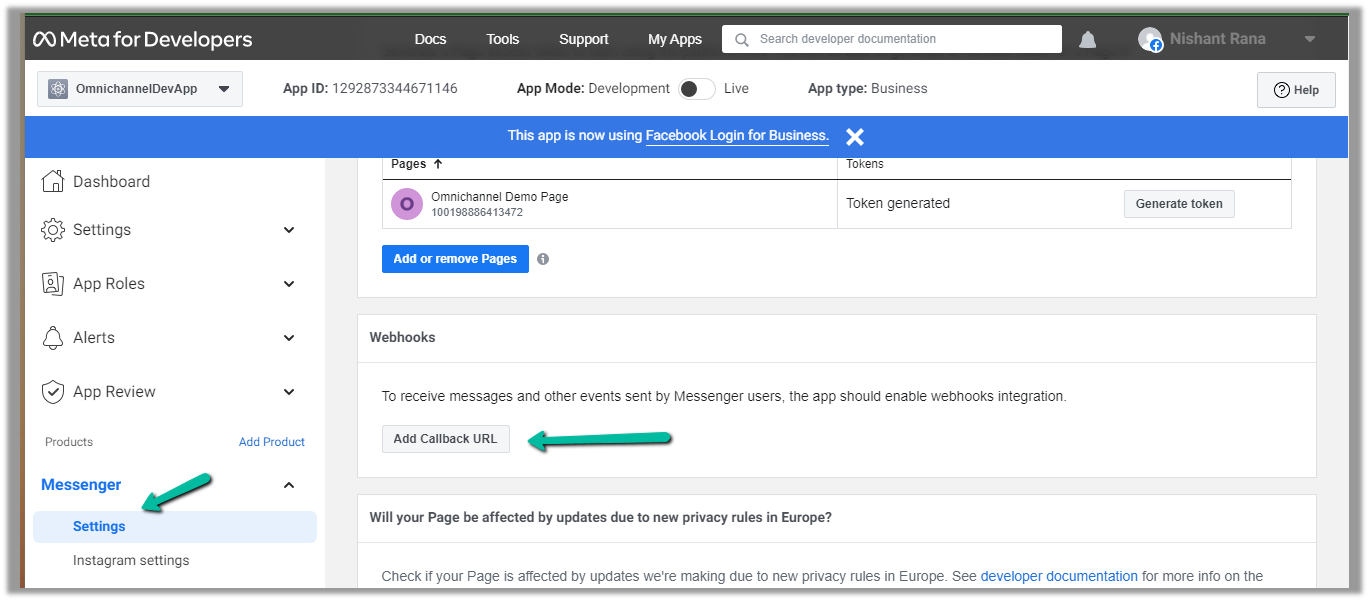
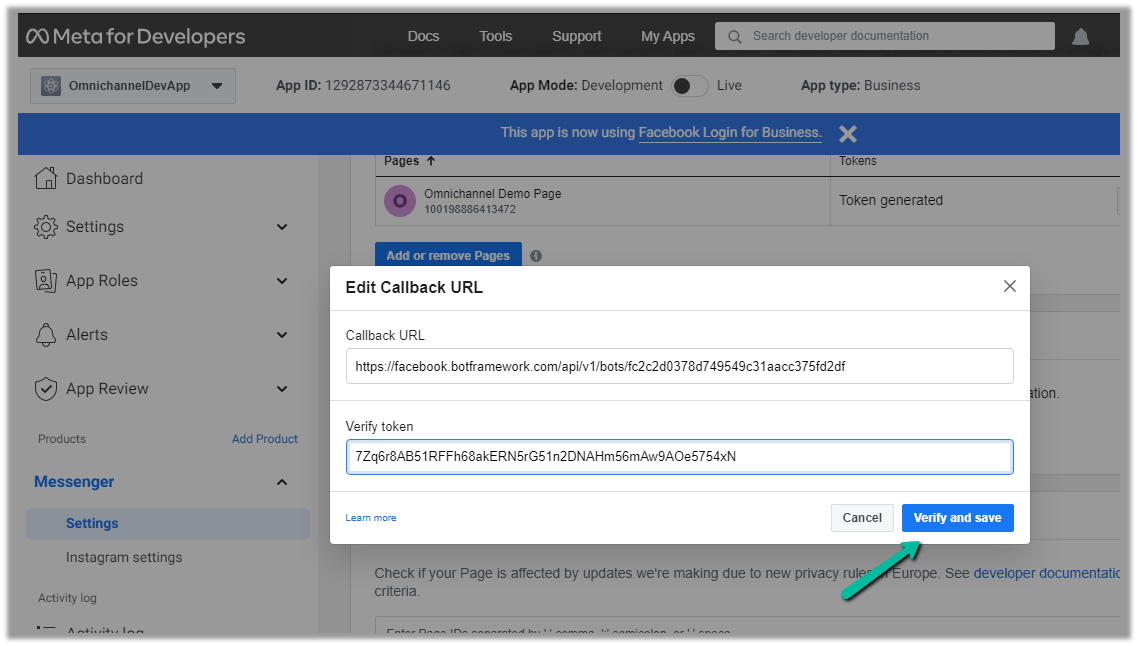
Paste this information in the Messenger product added.
Click on Add Callback URL.
Click on Verify and save
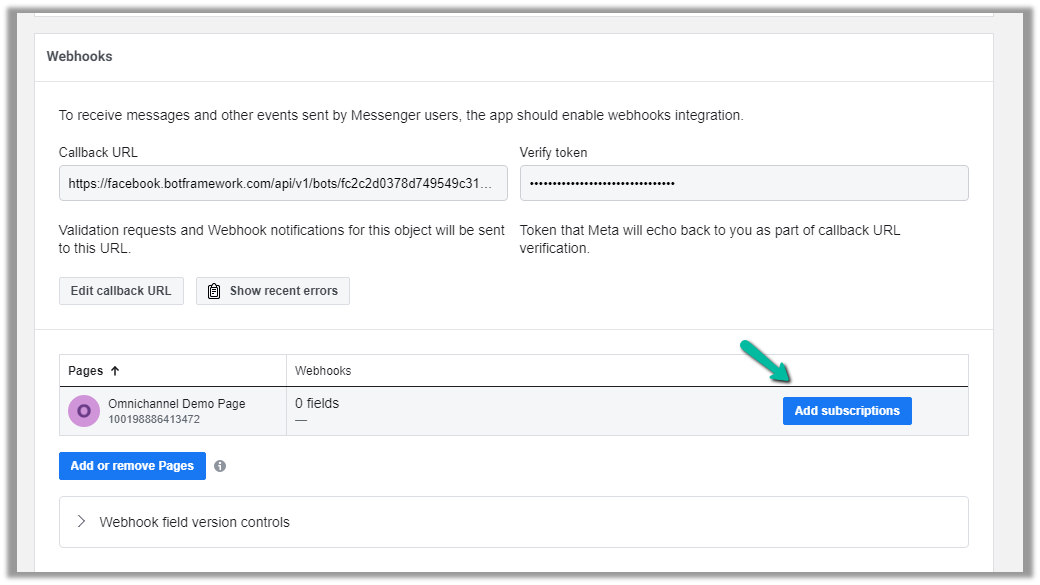
This adds the Webhooks details, click on Add Subscriptions for the Page added.
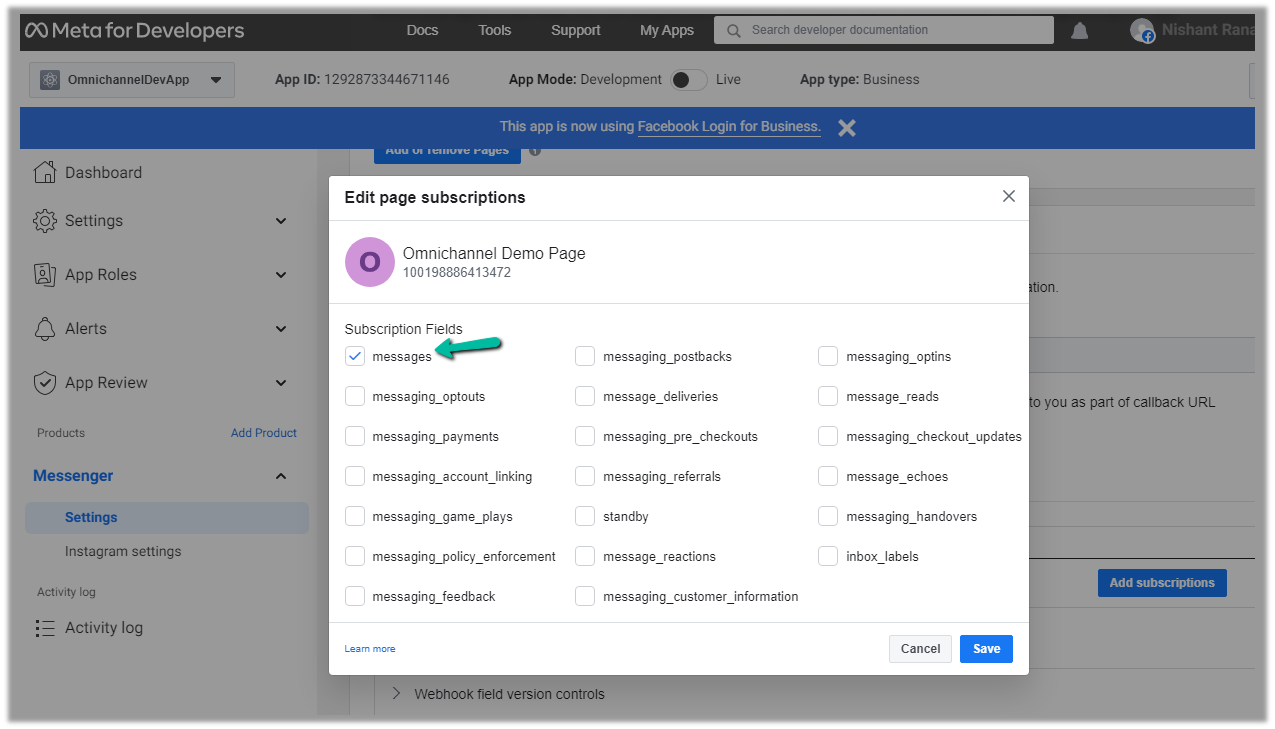
Select messages
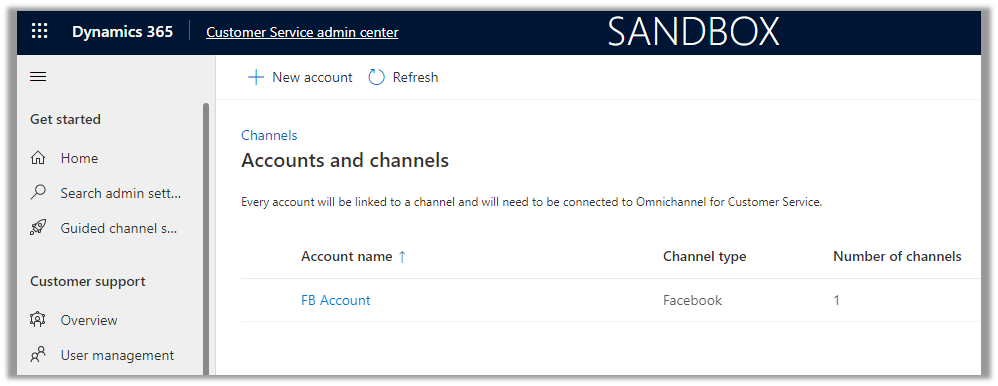
We can see the account added.
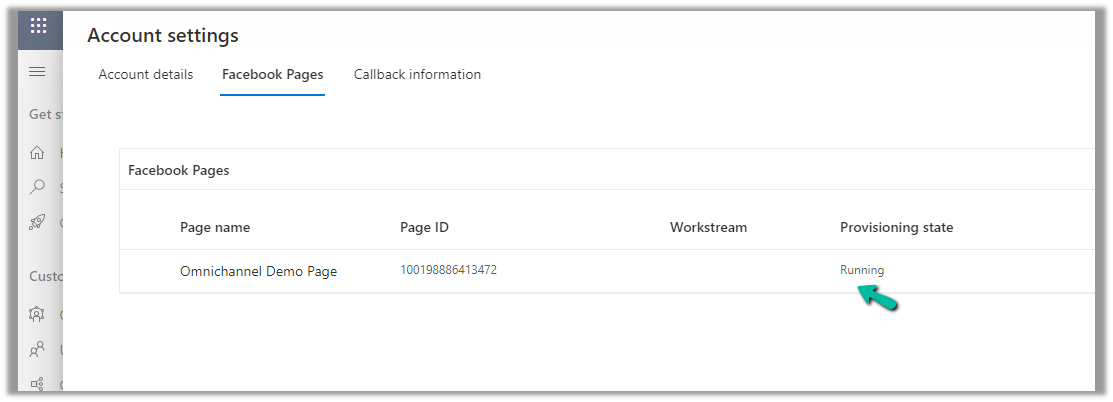
Open the record, and navigate to the Facebook Pages tab, there we can see the Provisioning state as Running.
Next, we will create a Channel for this Facebook Account.
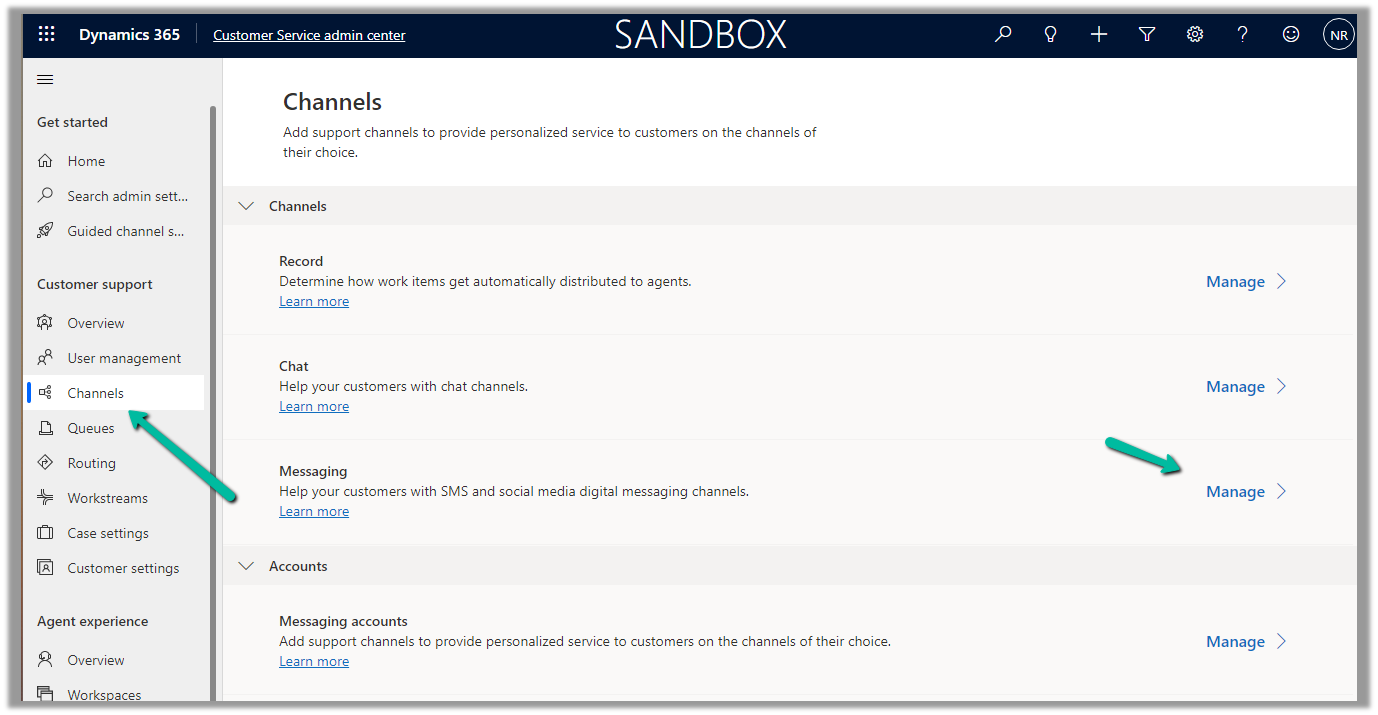
Navigate to Customer Support >> Channels >> Messaging (Manage) >> Add Channel
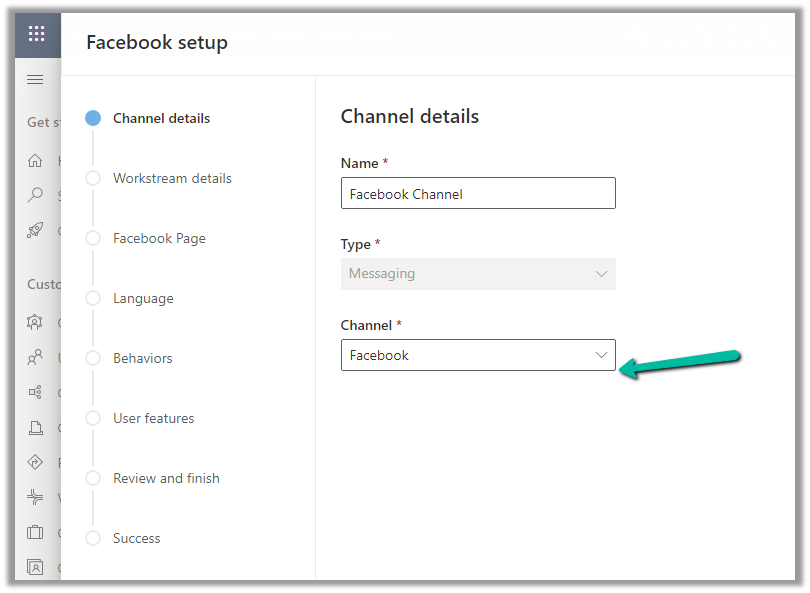
Select Channel as Facebook.
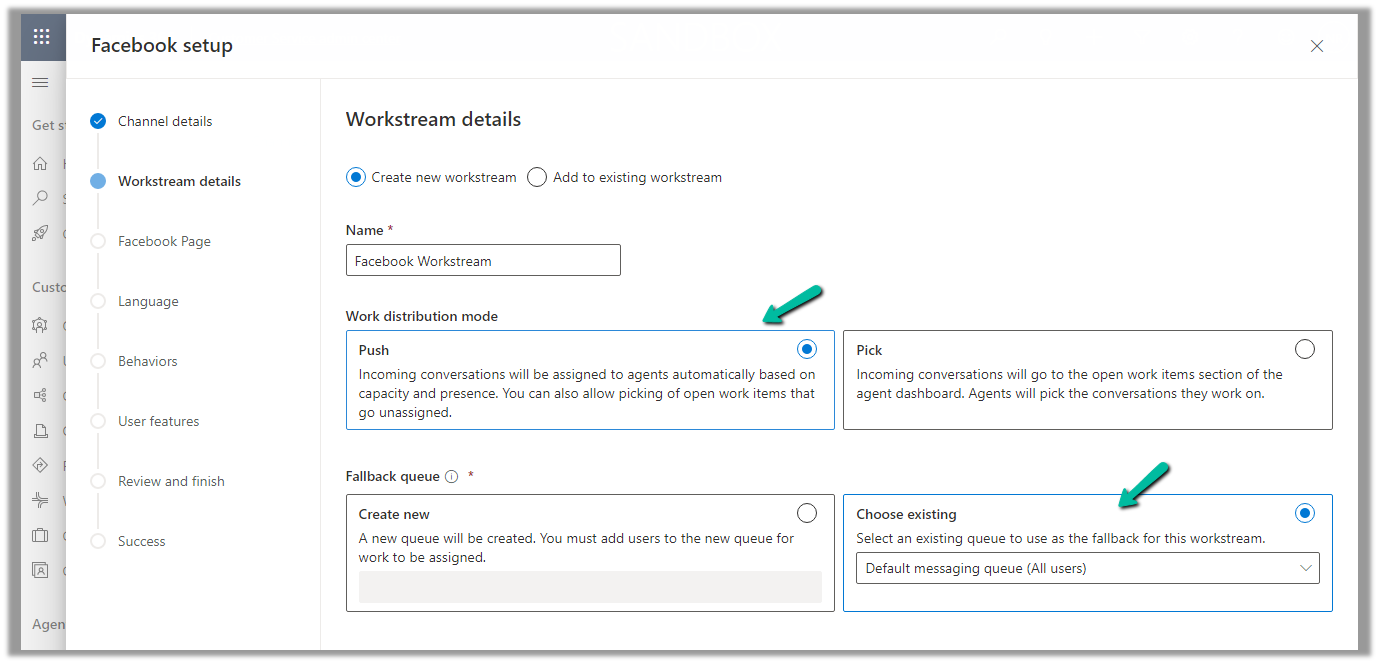
Add an existing workstream or create a new workstream.
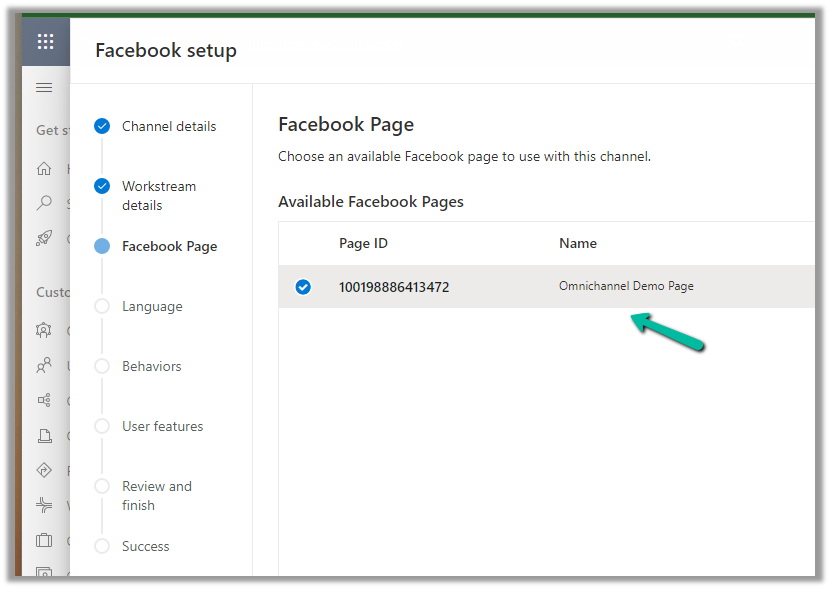
Next, select the Facebook Page configured in the previous steps.
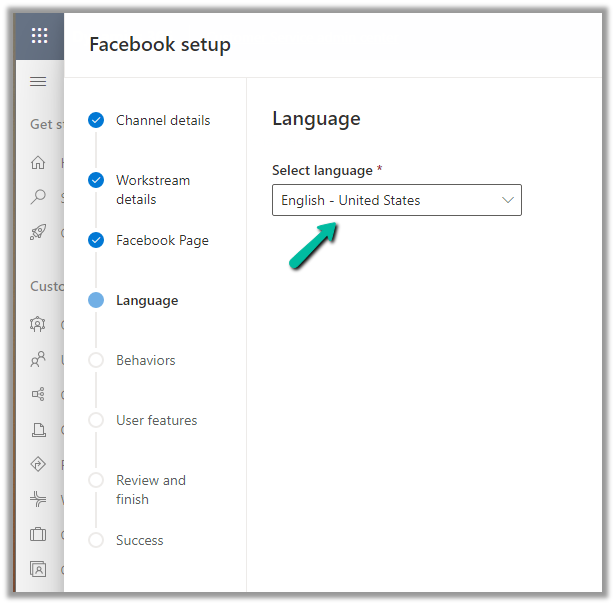
Language as English.
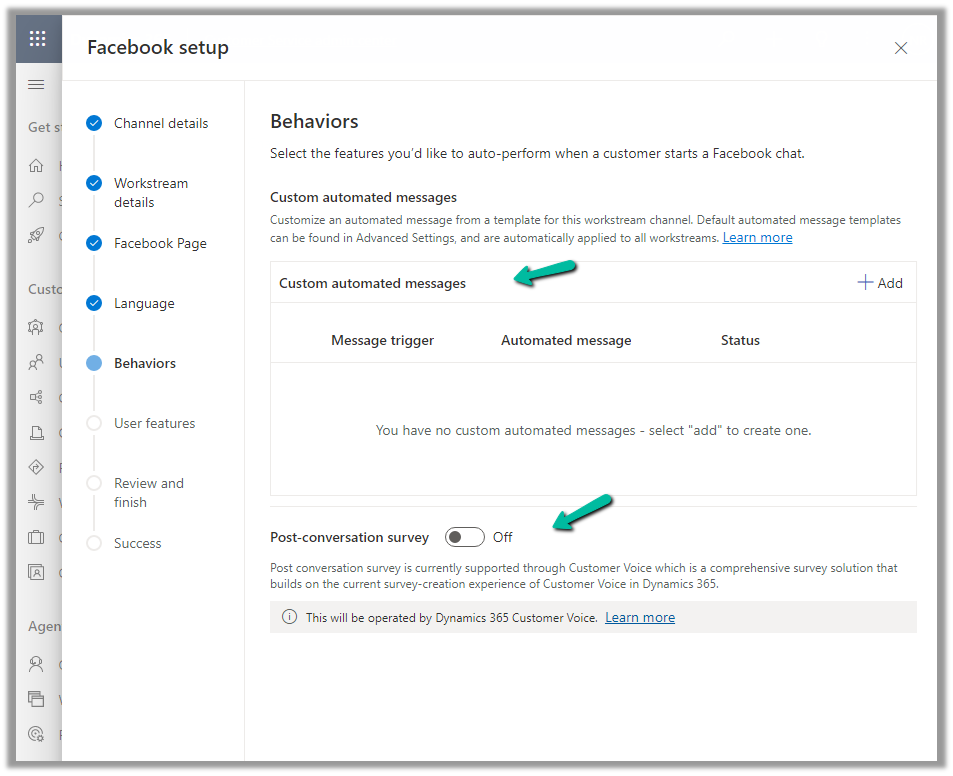
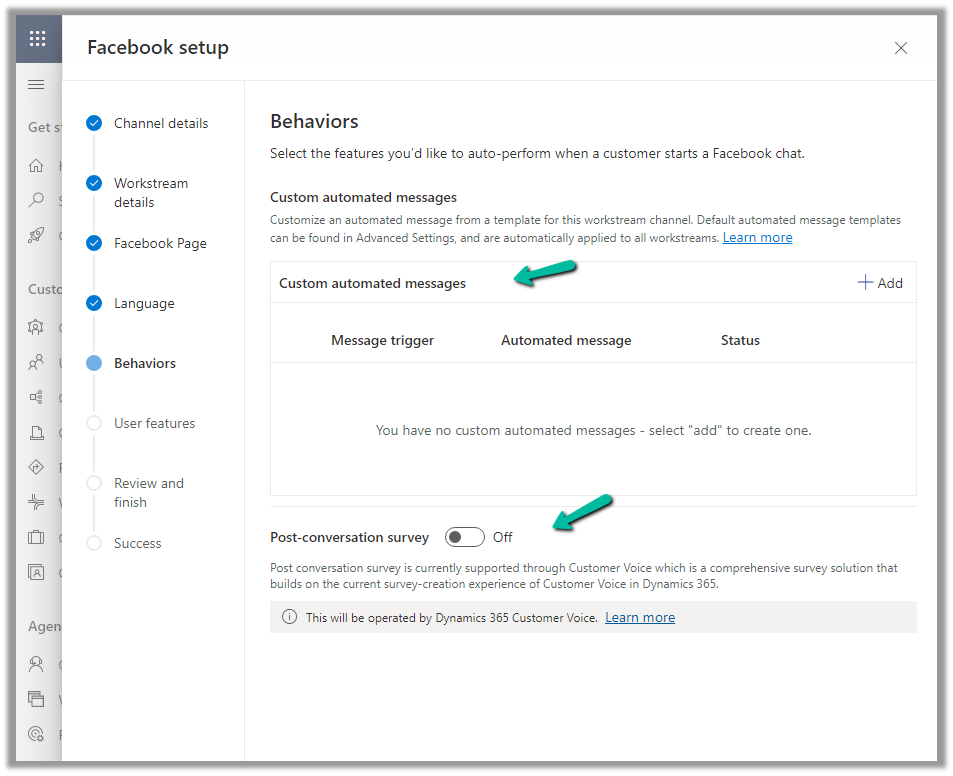
We can specify custom automated messages and Post Conversation survey settings here.
Specify the File attachments setting and message tag.
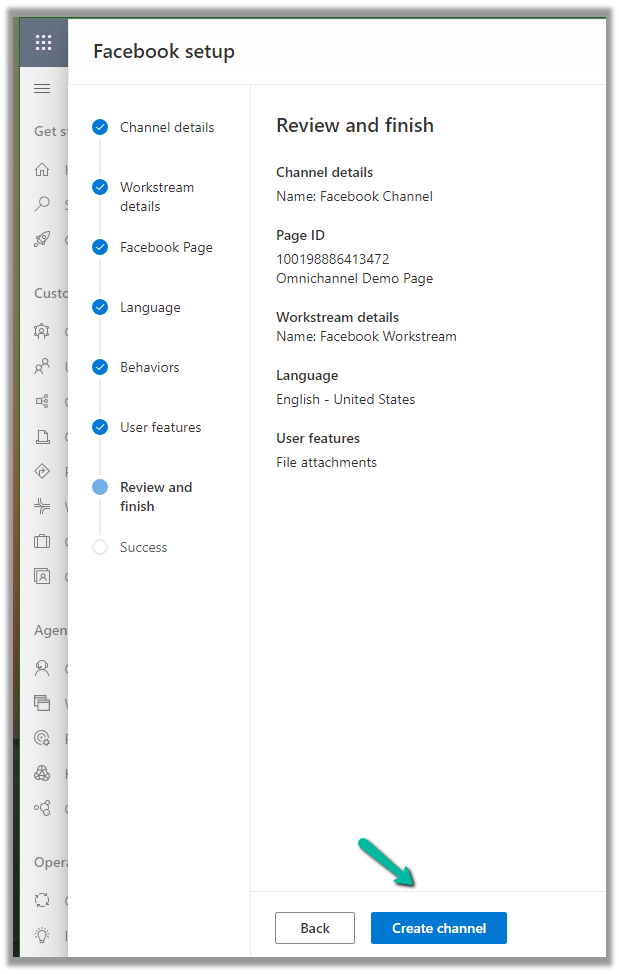
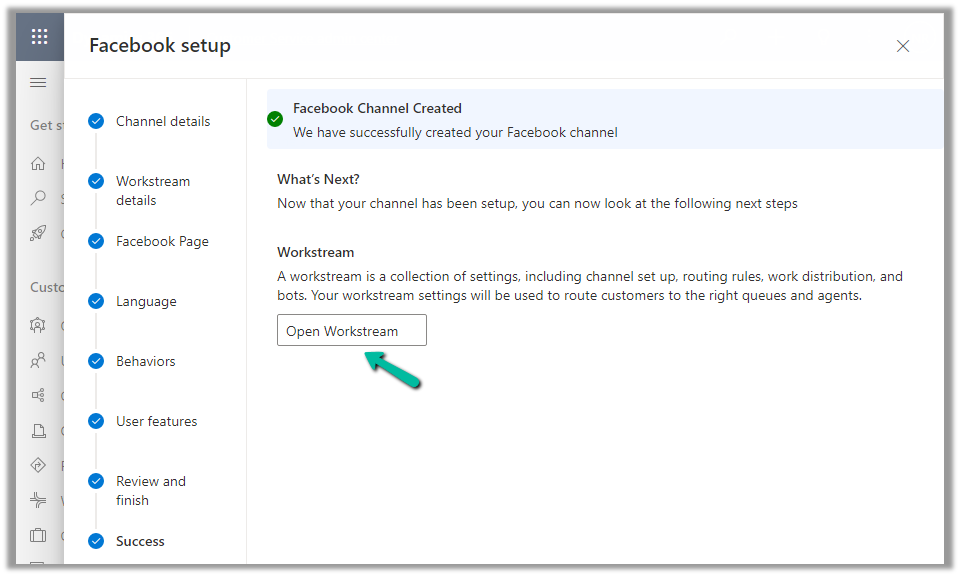
Review and if required edit the details and finally click on Create channel to create the Facebook channel
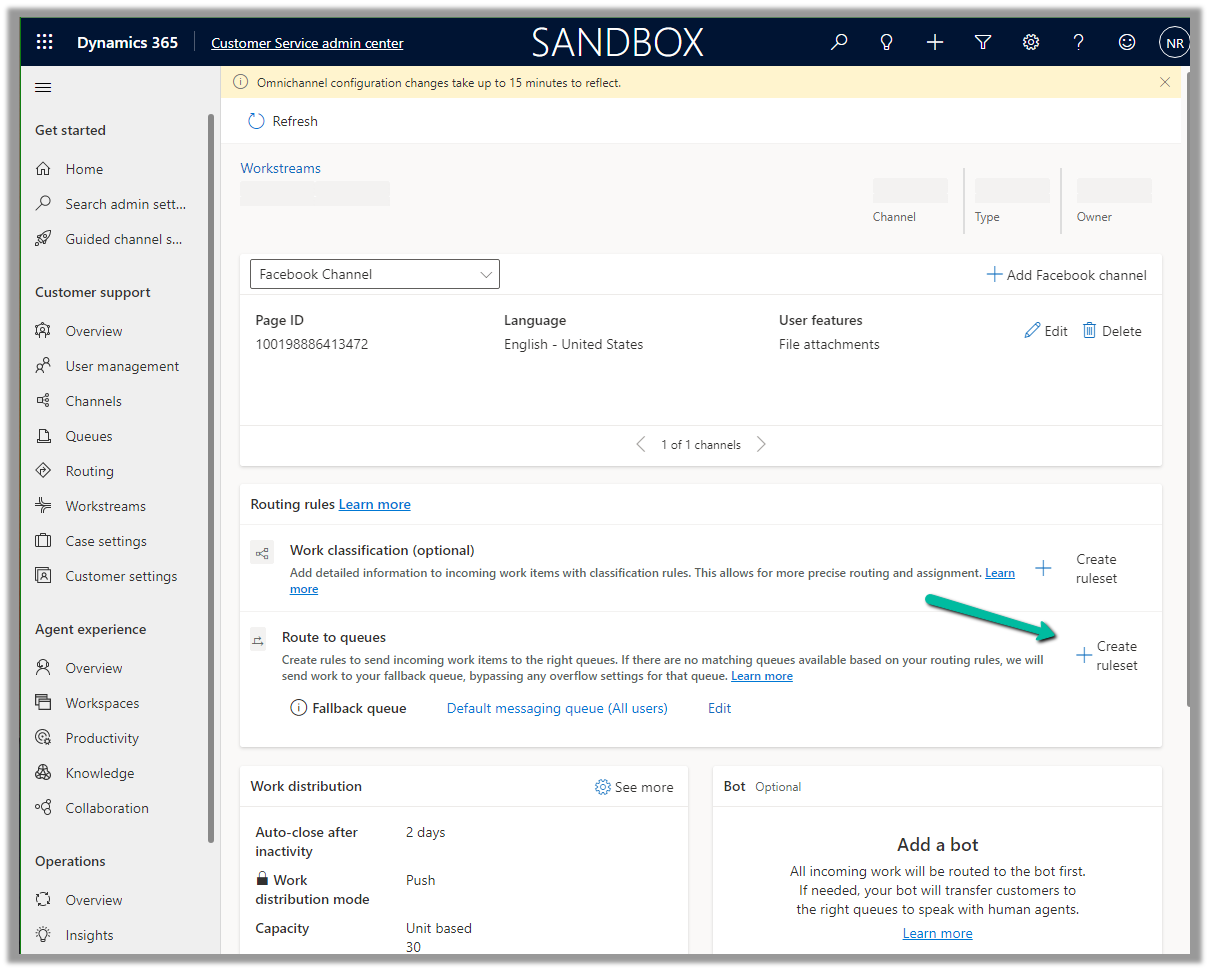
Next open the workstream created, to specify routing rules, work distribution, bot, etc. to route the customers to the queues/agents.
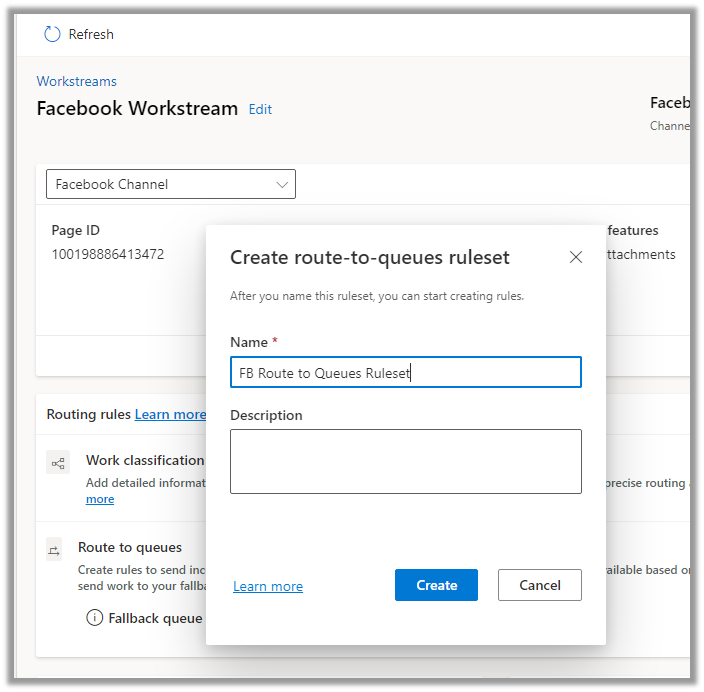
Here we can create a Route to Queue ruleset to route the messages on the Facebook page to a specific Queue.
Create the ruleset record.
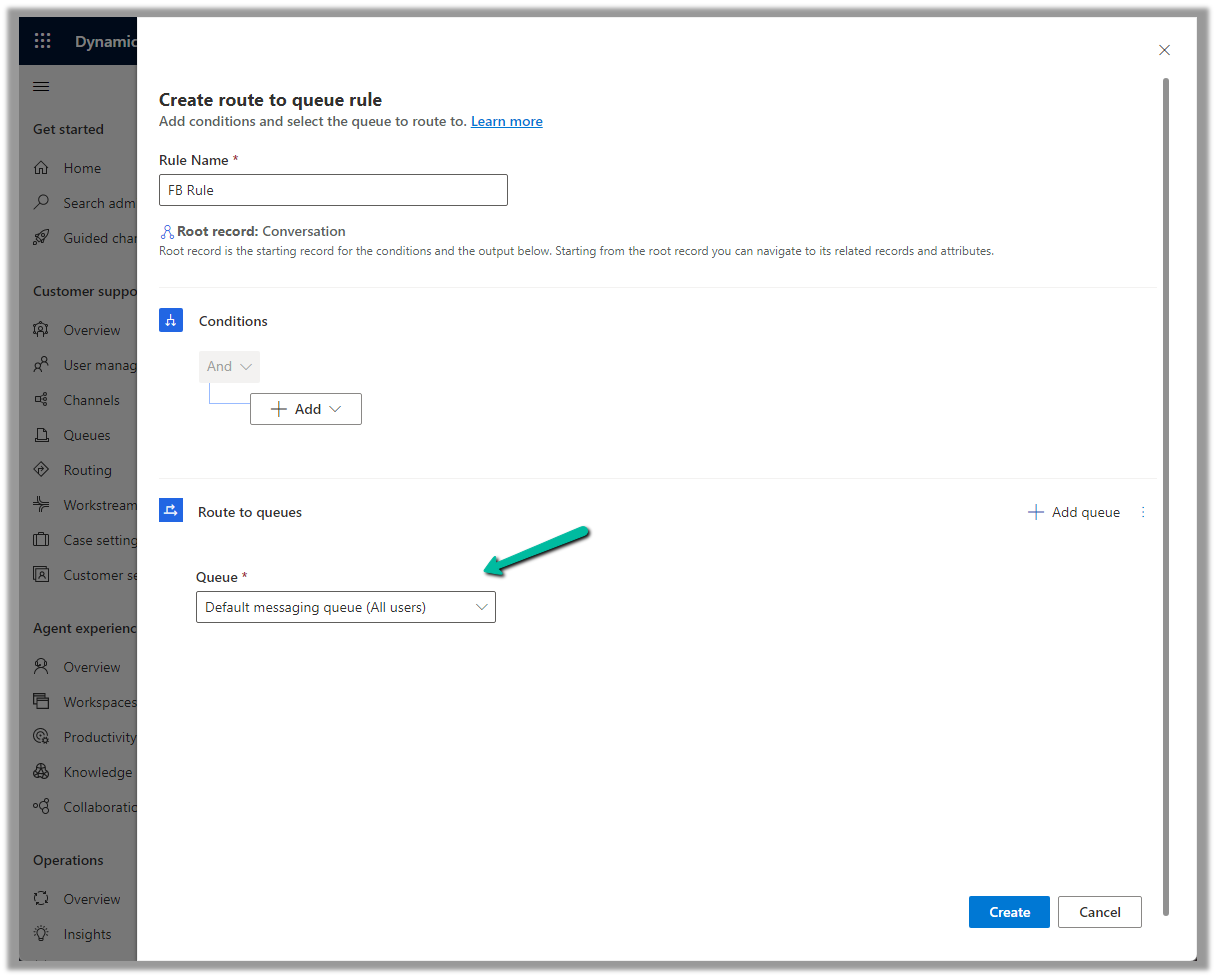
Next, Create a rule. We can define the conditions here (right now we are keeping it blank) and routing to the Default messaging Queue (we can create a specific queue and add only the required users).
Make sure you have added users to the Queue and assigned Omnichannel Agent security roles.
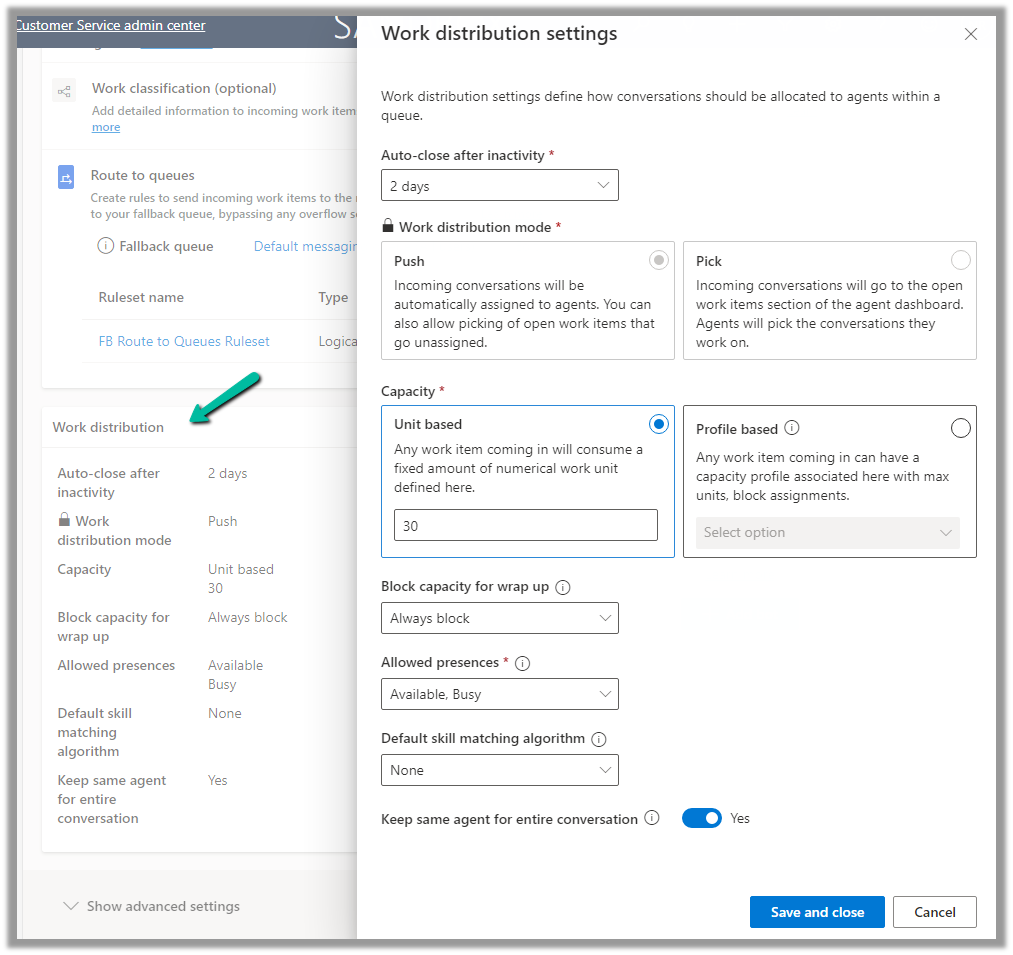
We can update the default Work distribution properties.
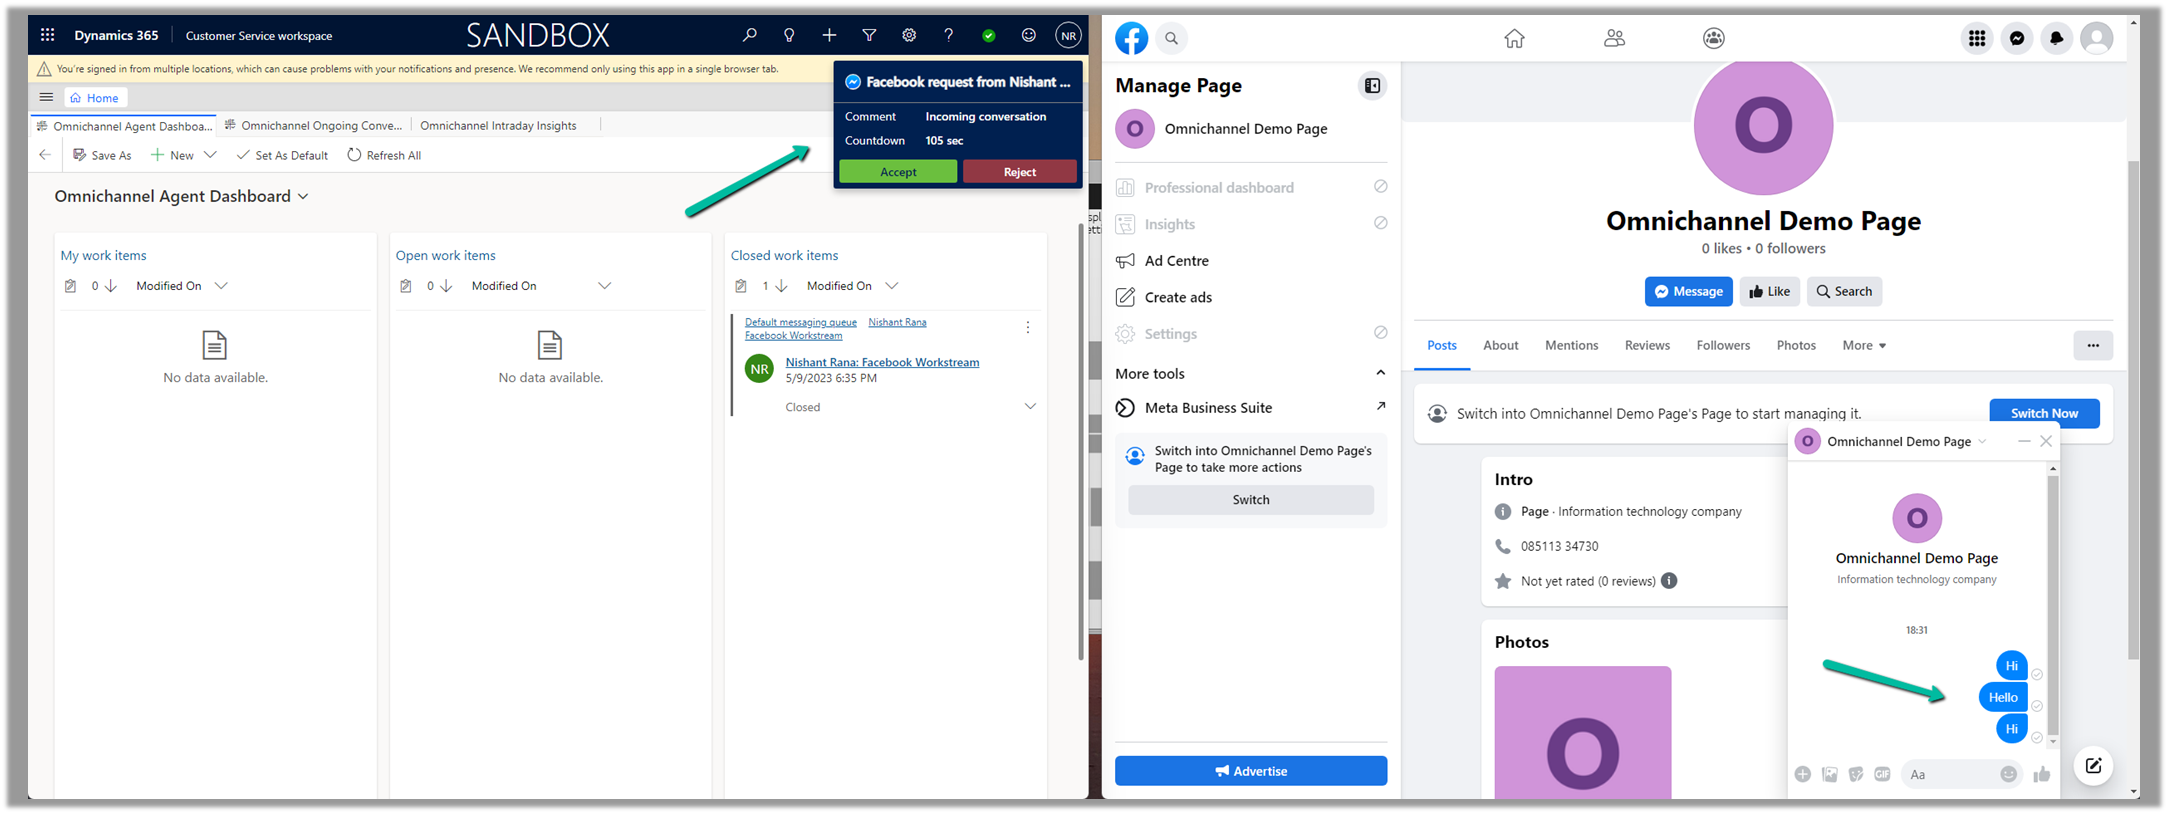
Now sending the message from the Facebook Messenger, will pop up the notification for the agent logged into Customer Service Workspace.
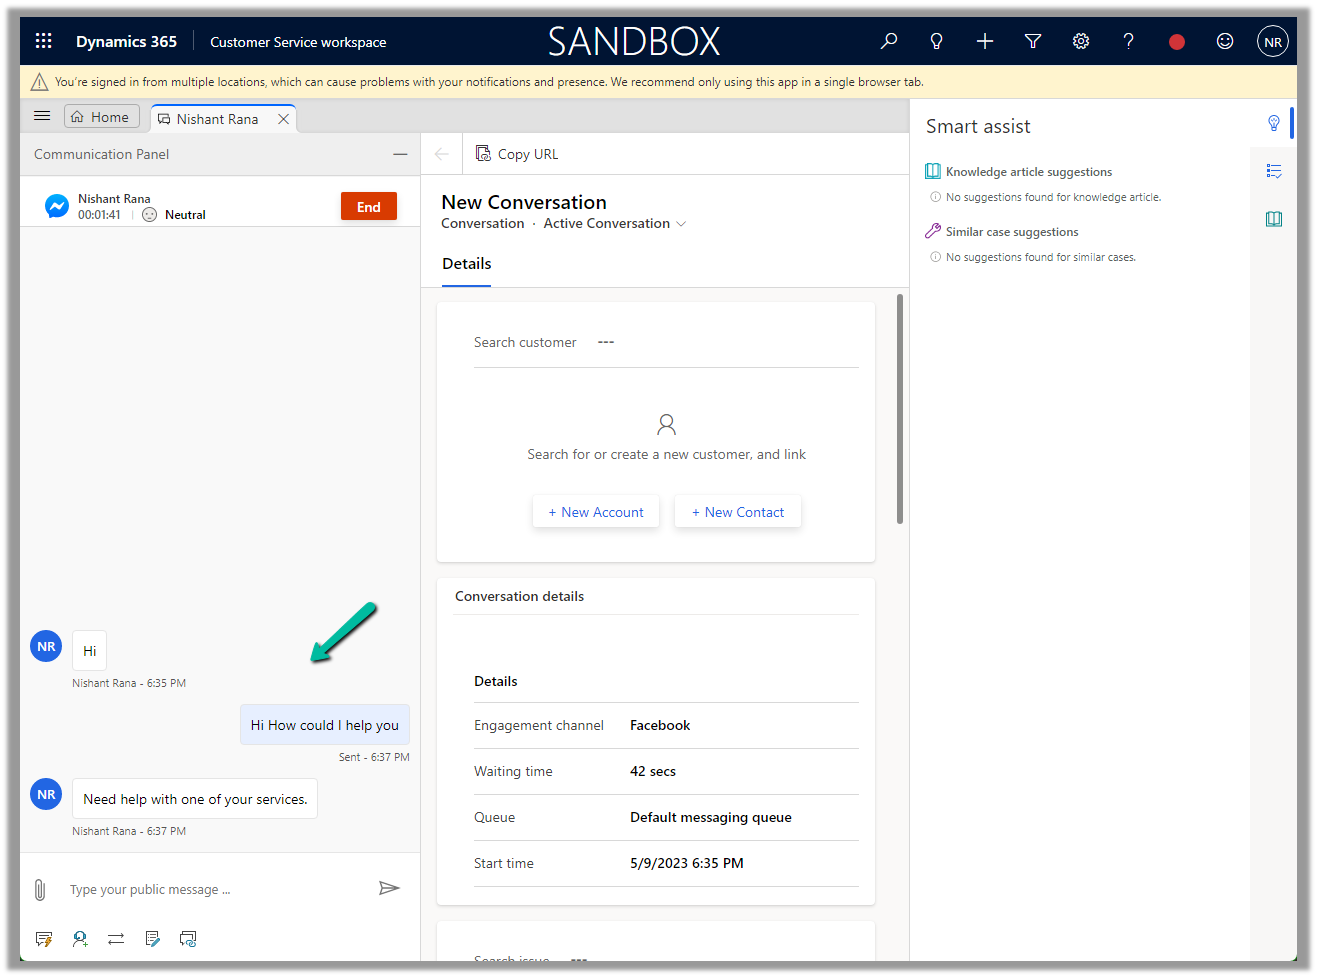
Accept the notification to start the conversation.















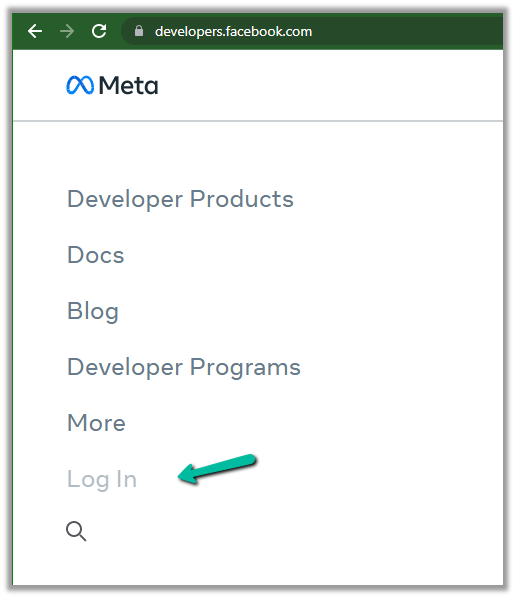
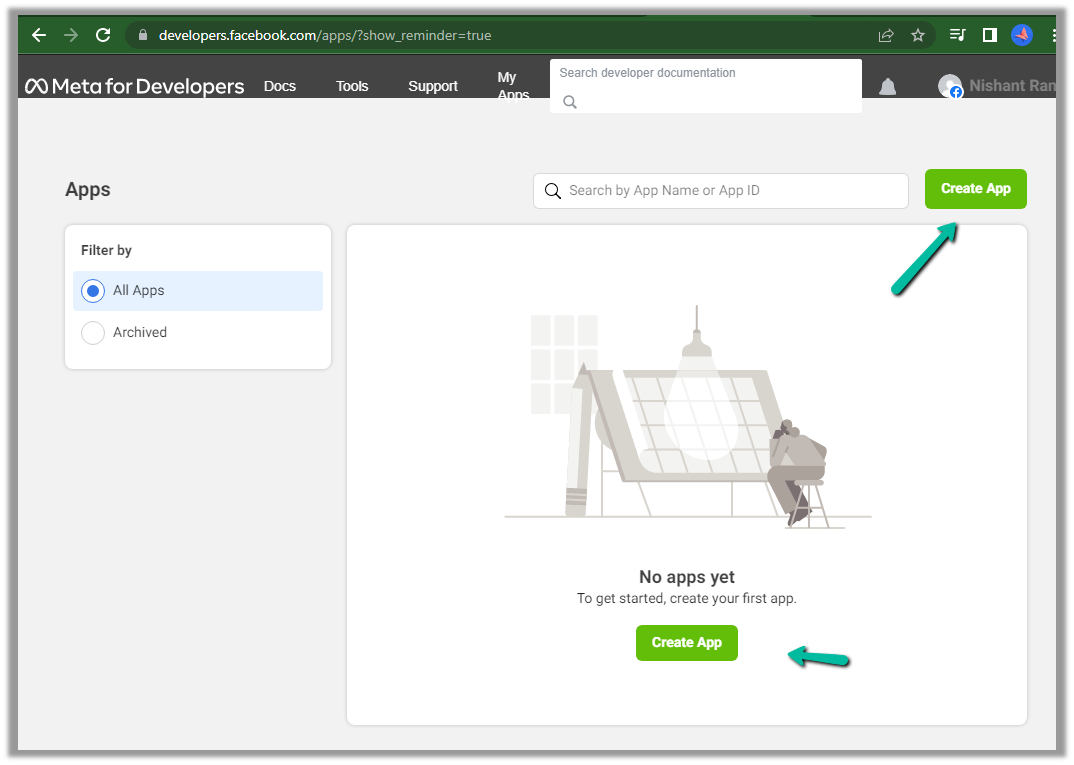
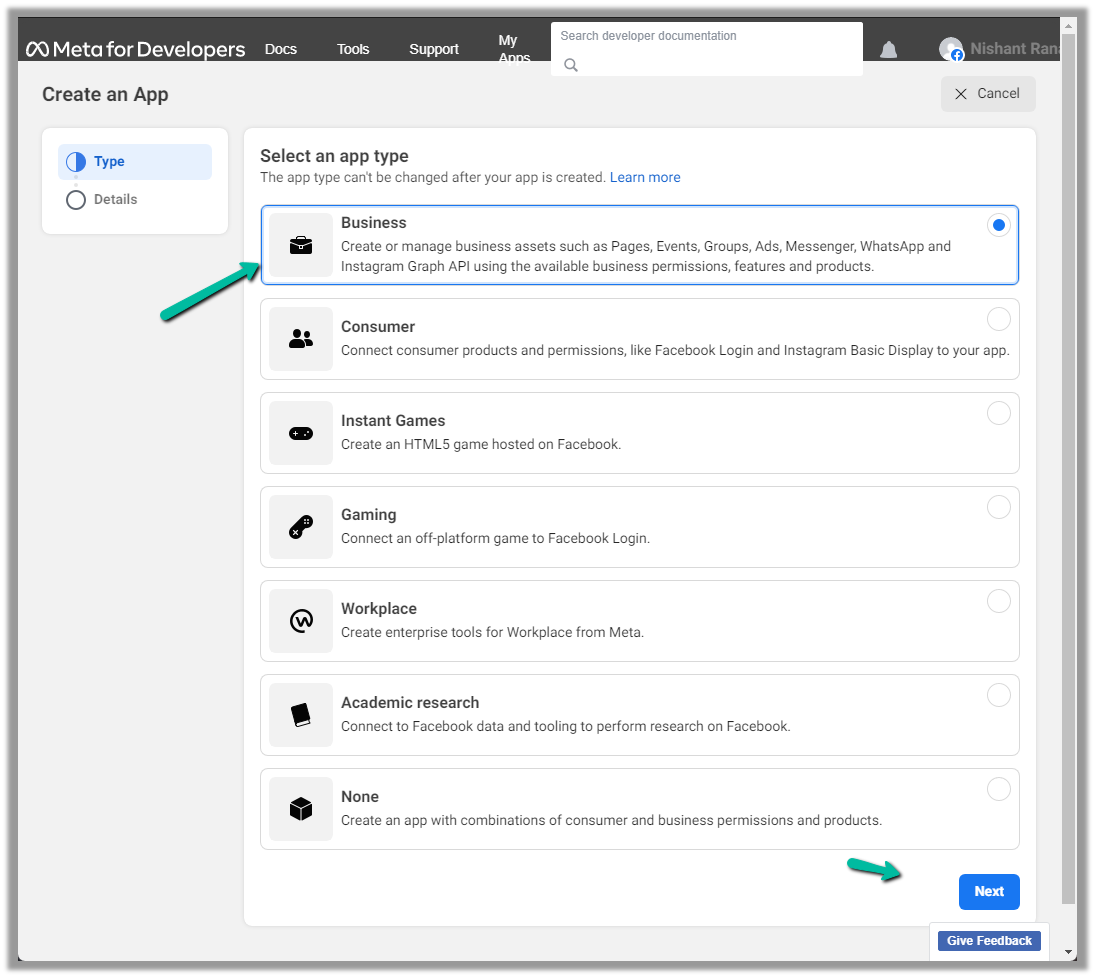
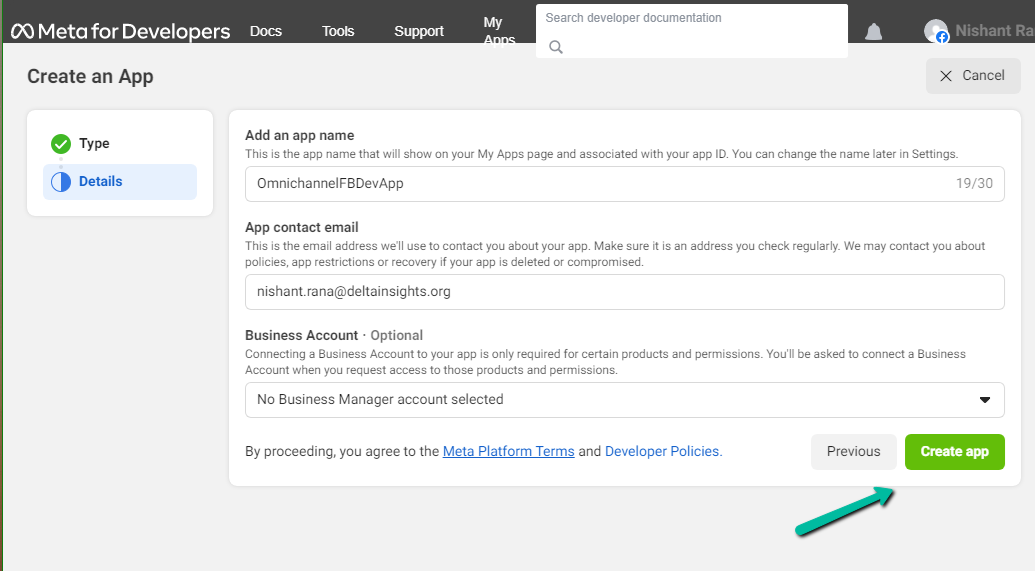
 We can also Generate token for the page, which we will use while configuring Facebook Channel in Dynamics 365.