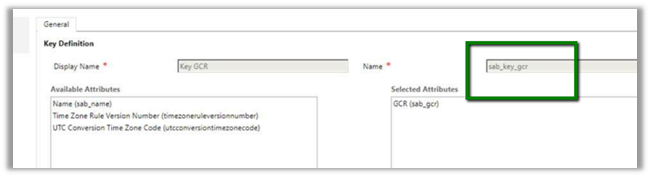
Fixed – The CREATE UNIQUE INDEX statement terminated because a duplicate key was found for the object while creating Alternate Key in Dynamics 365


We might get error while creating Alternate Key as shown below.

The CREATE UNIQUE INDEX statement terminated because a duplicate key was found for the object name ‘dbo.sab_fash_transactionheaderBase’ and the index name ‘ndx_for_entitykey_sab_fash_headername’. The duplicate key value is (0000001414).

The reason was because there was already records created for that entity and had the field (alternate key one) having duplicate values. Deleting the duplicate record allowed us to create the alternate key on that field.

Hope it helps..

Advertisements

Using Alternate key in the Dynamics 365 for Sales Connector in Informatica Cloud


In our recent project we were using Dynamics 365 for Sales Connector of Informatica Cloud to push data into CRM from SQL DB.

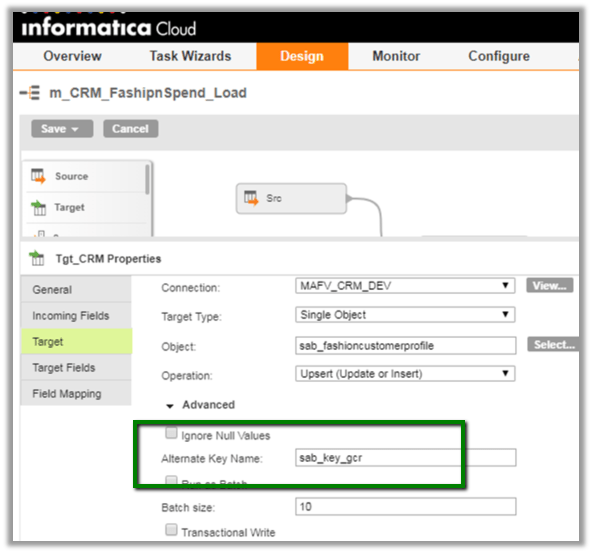
To update the lookup instead of using GUID we decided to us the Alternate Key.

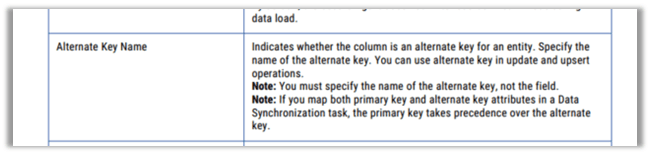
From the below KB article, it looks like the older version of the informatica connector wasn’t supporting the Alternate Key

https://kb.informatica.com/faq/7/Pages/15/377766.aspx

However, the newer and the recent version of the connector based which is based on Web API supports the alternate key.

To set the alternate key we basically need to use the below syntax,

EntitySetName(keyfield=’keyfieldvalue’)

i.e.

sab_fash_transactionheaders(sab_name=’value’)


Hope it helps..

Common Data Service for Apps – Business Rules (Server-Side Logic) – Part 6


Another interesting article on Modern Driven Apps by the author

Sachin Bansal's avatarBansal Blogs - Dynamics 365, PowerApps, Microsoft Flows, Power BI

CC1

With Spring 2018 release, Microsoft introduced several types of server-side logic including Business Process Flows, Workflows, Calculated & Rollup Fields and Business Rules which do not require any coding. Part 5 of this series covers Calculated & Rollup Fields. In this blog we will explore Business Rules.

Business Rules: Declarative logic comprises of conditions and actions for data accuracy and consistency across applications. Business Rules provide a nice graphical UI for defining these rules and actions that will be executed synchronously when a record is created/updated. These rules are created at entity level in common data services, hence you do not need to write separate logic for individual apps (canvas & model driven apps)

You can perform below actions using business rules:

  • Set field values
  • Clear field values
  • Set field requirement levels
  • Show or hide fields
  • Enable or disable fields
  • Validate data and show error messages
  • Create business recommendations based…

View original post 483 more words

Error while setting the lookup and publishing the workflow in Dynamics 365


Recently while trying to configure a Team in Assign step we were getting the below error

With following details (not much useful)

The only way we figured out to set that field was to first chagne the Entity in the Assign Drop down and then selecting the team in the lookup dialog bx.

Below we have changed the Entity to Brand (custom entity) from Lead and then changed it back to Lead and then tried setting the team from the lookup dialog box.

We were successful this time.

Or setting the lookup through quick search view instead of opening up the lookup dialog box as shown below

The other issue we were facing was while trying to publish the workflow we were getting the below errorà “The selected workflow has errors and cannot be published. Please open the workflow, remove the errors and try again.”

This we realized in one of the Check Condition steps we had the values repeated for one of the lookup field.

This was because the workflow was imported to the target environment and later the records of the lookup entity that is being referred were deleted and added back which eventually led to 2 duplicate values i.e. same display name and different GUID thing. (1 non-existing in that environment, but still there inside workflow step). Removing it fixed the issue and we were able to publish the workflow.

Hope it helps..

Setting Lookup field in the Dynamics 365 for Sales Connector in Informatica Cloud


Informatica Cloud has recently released new connector for integration with Dynamics 365 named Dynamics 365 for Sales Connector, which uses Web API of Dynamics 365.

Below is how we specify the details of the connection –

Because of lack of documentation for the new connector, while trying to insert a record inside CRM and trying to setup a lookup field we struggled a lot.

Eventually, we realized the format that is required for setting the lookup field.

EntitySetName:(GUID)

i.e.

sab_fash_categories(72e0b837-e060-4a5c-b831-0e8266dd9a56)

Here sab_fash_categories is the EntitySetName of the custom entity sab_fash_item and it is being used as a lookup in another entity.

For the older version of the connector that used OrganizationService, the documentation is available which specifies the following format for the lookups

{SchemaName:GUID} i.e. the way we specify while setting EntityReference field

https://kb.informatica.com/proddocs/Product%20Documentation/6/IC_Spring2017_MicrosoftDynamicsCRMConnectorGuide_en.pdf

ER

Hope it helps..

USD 3.3: Help Improve Unified Service Desk


Ajit Patra's avatarAjit Patra

Help improve USD means Unified Service Desk sends information to Microsoft anonymously different data such as:

  • Operating system version and bit type

  • Web browser application and version
  • Unified Service Desk version

  • Number of monitors used and screen resolution of the primary monitor

  • Device processor class and RAM details

With the new version of USD released recently(USD 3.3) this option is ENABLED by default.

If USD administrator wants to DISABLE this option, then below are the steps to do it:

  1. Go to Settings–> Unified Service Desk
  2. Go to Options
  3. Click on New and create the new UII option as shown below:

False

In the earlier version of USD released for Dynamics 365 online, this option is DISABLED by default, which can be ENABLED by following above steps with value field as “TRUE” as shown below:

True

Another way to control this option of sending information to Microsoft is by Activating/Deactivating the UII option(HelpImproveUSD

View original post 37 more words