How to – Use File and Image Data Type in Dataverse (Dynamics 365)


File Data Type was introduced somewhere around late 2019. At that time, it was only available for Canvas App and Power Automate / Flow, and with subsequent updates, it was then added for Model Driven App as well.

https://powerapps.microsoft.com/en-us/blog/introducing-improvements-to-data-storage-in-common-data-services/

The File Data type while creating the column à

By default, the file size is 32,768 KB.

  • Min – 1 KB
  • Maximum – 131072 KB

Let us keep it as 2000 KB and save it.

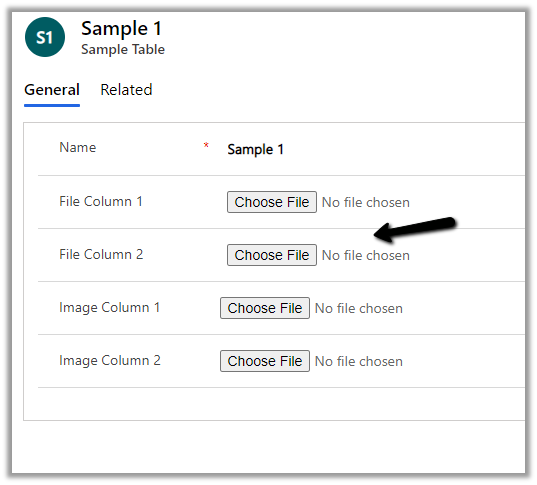
Here we have added the field in the form.

We need to save the record before the field is enabled.

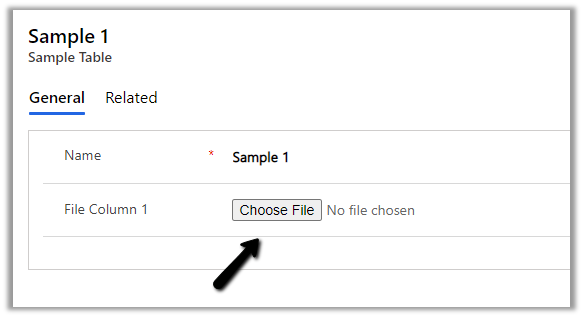
On trying to upload a file more than 2000 KB size, the max size, we specified while creating the column, will give the below error.

“The upload failed for File Column 1. Please try again or contact your admin.”

The Maximum file size property cannot be updated after the column is created.

Similarly, we have the Image data type.

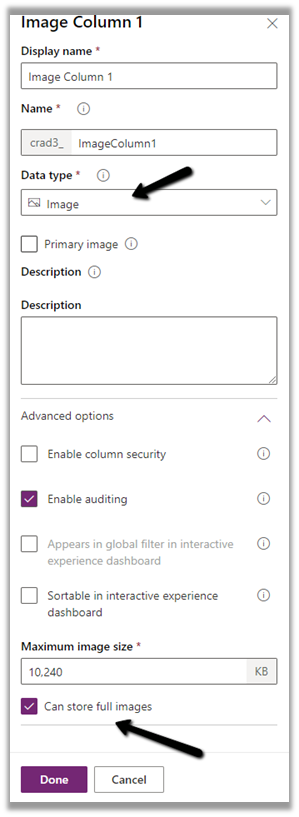
The default size is 10240 KB.

  • Min – 1 KB
  • Max – 30720 KB

If the image size is more than specified, we will get the below error message

The upload failed for Image Column 2. Please try again or contact your admin.

Below we have added a new file type column named File Column 2 with a maximum size of 100 MB.

With 2020 Release Wave 2, there is no need to specify file chunking while uploading a file of 16 MB or more, by dividing file data blocks of 4 MB or less through API.

https://docs.microsoft.com/en-gb/power-platform-release-plan/2020wave2/data-platform/improvements-microsoft-dataverse-file-image-upload-download

Earlier à

https://docs.microsoft.com/en-us/powerapps/developer/data-platform/file-attributes#retrieve-file-data

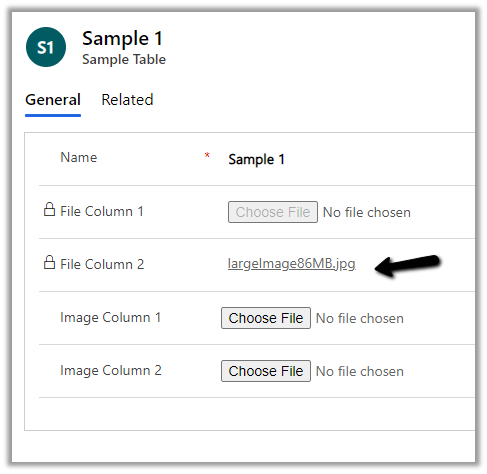
Below is the sample code we have used to upload a file of size 86 MB.
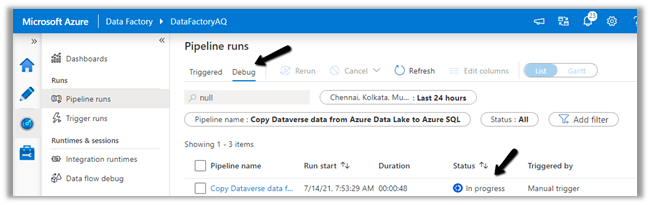
The file uploaded à

Now let us look at downloading part.

The URL that can be used are
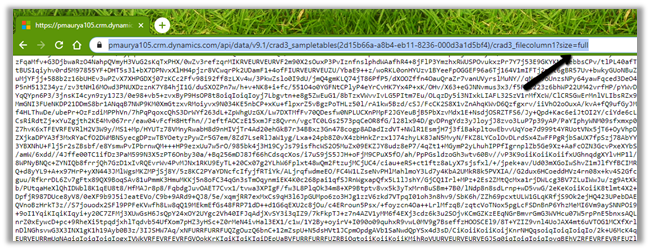
Byte Array formatà
https://%5Borganization%5D/api/data/v9.1/entitySetName(entityID)/fileTypeAttributeName/$value?size=full

Base64 String formatà

https://[organization]/api/data/v9.1/entitySetName(entityID)/fileTypeAttributeName/?size=full

Let us try the URL in the browser for both below File column 1 and 2.

https://pmaurya105.crm.dynamics.com/api/data/v9.1/crad3_sampletables(2d15b66a-a8b4-eb11-8236-000d3a1d5bf4)/crad3_filecolumn1/$value?size=full

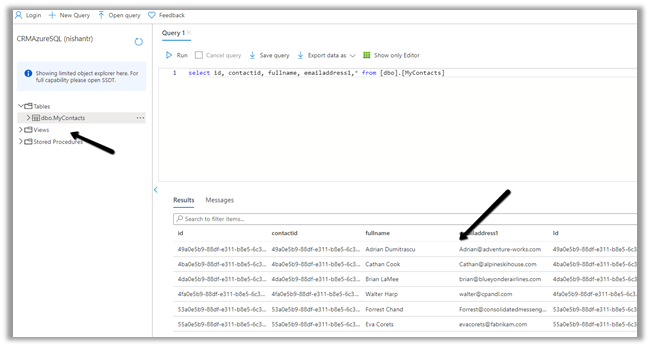
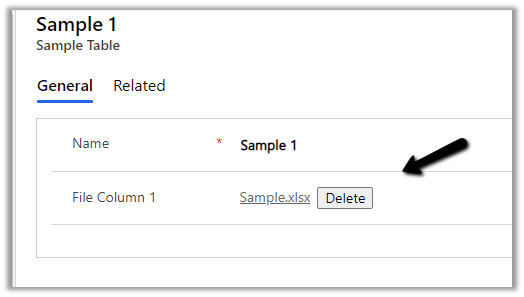
It downloads the file for File Column 1à

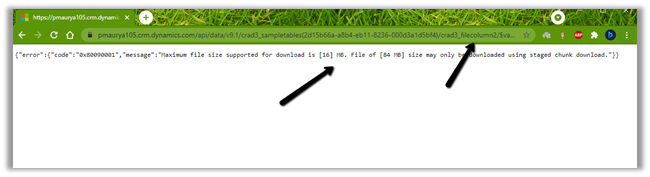
In case of File Column 2, we get the below error message as its size exceeds 16 MB à

{“error”:{“code”:”0x80090001″,”message”:”Maximum file size supported for download is [16] MB. File of [84 MB] size may only be downloaded using staged chunk download.”}}

Base 64 Format ->

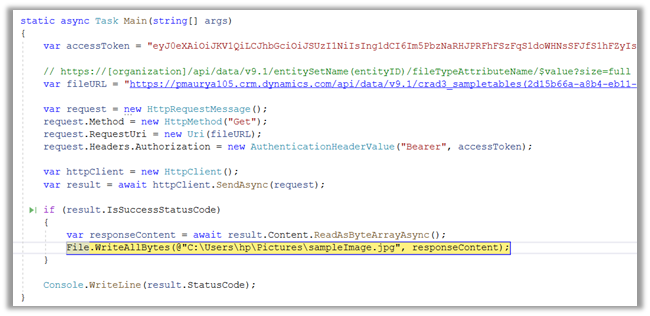
Below is the sample C# code to download the file if the size is less than 16 MB

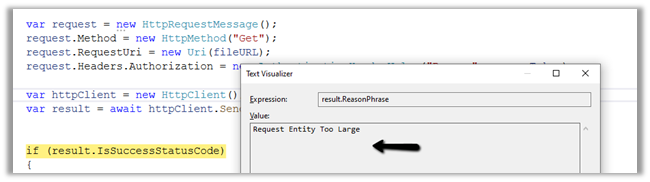
If it is more than 16 MB we will get the below error à Request Entity Too Large

For Image Data Type, for uploading the full image > 16 MB (without dividing into a smaller chunk of less than 4 MB), we can use the below source code. It is the same as for the file data type.

For download, we can download either the thumbnail or full image (<= 16 MB) using the same source code used for file download.

For thumbnail –

GET [Organization URI]/api/data/v9.1/entity(recordGuid)/myentityimage/$value

For full image –

GET [Organization URI]/api/data/v9.1/entity(recordGuid)/myentityimage/$value?size=full

For more than 16 MB we need to use chunking.

Get all the details below à

https://jukkaniiranen.com/2019/12/why-would-you-store-images-and-files-in-cds/

https://debajmecrm.com/new-data-type-filein-cds-all-you-may-need-to-know-about-it/

https://debajmecrm.com/retrieve-contents-of-file-data-type-field-in-dynamics-365-cds-using-javascript-client-code/

Hope it helps..

Advertisements

Delete the current (active) partition in Audit – Dynamics 365


We recently exceeded log storage capacity for our Power Platform environment

We can check the same at Resources >> Capacity inside the Power Platform admin center.

One of the sandbox environments had the most Log Usage

https://docs.microsoft.com/en-gb/power-platform/admin/legacy-capacity-storage#capacity-page-details

We deleted the plugin trace logs and all the audit partitions (except the active/current one, which the system doesn’t allow)

If we try deleting the current active partition, we will get the below error –

Microsoft.Crm.CrmException: You cannot delete audit data in the partitions that are currently in use, or delete the partitions that are created for storing future audit data.

The partitions are created on quarterly basis each year –

1 Jan – April, 1 April – July, 1 July – October, 1 Oct – January

Even after deleting the plugin trace logs and the partitions, we didn’t see any change in the storage capacity usage. So we raised a Microsoft Support Ticket and were informed by the team that they can delete the active partition for us, and it could take around 3 days. As that was a sandbox environment and we had no use of Audit data we went ahead and the Support Team deleted the active partition for us. (Also there was some issue in our data center with regards to the recalculation of the storage and it took few more days for that change to reflect inside the Capacity page of Power Platform Admin Center).

This way we were able to reclaim some of the log storage.

So basically we just need to raise Microsoft Support Ticket and request the same.

More on Audit

Also check the new process for deleting audit logs –

https://docs.microsoft.com/en-gb/power-platform/admin/free-storage-space#method-10-delete-audit-logs—new-process

Select audit logs to delete.

Hope it helps..

Audit Entity / Table – Few key points (Dynamics 365 / Power Apps)


In the earlier post we looked at different ways of extracting Audit History data.

Extract Audit Historyhttps://nishantrana.me/2021/05/17/how-to-export-the-audit-history-values-from-dynamics-365/

We can use Microsoft 365 Security and Compliance Center for the same, though it is limited to the Production environment only.

https://docs.microsoft.com/en-us/power-platform/admin/enable-use-comprehensive-auditing#requirements

Then we have Audit History Extractor, and we can also write SSIS Packages as well as Custom Code.

Let us just revisit some of the key points with regards to the Audit entity.

  • Do we have the Audit entity available for Advanced Find? >> No.

  • Do we have it available inside Report Wizard? >> No.

  • Can we write SSRS Report against the Audit entity using the TDS endpoint?

Let us create the Data Source.

Select the authentication as Active Directory Password Authentication for the TDS endpoint.

Enter the database name manually.

The final connection string >>

Data Source=orgnamae.crm.dynamics.com;Initial Catalog=orgname.crm.dynamics.com;Encrypt=True;TrustServerCertificate=False;Authentication=”Active Directory Password”

Within SQL4CDS the following query works

However, the same query doesn’t work inside SSRS.

It will give the below error message >>

Table audit is not available for reports

  • Do we have the Audit entity in the Power BI Dataverse connector? >> No

However, we can use the OData endpoint to create the report against the Audit entity.

https://www.365knowledge.com/2019/03/06/dynamics-365-user-access-report-with-fetchxml-and-power-bi/

  • Do we have the Audit entity available in Azure Synapse Link (Export to Data Lake)? >> No

How to set up Azure Synapse Link >>

https://nishantrana.me/2021/06/16/how-to-setup-azure-synapse-link-microsoft-dataverse/

  • Cannot we write a Fetch XML Based SSRS report?

Writing a Fetch XML based-report would be challenging, because of the way information is saved.

Check the below article to understand how the audit table stores the information.

https://mahadeomatre.blogspot.com/2015/02/ms-crm-audit-database-table-details.html

http://makdns.blogspot.com/2014/06/dynamics-crm-audit-entity.html

  • How about SQL Based SSRS Report if we are using SQL – for On-Premise?

Refer to the below article that provides the steps to do so.

http://makdns.blogspot.com/2014/06/dynamic-crm-20112013-audit-report-in.html

Hope it helps..

Advertisements

New Subject Control for the subject entity in Dynamics 365 Customer Service (2021 Release Wave 2)


It becomes difficult to find and select the appropriate subject if there are too many subjects defined as one has to manually traverse across the subject tree hierarchy.

Also, check – Differences between Subject and Category Entity

We now have new subject control introduced as part of 2021 Release Wave 2

  • It allows for easy viewing of the subject tree hierarchy.
  • Search across parent and child nodes.
  • Highlighting the search results.

Below is our sample Subject

Old experience

  • No Search Capability

2021 Release Wave 2

  • We can now perform a search

  • We can search across the parent and child nodes and also the search results are highlighted as shown below

Check out the Release Wave 2 Plan

Microsoft Dynamics 365 2021 release wave 2 plan overview | Microsoft Docs

Hope it helps..


Advertisements

How to – Export Dataverse (Dynamics 365) data to Azure SQL using Azure Data Factory pipeline template


[Visual Guide to Azure Data Factory - https://acloudguru.com/blog/engineering/a-visual-guide-to-azure-data-factory]

Using the new Azure Data Factory pipeline template – Copy Dataverse data from Azure Data Lake to Azure SQL – we can now easily export the Dataverse data to Azure SQL Database.

https://docs.microsoft.com/en-us/power-platform-release-plan/2021wave1/data-platform/export-dataverse-data-azure-sql-database

Check other posts on Azure Data Factory

Select Pipeline from template option inside the Data Factory

Search for Dataverse and select the Copy Dataverse data from Azure Data Lake to Azure SQL template

Let us specify the User Inputs required by the template – i.e. Azure SQL Database and the Data Lake Storage.

First we have created the linked service for the Azure SQL Database.

We’d use it to connect to the below table MyContacts.

Similarly create a linked service to Azure Data Lake Gen 2, which holds our Dataverse data.

Get the URL from the Container’s property. (replace blob with dfs in the URL)

To get the storage account key, select Access Keys >> Show Keys >> Copy the Key for the Storage Account.

Here we have already configured Azure Synapse Link for Dataverse

https://nishantrana.me/2020/09/07/export-data-from-common-data-service-to-azure-data-lake-storage-gen2/

Now as we have defined the User Inputs, select Use this template.

Navigate to the data flow created – DataverseToAzureSQL

Select our source ADLS and check and configure its properties.

Source Settings

Here we have the Inline dataset type set to Common Data Model and the Linked service is the AzureDataLakeStorage1 we created earlier.

Source Option

Specify the Dataverse folder for the Root Location.

Here we have specified the contact entity from our Data Lake Storage.

Projection

In the projection we have cleared the generated schema using Clear Schema, also selected Schema options >> Allow schema drift


We have enabled Allow schema drift option which will create the required columns in the destination Azure SQL Table.

Optimize

Inspect

Data preview

As we have not turned on Debug mode, there is nothing to preview

Now let us move to our Destination – SQL.

Sink

Here we have AzureSQLTable dataset connected to contact table in Azure SQL and have checked Allow schema drift option.


Below is our AzureSQLTable Dataset connected to the MyContacts table.

Settings

Here we have selected Allow Insert as the Update Method and Table
action as Recreate table – as we want the destination table to be re-created dynamically based on the source.

Mapping

We have left it to Auto mapping.

Optimize

Inspect

Data preview

Let us Publish All our changes and Debug our pipeline.

Let us monitor our pipeline run.

We can see that pipeline has run successfully and took around 4 minutes.

We can see the contact’s data copied to our Azure SQL successfully.

So here we covered the insert operation, in the next posts we’d see how we can configure update, upsert and delete operation.

Also, check

Posts on Azure Data Factory

Posts on Azure Data Lake

Hope it helps..

How to – Get the size of tables in Dataverse / Dynamics 365


Using the Capacity page in the Power Platform Admin Center we can extract the details of size occupied by table (in MB) within a particular environment.

Login to the admin portal and navigate to Capacity

https://admin.powerplatform.microsoft.com/resources/capacity

Select the Dataverse tab and click on Details or in case of trial click on the Trial tab

Here we have selected the details (graph) option for one of the environments.

Select Download all tables option for the Top database capacity use, by table chart


We can see the details within the extracted CSV file.

Get all the details here

https://docs.microsoft.com/en-us/power-platform/admin/capacity-storage#environment-storage-capacity-details

Hope it helps..

Advertisements