Disable Security Defaults while login into Power Platform / Dynamics 365


Security Defaults provides preconfigured security settings such as MFA – Multi-factor authentication for all users, blocking legacy authentication protocols, etc.

Any tenant created on or after 22nd October 2019, will have this setting enabled for default.


An organization with complex security requirements could disable the security defaults and consider using Conditional Access instead.

Use Azure AD Conditional Access to block user access by device platform (Dynamics 365)

Use Azure AD Conditional Access to block access by country (Dynamics 365)

To disable Security default, login to Azure Portal

https://portal.azure.com

Navigate to Azure Active Directory > Properties

https://portal.azure.com/#blade/Microsoft_AAD_IAM/ActiveDirectoryMenuBlade/Properties


Toggle it to No and Save.


Hope it helps..

Advertisements

How to – Upload file to Azure Blob Storage using BlobClient class – C#


Let us see a simple example to upload the file to Azure Blob Storage through a desktop application (C#).

Below is our Storage account and the container to which we will upload the files from the local drive.

Get the Connection String for the storage account from the Access Key area

Next – Create a console application or windows form application project and add the following NuGet Package

Azure.Storage.Blobs

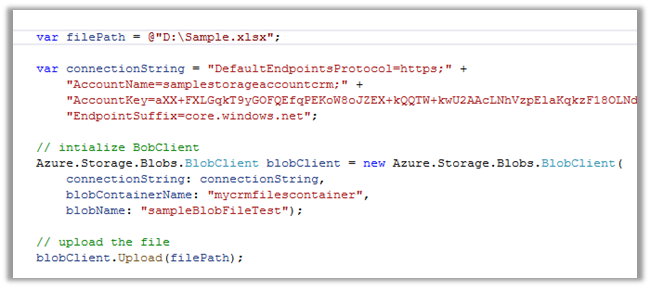
Sample code –

The uploaded file – 

blob

Also check out – https://nishantrana.me/2020/11/25/use-azcopy-to-transfer-files-from-local-drive-to-azure-blog-storage/

Hope it helps..

 var filePath = @"D:\Sample.xlsx";

            var connectionString = "DefaultEndpointsProtocol=https;" +
                "AccountName=samplestorageaccountcrm;" +
                "AccountKey=aXX+FXLGqkT9yGOFQEfqPEKoW8oJZEX+kQQTW+kwU2AAcLNhVzpElaKqkzF18OLNd1pCy2NEniTMLTwwDoiv4Q==;" +
                "EndpointSuffix=core.windows.net";

            // intialize BobClient 
            Azure.Storage.Blobs.BlobClient blobClient = new Azure.Storage.Blobs.BlobClient(
                connectionString: connectionString, 
                blobContainerName: "mycrmfilescontainer", 
                blobName: "sampleBlobFileTest");
             
            // upload the file
            blobClient.Upload(filePath);
Advertisements

How to – Manage Dynamics 365 Web API with Azure API Management


Azure API Management is an Azure service to create consistent API gateways for secure, scalable access for back-end applications and services.

Azure API Management consists of 3 main components
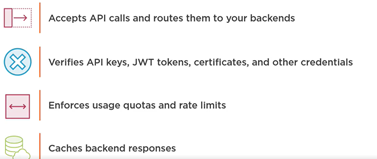
  • API Gateway

  • Azure Portal for administration

  • Developer Portal for API documentation

Each API inside Azure API Management contains a reference to the back-end service that implements the API and its operations.

Let us start by creating the Azure API Management resource –

Login to Azure Portal

https://portal.azure.com/

Search for API Management
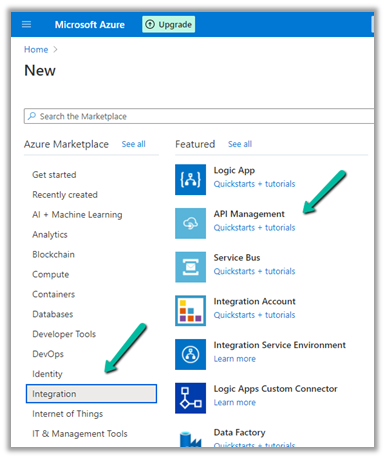
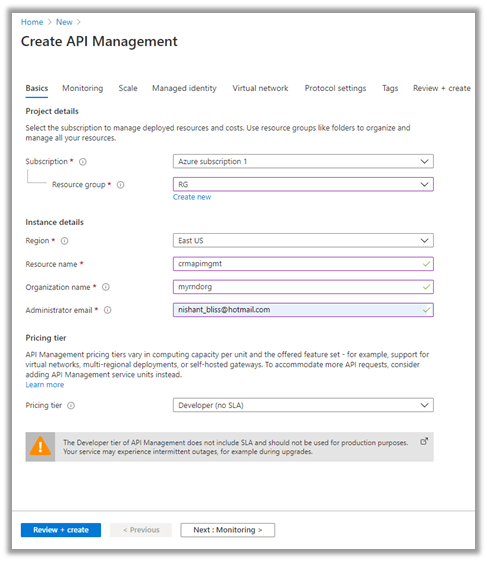
Provide the appropriate details. (Here we have selected the – Developer tier)
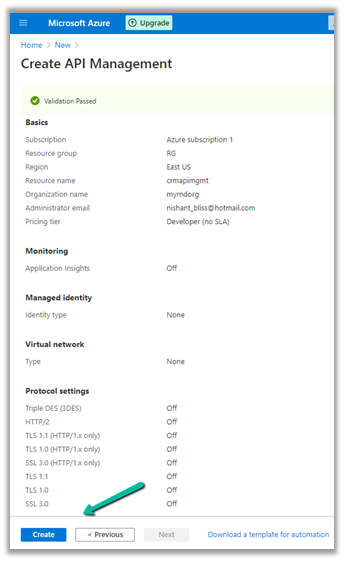
After validation is passed, review and click on Create.
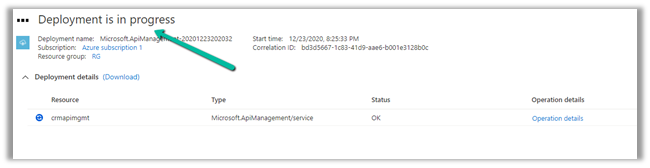
It will take around 30 minutes for the deployment to be finished
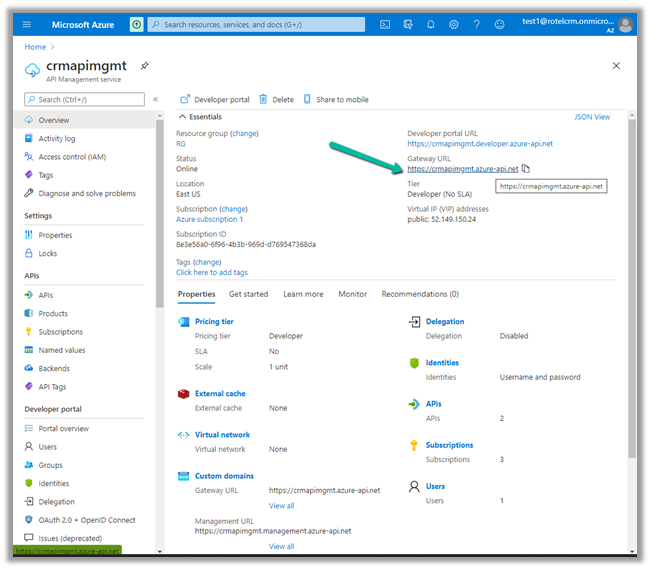
After the deployment is successful, we can navigate to it and can find the Gateway URL and Developer portal URL as shown below.
Here we will start with a Blank API.
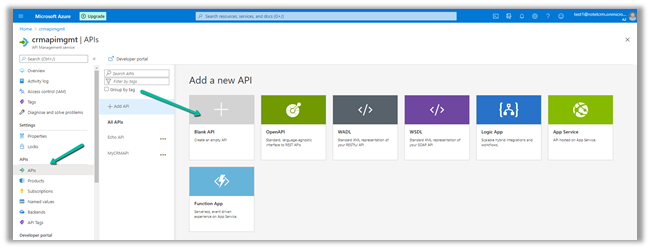
Specify the display name, name and for Web service URL the URL of Dynamics 365 Web API

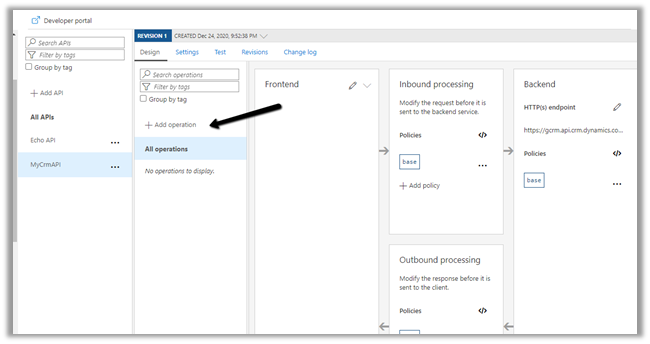
Click on +Add operation to add a new operation to the API.
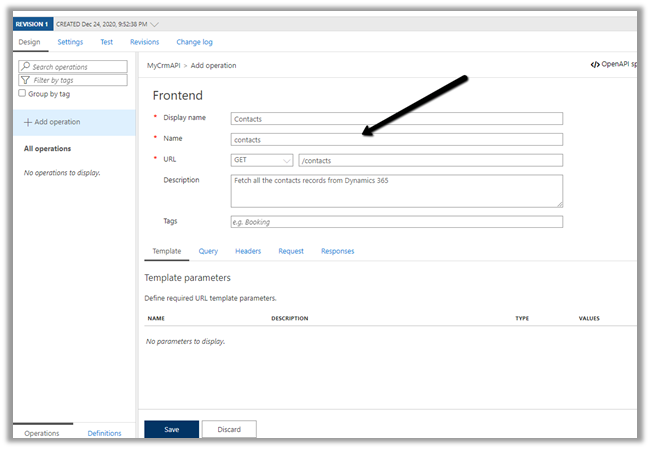
Specify the URL as shown below to fetch all the contacts from Dynamics 365.
The URL of the operation
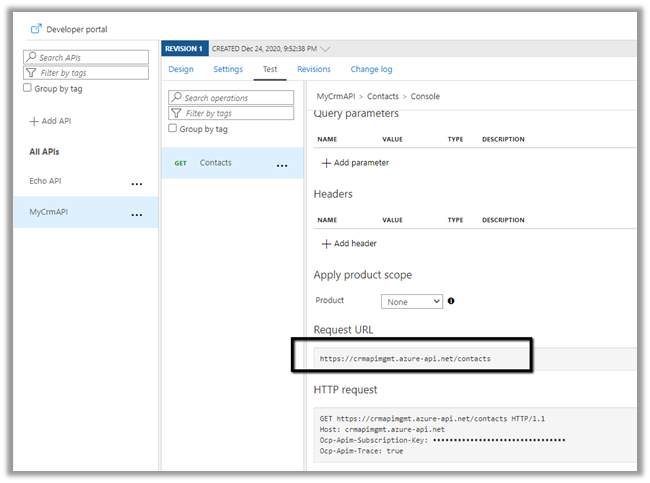
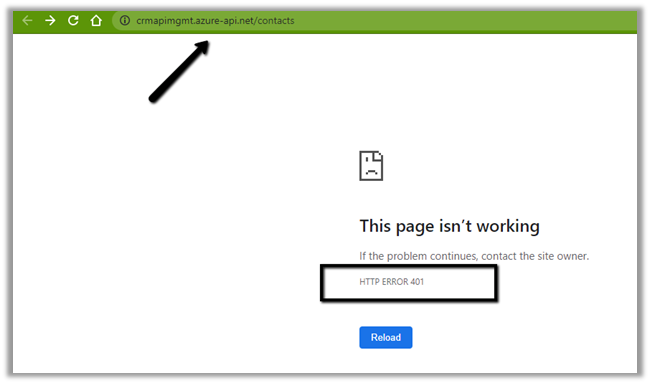
Right now we will get the 401 error as expected as we have not passed the token expected by the Web API.
Now for the token part for calling the Dynamics 365 API, register the Application in Azure AD, create a new Application User, and assign appropriate security roles to it.

https://docs.microsoft.com/en-us/powerapps/developer/data-platform/authenticate-oauth#connect-as-an-app

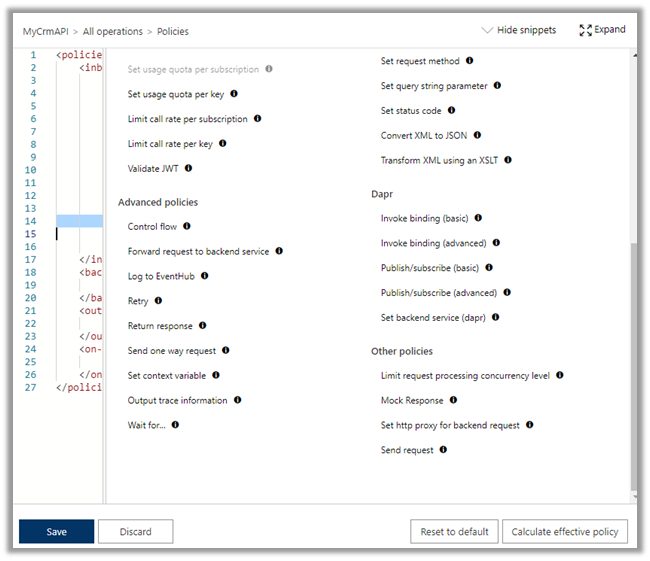
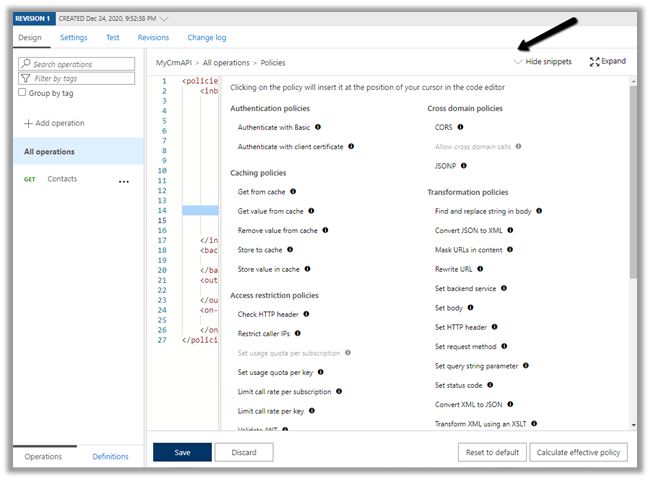
Here we would be defining send-request policy, to generate the Token and pass it in the Authorization header to the Dynamis 365 Web API request.

Select the GET operation, navigate to the Design tab and open the policy code editor for inbound processing
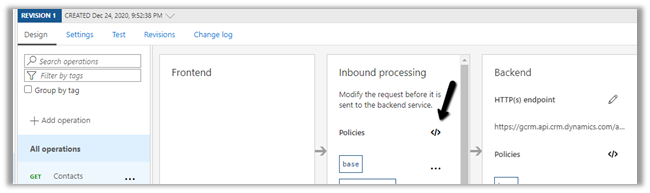
Add the send-request and set-header policy to generate and set the bearerToken

Specify the endpoint URL of OAuth token, client id, client secret of the application registered.
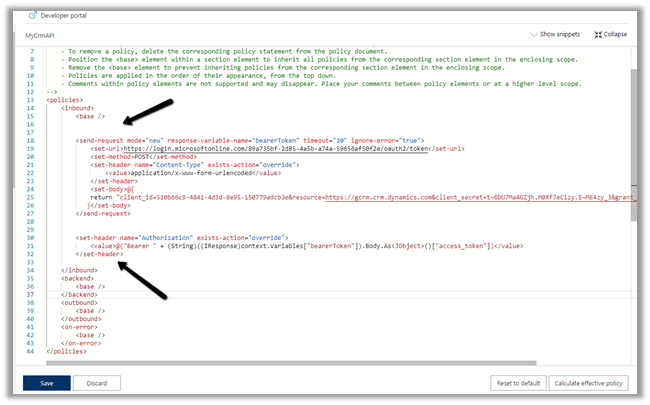
"copy code from the end of the post"

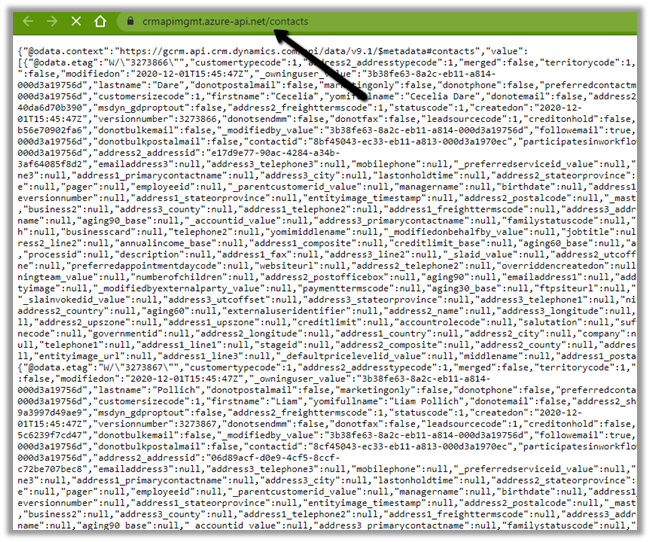
Save the change and let us test the API.

We can see the results as expected.
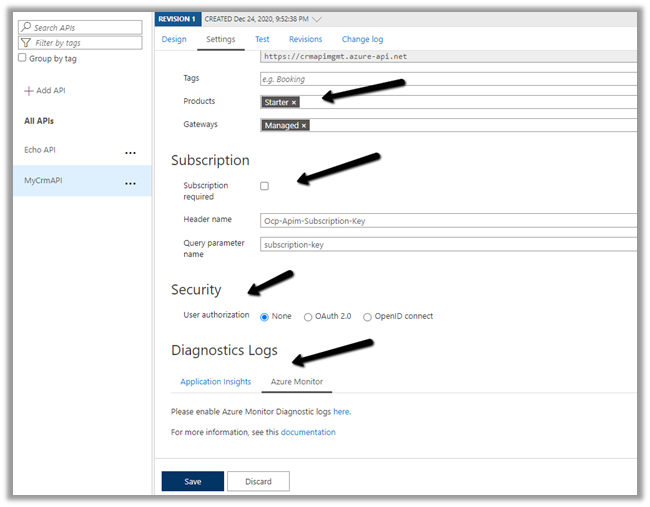
The other things that can be done are to associate the API with Products, specify Subscription, Security, enable Application Insights, Azure Monitor etc.
Specify policies –

https://docs.microsoft.com/en-us/azure/api-management/api-management-policies
References –

https://transform365.blog/2020/03/29/azure-api-management-and-dynamics-365-web-api/

https://app.pluralsight.com/library/courses/microsoft-azure-developer-implement-api-management/table-of-contents

Hope it helps..

<policies>
  <inbound>
    <base />
    <send-request mode="new" response-variable-name="bearerToken" timeout="20" ignore-error="true">
      <set-url>https://login.microsoftonline.com/89a735bf-2d85-4a5b-a74a-59656af50f2e/oauth2/token</set-url>
      <set-method>POST</set-method>
      <set-header name="Content-Type" exists-action="override">
        <value>application/x-www-form-urlencoded</value>
      </set-header>
      <set-body>@{ return "client_id=510b66c9-4841-4d3d-8e95-150779adcb3e&resource=https://gcrm.crm.dynamics.com&client_secret=t~6DU7Ma4GZjh.M0Xf7eCizy.E~ME4zy_3&grant_type=client_credentials"; }</set-body>
    </send-request>
    <set-header name="Authorization" exists-action="override">
      <value>
        @("Bearer " + (String)((IResponse)context.Variables["bearerToken"]).Body.As<JObject>()["access_token"])</value>
    </set-header>
  </inbound>
  <backend>
    <base />
  </backend>
  <outbound>
    <base />
  </outbound>
  <on-error>
    <base />
  </on-error>
</policies>
Advertisements

Azure Data Lake Storage Component in KingswaySoft – SSIS


Download and install the SSIS Productivity Pack

https://www.kingswaysoft.com/products/ssis-productivity-pack/download/

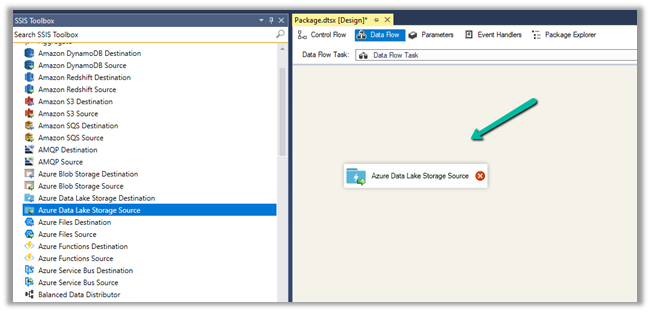
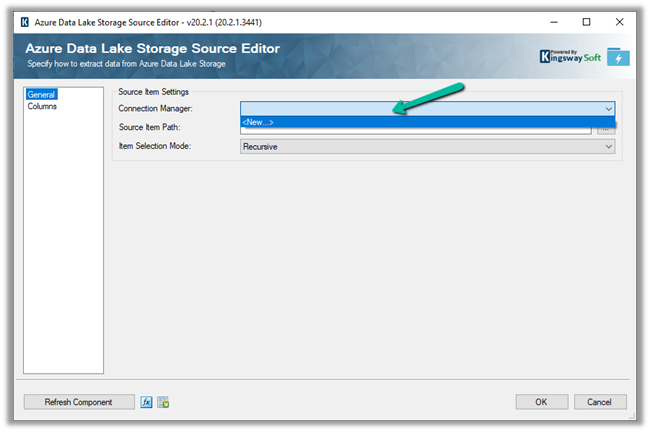
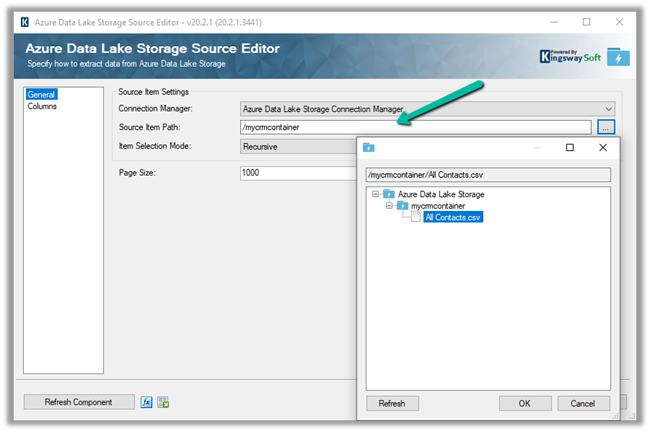
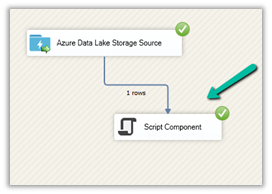
Drag the Azure Data Lake Storage Source component in the data flow

Double click and click on New to specify the connection

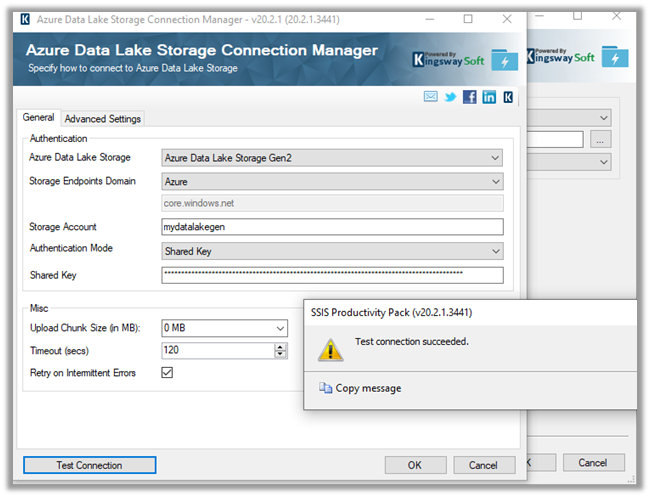
Provide the connection details and test the connection

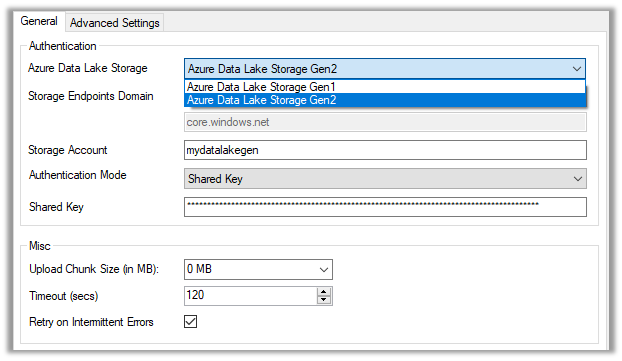
  • It supports both Gen 1 and Gen 2

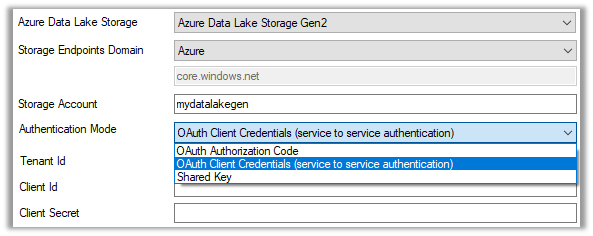
  • Supports the below Authentication modes

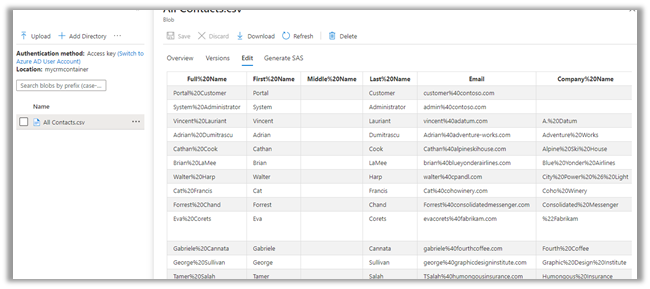
Inside the Azure Data Lake Storage Source component, we have specified our CSV file.

  • All Contact.csv file

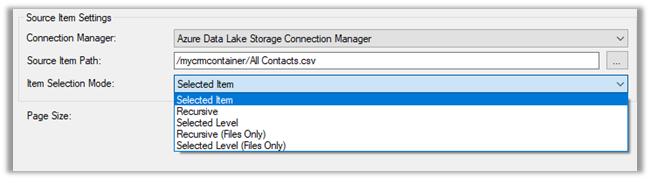
Item Selection Mode:

  • Selected Item: Retrieves only the item specified by Source Item Path.
  • Selected Level: Retrieves the selected item and all immediate files and folders under the path specified by the Source Item Path option.
  • Selected Level (Files only): Retrieves the selected item and all immediate files under the folder as specified by the Source Item Path option.
  • Recursive: Retrieves the selected item (specified by the Source Item Path option) and all sub items recursively.
  • Recursive (Files only): Retrieves items the same as the Recursive mode but only returns files.

The page size refers to how many records to retrieve per service call

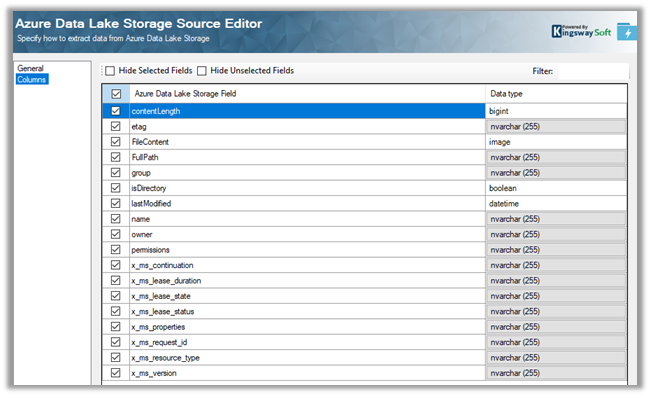
The columns page shows all the available attributes from the object specified in the General page

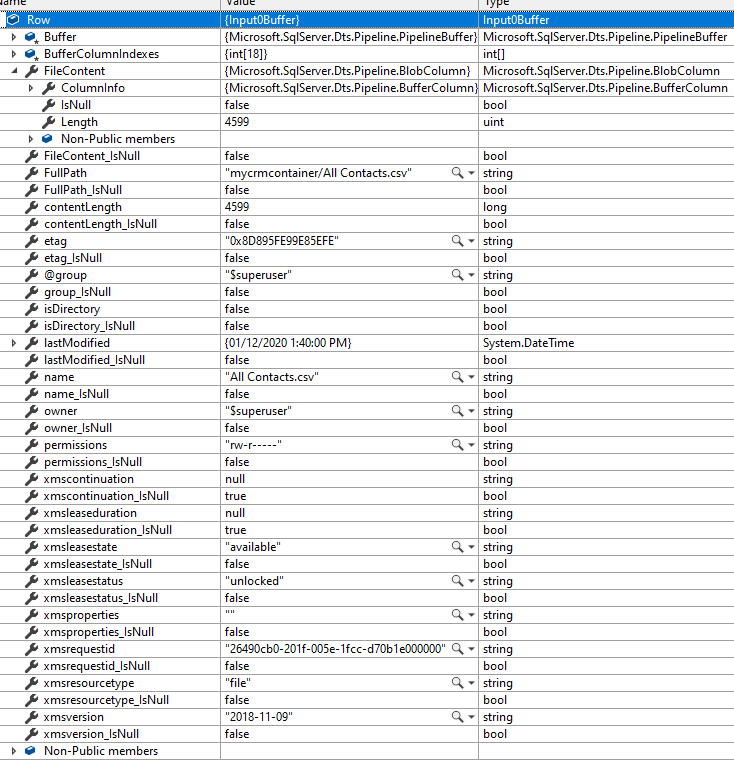
We have used the script component as the destination to read the values of all the above columns

The value for each of the columns –

datalakecsv

Get all the details here

https://www.kingswaysoft.com/products/ssis-productivity-pack/help-manual/cloud-storage

Posts on Azure Data Lake

Hope it helps..

How to – Consume Dynamics 365 Web API using MSAL.NET


Sharing a sample code to consume Dynamics 365 Web API using MSAL.NET

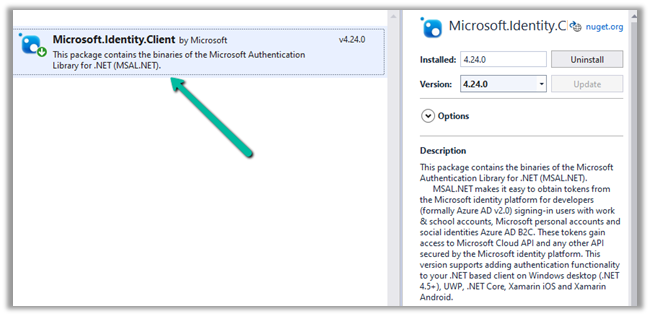
Create a console application and add the following NuGet Package

  • Microsoft.Identity.Client

More on Microsoft identity platform

https://docs.microsoft.com/en-us/azure/active-directory/develop/

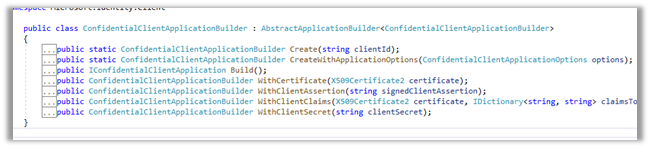
We are using ConfidentialClientApplicationBuilder create method.

https://docs.microsoft.com/en-gb/azure/active-directory/develop/msal-net-initializing-client-applications

The sample code –

using Microsoft.Identity.Client;
using System;
using System.Net.Http;
using System.Net.Http.Headers;
using System.Threading.Tasks;

namespace CrmAppMSAL
{
class Program
{
static async Task Main(string[] args)
{

string clientId = "fc34502a-74db-4977-8c83-***********";
string secret = "5~mByJeQ8dDO2LZP_H_J2**********";
string[] scope = new string[] { "https://orgname.crm15.dynamics.com/.default" };
string webAPI = "https://[org].crm15.dynamics.com//api/data/v9.0/leads";
string authority = "https://login.microsoftonline.com/7bc93881-0733-48ab-baa1-ee3ed7717633";

var clientApp = ConfidentialClientApplicationBuilder.Create(clientId: clientId)
.WithClientSecret(clientSecret: secret)
.WithAuthority(new Uri(authority))
.Build();

try
{
AuthenticationResult authResult = await clientApp.AcquireTokenForClient(scope).ExecuteAsync();

var httpClient = new HttpClient();
httpClient.DefaultRequestHeaders.Add("OData-MaxVersion", "4.0");
httpClient.DefaultRequestHeaders.Add("OData-Version", "4.0");
httpClient.DefaultRequestHeaders.Accept.Add(new MediaTypeWithQualityHeaderValue("application/json"));
httpClient.DefaultRequestHeaders.Authorization = new AuthenticationHeaderValue("Bearer", authResult.AccessToken);

httpClient.BaseAddress = new Uri(webAPI);

var response = httpClient.GetAsync("WhoAmI").Result;

if (response.IsSuccessStatusCode)
{
var userDetails = response.Content.ReadAsStringAsync().Result;
Console.WriteLine(userDetails);
Console.WriteLine(authResult.AccessToken);
Console.WriteLine(authResult.ExpiresOn);
Console.ReadLine();
}

}
catch (Exception ex)
{
string errorMessage = ex.Message;
}
}
}
}

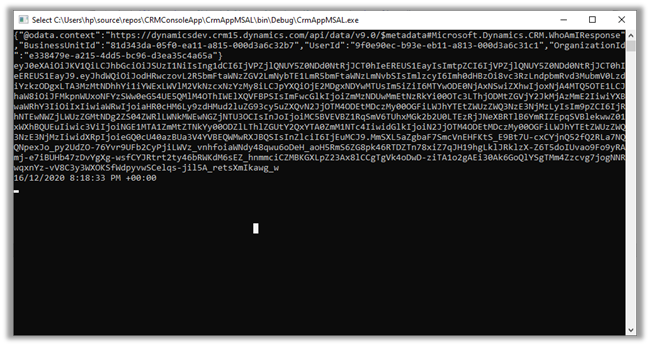
Result –

Reference –

https://medium.com/capgemini-microsoft-team/access-tokens-for-dynamics-365-using-microsoft-authentication-library-2b16c9f794b

Sample Code – Dynamics 365 Web API / Organization Service

Hope it helps..

Advertisements

How to – Read Secret from Azure Key Vault using Key Vault Rest API through Postman


In the previous posts, we saw how to register an Azure AD app and read the secret from Azure Key Vault using SecretClient and UsernamePasswordCredential class

In this post, we’d fetch the secret saved in Key Vault through Postman.

  • Register an Azure AD App
  • Copy its client id and client secret
  • Provide the Get Secret permissions to the application for the Key Vault.

Within Postman we’d first fetch the token

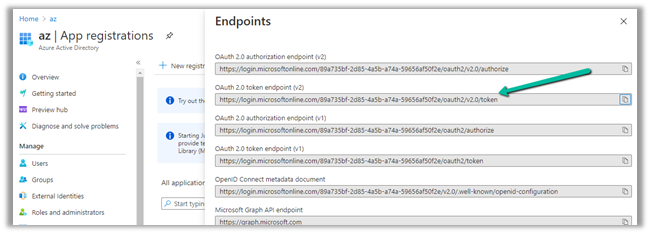
Get the URL from endpoints

Format – https://login.microsoftonline.com/{tenantid}/oauth2/v2.0/token

Scope value – https://vault.azure.net/.default

Send the request which responds with the token.

Copy the token

Create the new Get request and pass the Secret identifier with the API version.

https://mykvcrm.vault.azure.net/secrets/MySecret/f046535ef5644ca5a4b43f2a718776b9?api-version=7.1

For authorization select type as Bearer Token and paste the token generated earlier.

Send the request to get the secret’s value as shown below – “itissecret”

Get more details here –

https://docs.microsoft.com/en-us/rest/api/keyvault/getsecrets/getsecrets

Hope it helps..

Advertisements