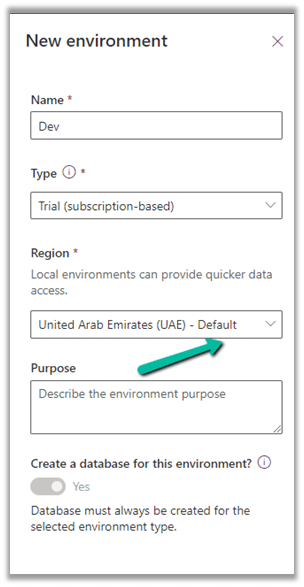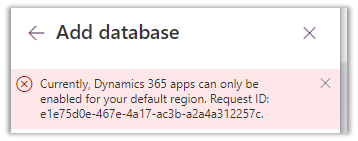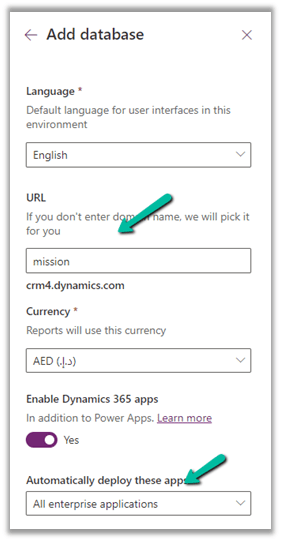
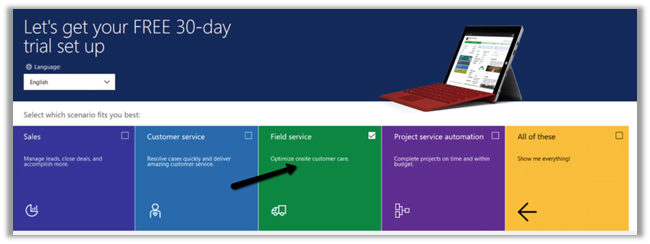
- Setup the free trial of Dynamics 365 Field Service
https://dynamics.microsoft.com/en-us/dynamics-365-free-trial/
- Security Roles
Below are the roles specific to Dynamics 365 Field Service app.
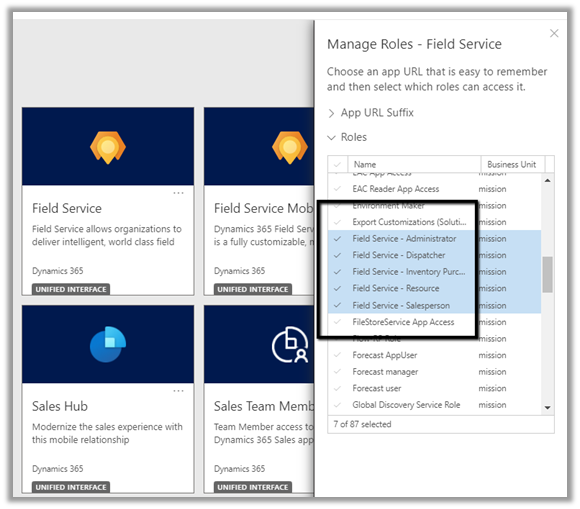
- Field Service – Administrator = The user with full rights on Field Service Entities.
- Field Service – Dispatcher = The users who will create, assign, and schedule Work Orders.
- Field Service – Inventory Purchase = The user with full rights on Inventory specific entities.
- Field Service – Resource = The user who would be executing the work order, at the customer’s site.
- Field Service – Salesperson = The user who along with work order need access to sales-specific entities like Lead, Opportunities, Quotes, etc.
For the Field Service Mobile app, we have Field Service – Resource as the default security role.

The corresponding field service-specific security profile needs to be added to the user.
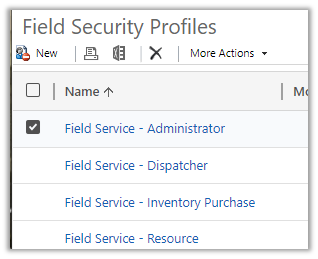
https://docs.microsoft.com/en-us/dynamics365/field-service/view-user-accounts-security-roles
- Mobile App

For the mobile app, we have 2 options
- Field Service (Dynamics 365)
- Field Service Mobile
Microsoft recommends using Field Service (Dynamics 365) app, which is based on the corresponding Field Service Model-driven app and will be continuously updated with new features.
The support for the old Field Service Mobile app will end in June 2022.
To customize the Field Service (Dynamics 365) app, we need to use the App Designer.
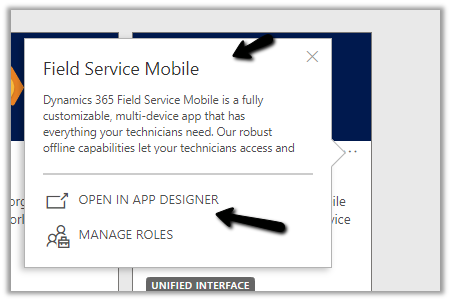
To customize the Field Service Mobile App, we need to use the Woodford mobile configuration tool, i.e. installing the Woodford solution, import the mobile project template (HTML 5), etc.
For the user or the Bookable Resource in terms of Field Service to log in, the Enable for Field Service Mobile (legacy Xamarin app) option should be set to Yes.
- Work Order Life Cycle
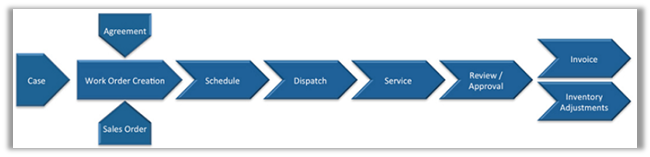
- Work Order is the primary entity of Dynamics Field Service.
- CSR or Sales agent will CREATE the work order (convert case, opportunity to work order, or agreements can generate work order automatically)
- DISPATCHER will schedule the work order.
- FIELD AGENT / RESOURCE gets notified and performs the work and updates the status of the work order through the mobile app.
- FIELD MANAGER will verify work order entities
Eventually followed by sending the invoice to the customer, where an ERP system like Dynamics 365 Finance and Operations can be integrated.
Work Order – holds the information about the work to be performed.
Work Order Type – is used for categorizing the work order. The incident required field specifies if the incident type is mandatory for the work order or not. The price list can be associated with the word order type.

Incident
Type acts as a template for the work order. On associating an Incident Type with a work order, the work order details get auto-populated from the incident type.
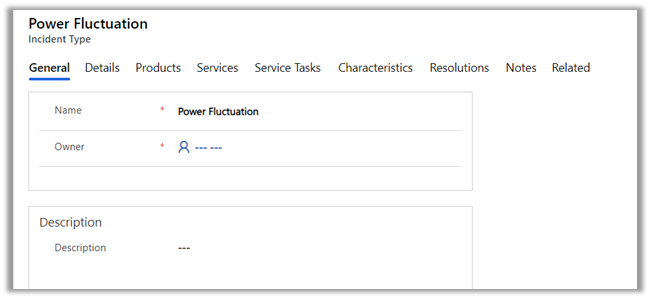
Details tab holds the information like work order type, estimated duration, linked articles, etc.

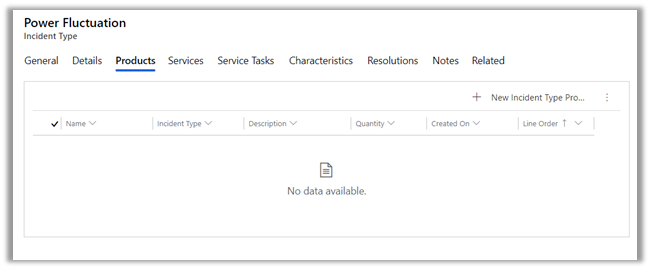
Products can be associated with an incident type. These incident type products will create the work order products automatically if the incident type is associated with the work order.
Below is the sequence of defining products inside Dynamics 365.
- Create Discount Lists (optional)
- Define Unit Groups and Units.
- Create Product
- Create price lists and discount lists (optional) and associate them with Products.
- Set default price list for the product.
The work order will have a price list associated with it. It can be derived from the Work Order Type record selected for the work order.
Services are the records that are billed to the customer.

Service Tasks list down the tasks and the order in which they need to be performed.

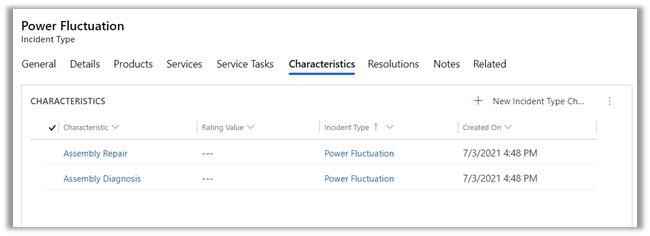
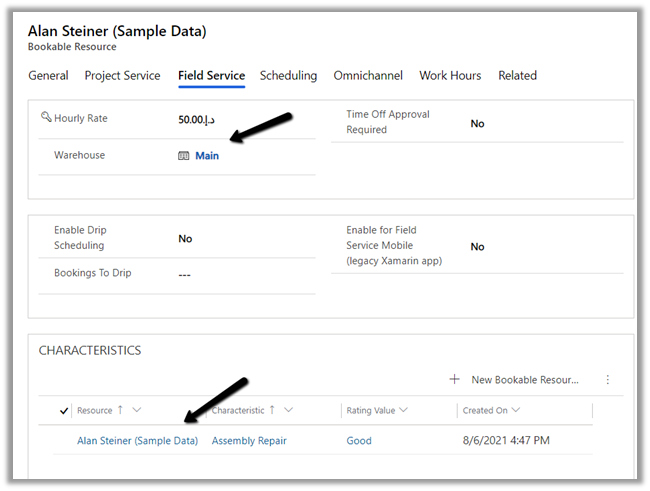
Characteristics information will be used while scheduling the work order to the appropriate field service agent.
We can specify a primary incident type for the work order which acts as a template and populates all the required details in the work order.

The Service Account is where the work is performed and the billing account is the customer/organization who will be billed or will be sent the invoice of the work order. This field is auto-populated on the selection of Service Account. An organization can have multiple locations for services but would have only one account which handles the payment.
The work order entity has the additional settings, location, and record log tab.

The location holds the address details with latitude and longitude used for location tracking. We can move the pin and the latitude and longitude values are updated accordingly. (Make sure to enable Bing map from System Settings >> General >> Enable Bing Maps)


The record log tab holds the work order details like first arrived, completed, and closed.

Bookable Resources can be defined as any resource that can be scheduled.
We have the following bookable resource.

User is the most common, who would be accessing Dynamics 365 Field Service and the Field Service Mobile app.
The facility can be the location/rooms.
Equipment would be any tools required.
Contact / Account would be contractors here, they are used when the work order is delegated to the external contractors and not the users.
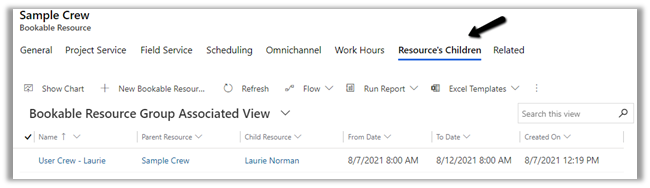
The crew could be multiple resources grouped together. Some work order in case if they need more than one resource can use crew instead of creating separate work orders for each resource.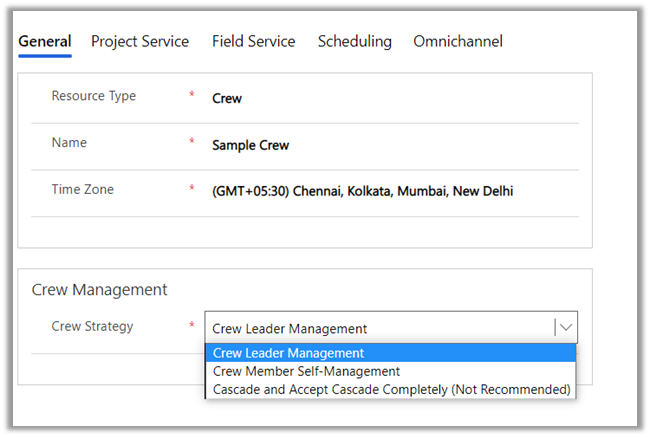
- Crew Leader Management = There is one designated person who manages the work.
- Crew Member Self-Management = Multiple resources are performing different tasks and would be billed separately.
- Cascade and Accept Cascade Completely = All resources on a crew can manage all the work. Useful for the scenario when there is just one user and the rest crew is equipment.
A pool is a grouping of similar types of resources.

For the user type bookable resource, we can define Hourly Rate, Warehouse, Characteristics (skills), etc.
Scheduling specifies the location for the user, whether to display the user on the schedule board etc.
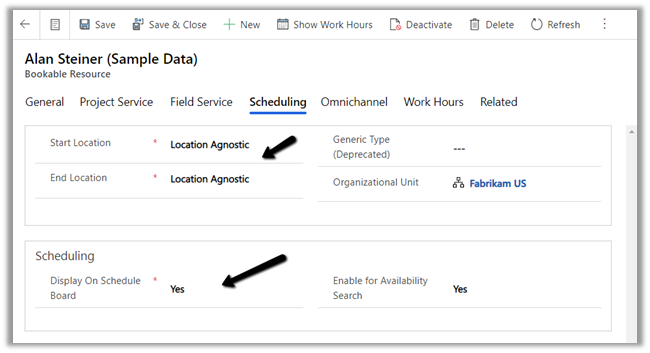
Start location and End location can be –
- Location Agnostic – The resource performs its day-to-day activity remotely and the location information is not to be considered during scheduling.
- Resource Address – The address needs will be considered while scheduling the work orders.
- Organizational Unit Address – The address of the resource is the same as the organization.
Work hours is where we can define work hours for the user.

When a work order record is created it also creates a Resource Requirement record, which is used for scheduling.

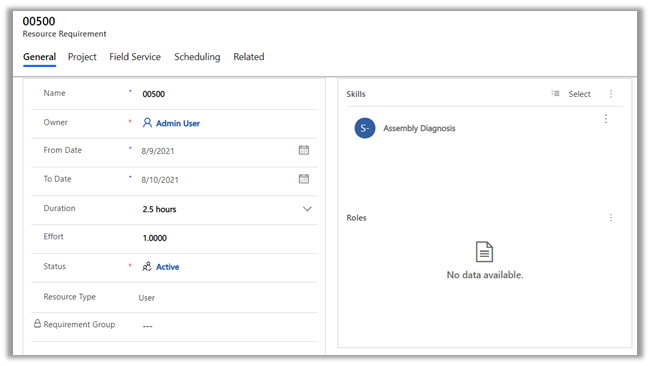
Resource requirement records are created for each bookable resource that is required to perform the job.
In the case of bookable resource type Crew, then resource requirement records are created for each resource children record.
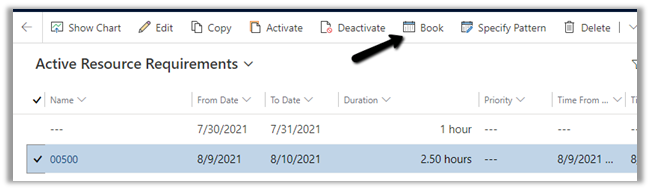
We can create a booking record from the resource requirements record
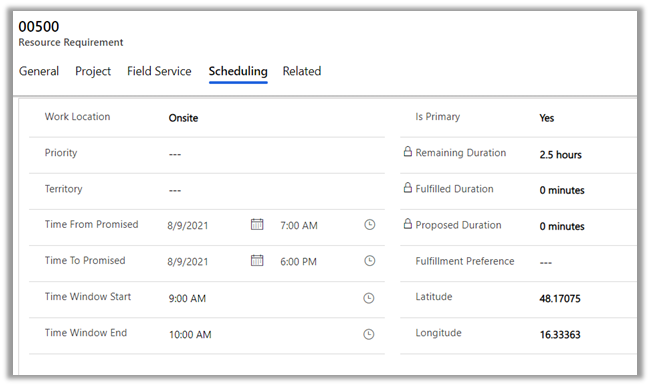
The scheduling tab holds the information like the time promised and location details
When the work order is scheduled it creates the bookable resource booking records, it holds the information about the work order and the resource assigned.
Field Service Dispatcher or Admin can access the Schedule Board to schedule the work order activities.
Navigate to Service >> Schedule Board to access it.
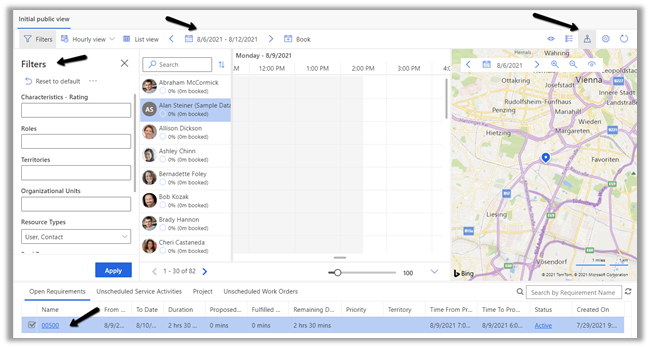
Filters – allows us to filter resources displayed on the schedule board based on a characteristic (skills), resource type, territories, etc.
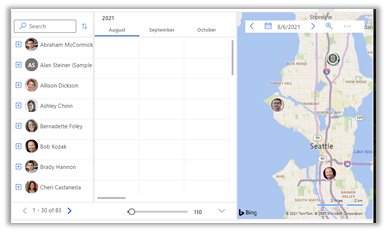
The Hourly view can be changed to Daily, Weekly, Monthly. We can specify the date range using the calendar control.
Book button allows manual creation of the Booking record.

The map view shows the work order and the resources. We can drag the unscheduled map pin from the map and assign it to one of the resources in the center.
The bottom of the schedule board shows Open Requirements, Unscheduled Service Activities, and Work Orders, which can be dragged to the schedule board.
Right-clicking on the resource and selecting View Resource Card displays the skills and roles of the resources.

To automate the resource scheduling, Microsoft provides a paid add-on Resource Scheduling Optimization (RSO)
https://docs.microsoft.com/en-us/dynamics365/field-service/rso-overview
As part of Inventory, we have the below tables in Field Service

First is the Warehouse, which specifies the location where the inventory is stored.
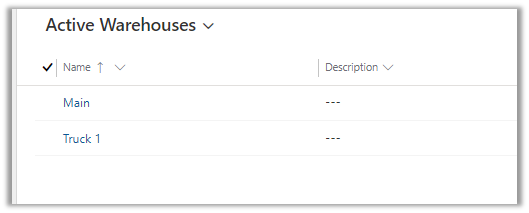
The warehouse will have products, for which there is a Product Inventory table that links Product with Warehouse.


If we would need to move products from one warehouse to another, for this we have an Inventory Transfer table, having source warehouse and destination warehouse details.
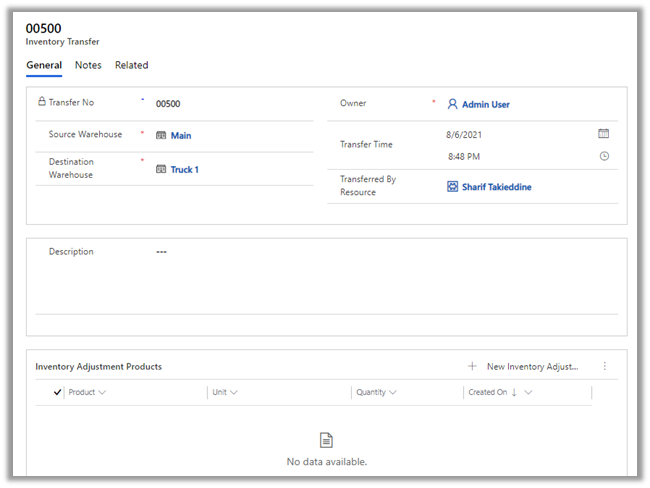
The Inventory Adjustment table allows for adjustment of the product as part of inventory transfer. The Inventory Adjustment table has the Inventory Adjustment Product table for associating the products.
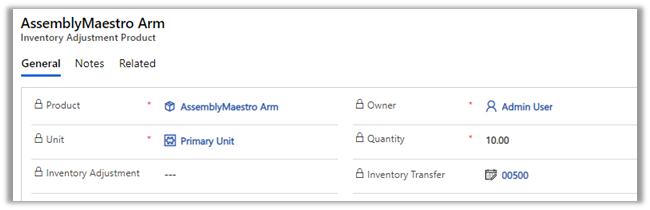
As soon as the inventory adjustment product is added to the Inventory Transfer record, the inventory of the source and the destination warehouse gets updated. The product will be created if doesn’t exist in the destination.
The purchase order is for buying products for the inventory/warehouse or can be linked with a work order if a product has to be purchased for fulfilling it.
Purchase Order Product allows associating products to the purchase order.

The purchase order has to be approved and then submitted as part of the Purchase Order Business Process.

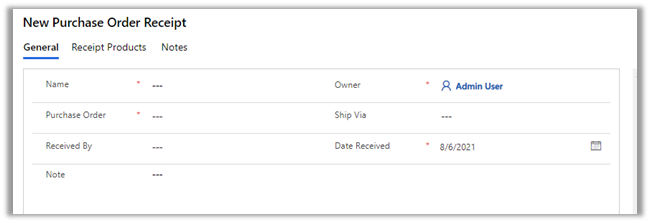
Purchase Order Receipts are for managing the receipts for the product purchased or received at the warehouse. Purchase Order Receipt
Products hold the products information.
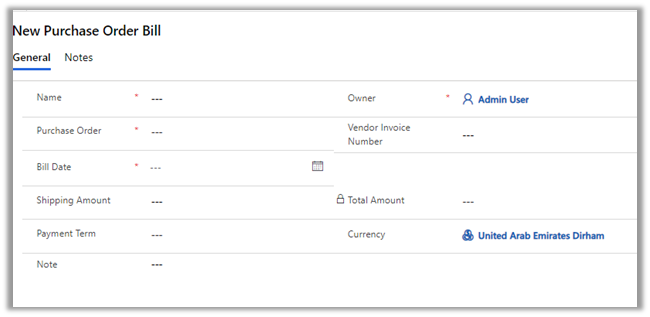
Similar Purchase Order Bills is for managing the invoice received from the vendors.
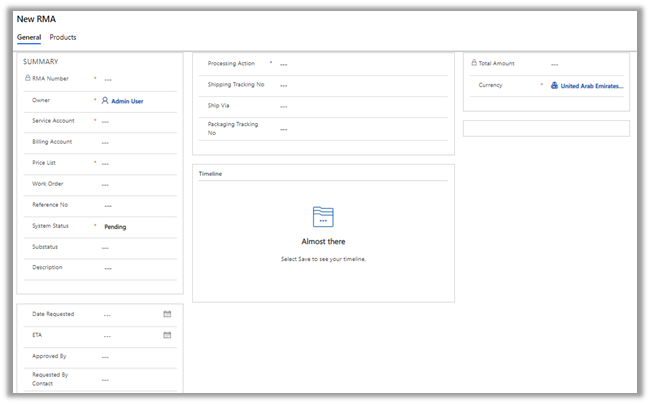
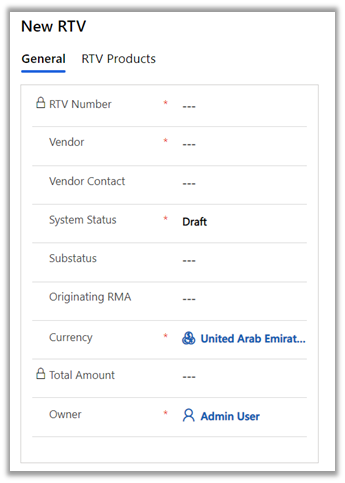
RMA stands for Return Merchandise Authorization and RTV stands for Return to Vendor.
RMA is for managing the products returned by the customer.
RTV is for managing the scenarios where the returned products are directly sent to the Vendor, without adding those items to the inventory.
Field Service Mobile also supports offline mode.
Navigate to Settings >> Mobile Offline >> Mobile Offline Profiles >> Field Service Mobile – Offline Profile
The entity for offline sync can be added in the mobile offline profile item details along with the users for which offline mode needs to be enabled.
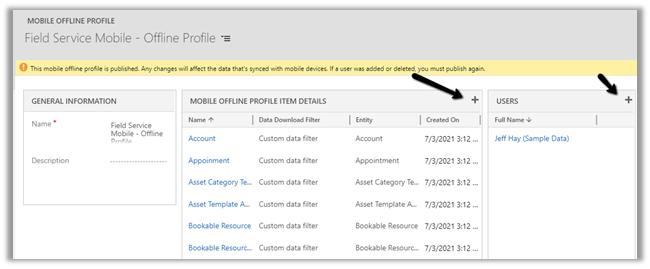
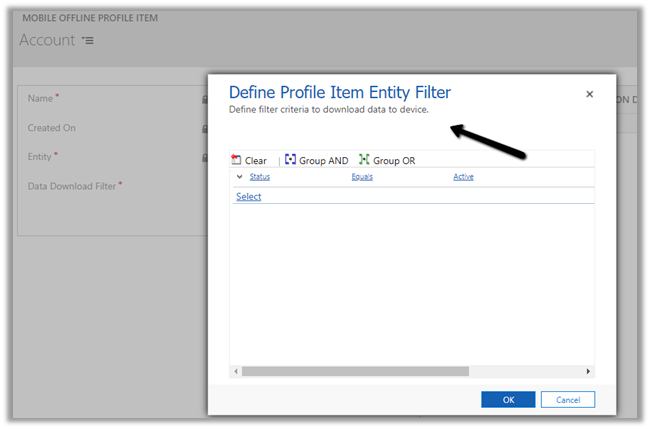
Different download filter options
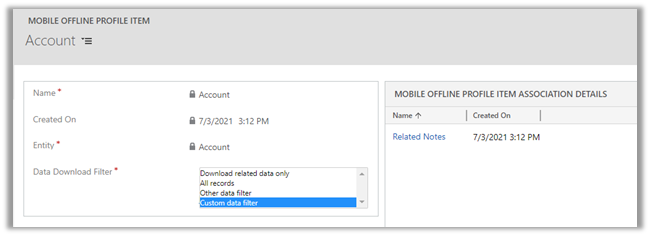
In the case of a Custom data filter, we can specify our custom condition.
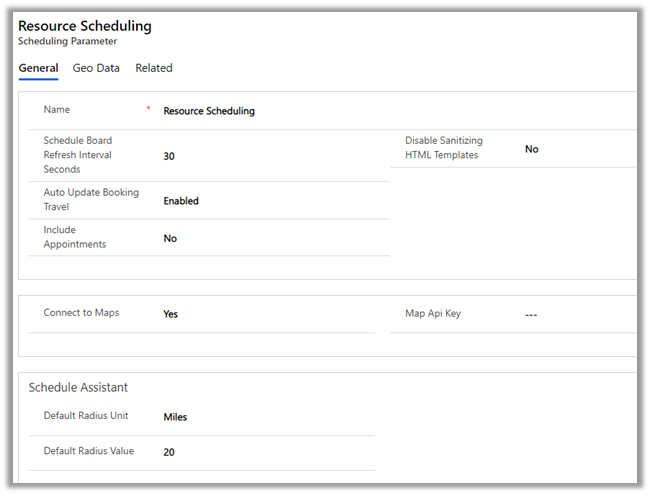
URS – Universal Resource Scheduling app can be used to schedule anything in Dynamics 365.

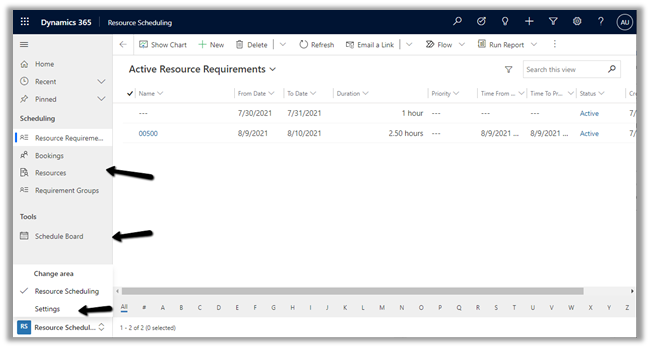
Within Settings, we can administrate entities that can be scheduled, change settings for Schedule Board, define resources, roles, skills, and other parameters.
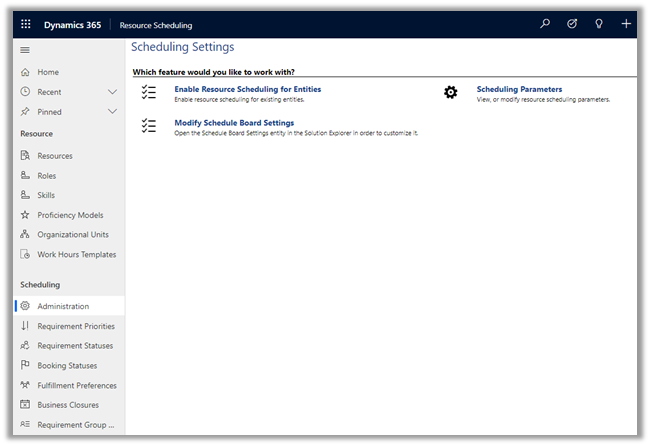
The work order entity is enabled by default for scheduling.

Scheduling Parameters
Agreements are used to generate work orders automatically, it could be periodic visits as part of service and regular maintenance and could be sales visits as well.
The agreement record contains details like agreement number, account associated, price list, start date and end date of the agreement.

An agreement can have multiple Agreement Booking Setup records. It acts as a template for the work order that is generated automatically.
Products, Services, and Service tasks can also be defined as part of the Agreement Booking Setup record.

Setting the Auto Generate Work Order as true will generate the work order record automatically. Auto-generate booking will generate booking dates and automatically assign the work order on the booking dates to the resource. If both these settings are no, the work order will have to be generated and scheduled manually.
The booking recurrence defines the pattern for generating these records.

Based on the recurrence defined, the Agreement booking dates records will be generated. These are the dates used by the system to generate and assign the work order to the resource specified in the agreement booking setup.
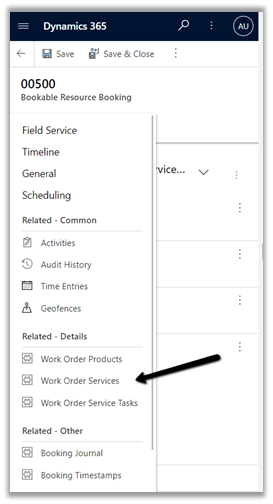
The Field Service Resource when he logins into the Field Service Mobile app, is presented with Bookable Resource Bookings records as an Agenda view, which can be changed to Day or Map.

The agent can add and/or work on Work Order Products, Services, Service Tasks (Mark Complete) associated with the Bookable Resource Booking record.
The Booking Status can be set as Completed in the Bookable Resource Booking record to mark the job as completed.
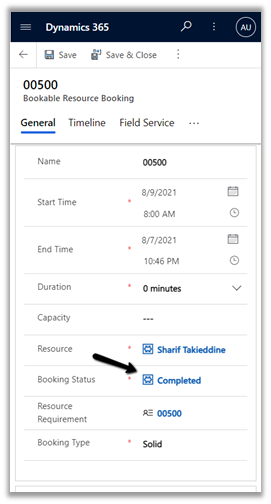
This will also set the status of related Work Order as Open – Completed.
Marking work order as Close – Posted will generate the Invoice.

Download the word (.docx) format –Dynamics 365 Field Service
Hope it helps..