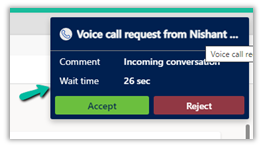
Below is how the notification appears to the agents for the incoming conversation. In case the app is in the background the agent might miss the notification. To avoid this scenario we can enable Desktop notifications.
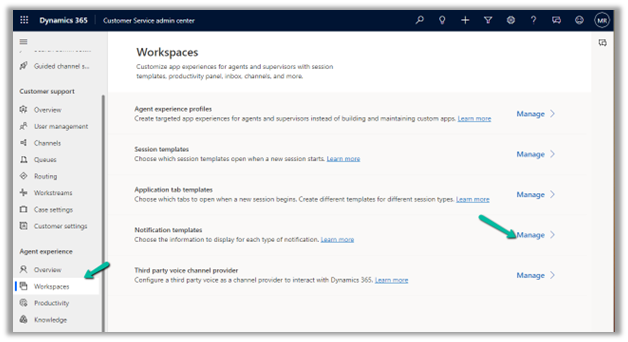
Navigate to Agent Experience >> Workspaces >> Notification Templates (Manage) in the Customer Service Admin center
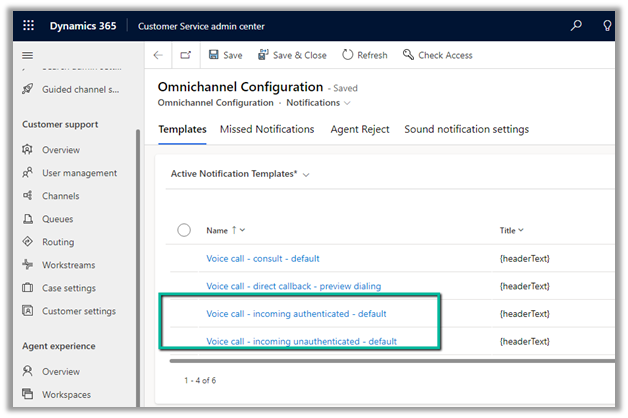
Here we can see the default template – authenticated and unauthenticated for the incoming voicemail. We cannot update these out-of-the-box templates, however, we can refer to these existing templates to create a new template.
Let us open the existing incoming authenticated template.
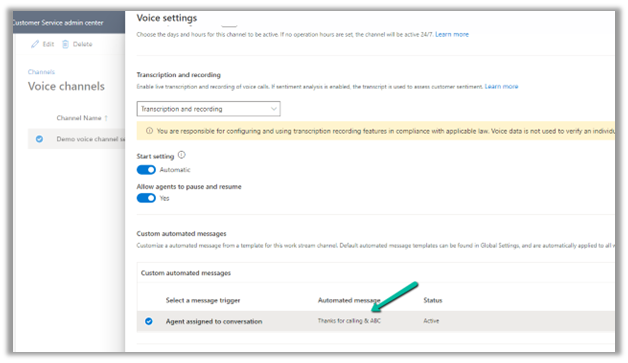
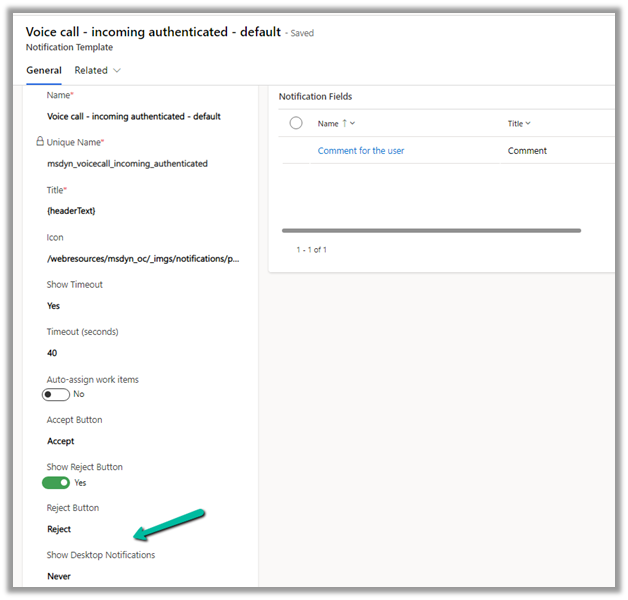
The Voice call – incoming authenticated – default :-
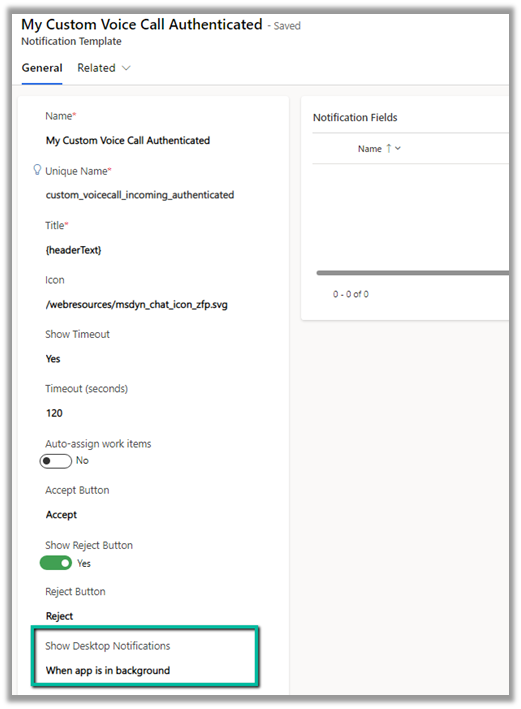
Let us create a new template, referring to the existing template, where we will set the Show Desktop Notifications = When the app is in the background.
Notice we can specify other values such as notification timeout, auto assign work items, show reject button as well as notification fields.
Below is our new notification template.
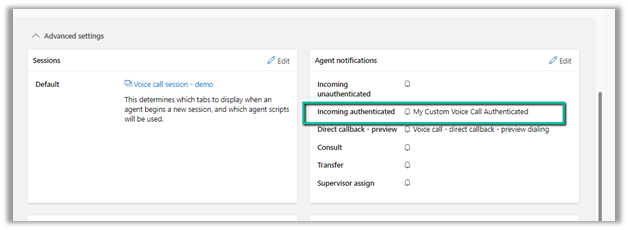
With the template created, navigate to the workstream to which we want to apply this template. In the Agent notification template, specify the custom notification template for the Incoming Authenticated.
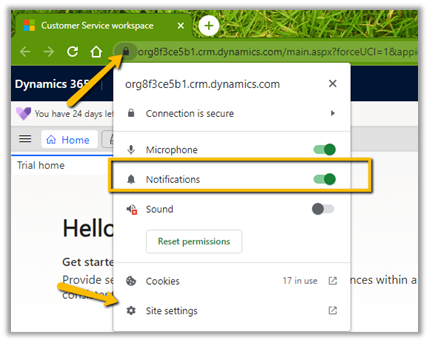
Also, enable Notifications for the app in the browser from Site Settings.
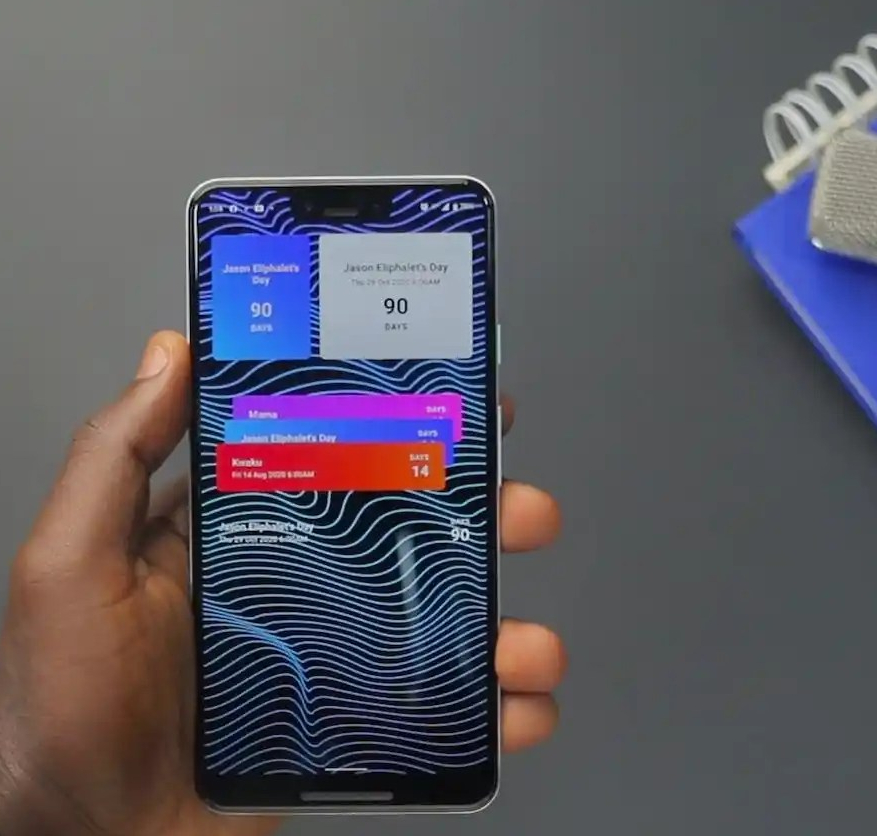
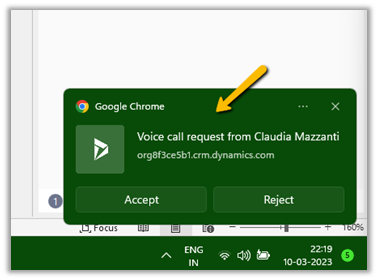
Here we can see the Desktop notification for the agent on the incoming call.
Learn more about it – https://learn.microsoft.com/en-us/dynamics365/app-profile-manager/notification-templates?tabs=customerserviceadmincenter#create-a-notification-template
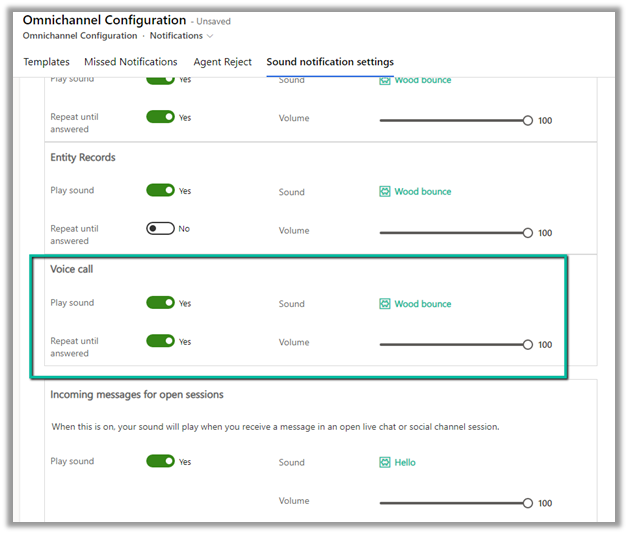
To enable Sound Notification – https://nishantrana.me/2023/03/08/enable-sound-notifications-in-omnichannel-voice-and-other-channels-dynamics-365-for-customer-service/
Hope it helps..