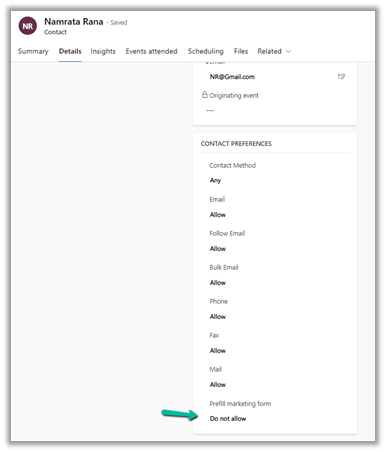
In the previous posts, we learned about website tracking and how to authenticate the domain for external hosting of the form as well as email marketing.
Here we will explore the option of hosting the form on an external page.
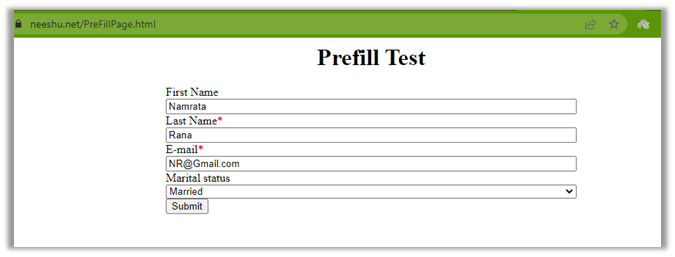
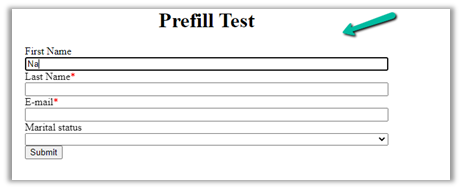
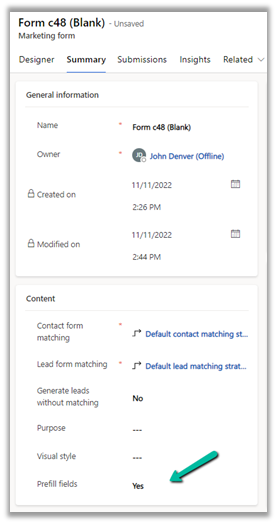
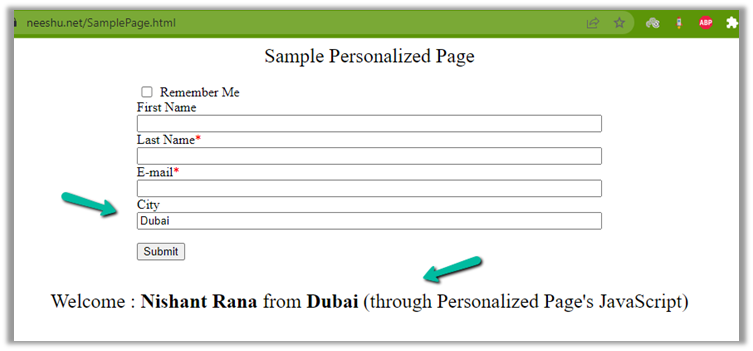
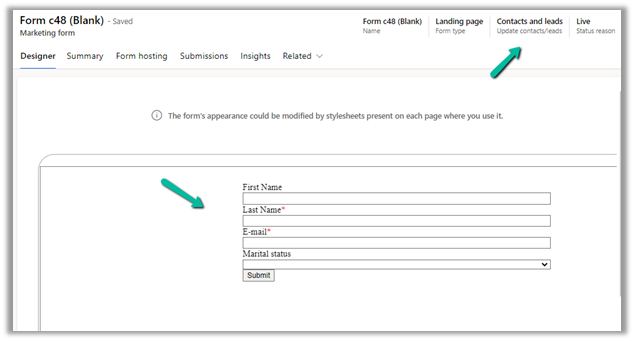
Let us start by creating a simple marketing form having a first name, last name, and email fields in it.
Click on Check for errors, if everything is fine then select Go Live.

This shows up in the form hosting tab in the Marketing form.

There we need to first create a new marketing form page record.
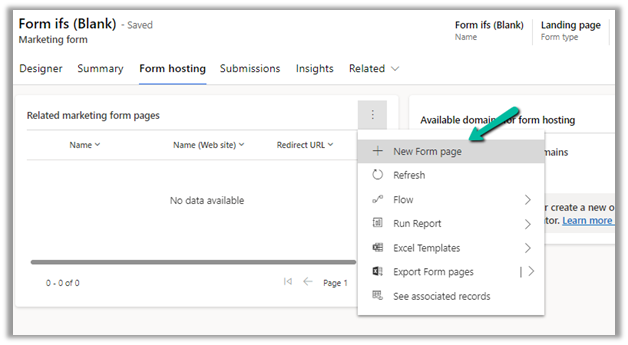
Here while creating a new form page, we have associated it with the marketing website we had created earlier.
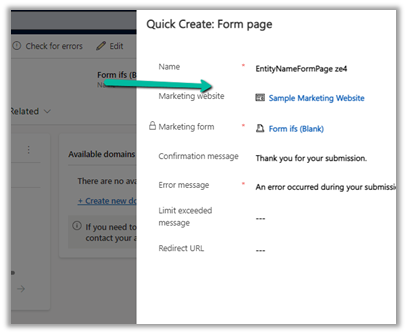
Just refresh the marketing form page, and it will start showing the already authenticated domains.
Open the form page record created. There we can see a few other options to be configured along with an external hosting format.


If we choose the option of iframe, the style of the form will remain isolated from the rest of the page it cannot take the styling element of the page it is hosted on, and website tracking will not work.
Let us start by hosting it as an iframe option.
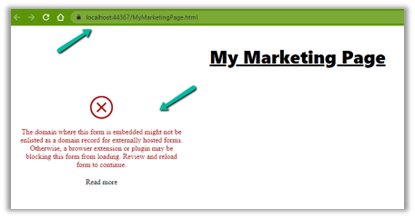
Let us run it locally first before deploying the page to our authenticated domain.
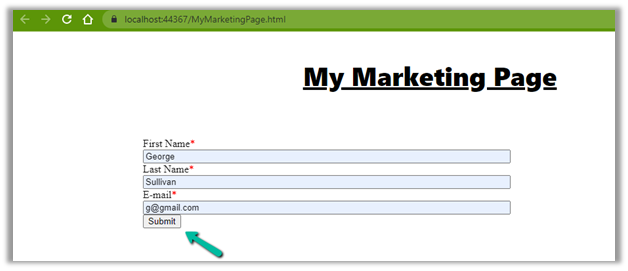
Submit the form

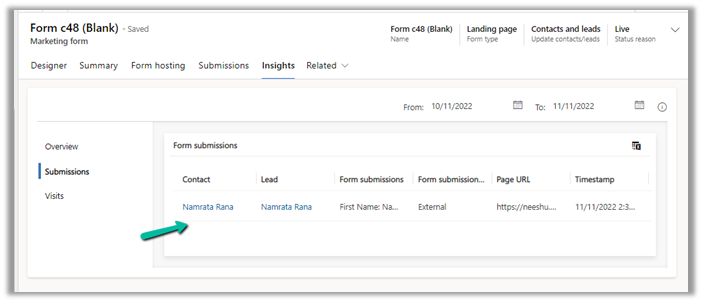
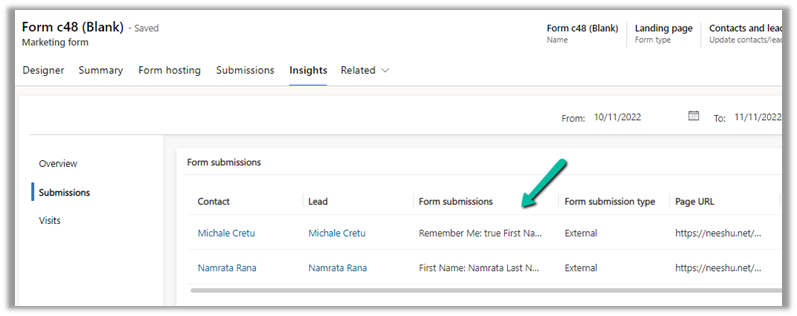
Open the Marketing Website record or the Form , we can see the details added to the Visits and Submissions section of Insights.

Now let us submit it once more from the authenticated domain.

We can see the details in the Form submissions.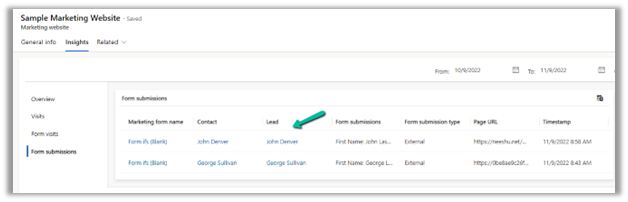
Now let us now check the option of hosting it as a script.
Copy and paste the code

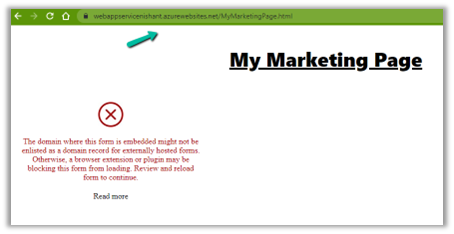
If we embed it in the unauthenticated domain, we will get the below error.
Hosting it inside the authenticated domain we get the form loaded correctly.
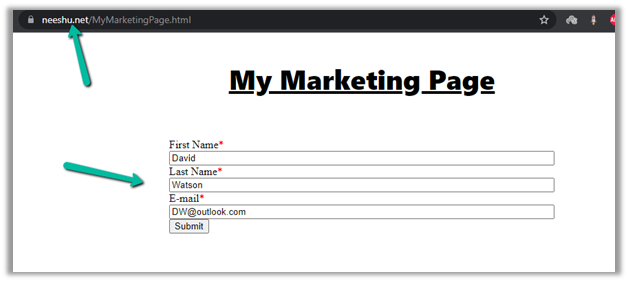
Submit the details.

Let us again check the Insights tab in the marketing website record or the marketing form. We can see it being tracked in Visits, Form Visits as well as Form Submissions.

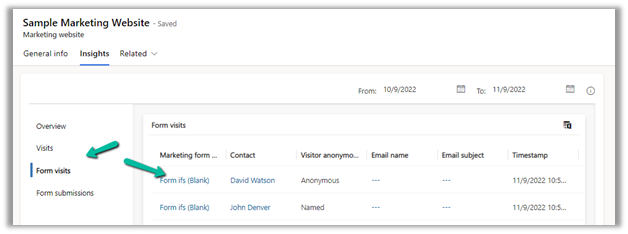

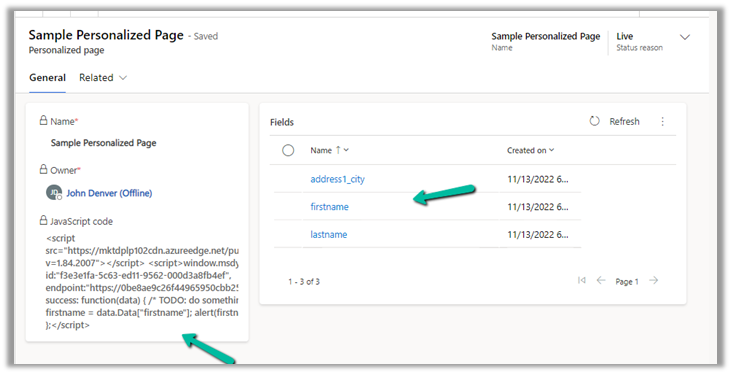
Insights tab in the Marketing form –
Get all the details here – Embed forms on external websites
To learn more about Dynamics 365 marketing – https://meganvwalker.com/category/dynamics-marketing/
Hope it helps..


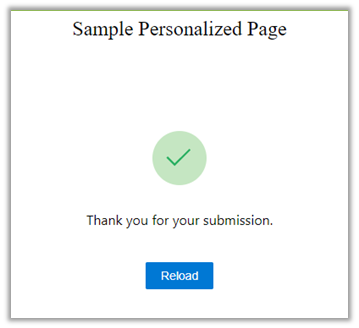


 Submit the form –