While registering a plugin step, found that we can now specify Filtering Attributes for Create message.
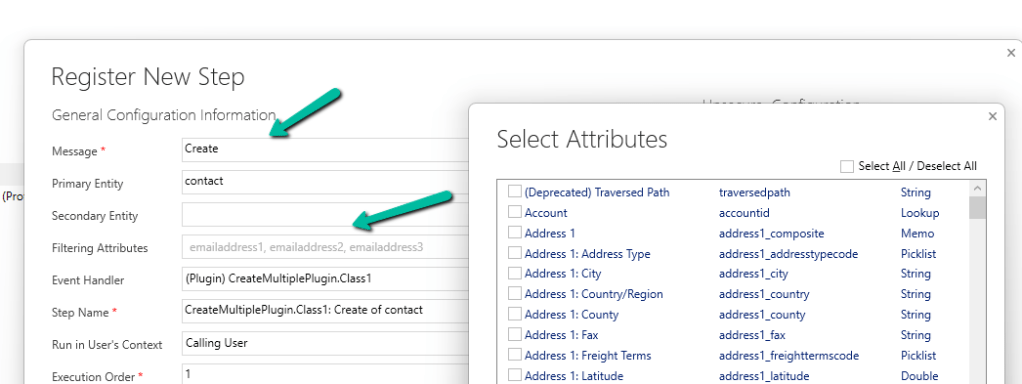
Check the below post for more details –
Advertisements
While registering a plugin step, found that we can now specify Filtering Attributes for Create message.
Check the below post for more details –

Sales Copilot can generate a quick summary of a lead and opportunity record, based on the fields defined in a view.
Allow data movement across regions in the Power Platform Admin Center using Enable copilots and generative AI features outside United States and Switzerland – Power Platform | Microsoft Learn
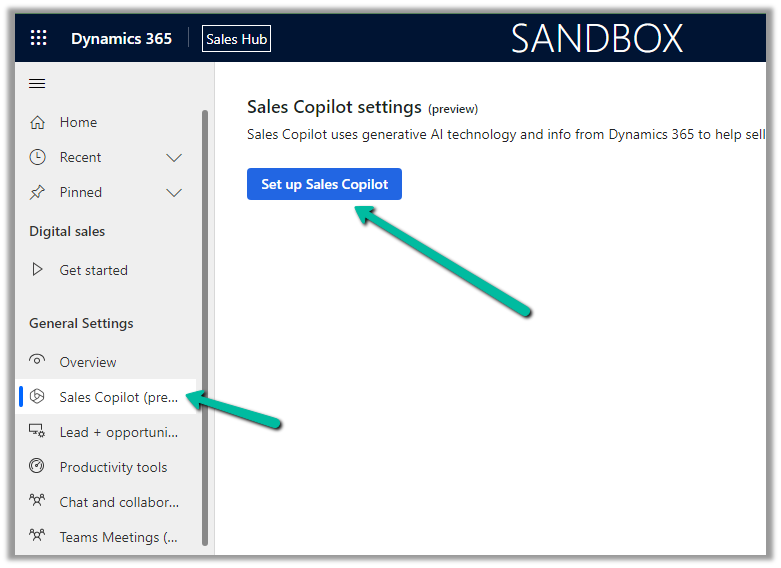
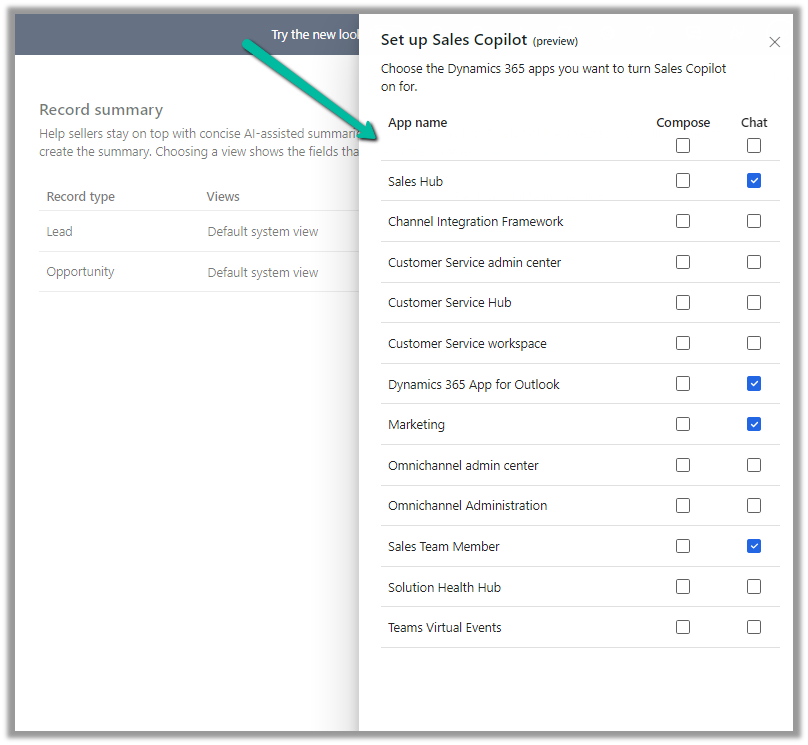
To enable Sales Copilot, navigate to
Sales Hub >> App Settings >> Sales Copilot (preview) >> Set up Sales Copilot
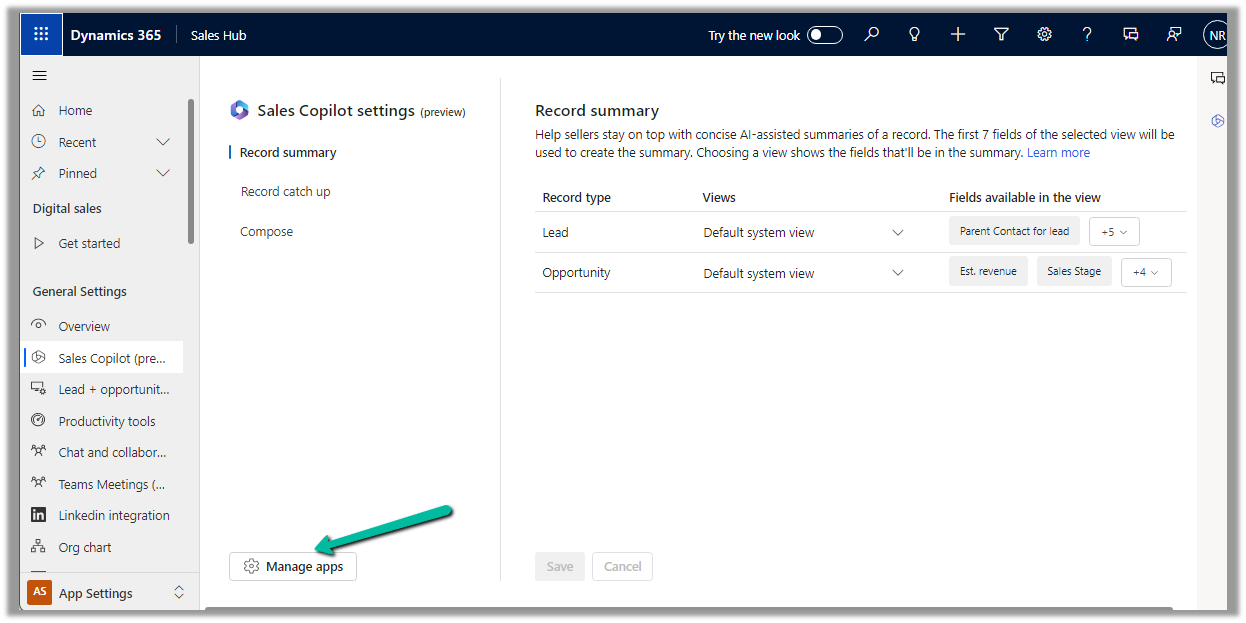
Or if we have already enabled it, we can manage the features provided along with the different apps we want to apply the Sales Copilot using the Manage apps option.

Here we can specify to which apps we want to enable the Compose and Chat feature

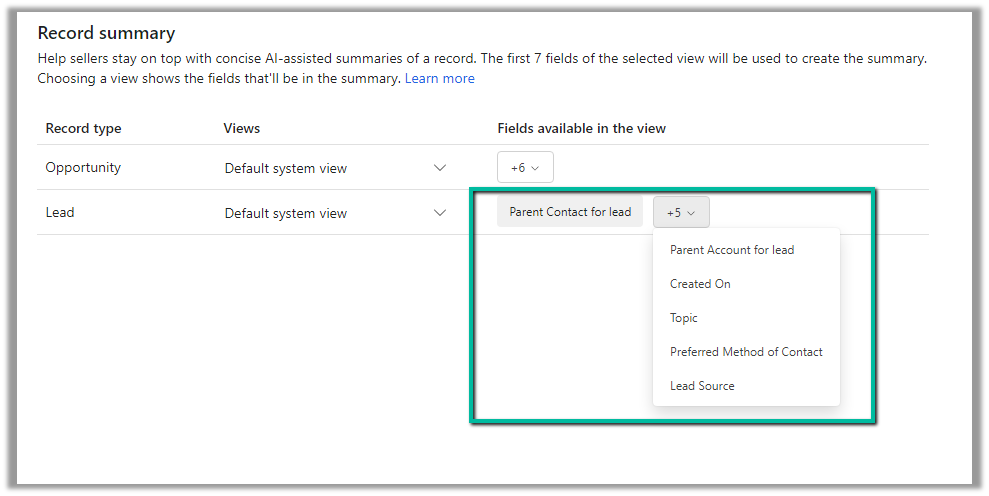
For the Record summary feature, the first 7 fields of the view are considered. We can see “Default System View” selected by default.
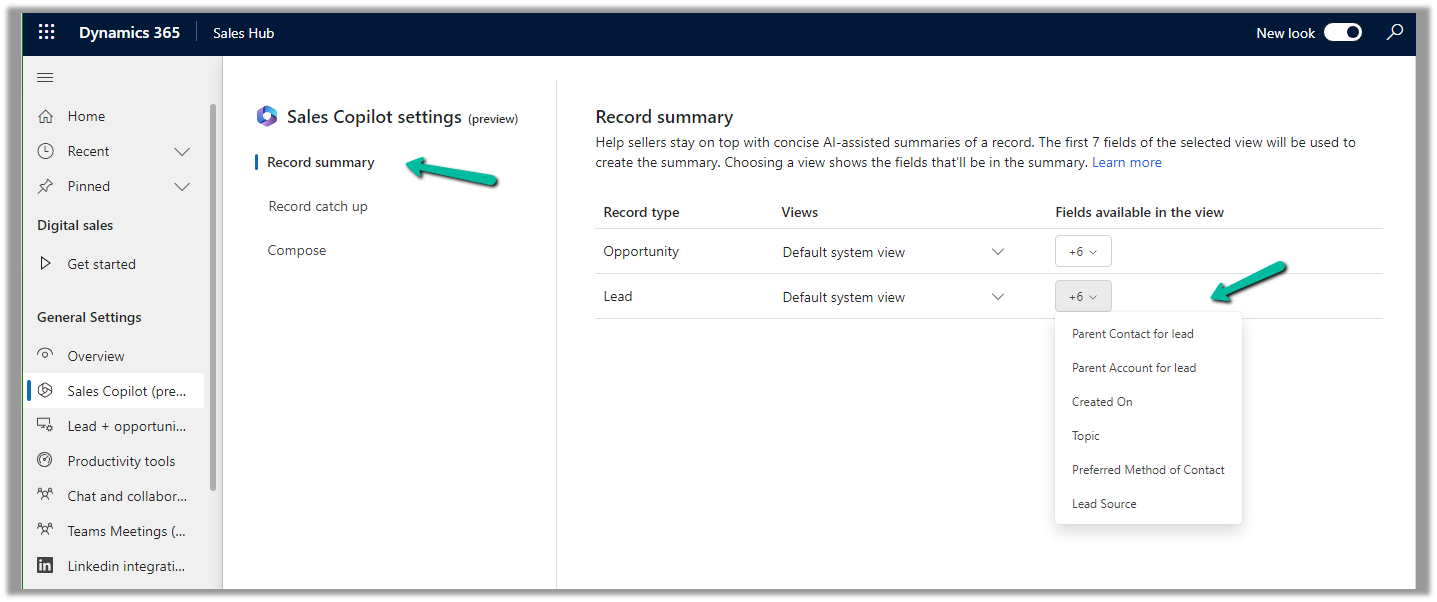
However, we have the option to select a different view, and then the fields of the selected view will be used for the summaries.
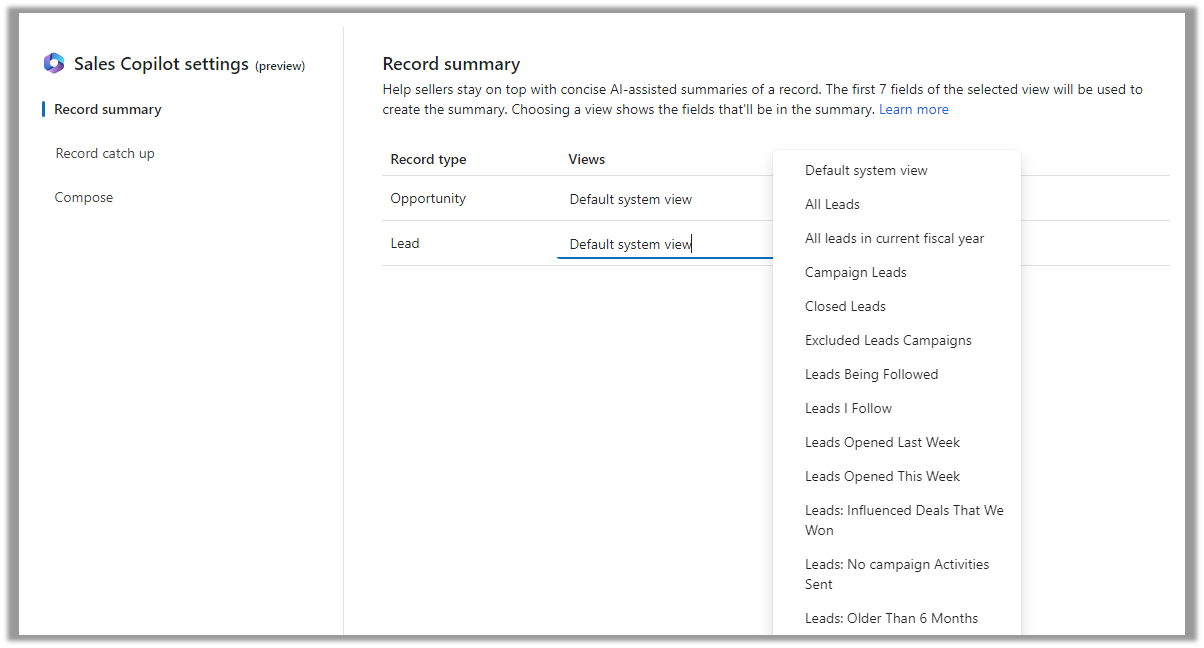
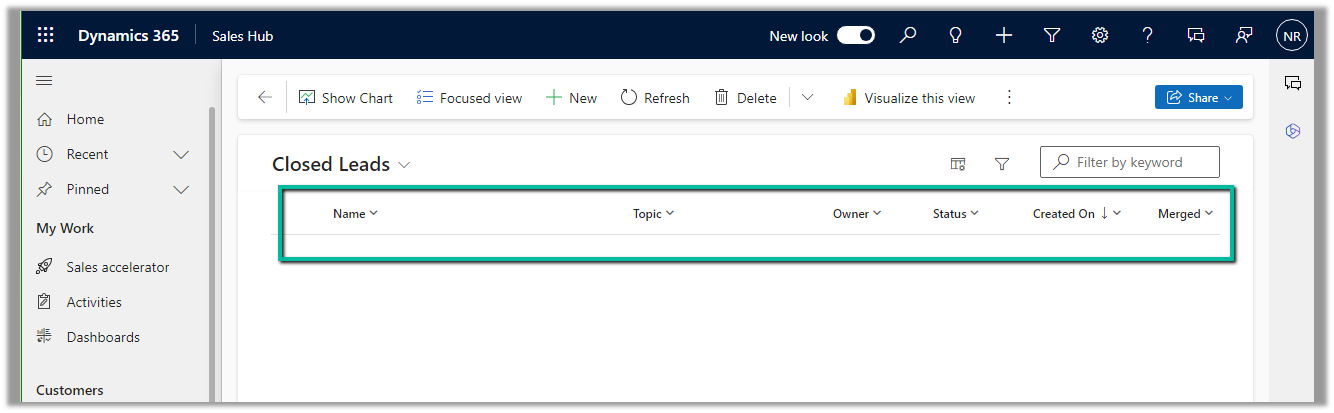
Below if we select the Closed Leads view and we can see it corresponding fields that will be considered for the summaries.
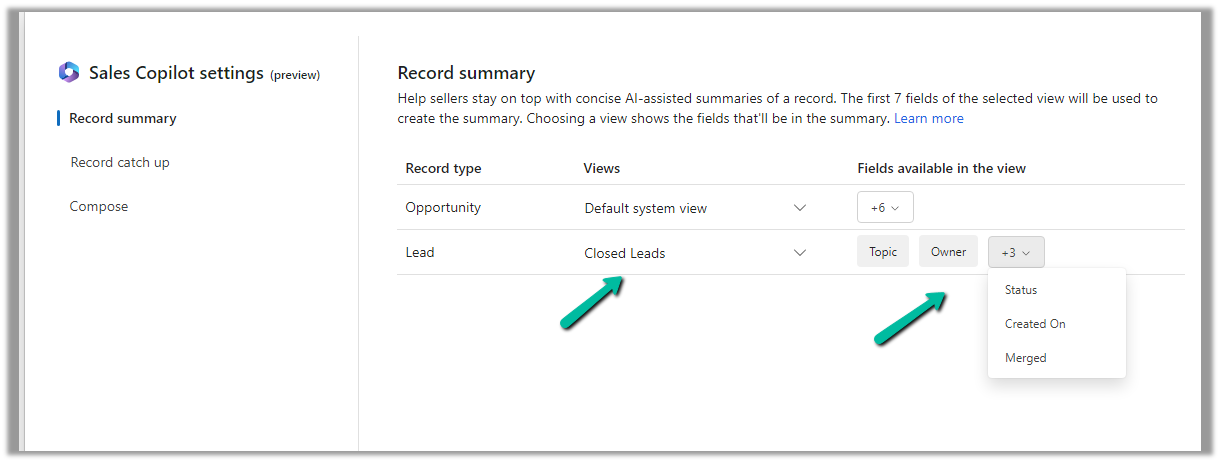
The Closed Leads view
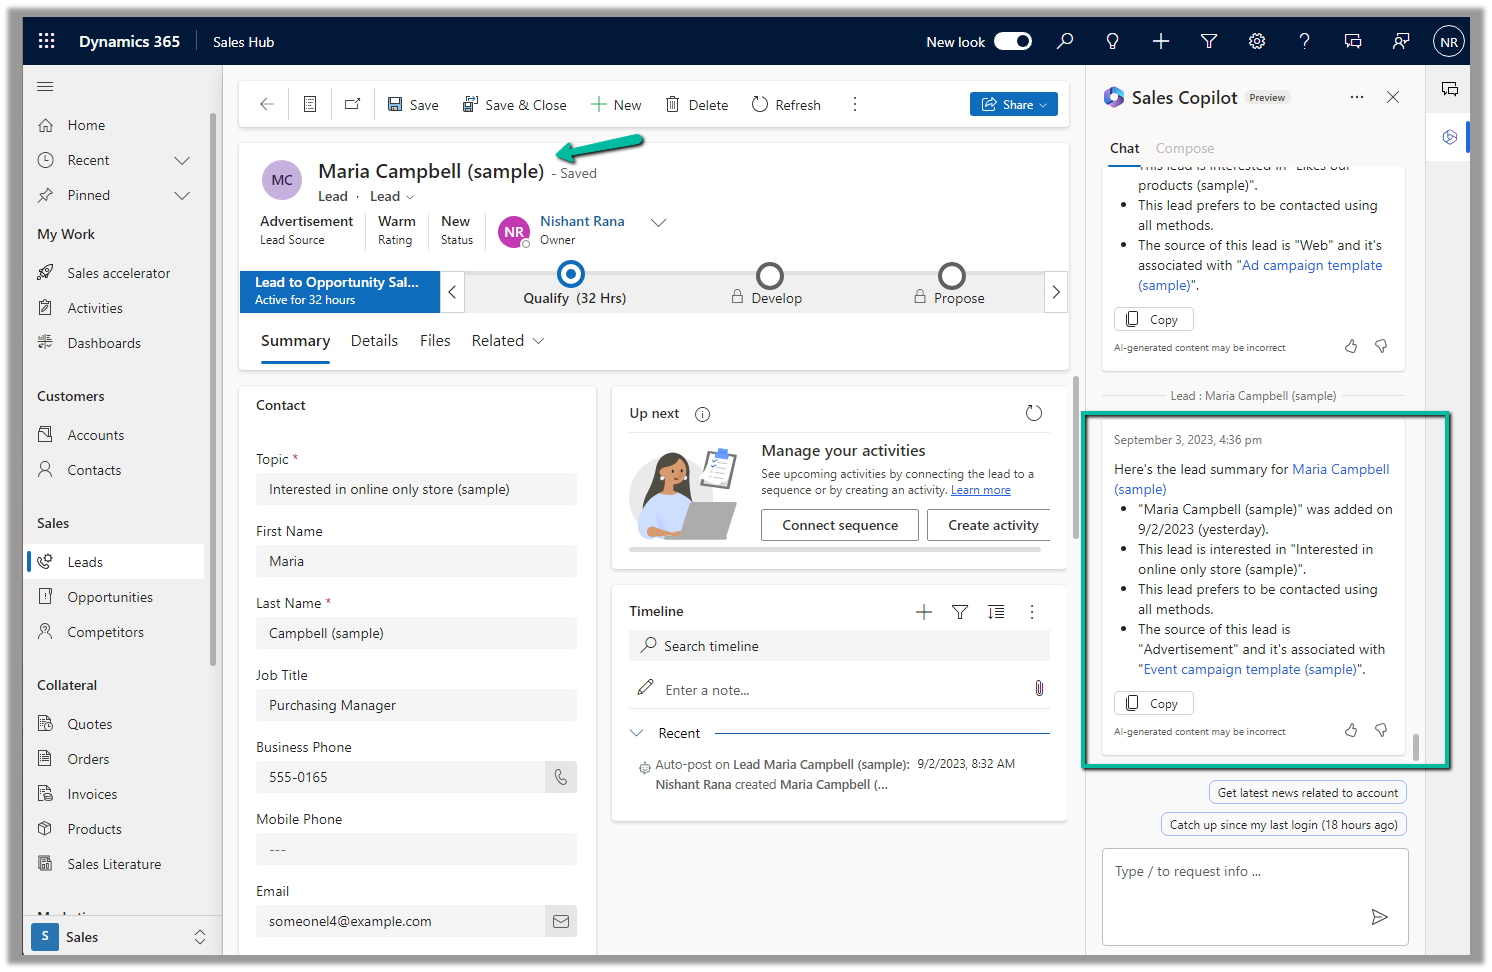
We can open an existing lead or opportunity record, and the Sales Copilot automatically generates the summary for that record.
Or if we want to generate summary for a specific lead or opportunity we can use the below prompt.
Summarize lead or Summarize opportunity followed by @ and the record’s name.
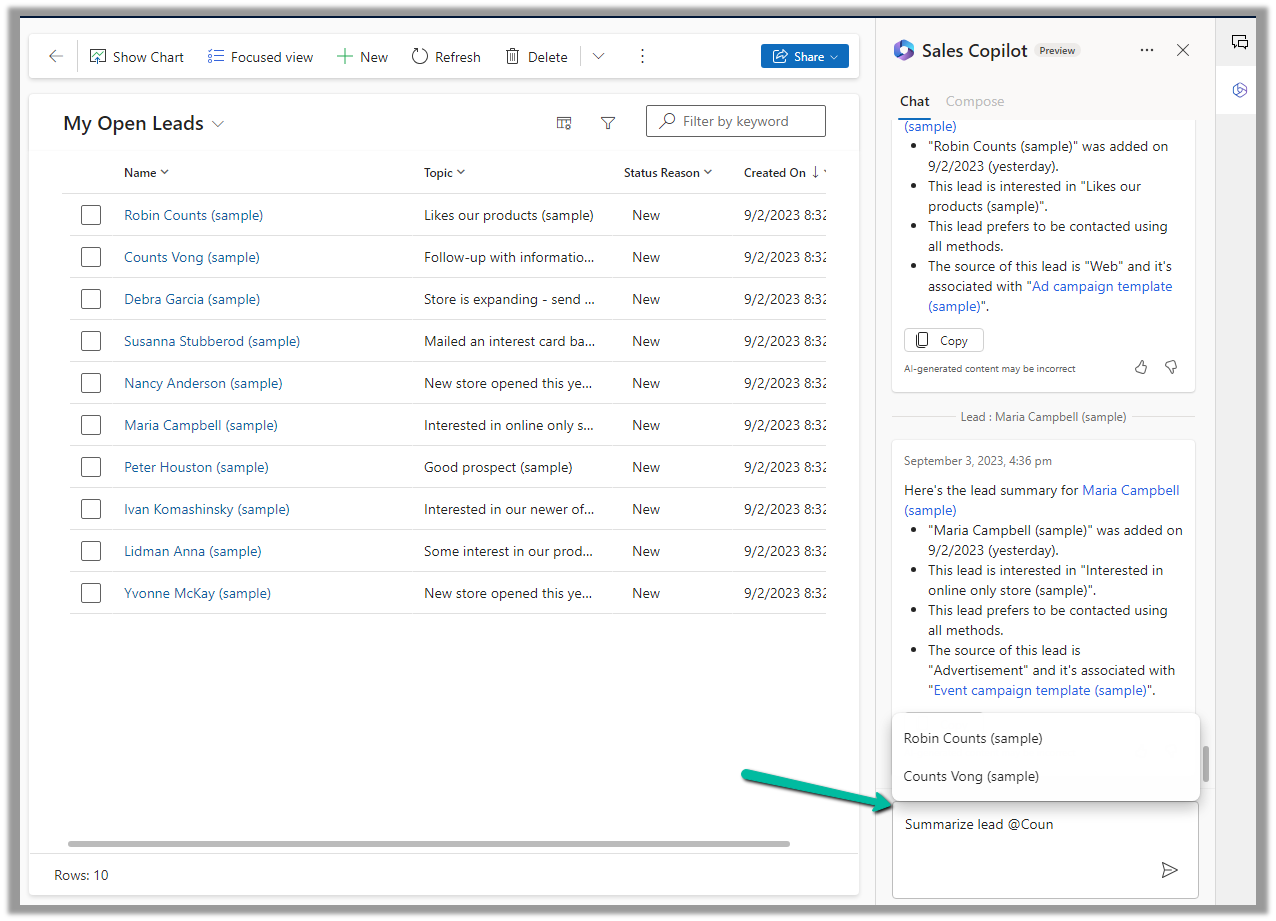
Below is the summary for Counts Vong (sample) lead record.
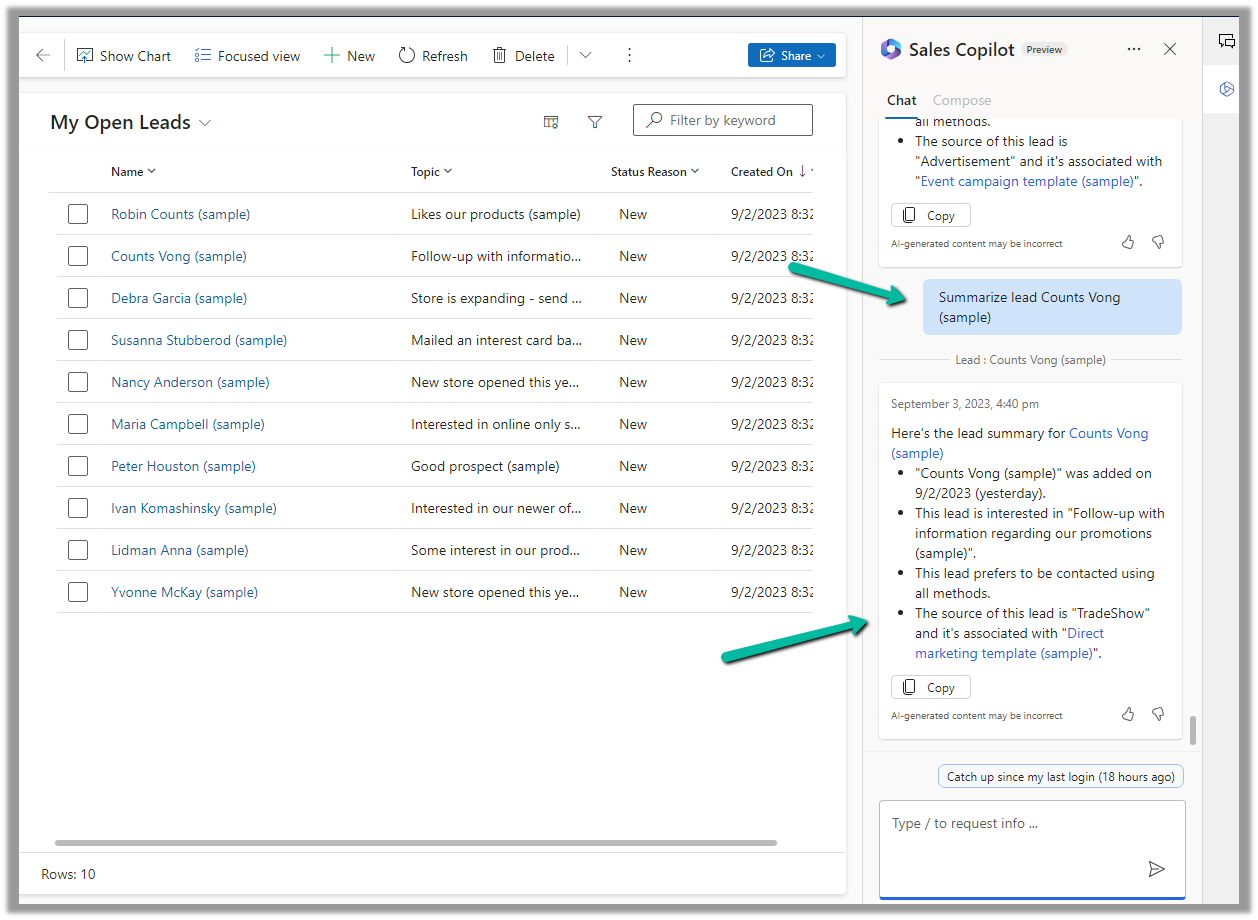
Here we can see the AI-generated summary making use of Created On, Topic, Preferred Method of contacct, Lead source field etc of Default system view.
Get more details here.
Hope it helps..

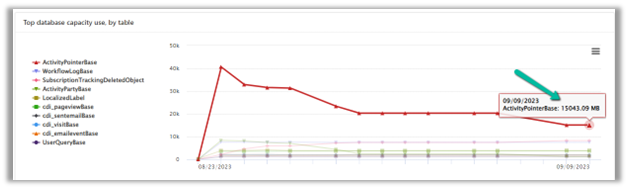
In one of our environments, the ActivityPointBase table was occupying nearly 20 GB. It was earlier 40 GB, and we then deleted email records to bring it down to 20 GB.
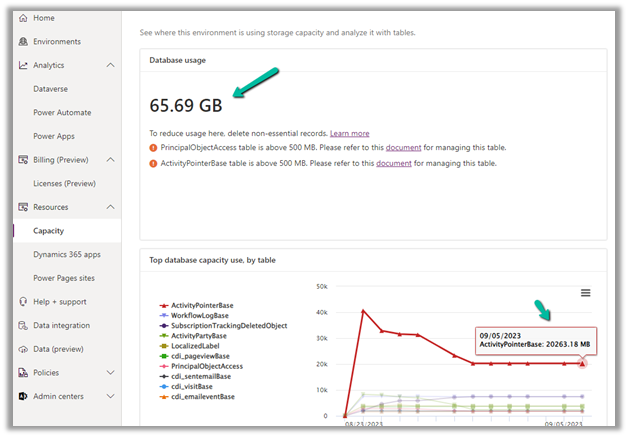
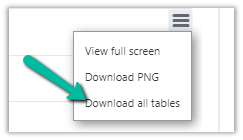
On downloading the table details, we did not get a clear idea of what activity-type table was occupying that much space.
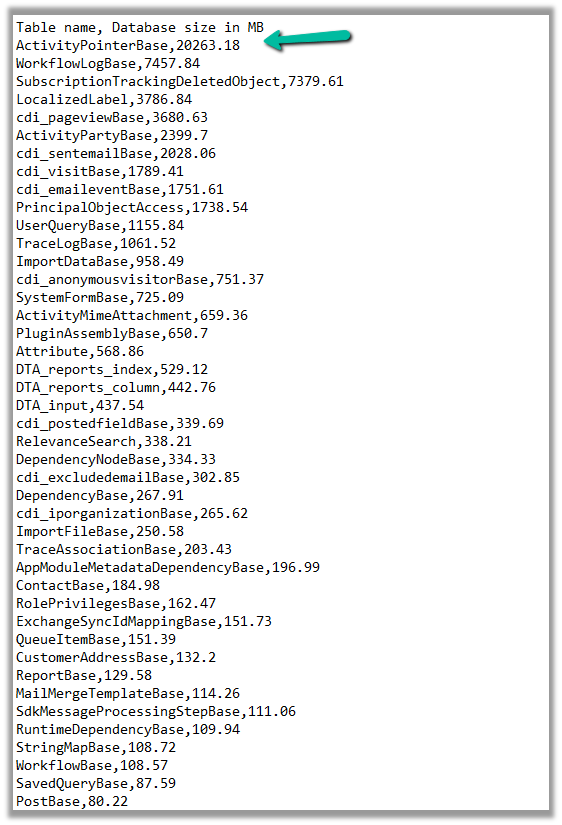
So we raised the Microsoft Support ticket, and they shared with us the breakdown of records occupied by different activity type tables.
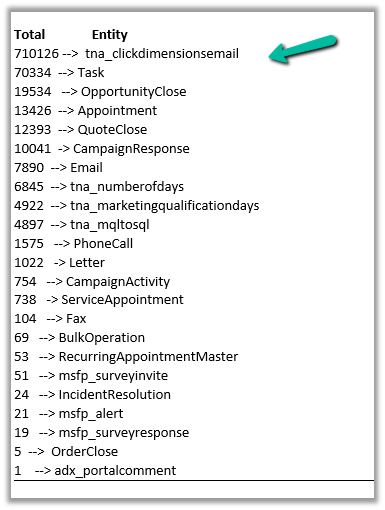
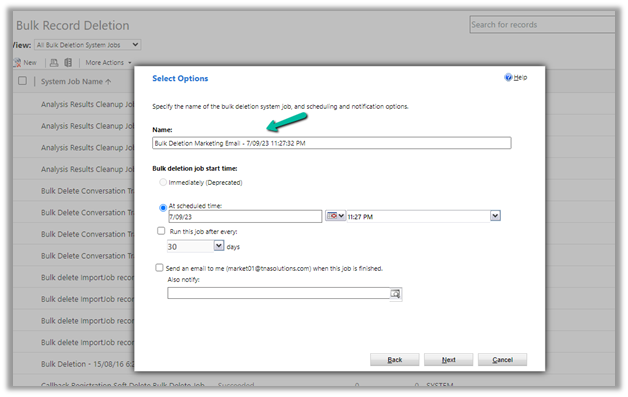
Then we configured our Bulk Deletion Job to delete the corresponding activity type records.

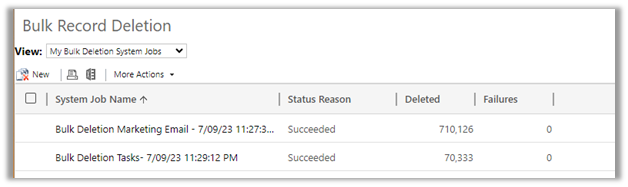
This helped us to bring down the ActivityPointerBase from 20 GB to 15 GB.
https://learn.microsoft.com/en-us/power-platform/admin/capacity-storage
Hope it helps..

Thanks to David Rivard for the wonderful articles and XrmToolBox Plugin Custom API Manager on Custom API
Custom API Test (XrmToolBox plugin) by Jonas Rapp –
https://www.xrmtoolbox.com/plugins/Rappen.XrmToolBox.CustomAPITester/
Also check the other interesting articles on Custom API –
https://xrmdynamicscrm.wordpress.com/tag/dynamics-crm-custom-api/
https://www.pragmatic-development.io/blog/implement-business-logic-with-dataverse-custom-api/

Sales Copilot can generate and suggest email content while composing or replying to an email in Dynamics 365 in the context of a Lead or Opportunity record.
Allow data movement across regions in the Power Platform Admin Center using Enable copilots and generative AI features outside United States and Switzerland – Power Platform | Microsoft Learn
To enable Sales Copilot, navigate to
Sales Hub >> App Settings >> Sales Copilot (preview) >> Set up Sales Copilot

Or if we have already enabled it, we can manage the features provided along with the different apps we want to apply the Sales Copilot using the Manage apps option.
Here we can specify to which apps we want to enable the Compose and Chat feature
The Compose refers to the AI-driven email insights here.

Let us create a new Email from the timeline of the lead record.
We can see the Sales Copilot Compose in the inactive state right now. It becomes active when opening an email record or creating a new email record with either lead or opportunity in the Regarding field.

On the new email record, we can see the Compose tab enabled, and the option Describe the email you want.

We get the option to specify the statement, for which the content should be generated.

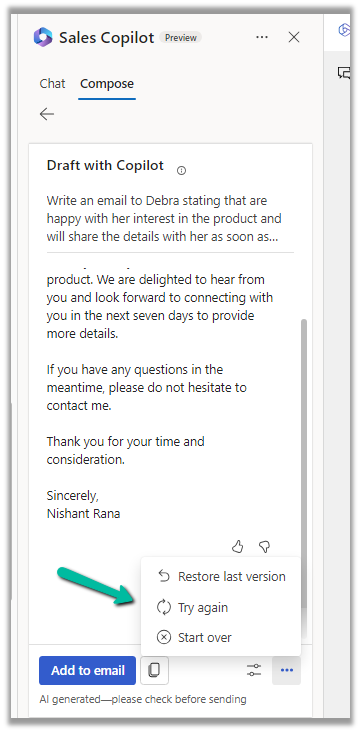
Below we can see the suggested content

We also get the option to Add content to the Email, Copy it

Adust tone and add more details

Also, Restore the last version, Try again, Start Over
Similarly, in the case of replying to an email we get the below options to start with along with an Email Conversation Summary.
Selecting the Address a Concern option generates the following content.

Get all the details here
Hope it helps..

In the previous posts, we covered the Key Features and Capabilities of Kupp Code Analytics and the Installation and Setup of the Visual Studio Extension.
In this blog post, we’ll cover one of its key features – IntelliSense.
As we saw in the last post the Kupp Analytics tool will download and cache the Metadata of the environment it is configured to, which it uses for IntelliSense.
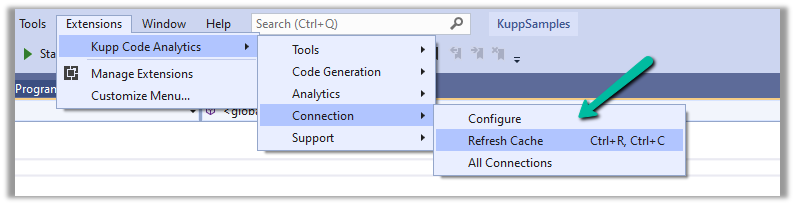
To refresh the Metadata cache, or configure and manage the connection, navigate to Extensions >> Kupp Code Analytics >> Connection
Let us look at different places where we get the IntelliSense.
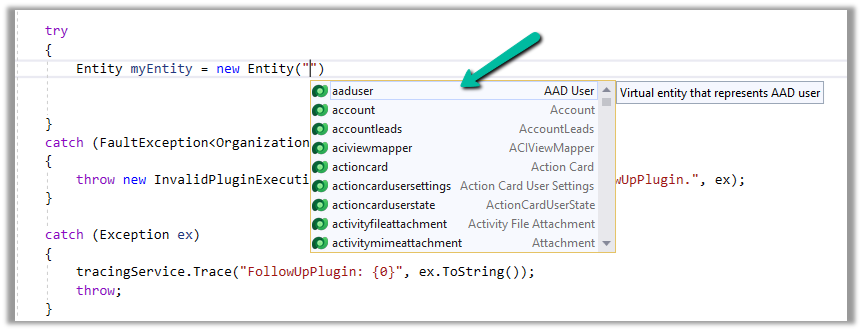
Starting with the entity or table, we can see it suggesting all the tables in that Environment.
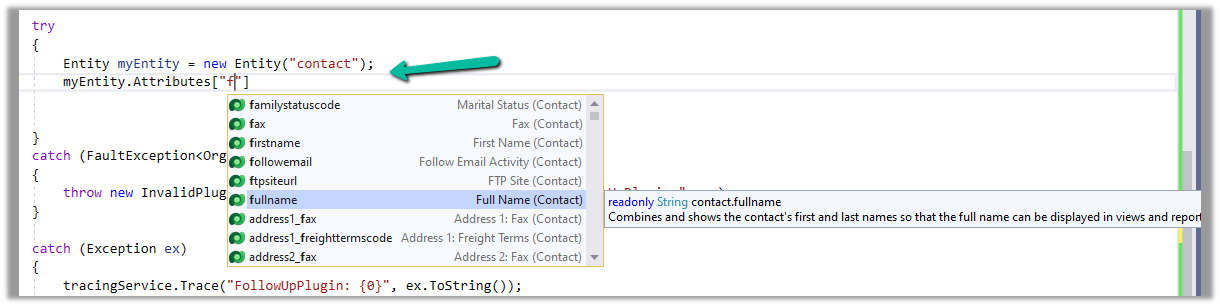
If we have specified the entity name, when it comes to attributes or columns, we can see it suggesting all the attributes specific to that table.
Getting attributes with specific type lists only attributes having the same type.
For EntityReference – we can see it suggesting all the lookup fields.

Same for Money –

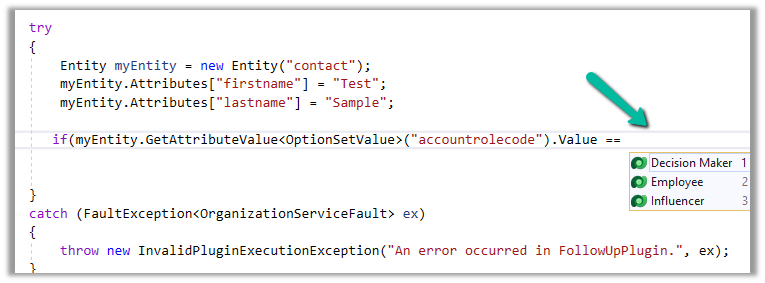
And for OptionSetValue –

It also suggests the attribute’s value in the case of Option Sets
IntelliSense also applies to Relationships, we can see it suggesting only contact-related relationships.

Apart from our Plugin and Console Applications (C#), we have the Intellisense feature available for our client-side code as well (JS/TS).
To configure we can navigate to Options >> Kupp Code Analytics >> General
Currently, the IntelliSense support is limited to retrieve operation only.
It suggests,
the name of the entity –

different query options –

attributes specific to the entity –

Filter
operators –

Query
functions –
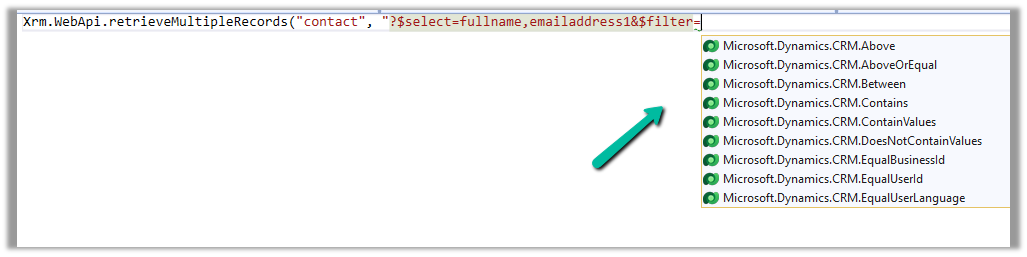
Thus using the IntelliSense feature that provides real-time suggestions, the development team can code efficiently, reduce typing errors, develop faster, and maintain code consistency.
Get all the details here –
https://docs.kuppsoft.com/Kupp-Code-Analytics/CA-Reference/CA-IntelliSense-(.NET)
https://docs.kuppsoft.com/Kupp-Code-Analytics/CA-Reference/CA-OData-IntelliSense
Hope it helps..