How to – Use AzCopy to sync the local data with Azure Storage


Using the sync command of azcopy, we can keep the local data synchronized with Azure Blob.

https://docs.microsoft.com/en-us/azure/storage/common/storage-ref-azcopy-sync

Suppose below is our storage account named – samplestorageaccountcrm

having the container named – mycrmfilescontainer inside it as shown below.

Below is how the URL for the container will look like

https://samplestorageaccountcrm.blob.core.windows.net/mycrmfilescontainer

i.e. format –

https://[storagename].blob.core.windows.net/[containername]

Let us generate the SAS token for the Storage account with the appropriate permissions..

Navigate to Shared access signature navigation link, specify the permissions and click on Generate SAS and connection string

Copy the generated SAS token and append it to the URL.

https://samplestorageaccountcrm.blob.core.windows.net/mycrmfilescontainer?sv=2020-02-10&ss=bfqt&srt=sco&sp=rwdlacupx&se=2021-03-09T02:50:19Z&st=2021-03-08T18:50:19Z&spr=https&sig=OKydecj8kMBzi%2Ff4dwutlHbIvYimQv9FGPQmKwott5w%3D

Now we are ready to run the AzCopy command to sync the contents of the below folder with the container.

On executing the command within PowerShell, it will scan the files at the source first, followed by the files in the destination, and will copy the files from the source that are not present in the destination.

Sample Run:-

We can see both the files uploaded in the container.

Now if we try to run the same command as the batch .bat file.

https://www.windowscentral.com/how-create-and-run-batch-file-windows-10

We might encounter the below error – “Server failed to authorize the request. Make sure the value of the Authorization header is formed correctly including the signature

This is because of the special characters within the SAS token – the signature part, that needs to be escaped.

https://bornsql.ca/blog/using-azcopy-with-batch-files-and-task-scheduler/

https://www.robvanderwoude.com/escapechars.php

Here the special character within the sig is replaced with appropriate escape sequences.

E.g. “%” with “%%”

Now updating the .bat file with the updated command allows us to run it successfully.

@ECHO OFF

“D:\azcopy_windows_amd64_10.9.0\azcopy.exe” sync “C:\Intel” “https://samplestorageaccountcrm.blob.core.windows.net/mycrmfilescontainer?sv=2020-02-10&ss=bfqt&srt=sco&sp=rwdlacupx&se=2021-03-09T02:50:19Z&st=2021-03-08T18:50:19Z&spr=https&sig=OKydecj8kMBzi%%2Ff4dwutlHbIvYimQv9FGPQmKwott5w%%3D”

PAUSE

Next, we can run the batch file within the task scheduler.

https://stackoverflow.com/questions/4437701/run-a-batch-file-with-windows-task-scheduler

Hope it helps..

Advertisements
Advertisement

Disable Security Defaults while login into Power Platform / Dynamics 365


Security Defaults provides preconfigured security settings such as MFA – Multi-factor authentication for all users, blocking legacy authentication protocols, etc.

Any tenant created on or after 22nd October 2019, will have this setting enabled for default.


An organization with complex security requirements could disable the security defaults and consider using Conditional Access instead.

Use Azure AD Conditional Access to block user access by device platform (Dynamics 365)

Use Azure AD Conditional Access to block access by country (Dynamics 365)

To disable Security default, login to Azure Portal

https://portal.azure.com

Navigate to Azure Active Directory > Properties

https://portal.azure.com/#blade/Microsoft_AAD_IAM/ActiveDirectoryMenuBlade/Properties


Toggle it to No and Save.


Hope it helps..

Advertisements

How to – Upload file to Azure Blob Storage using BlobClient class – C#


Let us see a simple example to upload the file to Azure Blob Storage through a desktop application (C#).

Below is our Storage account and the container to which we will upload the files from the local drive.

Get the Connection String for the storage account from the Access Key area

Next – Create a console application or windows form application project and add the following NuGet Package

Azure.Storage.Blobs

Sample code –

The uploaded file – 

blob

Also check out – https://nishantrana.me/2020/11/25/use-azcopy-to-transfer-files-from-local-drive-to-azure-blog-storage/

Hope it helps..

 var filePath = @"D:\Sample.xlsx";

            var connectionString = "DefaultEndpointsProtocol=https;" +
                "AccountName=samplestorageaccountcrm;" +
                "AccountKey=aXX+FXLGqkT9yGOFQEfqPEKoW8oJZEX+kQQTW+kwU2AAcLNhVzpElaKqkzF18OLNd1pCy2NEniTMLTwwDoiv4Q==;" +
                "EndpointSuffix=core.windows.net";

            // intialize BobClient 
            Azure.Storage.Blobs.BlobClient blobClient = new Azure.Storage.Blobs.BlobClient(
                connectionString: connectionString, 
                blobContainerName: "mycrmfilescontainer", 
                blobName: "sampleBlobFileTest");
             
            // upload the file
            blobClient.Upload(filePath);
Advertisements

How to – Manage Dynamics 365 Web API with Azure API Management


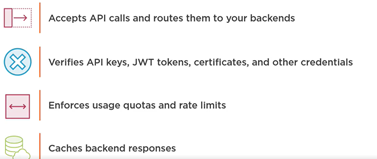
Azure API Management is an Azure service to create consistent API gateways for secure, scalable access for back-end applications and services.

Azure API Management consists of 3 main components

  • API Gateway

  • Azure Portal for administration

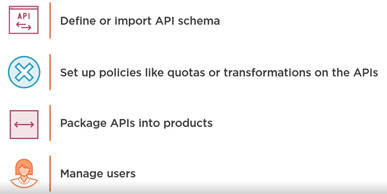
  • Developer Portal for API documentation

Each API inside Azure API Management contains a reference to the back-end service that implements the API and its operations.

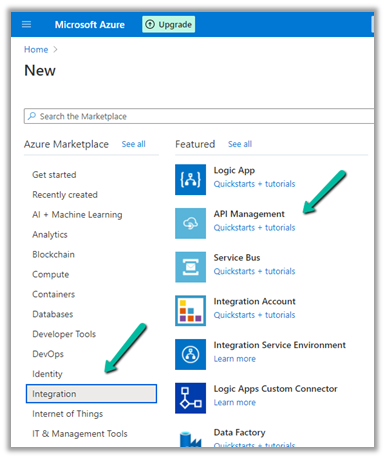
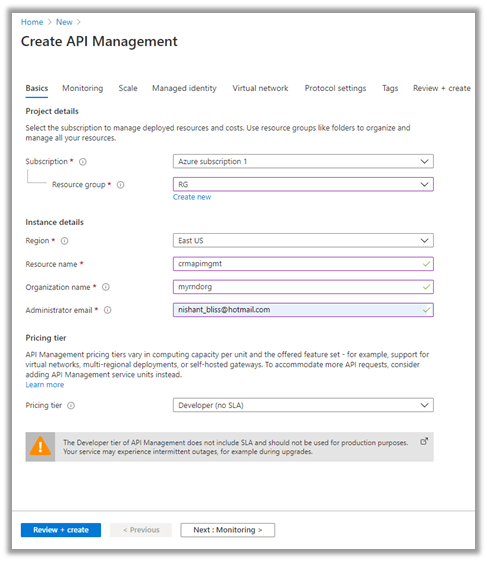
Let us start by creating the Azure API Management resource –

Login to Azure Portal

https://portal.azure.com/

Search for API Management

Provide the appropriate details. (Here we have selected the – Developer tier)

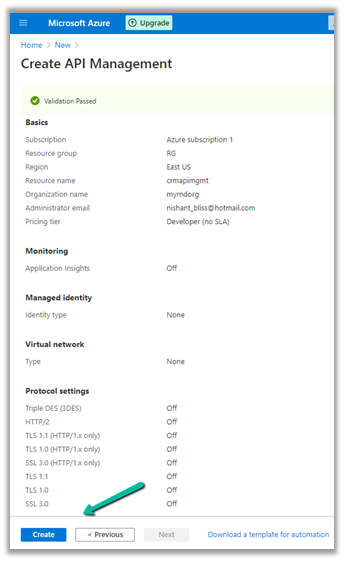
After validation is passed, review and click on Create.

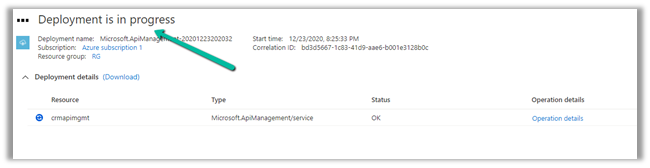
It will take around 30 minutes for the deployment to be finished

After the deployment is successful, we can navigate to it and can find the Gateway URL and Developer portal URL as shown below.

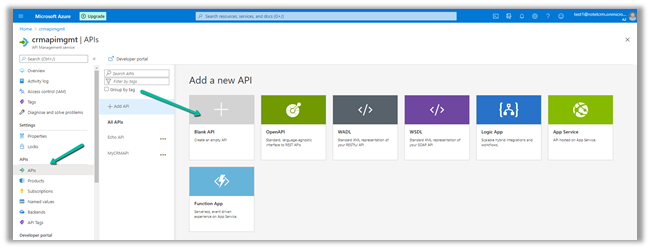
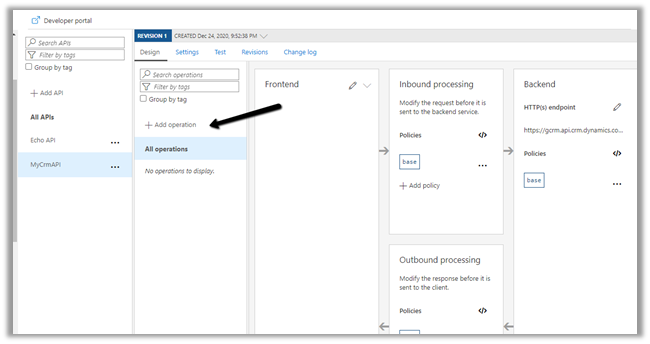
Here we will start with a Blank API.

Specify the display name, name and for Web service URL the URL of Dynamics 365 Web API

Click on +Add operation to add a new operation to the API.

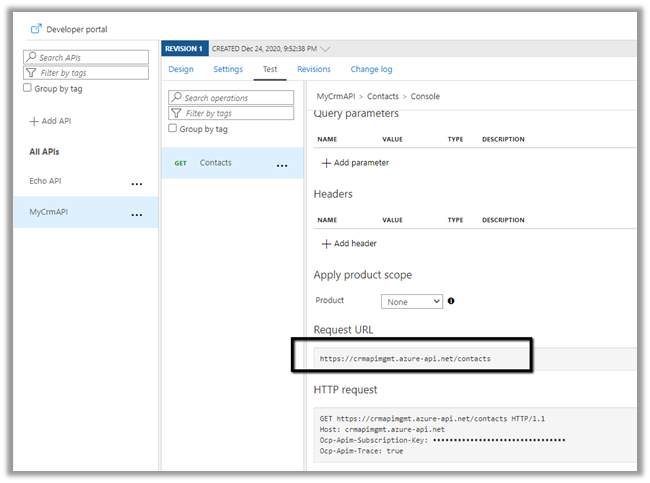
Specify the URL as shown below to fetch all the contacts from Dynamics 365.

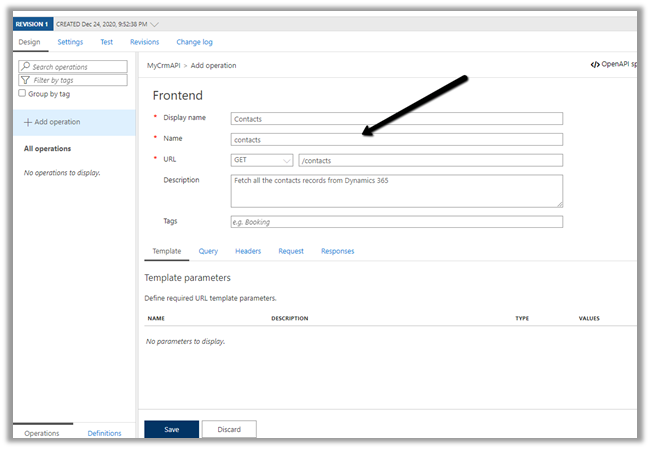
The URL of the operation

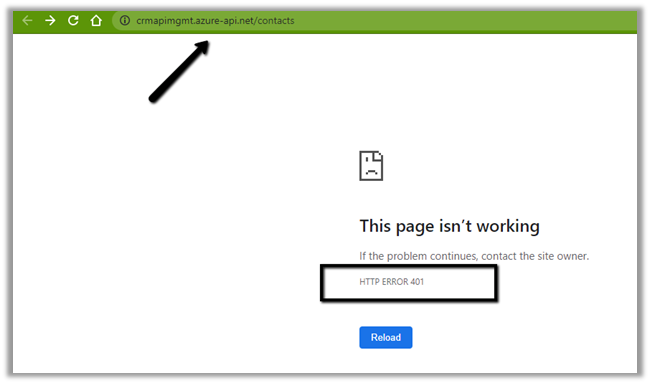
Right now we will get the 401 error as expected as we have not passed the token expected by the Web API.

Now for the token part for calling the Dynamics 365 API, register the Application in Azure AD, create a new Application User, and assign appropriate security roles to it.

https://docs.microsoft.com/en-us/powerapps/developer/data-platform/authenticate-oauth#connect-as-an-app

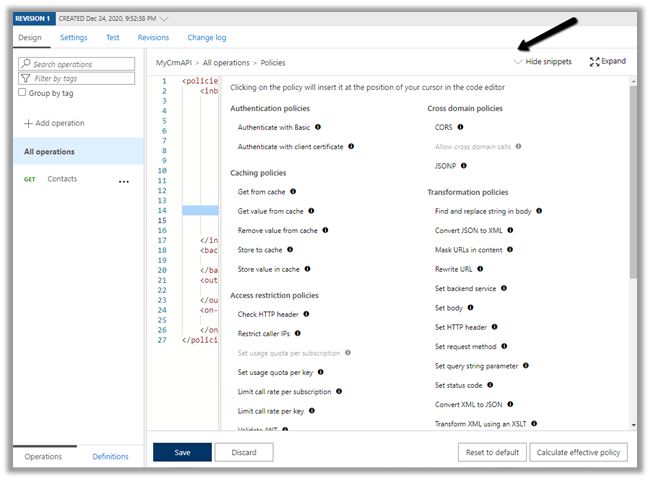
Here we would be defining send-request policy, to generate the Token and pass it in the Authorization header to the Dynamis 365 Web API request.

Select the GET operation, navigate to the Design tab and open the policy code editor for inbound processing

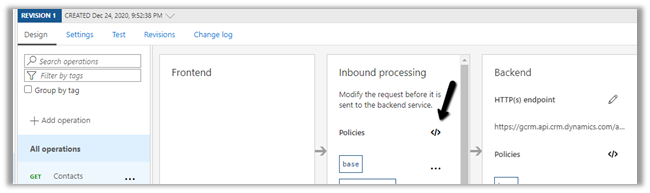
Add the send-request and set-header policy to generate and set the bearerToken

Specify the endpoint URL of OAuth token, client id, client secret of the application registered.

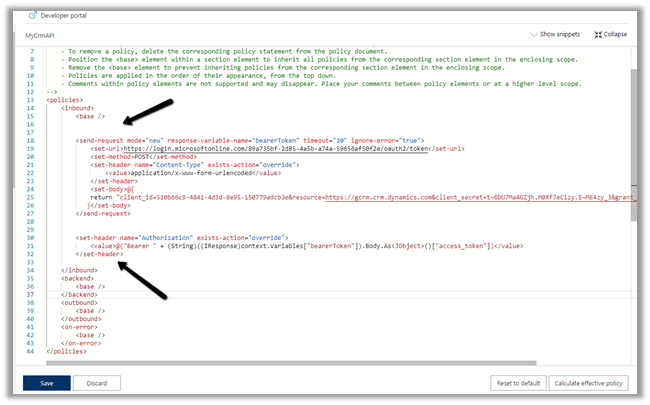
"copy code from the end of the post"

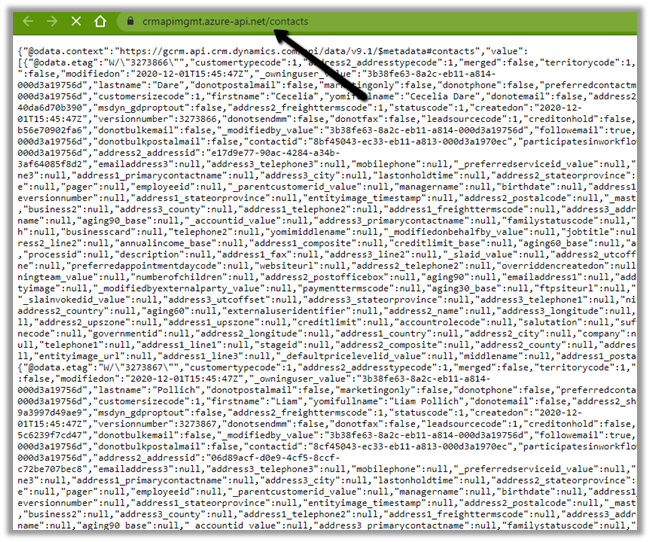
Save the change and let us test the API.

We can see the results as expected.

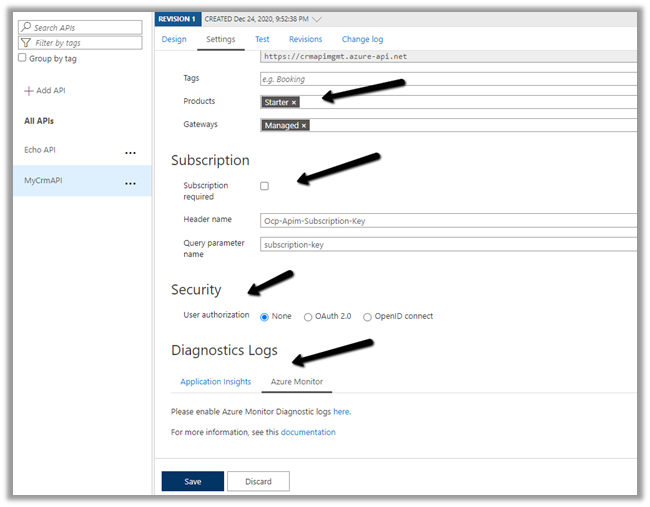
The other things that can be done are to associate the API with Products, specify Subscription, Security, enable Application Insights, Azure Monitor etc.
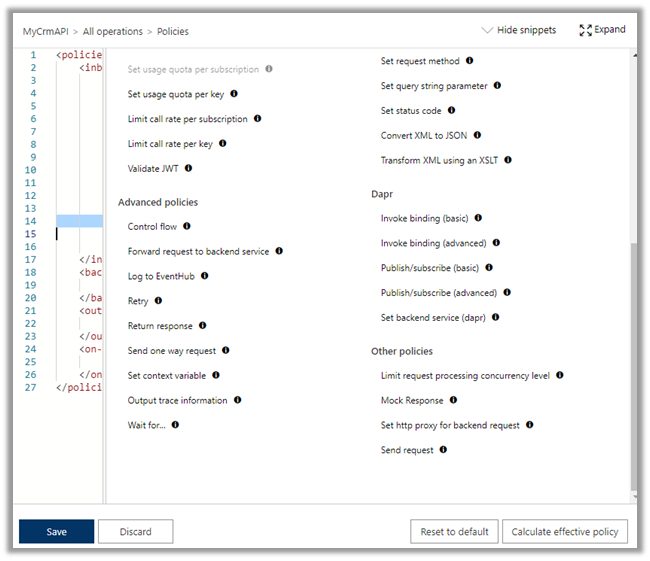
Specify policies –

https://docs.microsoft.com/en-us/azure/api-management/api-management-policies

References

https://transform365.blog/2020/03/29/azure-api-management-and-dynamics-365-web-api/

https://app.pluralsight.com/library/courses/microsoft-azure-developer-implement-api-management/table-of-contents

Hope it helps..

<policies>
  <inbound>
    <base />
    <send-request mode="new" response-variable-name="bearerToken" timeout="20" ignore-error="true">
      <set-url>https://login.microsoftonline.com/89a735bf-2d85-4a5b-a74a-59656af50f2e/oauth2/token</set-url>
      <set-method>POST</set-method>
      <set-header name="Content-Type" exists-action="override">
        <value>application/x-www-form-urlencoded</value>
      </set-header>
      <set-body>@{ return "client_id=510b66c9-4841-4d3d-8e95-150779adcb3e&resource=https://gcrm.crm.dynamics.com&client_secret=t~6DU7Ma4GZjh.M0Xf7eCizy.E~ME4zy_3&grant_type=client_credentials"; }</set-body>
    </send-request>
    <set-header name="Authorization" exists-action="override">
      <value>
        @("Bearer " + (String)((IResponse)context.Variables["bearerToken"]).Body.As<JObject>()["access_token"])</value>
    </set-header>
  </inbound>
  <backend>
    <base />
  </backend>
  <outbound>
    <base />
  </outbound>
  <on-error>
    <base />
  </on-error>
</policies>
Advertisements

How to – Read Secret from Azure Key Vault using Key Vault Rest API through Postman


In the previous posts, we saw how to register an Azure AD app and read the secret from Azure Key Vault using SecretClient and UsernamePasswordCredential class

In this post, we’d fetch the secret saved in Key Vault through Postman.

  • Register an Azure AD App
  • Copy its client id and client secret
  • Provide the Get Secret permissions to the application for the Key Vault.

Within Postman we’d first fetch the token

Get the URL from endpoints

Format – https://login.microsoftonline.com/{tenantid}/oauth2/v2.0/token

Scope value – https://vault.azure.net/.default

Send the request which responds with the token.

Copy the token

Create the new Get request and pass the Secret identifier with the API version.

https://mykvcrm.vault.azure.net/secrets/MySecret/f046535ef5644ca5a4b43f2a718776b9?api-version=7.1

For authorization select type as Bearer Token and paste the token generated earlier.

Send the request to get the secret’s value as shown below – “itissecret”

Get more details here –

https://docs.microsoft.com/en-us/rest/api/keyvault/getsecrets/getsecrets

Hope it helps..

Advertisements

Use query acceleration to retrieve data from Azure Data Lake Storage


Few key points about query acceleration –

Query acceleration supports ANSI SQL like language, to retrieve only the required subset of the data from the storage account, reducing network latency and compute cost.

Query acceleration requests can process only one file, thus joins and group by aggregates aren’t supported.

Query acceleration supports both Data Lake Storage (with hierarchical namespace enabled) and blobs in the storage account.

Query acceleration supports CSV and JSON formatted data as input.

Let us take a simple example to see it in action.

Within mydatalakegen (StorageV2 (general purpose v2)), we have All Contacts.csv with the mycrmcontainer.

Open the Windows PowerShell command window

Sign in to Azure subscription

  • Connect-AzAccount

Register the query acceleration feature

  • Register-AzProviderFeature -ProviderNamespace Microsoft.Storage -FeatureName BlobQuery

Register the resource provider

  • Register-AzResourceProvider -ProviderNamespace ‘Microsoft.Storage’

Create a console application project in Visual Studio and add the following NuGet Packages

Sample Code –

&lt;/pre&gt;

using System;
using System.Globalization;
using System.IO;
using Azure.Storage.Blobs;
using Azure.Storage.Blobs.Models;
using Azure.Storage.Blobs.Specialized;
using CsvHelper;
using CsvHelper.Configuration;

namespace MyQuery
{
class Program
{
static void Main(string[] args)
{

// Initialize the BlockBlobClient
BlockBlobClient myBlobClient = new BlockBlobClient(connectionString: "DefaultEndpointsProtocol=https;AccountName=mydatalakegen;AccountKey=orc8e1Dpclu5P3Ox9PIlsLG2/x8KZLcmgyhOEgz6yFTmzFJty+EpHQ==;EndpointSuffix=core.windows.net",
containerName: "mycrmcontainer", blobName: "All Contacts.csv");

// Define the query
// First Name - space in the column header
// _4 - referring the 4th column in the csv file
// LIMIT - limit to first 10 records
string query = @"SELECT ""First Name"", _4, email FROM BlobStorage LIMIT 10";

var blobQueryOptions = new BlobQueryOptions();
blobQueryOptions.InputTextConfiguration = new BlobQueryCsvTextOptions() { HasHeaders = true };

var result = myBlobClient.Query(query, blobQueryOptions);
var reader = new StreamReader(result.Value.Content);

var parser = new CsvReader(reader, new CsvConfiguration(CultureInfo.CurrentCulture) { HasHeaderRecord = true });

while(parser.Read())
{
Console.Out.WriteLine(String.Join(" ", parser.Context.Record));
}

Console.ReadLine();
}
}
}
&lt;pre&gt;

Output –

Get all the details here –

https://docs.microsoft.com/en-us/azure/storage/blobs/query-acceleration-sql-reference

https://docs.microsoft.com/en-us/azure/storage/blobs/data-lake-storage-query-acceleration

https://docs.microsoft.com/en-us/azure/storage/blobs/data-lake-storage-query-acceleration-how-to?tabs=azure-powershell%2Cpowershell


Posts on Azure Data Lake

Hope it helps..

Advertisements
%d bloggers like this: