How to – Setup a free trial of Dynamics 365 Marketing


If we already have a Microsoft 365 / Dynamics 365 tenant, we can directly request the trial for Dynamics 365 Marketing from Microsoft 365 Admin Center https://admin.microsoft.com through Purchase services > Dynamics 365 Marketing option.

And within Power Platform Admin Center https://admin.powerplatform.microsoft.com/, we can navigate to Dynamics 365 Apps >> Dynamics 365 Marketing Application solution and select Manage.

Here Dynamics 365 Marketing Application is the full application with both the solution and the services and Dynamics 365 Marketing Solution Only provides the entities without services.

Select the appropriate Dynamics 365 Organization.

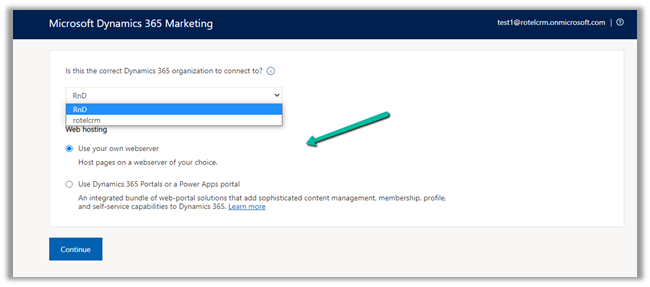
Provide the address and click on Setup

After a few minutes, the setup would complete.

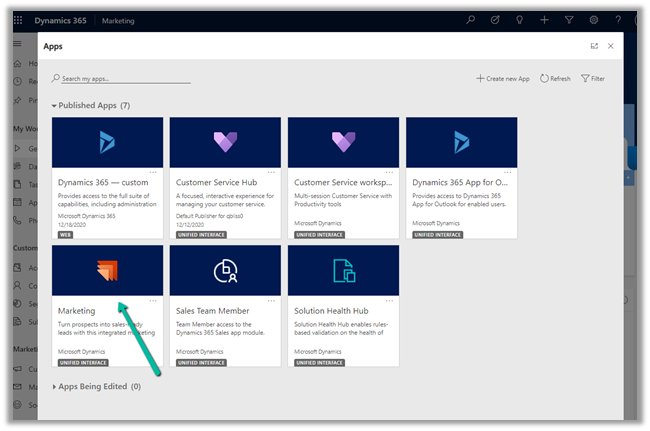
Take me to the app will open the Dynamics 365 Marketing App.

We can also set up Microsoft 365 Tenant or Dynamics 365 trial https://trials.dynamics.com/

(in case if we do not have one).

Microsoft recommends to sign up for Microsoft 365 E3 Trial

After the tenant is set up, go to Get started with Dynamics 365 Marketing page to set up the free trial.

https://dynamics.microsoft.com/en-us/get-started/free-trial/?appname=marketing

Here we provided the existing tenant’s account used.


Once the setup is done, the same sign up now options takes you to the instance picker page

Clicking on Open asks for an address.

Clicking on Begin opens the Dynamics 365 Marketing App.

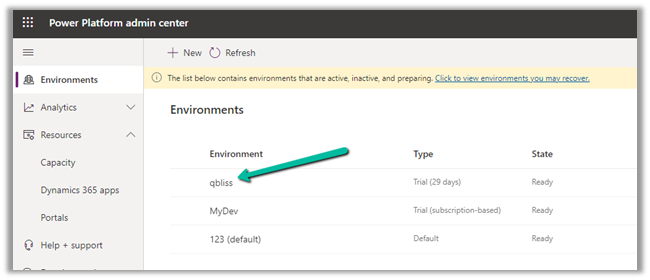
We can log in to the Power Platform admin center and can see the environment created for the marketing app.

https://admin.powerplatform.microsoft.com/environments

Get all the details here –

https://docs.microsoft.com/en-us/dynamics365/marketing/trial-signup

https://docs.microsoft.com/en-gb/dynamics365/marketing/purchase-setup#add-a-marketing-app-to-your-microsoft-365-tenant

Hope it helps..

Advertisements

Wrestling With Email Address Limitations


leontribe's avatarThat CRM Blog

Dynamics CRM has been around for a while (about 13 years) and, as is the way with any software, there are a few design features from the old days which linger today. One of those is how email addresses are treated for Accounts, Contacts, and Leads.

How Emails Work in CRM

Basically, for an Account, Contact, or Lead you have three email addresses: emailaddress1, emailaddress2, and emailaddress3. All three are used for linking Activities to records but you can only email out using emailaddress1.

When the smartest developers in the room built Microsoft CRM 1.0, they decided that the product would email a record and not an email address, and the email address used by that record would always be emailaddress1. If you type in an arbitrary email address in the CRM form, it will error, as it expects a record.

image

Naturally, some customers want to go beyond these limits…

View original post 446 more words

How to – Consume Dynamics 365 Web API using MSAL.NET


Sharing a sample code to consume Dynamics 365 Web API using MSAL.NET

Create a console application and add the following NuGet Package

  • Microsoft.Identity.Client

More on Microsoft identity platform

https://docs.microsoft.com/en-us/azure/active-directory/develop/

We are using ConfidentialClientApplicationBuilder create method.

https://docs.microsoft.com/en-gb/azure/active-directory/develop/msal-net-initializing-client-applications

The sample code –

using Microsoft.Identity.Client;
using System;
using System.Net.Http;
using System.Net.Http.Headers;
using System.Threading.Tasks;

namespace CrmAppMSAL
{
class Program
{
static async Task Main(string[] args)
{

string clientId = "fc34502a-74db-4977-8c83-***********";
string secret = "5~mByJeQ8dDO2LZP_H_J2**********";
string[] scope = new string[] { "https://orgname.crm15.dynamics.com/.default" };
string webAPI = "https://[org].crm15.dynamics.com//api/data/v9.0/leads";
string authority = "https://login.microsoftonline.com/7bc93881-0733-48ab-baa1-ee3ed7717633";

var clientApp = ConfidentialClientApplicationBuilder.Create(clientId: clientId)
.WithClientSecret(clientSecret: secret)
.WithAuthority(new Uri(authority))
.Build();

try
{
AuthenticationResult authResult = await clientApp.AcquireTokenForClient(scope).ExecuteAsync();

var httpClient = new HttpClient();
httpClient.DefaultRequestHeaders.Add("OData-MaxVersion", "4.0");
httpClient.DefaultRequestHeaders.Add("OData-Version", "4.0");
httpClient.DefaultRequestHeaders.Accept.Add(new MediaTypeWithQualityHeaderValue("application/json"));
httpClient.DefaultRequestHeaders.Authorization = new AuthenticationHeaderValue("Bearer", authResult.AccessToken);

httpClient.BaseAddress = new Uri(webAPI);

var response = httpClient.GetAsync("WhoAmI").Result;

if (response.IsSuccessStatusCode)
{
var userDetails = response.Content.ReadAsStringAsync().Result;
Console.WriteLine(userDetails);
Console.WriteLine(authResult.AccessToken);
Console.WriteLine(authResult.ExpiresOn);
Console.ReadLine();
}

}
catch (Exception ex)
{
string errorMessage = ex.Message;
}
}
}
}

Result –

Reference –

https://medium.com/capgemini-microsoft-team/access-tokens-for-dynamics-365-using-microsoft-authentication-library-2b16c9f794b

Sample Code – Dynamics 365 Web API / Organization Service

Hope it helps..

Advertisements

Updating Entity Reference Power Automate vs Plugin


Vrushali Ranjalkar's avatarVrushali's Techno Blog

Recently I worked on a project where not a single line of code was allowed. It was only configuration project. I had a requirement to create number of custom tasks at run time based on the task template. Since plugin was not allowed, used Power Automate(Flow).

While I started working on power Automate, I had to check the syntax for all small things which are on my finger tips when I write the plugin. Hence thought of posting about such syntaxes. Here are few quick help when we create a power automate instead of plugin.

Updating entity reference field

in Plugin if I am updating the regarding field of the task with the case ID

ActivityEntity.regardingobjectid= new EntityReference("incident", targetIncident.Id);

If we want to do same thing in Power Automate, we need to set it in different way

We need to either enter something like below

incidents(Guid) or /incidents/Guid

Updating Owner…

View original post 134 more words

Fixed – 401 Unauthorized error while calling Dynamics 365 Web API


We were recently getting the below error while trying to call Dynamics 365 Web API through Postman.

“401 Unauthorized”

It turned out that we were using the incorrect Token.

To generate the correct token,

For OAuth 2.0 token endpoint (v1) Version 1

  • We need to specify resource with Dynamics 365 URL.


For OAuth 2.0 token endpoint (v2) Version 2

  • We need to specify scope with
    Dynamics 365 URL followed by .default instead of a resource.

The correct token results in the successful call to the Web API

References –

https://matthijs.hoekstraonline.net/2020/04/27/v1-and-v2-identity-and-access-tokens-with-azure-active-directory/

https://crmchap.co.uk/generating-oauth2-v2-0-endpoint-tokens-for-dynamics-365-the-common-data-service/

Hope it helps..

Advertisements

How to – Read Secret from Azure Key Vault using Key Vault Rest API through Postman


In the previous posts, we saw how to register an Azure AD app and read the secret from Azure Key Vault using SecretClient and UsernamePasswordCredential class

In this post, we’d fetch the secret saved in Key Vault through Postman.

  • Register an Azure AD App
  • Copy its client id and client secret
  • Provide the Get Secret permissions to the application for the Key Vault.

Within Postman we’d first fetch the token

Get the URL from endpoints

Format – https://login.microsoftonline.com/{tenantid}/oauth2/v2.0/token

Scope value – https://vault.azure.net/.default

Send the request which responds with the token.

Copy the token

Create the new Get request and pass the Secret identifier with the API version.

https://mykvcrm.vault.azure.net/secrets/MySecret/f046535ef5644ca5a4b43f2a718776b9?api-version=7.1

For authorization select type as Bearer Token and paste the token generated earlier.

Send the request to get the secret’s value as shown below – “itissecret”

Get more details here –

https://docs.microsoft.com/en-us/rest/api/keyvault/getsecrets/getsecrets

Hope it helps..

Advertisements

Nishant Rana's Weblog

Everything related to Microsoft .NET Technology

Skip to content ↓