How to – Add users to the Queue – using Manage NN relationships XrmToolBox Plugin and AddPrincipalToQueueRequest (Dynamics 365)


Recently we implemented Unified Routing for one of our projects, and as part of testing we were supposed to add multiple users to different queues (advanced queues in case of unified routing).

So we were looking for a way to do this either through any existing tool or programmatically.

Well, using the Manage NN relationships XrmToolBox plugin we can add users to the queue.  (Thanks to Prashant for suggesting this)

Just as an example, we want to add the below users

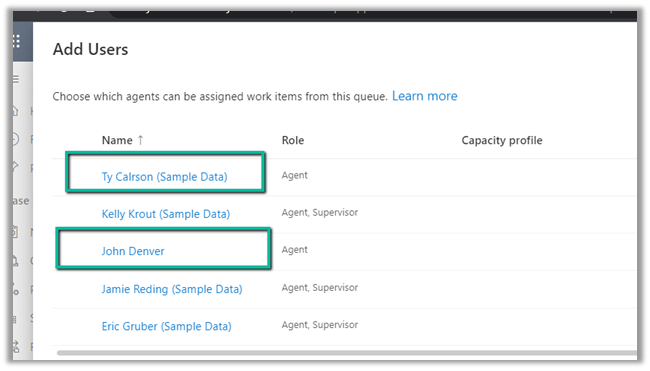
to the following Queue named Test, which currently has only one user added to it.

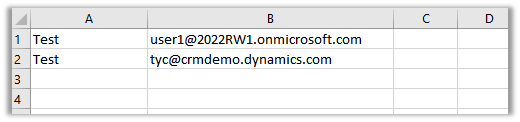
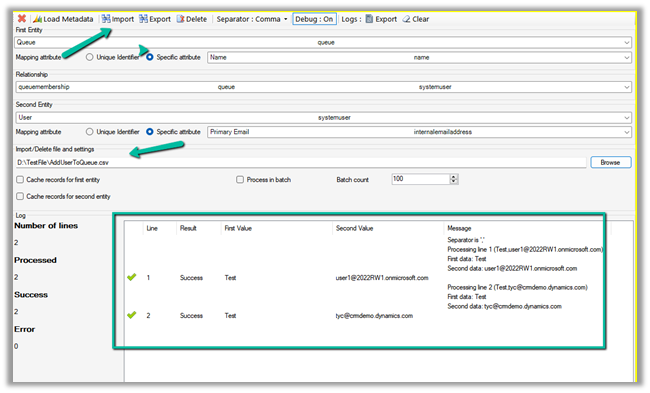
Below is the sample CSV file we have created having the name of the Queue and the email id of the users to be added.

Now let us open the Manage NN relationships tool and specify the appropriate values there.

Here we have specified the First Entity as Queue and the Second Entity as System User.

For Queue we have selected Name and for System User, we have specified Primary Email as the attribute to be considered while importing the data.

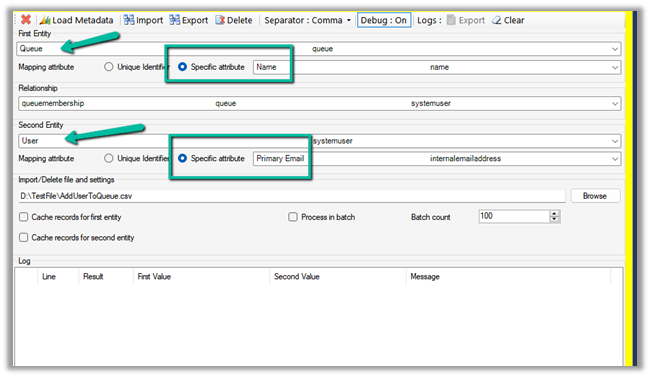
Click on Browse and load the file, followed by a click on the Import button to start the process.

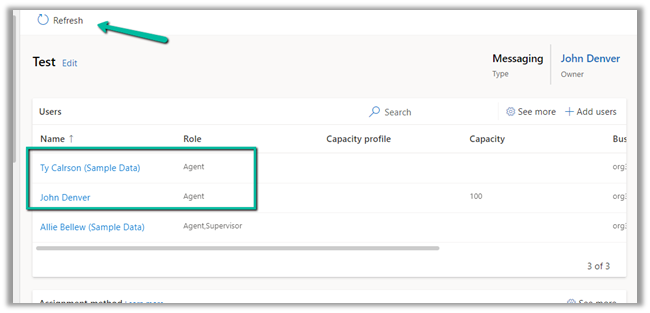
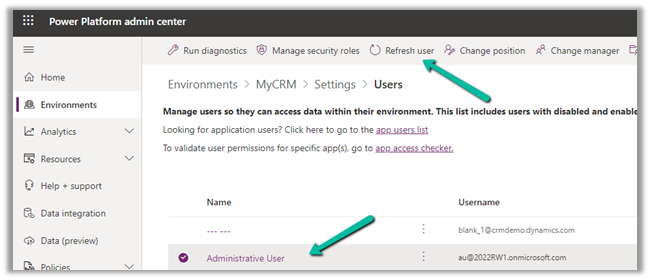
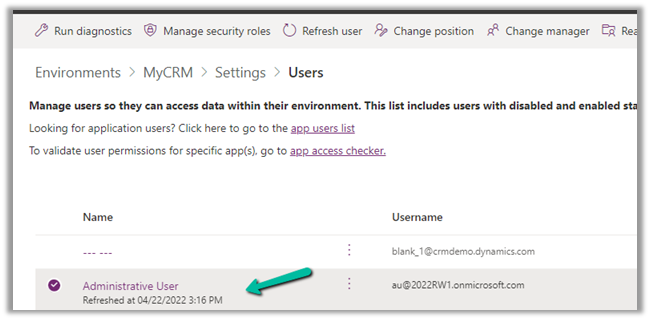
As we have received the Success result, let us refresh our Queue to see if the users were added to the Queue or not.

As expected we can see the users added to the Test Queue.

We can also add users programmatically by using the AddPrincipalToQueue Request class.

We need to populate the Principal and QueueId property as shown below.

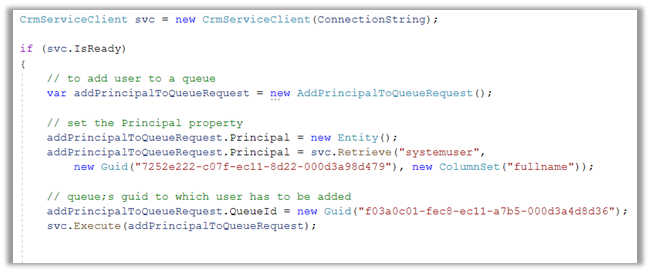
More on AddPrincipalToQueueRequest.

Hope it helps..

Advertisements

Duplicate Detection for leads (Preview) – Dynamics 365 Sales


Few key points on the new duplicate detection rules (preview) –

  • This new Duplicate Detection feature is available only for leads.
  • This can be enabled from Dynamics 365 Sales app. We need to navigate App Settings >> Data ImprovementDuplicate Detection (preview) to enable this feature.

It identifies duplicate leads based on –

  • Email address
  • Phone number
  • Similar name and company name (e.g. John Denver from Contoso and John Danver from Contoso. inc)
  • Similar name and the same email domain ( John Denver, JR@contoso.com, and John Danver, SalesExecutive@contoso.com)

It uses Dataverse Search for detecting duplicates.

  • It works along with the already existing duplicate detection rules set through Settings >> Data Management >> Duplicate detection rules


  • It takes around a couple of minutes for the setting to get enabled. Also, we get the message that data is getting prepared and it might take a few hours and up to a few days for it.


After this new detection rule is enabled, we can select the potential duplicate lead record and select the View duplicates option from the command bar.

This opens the Duplicate records page, with the duplicate records listed.

It also highlights the field based on which it identified the duplicate record. Email and the name in this case.

  • We have the option to Remove and Delete the selected duplicate record(s).

We get the same options when we open the record which has possible duplicate records as a notification on the form.

Clicking on View possible duplicates open the same duplicate records page.

Get all the details here

Hope it helps..

Advertisements

Managed Environments (preview) – Power Platform Admin Center


Managed Environments is a new feature added in the Power Platform Admin Center to simplify the administration of the platform. It is in Preview currently.

To enable it, select a particular environment and click on Enable Managed Environments.

We will need either Global Admin, Power Platform Administrator, or Dynamics 365 Administrator AD roles to enable the Managed Environments.

Through Managed Environment, we can specify who can receive the Weekly
Digest i.e., a weekly email summary of resource usage in the environment, apart from Dynamics 365 and Power Platform Admin. (it can be managed through PowerShell also)

Limit the sharing of the canvas apps to the security group and max number of users.

New Environment filters for the Managed Environment with regards to data policies.


For the Weekly Digest, we need to enable the tenant-level analytics from Power Platform Admin Center, click on the settings gear, and enable it from the Power Platform settings window.

Below are the information provided in the Weekly Digest

Total Apps, active flows and active app users in the past month in the managed environments.

Details of the apps that haven’t been launched for a long time.

Details of the most popular apps and flows of the last month.

Through Limit Sharing we can configure sharing with security groups as well as the max number of users with whom the app can be shared with. Here just for testing, we have set it as 1.

On trying to share the canvas apps with more than one user we will get the below error

“Apps in this environment cannot be shared with security groups or more than 1 user.”

The Data policies option adds the additional filter on the Data Policies page to show the details for the selected environment.

Click on the See active data policies for this environment

Below we can see the Environment filter added.

Get all the details here

Below is the mail we received for one of our trial tenant, which had hardly anything in it.

Analytics

Hope it helps..

Advertisements

How to – Use Refresh Option to force user state synchronization in Power Platform Admin Center – Dynamics 365 / CRM


At times we would assign or update the licenses and roles assigned to the users in Microsoft 365 Admin Center, and these changes would take time to reflect inside the Dynamics 365 applications.

A background system process takes care of synchronizing the user state in Azure AD to the System User table in Dataverse.

However, here we can also use the Refresh
User option in Power Platform Admin Center to force the synchronization instead of waiting.

Inside Power Platform Admin Center – Navigate to Environment >> [Env]>> Settings >> Users and select the user and click on Refresh user option.

This will immediately start the synchronization process.

Hope it helps..

Advertisements

How to – Stop Synchronization of Task / Appointment through System View using Sync Filter Manager


In the previous post, we saw how we can create a user filter (outlook) for a particular user and apply the same to other users through Sync Filter ManagerXrmToolBox plugin.

https://nishantrana.me/2022/03/29/how-to-stop-synchronization-of-task-appointment-between-dynamics-365-and-outlook/

In this post, we’d achieve the same through System View.

Here we have created below System View on Tasks entity/table.

The Created On Doesn’t Contain Data False Condition will make sure none of the records of the task are synced.

Open the Sync Filter Manager, navigate to the System Views tab and click on Load System Views

Select the new System View- Task Filter which we created earlier and click on Create – System Synchronization Filter Template from selected view(s)

Select Outlook Template for System Rule Type

We are presented with the option to specify the user(s) to who we want to apply the new template.

If we select Yes, we get the Select users dialog box to select the user(s).

Inside the Synchronization Filters Templates tab, we can click on Load Synchronization Filter Templates to list down all the outlook templates.

We can see our custom template listed there.

From there again we apply it to the user(s) or define it as the default filter.

After applying Define as default, we can see the custom filter applied to the new users. It won’t be applied or make changes to the filters of the existing users.

So for the existing users, we have to explicitly apply this filter using Apply to users option

As the last step, we need to disable or delete any other filter on the task, to make sure that we only have the new filter applied.

On disabling the filter, we can see their status updated as inactive.

Lastly, we can only delete Custom Outlook Template, if we try deleting any default out of the box template we will get the below error.

E.g. on trying to delete the My Tasks default filter, we will get the below error

“Error while deleting selected records: SavedQuery My Tasks for otc 4212 cannot be deleted”

Check other posts on Synchronization –

Hope this helps..

Advertisements

Business Process Flow UI Improvement in Dynamics 365 / CRM


With 2022 Release Wave 1, we have a small enhancement in the user interface inside the BPF path line’s color contrast.

With 2022 Release Wave 1 turned off

With 2022 Release Wave 1 – the path that needs to be followed is shown now in a slightly darker shade,

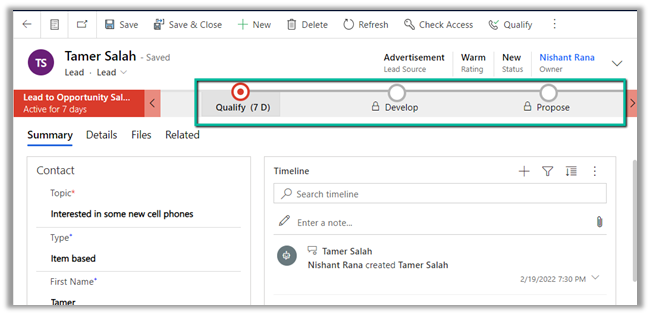
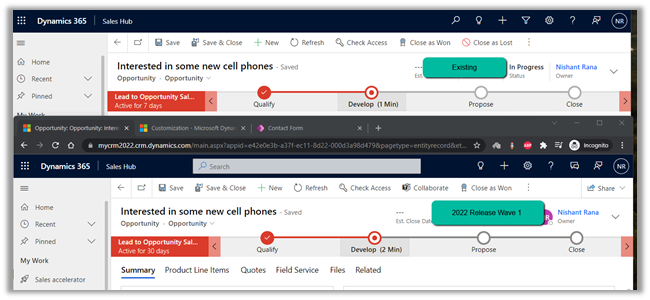
making it easy for an agent to understand the stages to be followed in the business process flow.

Hope it helps..

Advertisements