Recently we got the below exception for one of our plugins Message: System.InvalidOperationException: Message size exceeded when attempting to send response to sandbox. Message Size 123 Mb. Max Allowed 128974848 Mb.
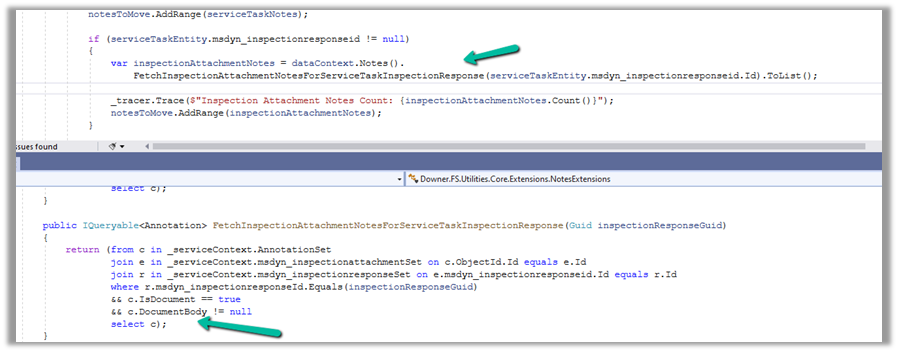
Below is the code where we were getting the error. We were retrieving the notes records associated with the inspection response/inspection attachments. (Dynamics 365 Field Service)
And if we had a total of all attachments to it more than 100 mb it was failing.
Below is the test Work Order Service Task record for which we were getting the error.
There were a couple of other attachments also to it making a total of more than 100 Mb.
Here to fix the error instead of fetching all the note details at once and then processing the notes attachments, we updated our logic to process the notes attachments one by one.
Enabling Microsoft Team chats inside Dynamics 365 allows the agents/sellers to start a new chat from a record or connect an existing chat to a record from within the application itself.
We can enable it from the Power Platform Admin Center or the corresponding Sales, Customer Service, Marketing, and Field Service applications.
Inside Power Platform Admin Center – Navigate to Environment >> Setting >> Team Integration Settings
We can either enable it for all the Dynamics 365 Apps or specify the apps.
Here we have specified the Customer Service Hub and Sales Hub.
We also have the option to specify the record types for Teams chats.
Let us open a contact record inside Sales Hub to see it in action.
We can see 2 sections on the Team chats pane, Chats connected to the record and Other chats.
As we have not connected chat currently, we see the option New connected chat to connect the record to the team chat.
The Other chats section lists the top 200 chat conversations on the Team, from where we can select any conversation to connect it to the record.
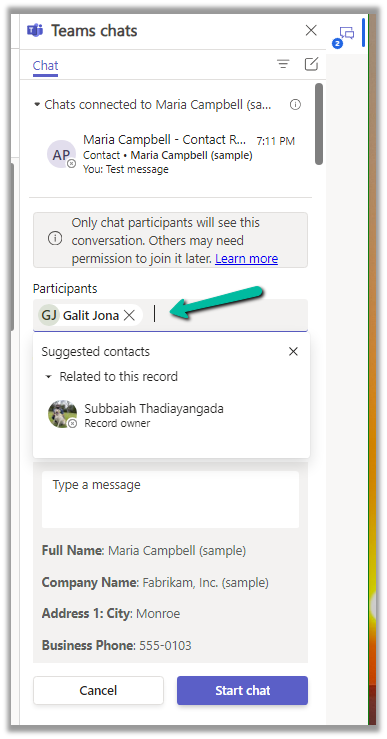
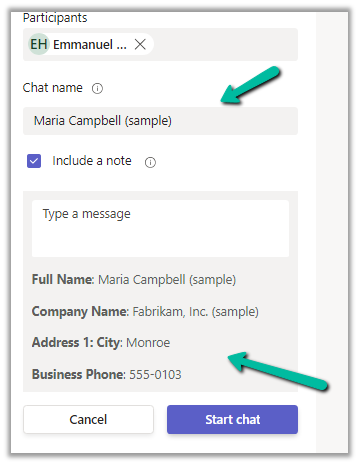
Clicking on the New connected chat allows us to search the Participants whom we want to chat with, update the chat name (suggested), and include a note as well.
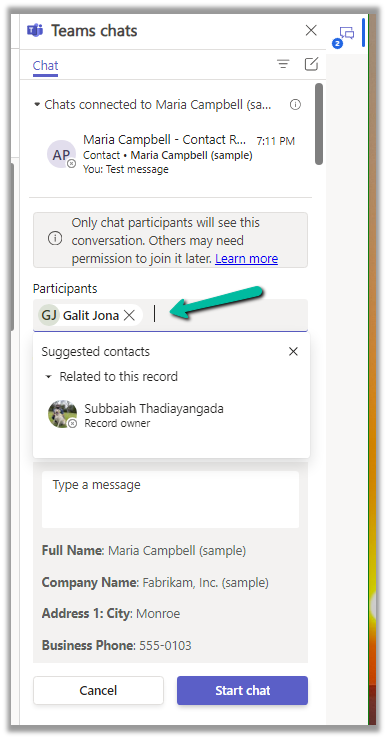
It also suggests the participant (as the record is owned by a user, it will suggest the name of the record’s owner)
We can also select a user from the Other chat section, and select the Start a connected chat option, which populates the participant.
We can also have multiple participants added.
Add the required details and click on the Start chat
We can see the chat window opening with the participant selected and details / message added.
We can also connect other chats to that record using the Connect to this record option.
We can also disconnect the chat using the Disconnect form this record option.
Similarly, we can also start a regular chat (not associated with any record) using the compose icon in the Teams Chat panel.
This opens the New chat window as shown below.
As we saw earlier, we can use the + Add record types option to add more record types to connect to Teams Chats. (including custom table)
For each record type added, we get the following settings.
Here we can specify who can join and disconnect the chat.
We can also specify if the record’s title can be used for the Chat name, should the note be included or not, and which view fields to be considered for the Message.
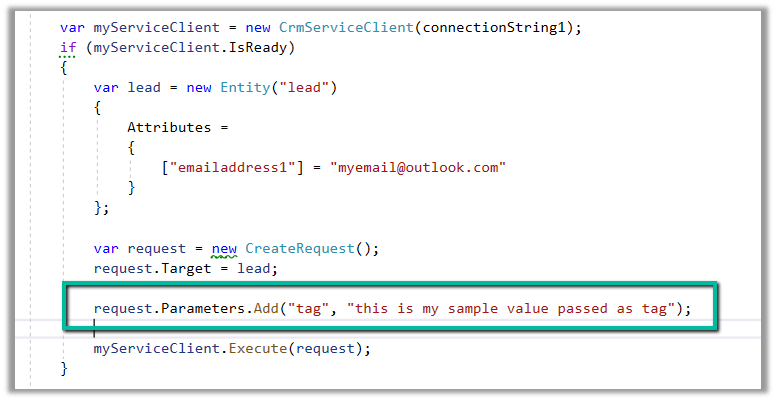
We can use the tag parameter in the request to pass any additional information to the plugin. This is added as a shared variable to the plugin execution context.
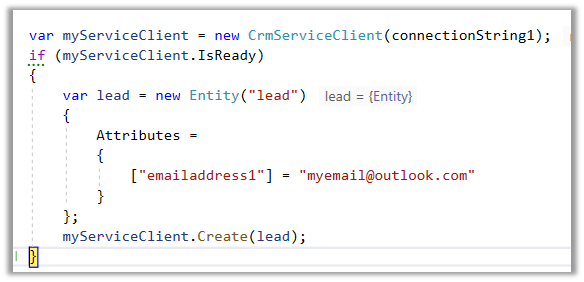
Below we are creating a lead record and passing the tag parameter in the CreateRequest
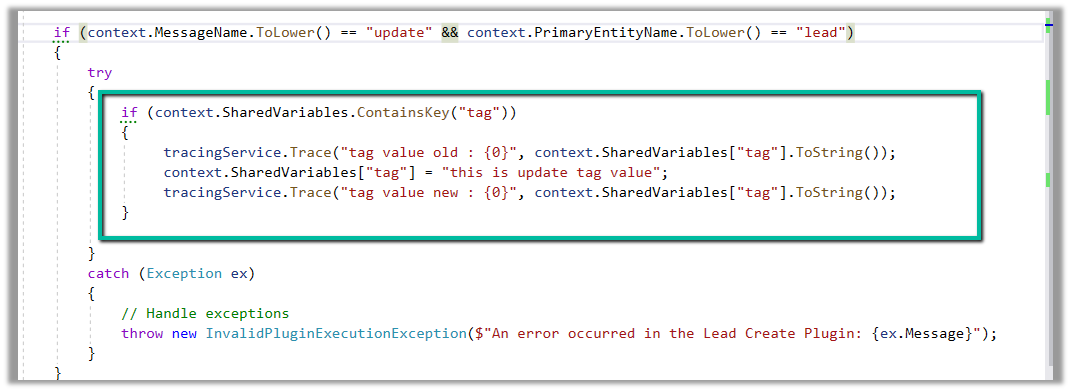
And below is our plugin, that gets the tag parameter passed from the shared variable collection.
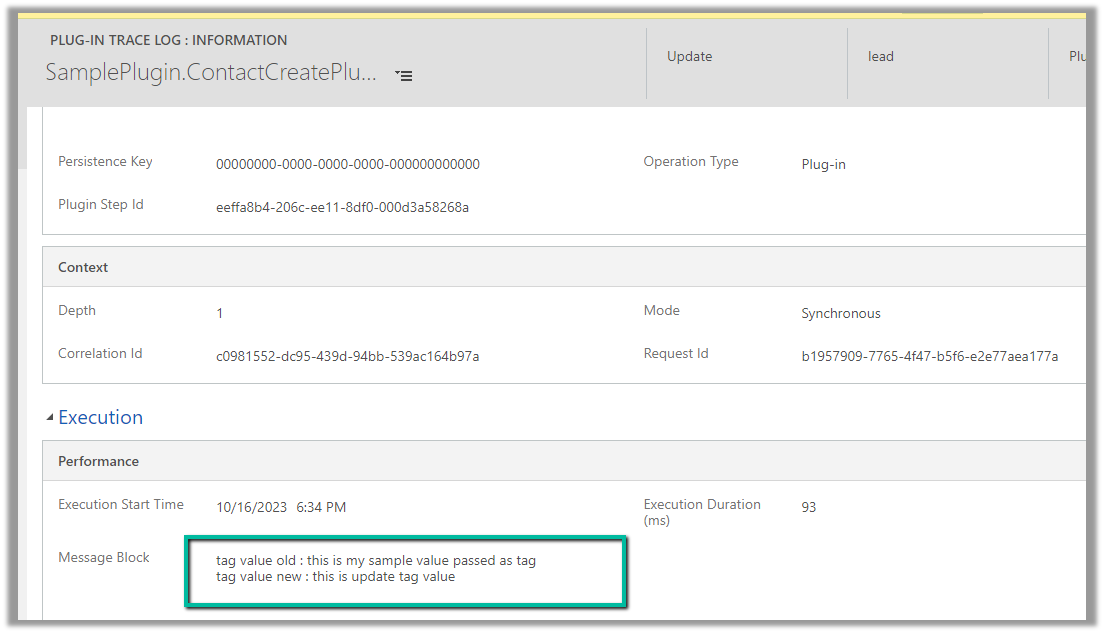
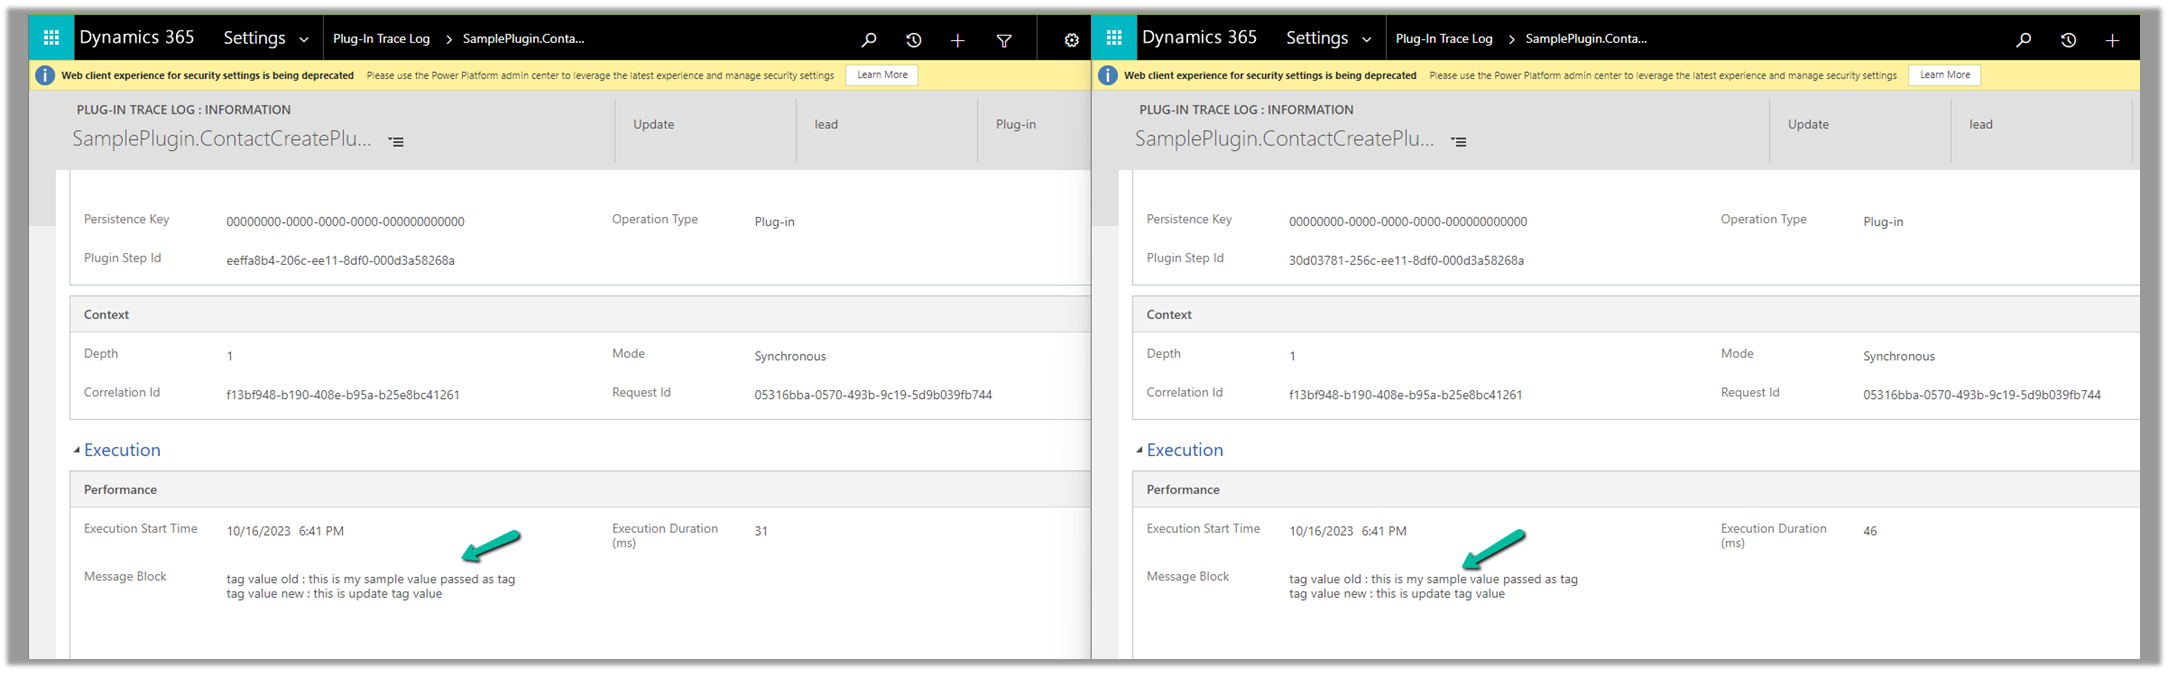
We can see the value of the tag parameter in the trace log.
Below is an example of where we are passing it in UpdateRequest
The trace log –
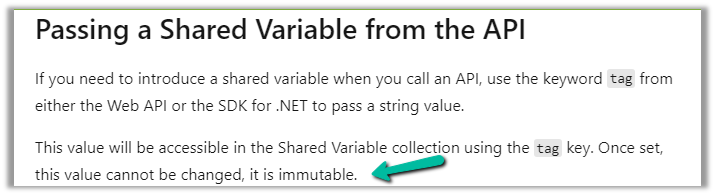
Also, the tag parameter is immutable, once set from the API, its value cannot be changed.
Below we had the same plugin registered in pre and post-operation, and we were getting the same value for the tag passed during the create request.
As per the Microsoft documentation, we can use this field to pass any additional details from the client application, that we can use to apply specific logic in the plugin.
In the previous post, we saw how we can use the SuppressDuplicateDetection parameter to throw errors in case of duplicates when creating or updating a record.
Here instead of relying on exception, we can make use of the RetrieveDuplicatesRequest message to detect the duplicates.
Let us take the “Leads with the same e-mail address” duplicate detection rule to see it in action.
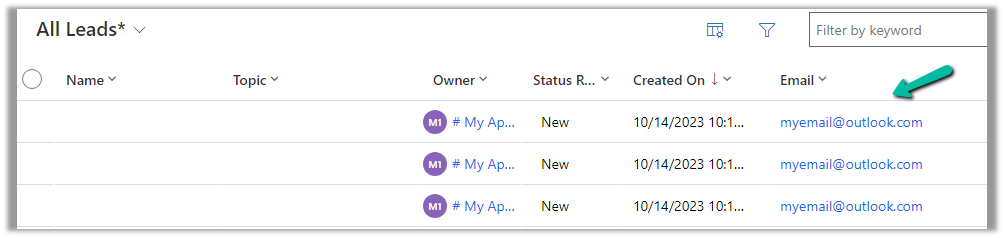
We can see 3 lead records already existing in the system with the same email address.
Below is our code that is trying to create a new lead record with the same email address and using the RetrieveDuplicatesRequest to check for the duplicates.
Below we can see that not only do we get the total number of duplicates found, but we can also get the details of the duplicate records found.
We can make use SuppressDuplicateDetection optional parameter of the Request if we want the configured duplicate detection rules to run and throw an exception while creating or updating the record.
We will use the below out-of-the-box duplicate detection rule, that checks for lead having same email address.
Below is our code and we can see the lead records with the same email address getting created without any exception.
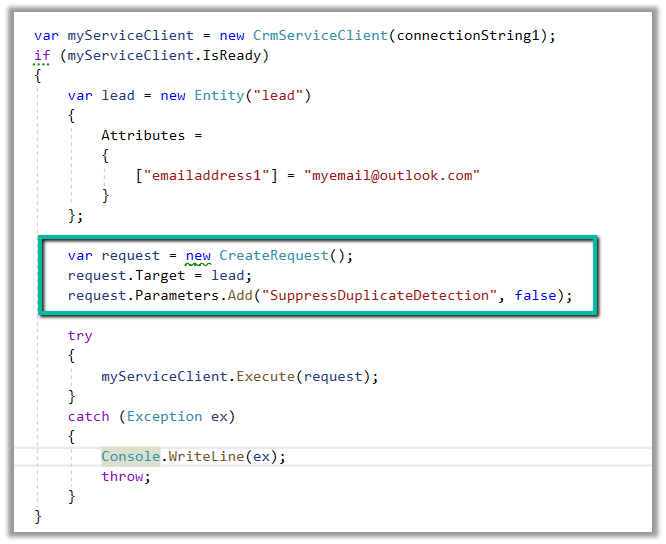
Now we have updated the code to use the SuppressDuplicateDetection optional parameter. We have set it as false.
As expected this time we get the exception.
“The record was not created or updated because a duplicate of the current record already exists.”
With the preferred solution (preview), now we can specify a solution to which all our changes, that are made outside of the context of the unmanaged solution, should get automatically added.
To enable it, navigate to Settings >> Features >> Preferred solution (Preview)
Inside the Maker Portal, now we can see a new section added, asking us to specify the preferred solution, and we can see Common Data Services Default solution set as the preferred solution as default.
We can click on Manage to specify any of the existing unmanaged solutions as the preferred solution or to create a new solution.
Here we have set one of the solutions as the preferred solution.
Now let us add an update existing table outside the context of the solution. Here we are updating its form by rearranging some of the fields in it.
We have moved the Fax field to be the last field in that General Information section and have published the changes.
Back in our preferred solution, we can see the form we updated, automatically added.
Similarly, any other changes, i.e. any solution components added or updated, outside the context of the unmanaged solution, will be added to the preferred solution. (apart from changing the Default Solution where all the solution components reside).
Also, other users/makers can specify their preferred solution.
To add the cloud flows or canvas apps, created outside the context of the solution, in the preferred solution, we can enable the below features.
Here we have created this sample flow from outside the solution and also a canvas app.