How to – Connect Dynamics 365 records and views to Microsoft Team channels – Dynamics 365


To enable the feature that allows linking existing Dynamics 365 records and views to a Team channel,

we need select the environment and navigate to Settings >> Team Integration Settings

Select Yes for the “Turn on the linking of Dynamics 365 records to Microsoft Teams channels” and save it.

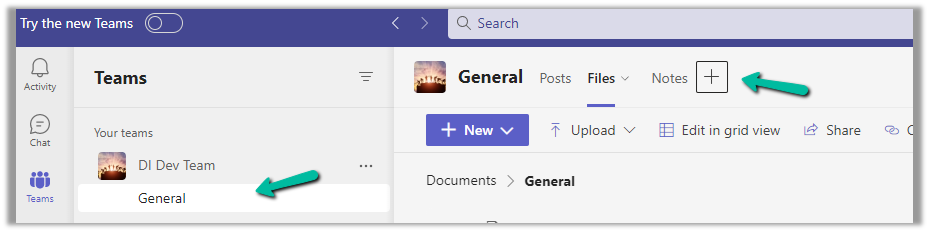
Now back in Microsoft Teams, from a team channel, select the Add (+) option

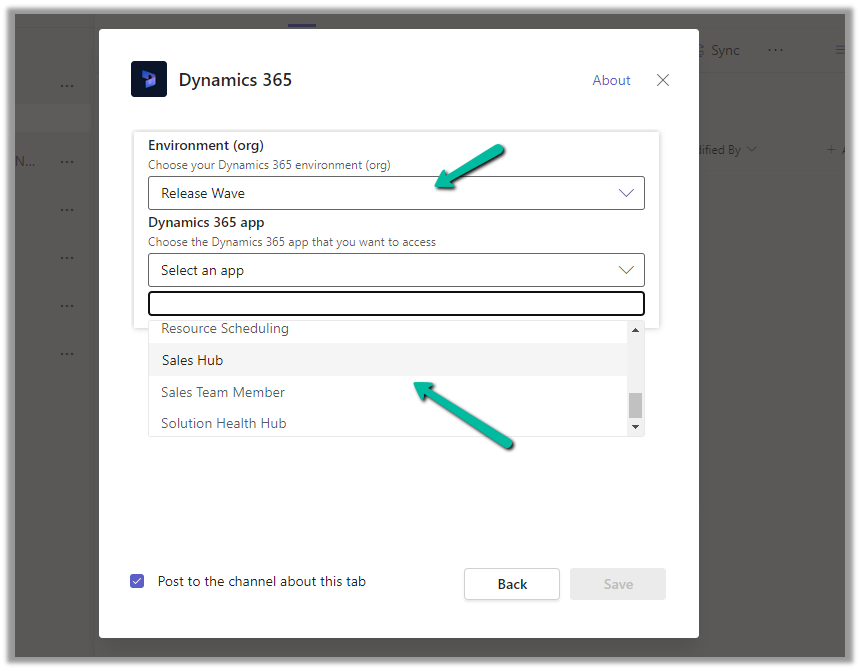
Select Dynamics 365

Specify the environment, and the corresponding Dynamcis 365 Apps in it.

Check Rememer this preference and click on Select.

Next, we get the option to search and filter for a record to link to.

Here we have selected the contact Nancy Anderson record, click on Save.

We can see the selected contact record pinned.

We also get the below options for the record tab added.


Similarly, if we want to link to a view, we can select the table and then its corresponding view to select and click on Save.

We can see the selected view added.

Also for both records and views pinned, we get the option of starting the conversation.

Clicking in Start conversation adds the below message with the link to the tab where the view or the record has been added or linked.

Get all the details here

Hope it helps..

Advertisements

Find email templates faster with the new Insert Template dialog – Dynamics 365 / Dataverse


The new insert template dialog box adds features to quickly find and insert the appropriate email template.

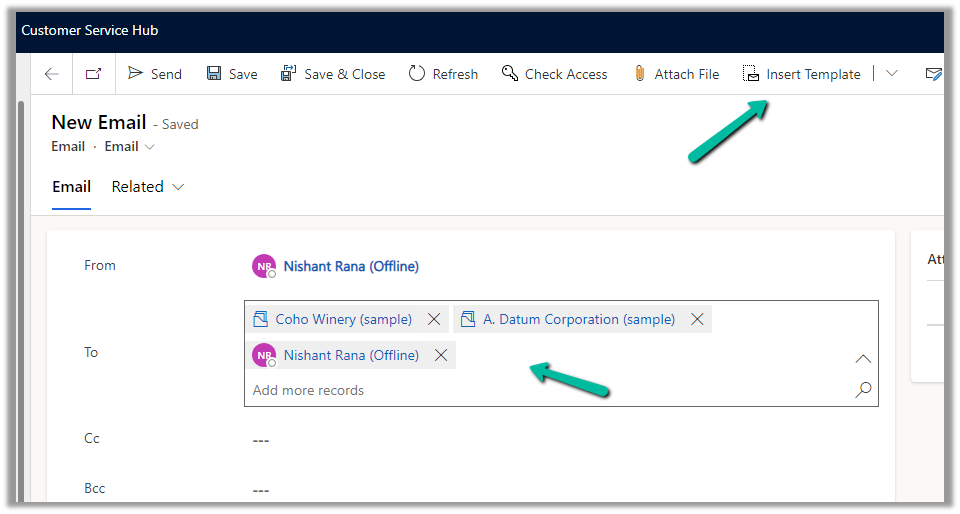
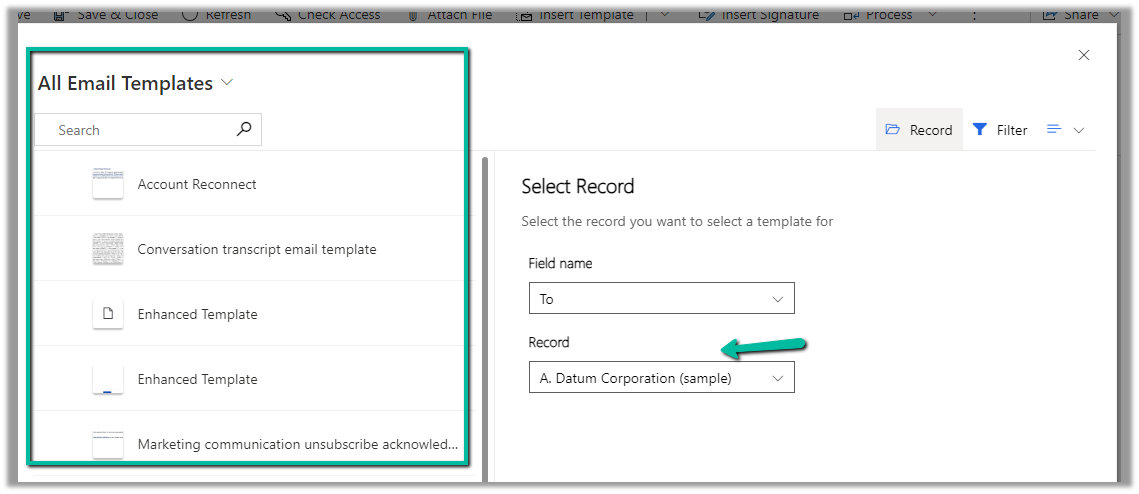
For the below email record, we have a contact, account, and user type record selected in To (Regarding), click on Insert Template to open the dialog box.

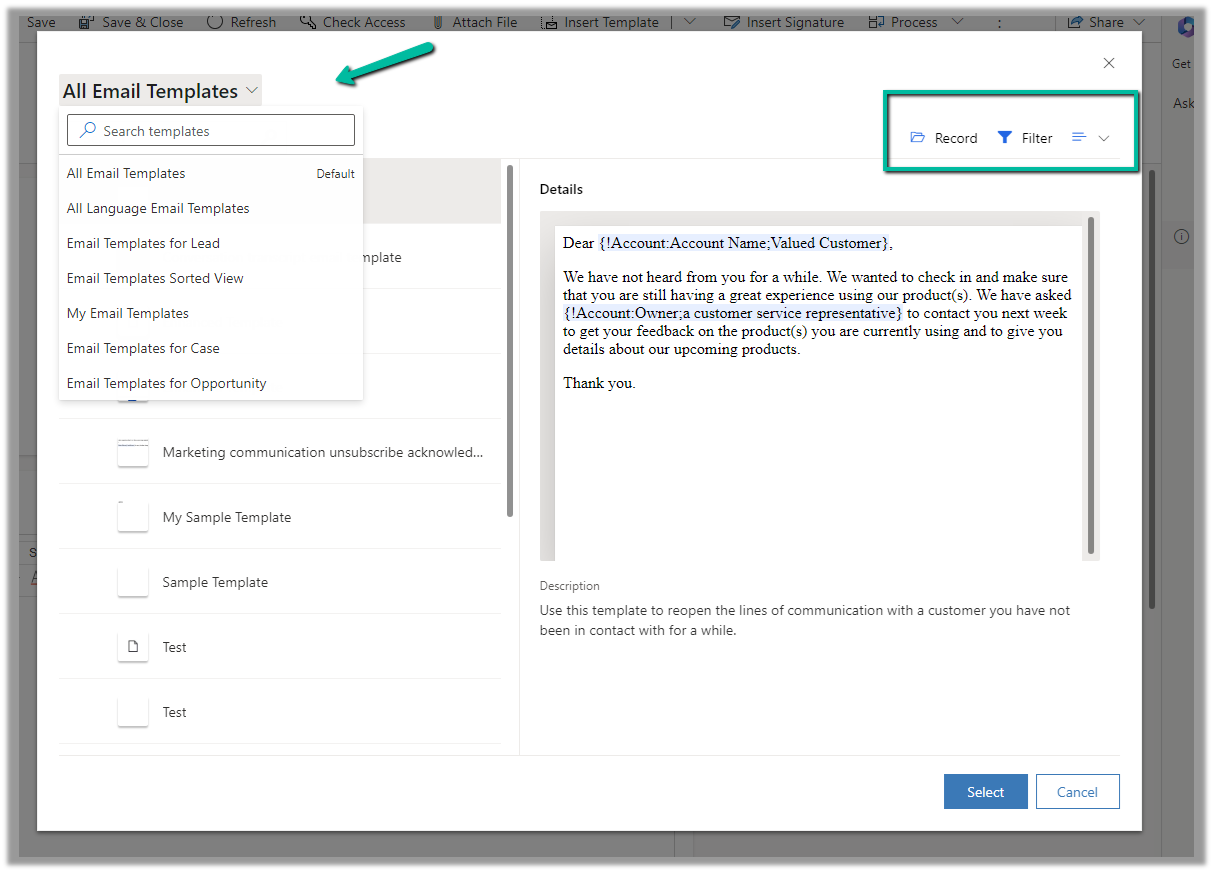
The new dialog box allows selecting the view for filtering the email templates.

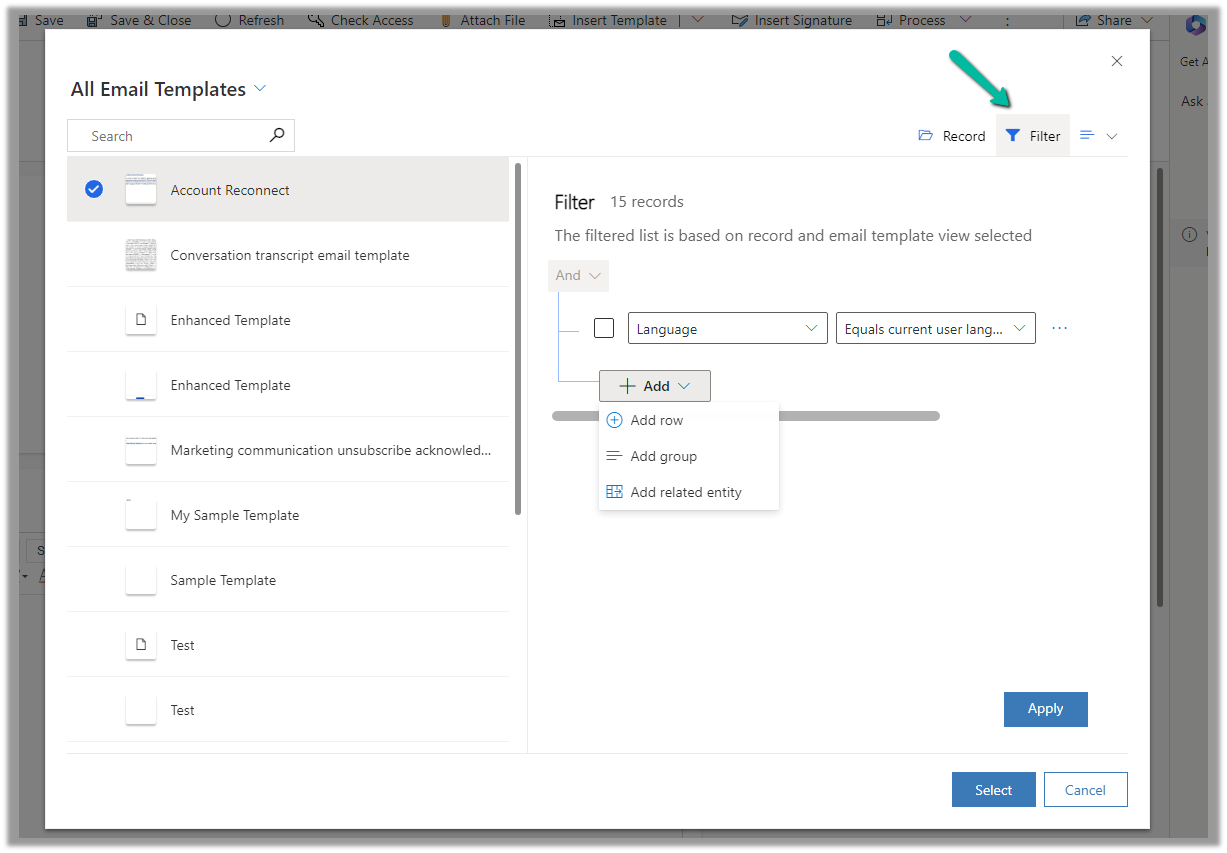
Clicking on Filter shows the filter for the selected view, and allows updating the filter to find the required template.

The Record options allow filtering the views based on the record type specified in the To (Regarding)

Selecting the A. Datum Corporation (Sample) account record, filters the view to show email templates related to the account.

We can also specify the type of view – either List (default), Grid, or Tiles.

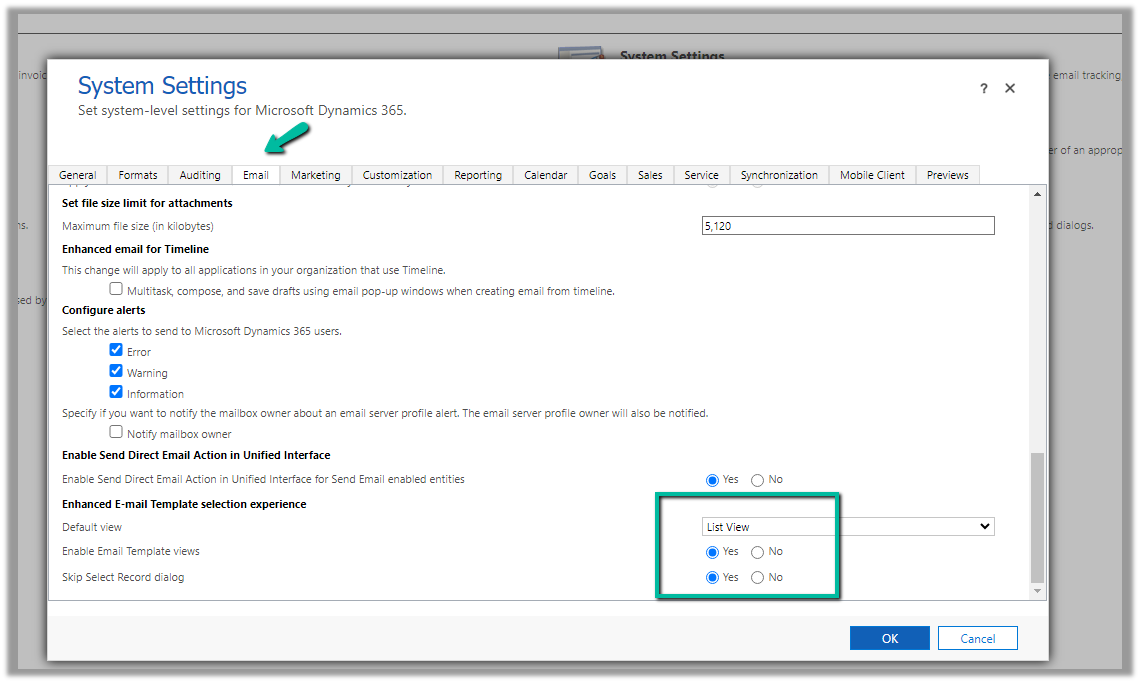
From Advanced Settings >> System Settings >> Email tab, we can control these options i.e. specify the default view, and show and hide for Record and Filter options.

The enhanced email template selection is enabled for default for Customer Service Workspace and Customer Service Hub Apps.

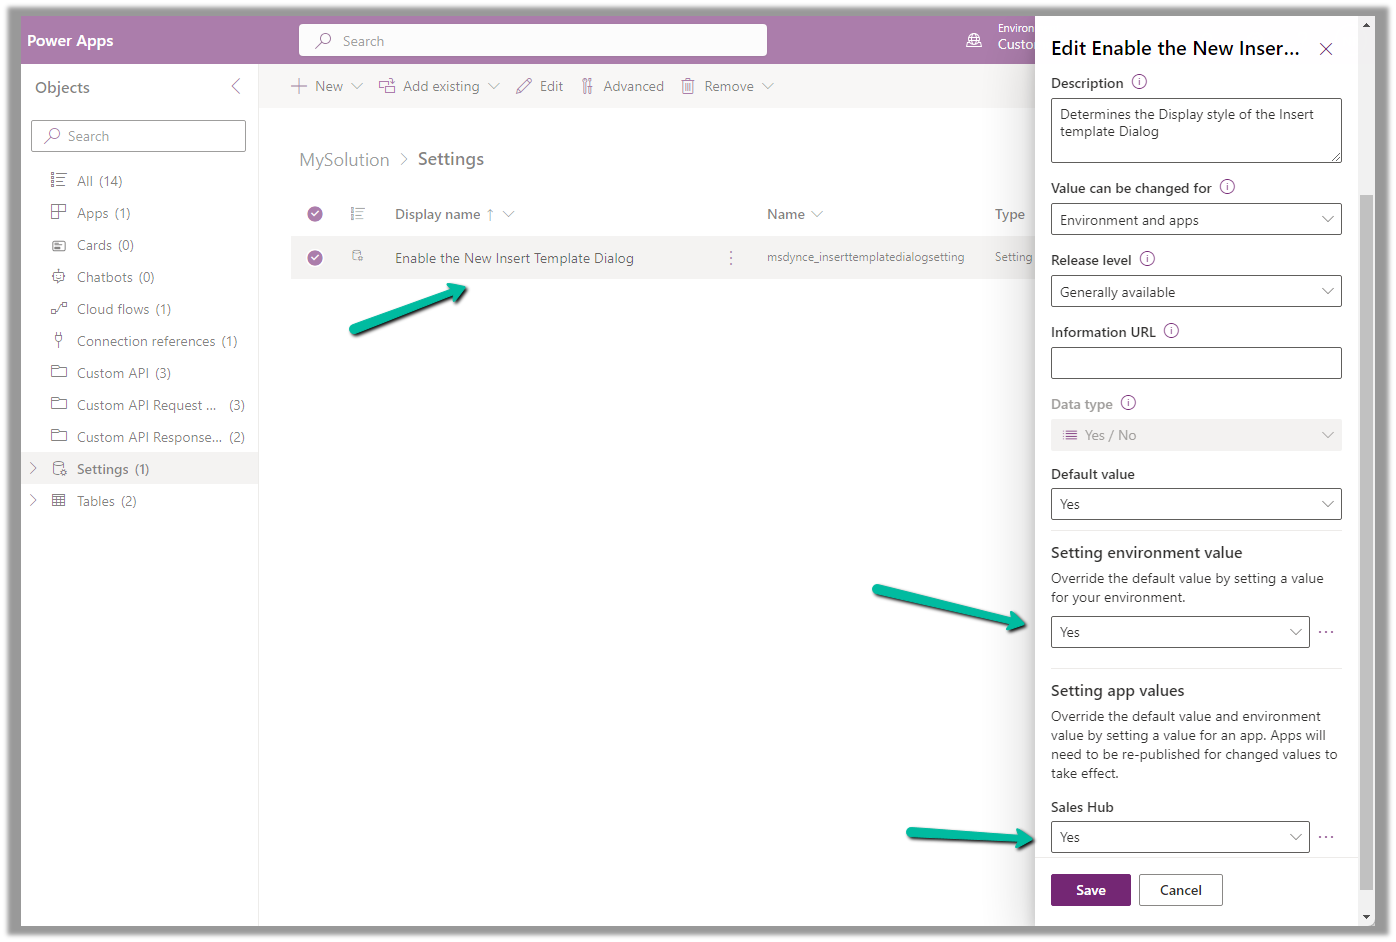
To enable it for other Model-driven apps, add and enable the following setting “Enable the New Insert Template Dialog” in the solution.

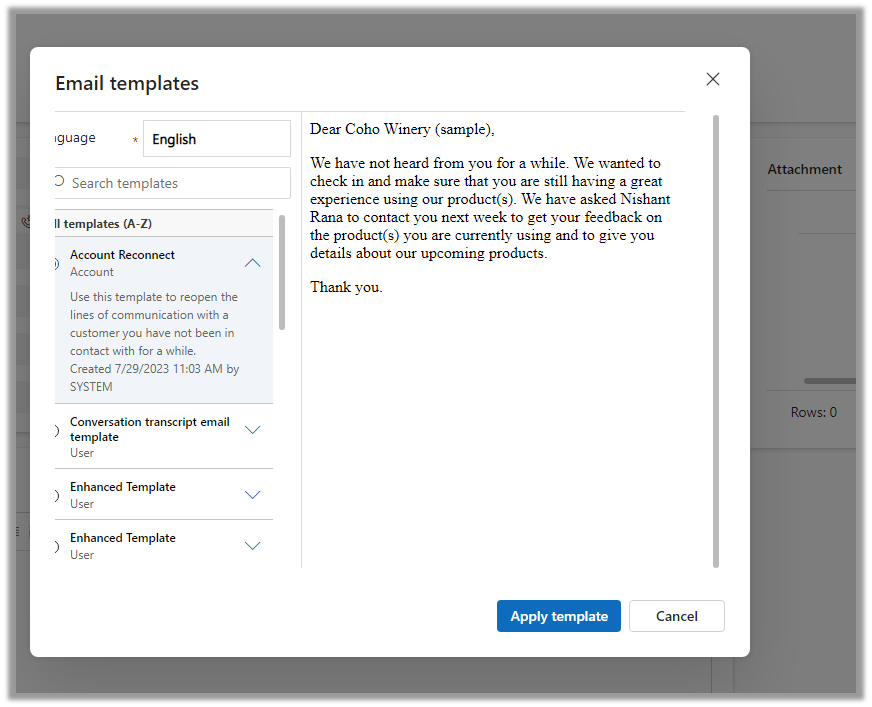
Below is how the old Insert Email Template dialog box looks

Get more details here

Hope it helps..

Advertisements

How to – enable the enhanced email template editor in Model-driven Apps(Dynamics 365 / Dataverse)


Below is what our existing or current Email Template editor looks like (Sales Hub >> Personal Settings >> Email templates)

Let us now enable the Enhanced Email Template editor for the App / Environment (it is enabled by default for Customer Service workspace and Customer Service Hub apps)

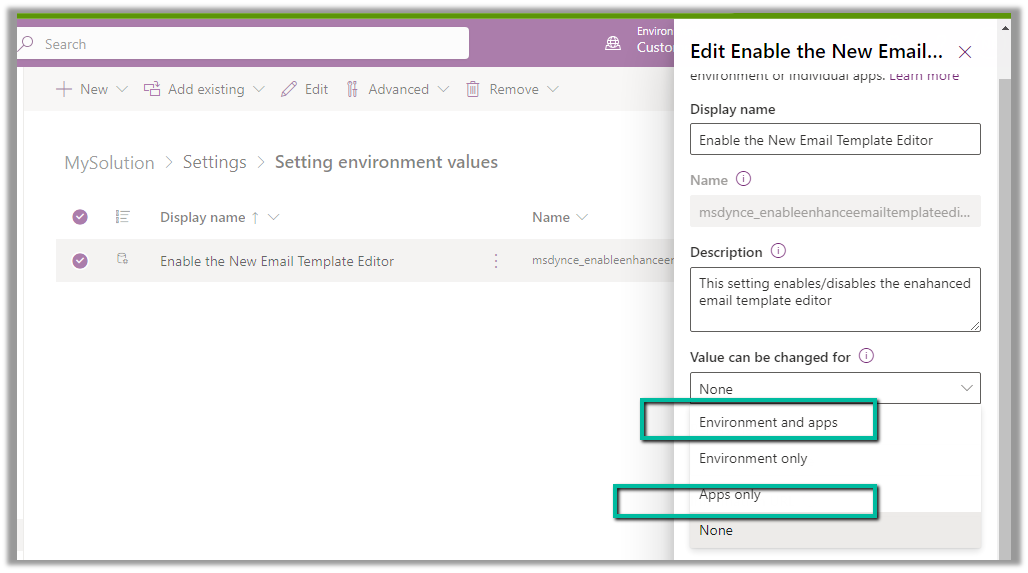
Create or Open an existing solution, Add existing >> Setting >> Enable the New Email Template Editor

We can set the value as Yes for the Setting environment value to apply it for the environment.

To enable it for a specific app, make sure we have the option “Environment and apps” and “Apps Only” selected for Value can be changed for option.

To specify the app(s) for which we want to enable the new email template editor, we need to add that corresponding app to the solution.

Here we have added the Sales Hub.

Add Existing >> App >> Model-driven App >> Sales Hub

On adding the Sales Hub App, we get the option to set the value for the Sales Hub app, which we have set as Yes.


Publish all customization.

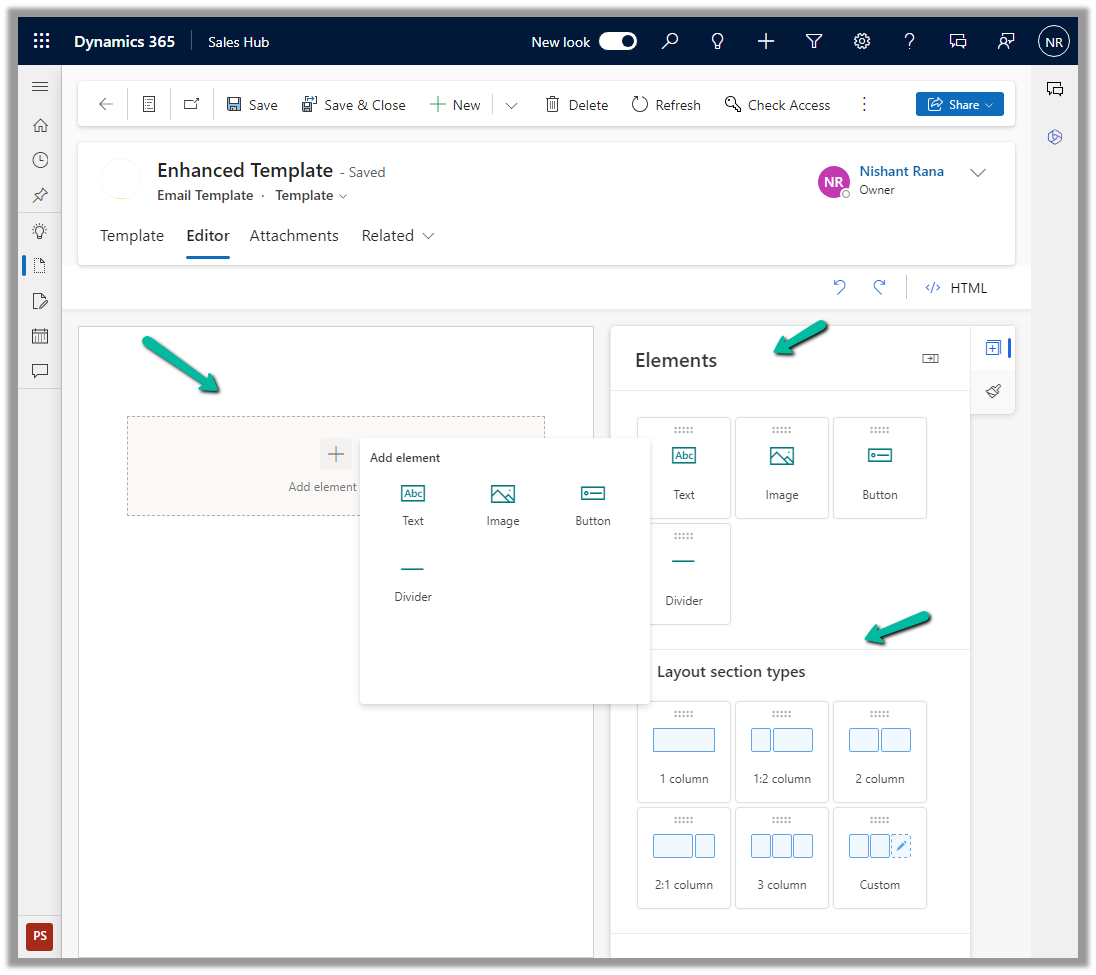
We can now see the new Editor tab added for the new Email Template record inside Sales Hub.

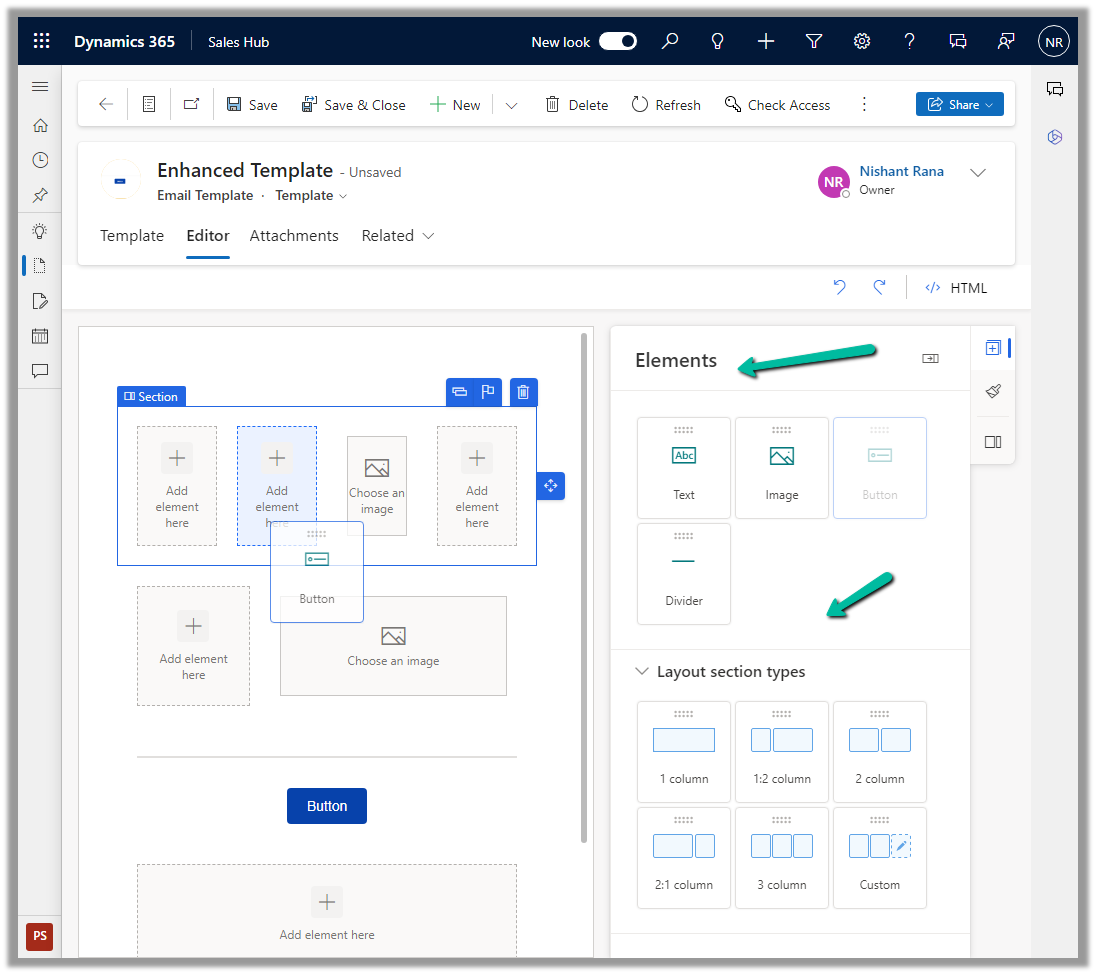
We can drag and drop, and specify properties, of the layout section and elements in the new editor.

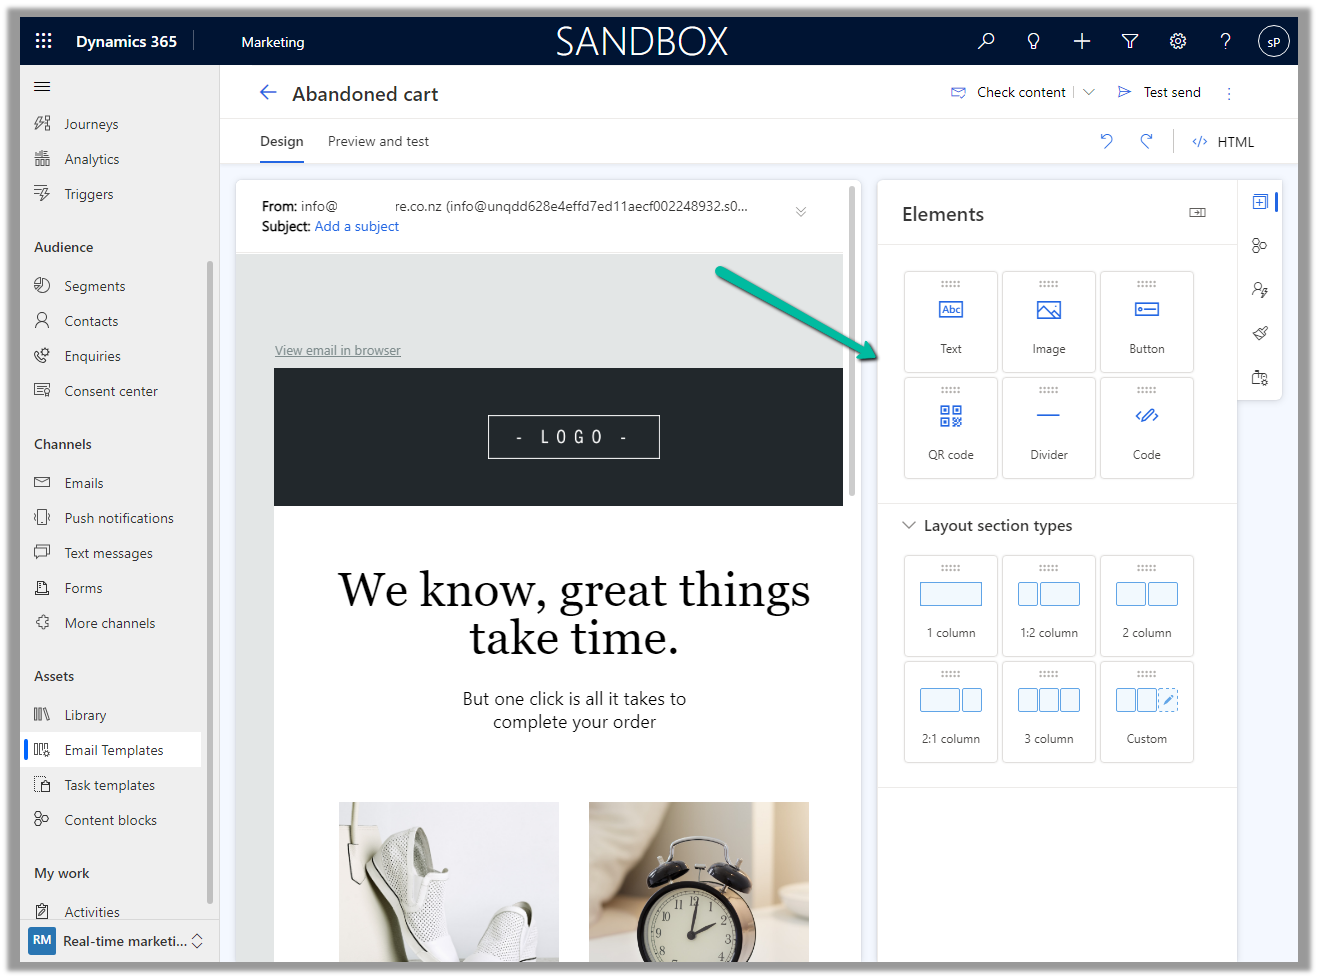
The new email template editor uses the same design as the email editor in Dynamics 365 Marketing, making it more consistent across the different apps in the platform.

Get all the details here.

Hope it helps..

Advertisements

Fixed – Plug-in assembly fullnames must be unique (ignoring the version build and revision number) – Dynamics 365 / Dataverse


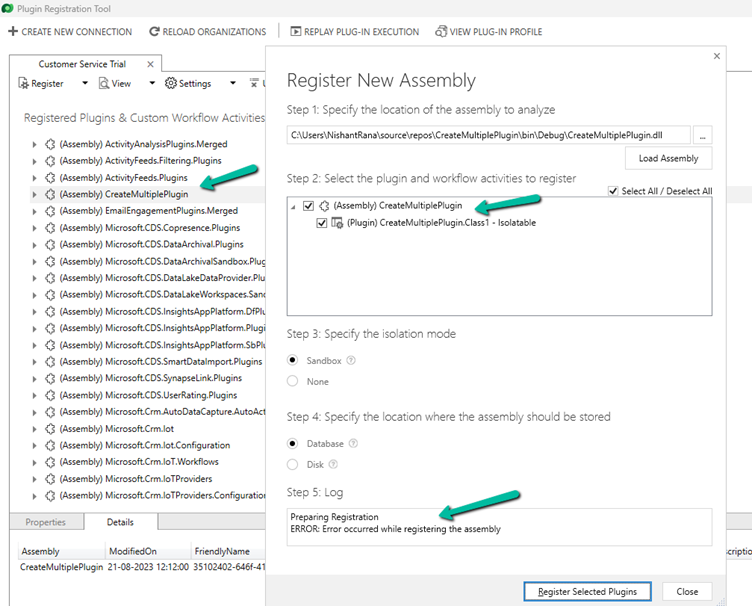
Recently while trying to register the plugin, we got the below error

Microsoft.Crm.CrmException: Plug-in assembly fullnames must be unique (ignoring the version build and revision number). —> Microsoft.Crm.CrmException: Plug-in assembly fullnames must be unique (ignoring the version build and revision number).

It was because we were trying to register the assembly which was already registered in that environment, instead of updating it.


Also, refer – https://helpfulbit.com/plugin-assemby-fullnames-must-be-unique/

Hope it helps.

Advertisements


Link and Create a case, contact, and account from a notes record in Timeline– Dynamics 365 / Dataverse


From the notes in the timeline, now we can link an existing note to an existing case, contact, or account record (this will unlink it from the current record) and also create either a new case, contact, or account record.

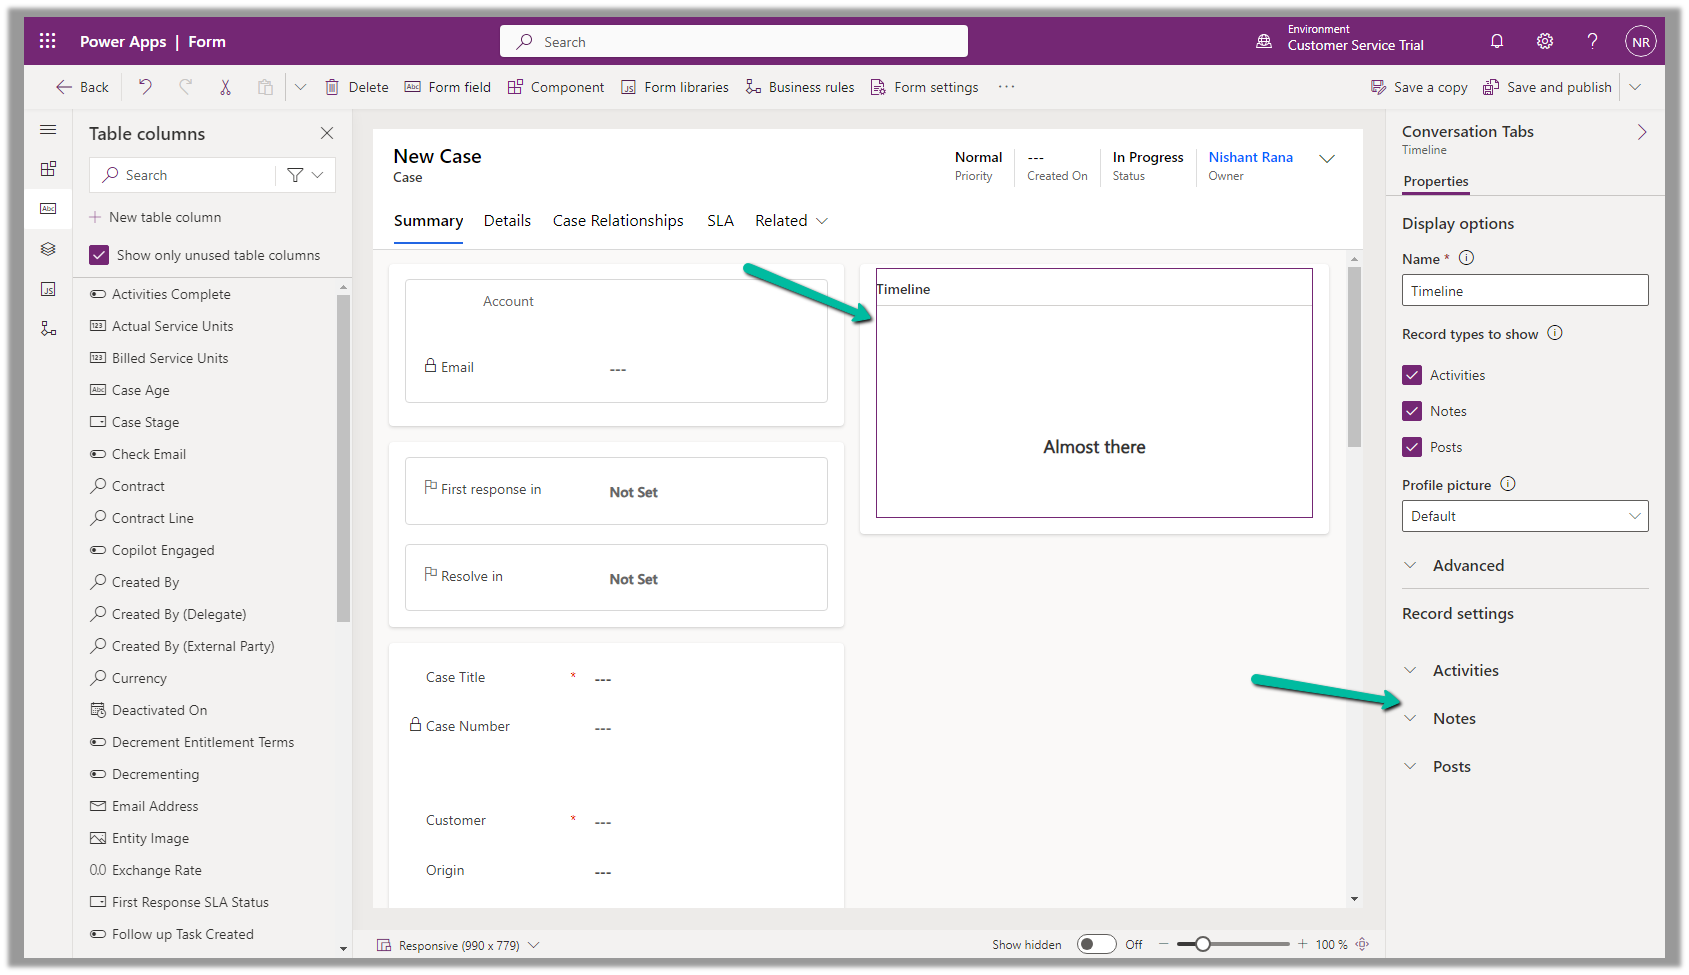
To configure it, open the Notes property of the Timeline section in the form.

Below we can see the different properties we can configure.

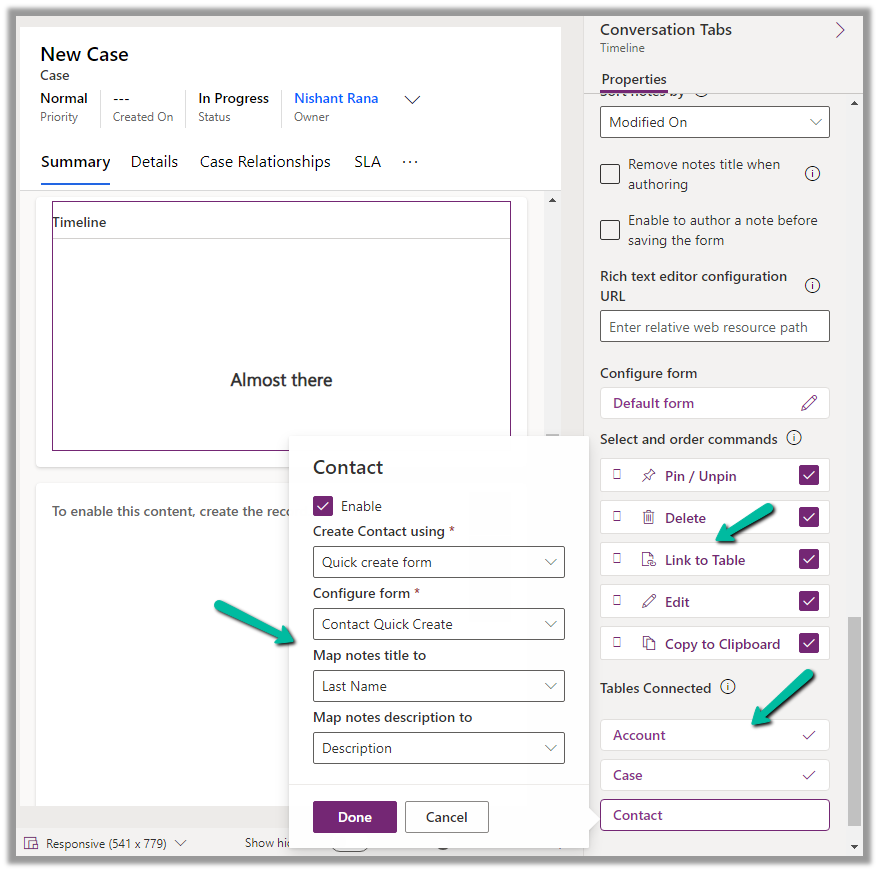
  • Enable the Link to Table Command
  • Enable the Tables to be connected.

Here we are enabling the Contact table, and then specfiying the Quick Create Form to be used while creating the new contact record, and also the mapping of the title and description field of the Notes. We have the same configuration for Case and Account.

Save and publish the changes.

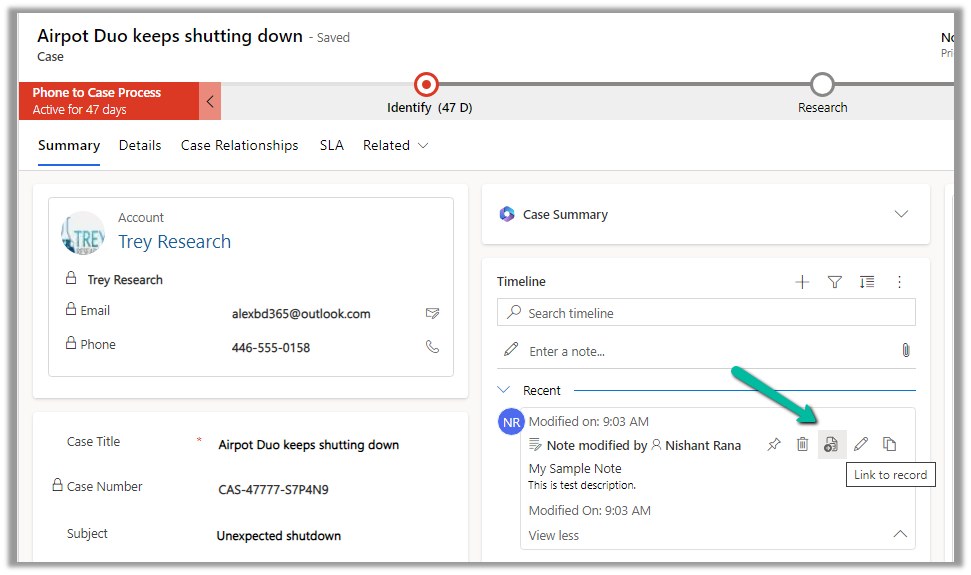
We can now see the option to Link to record for the notes.

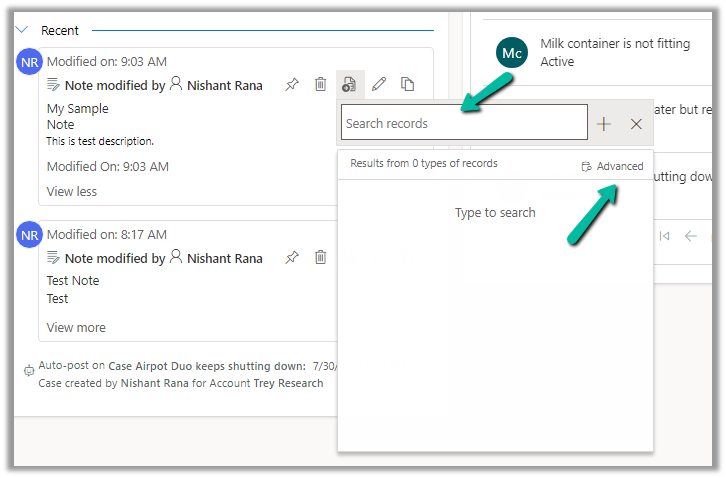
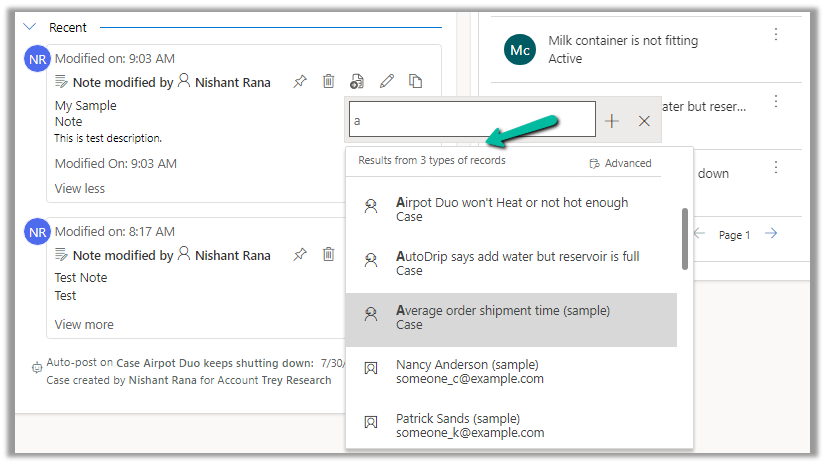
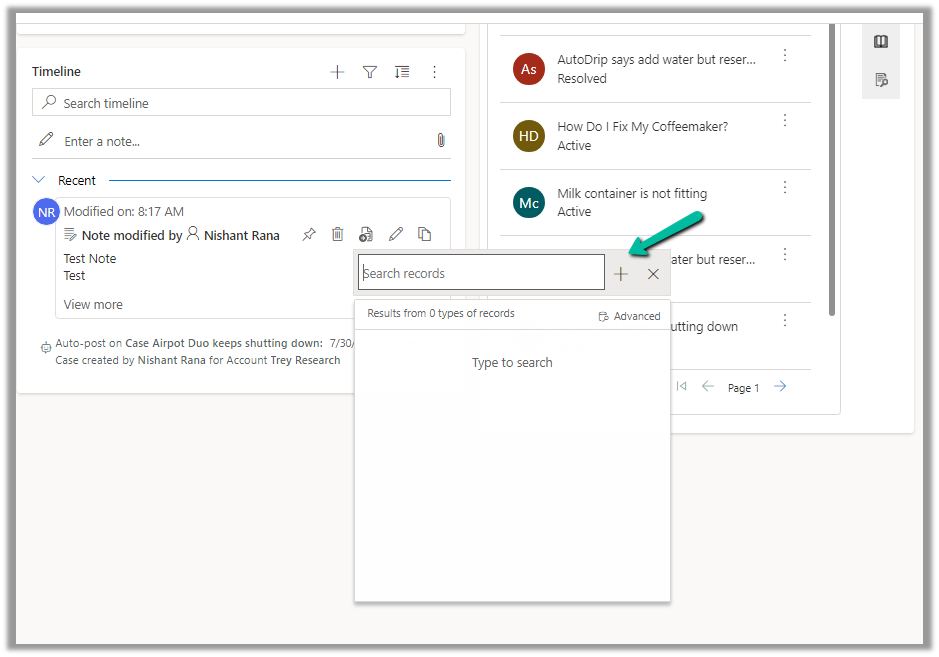
We get the option to search for an existing record (it will show results from tables connected).

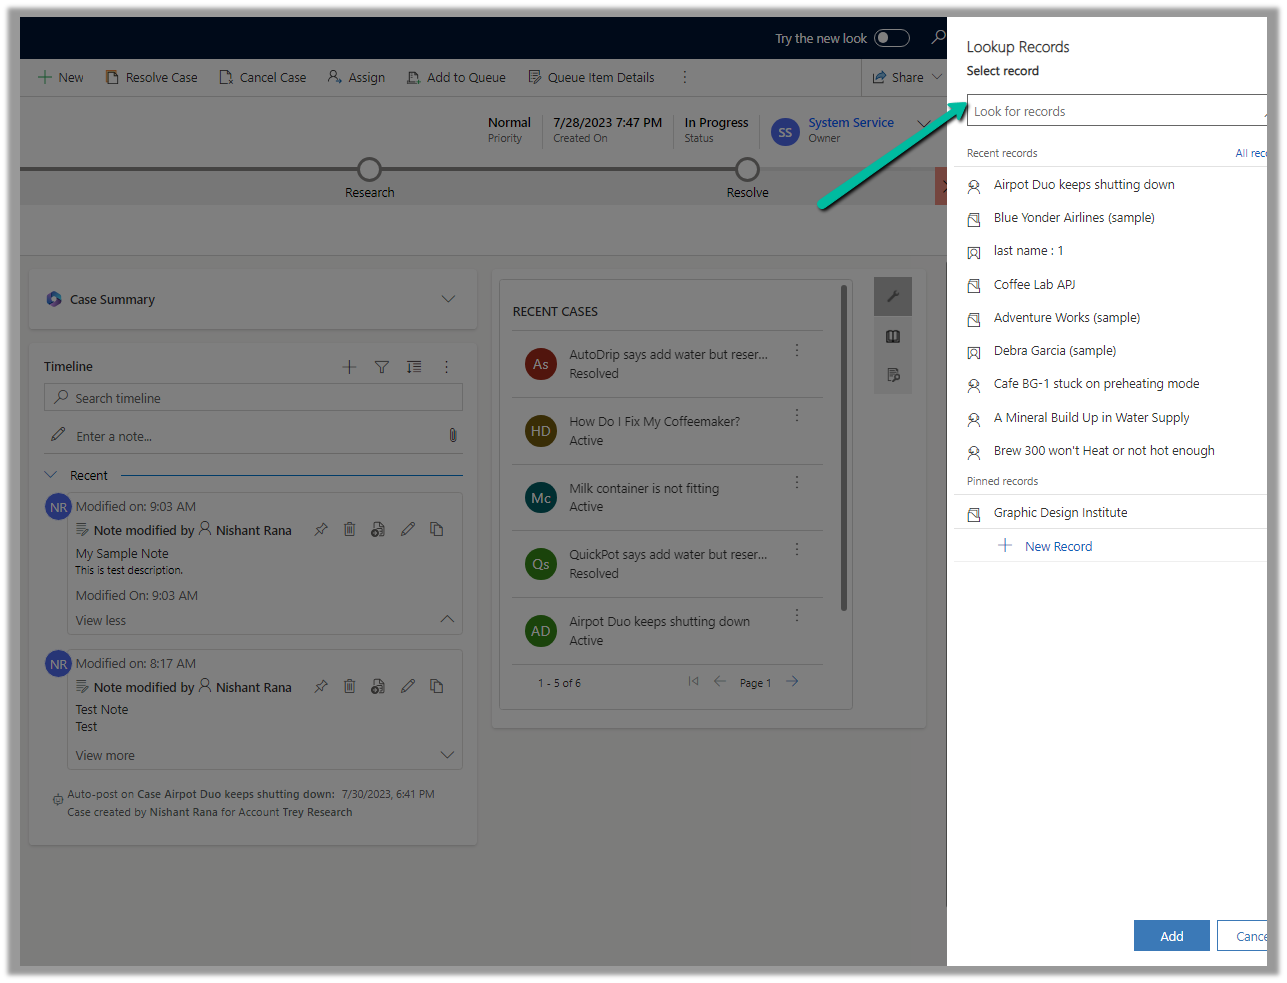
Clicking on Advanced opens the lookup dialog.

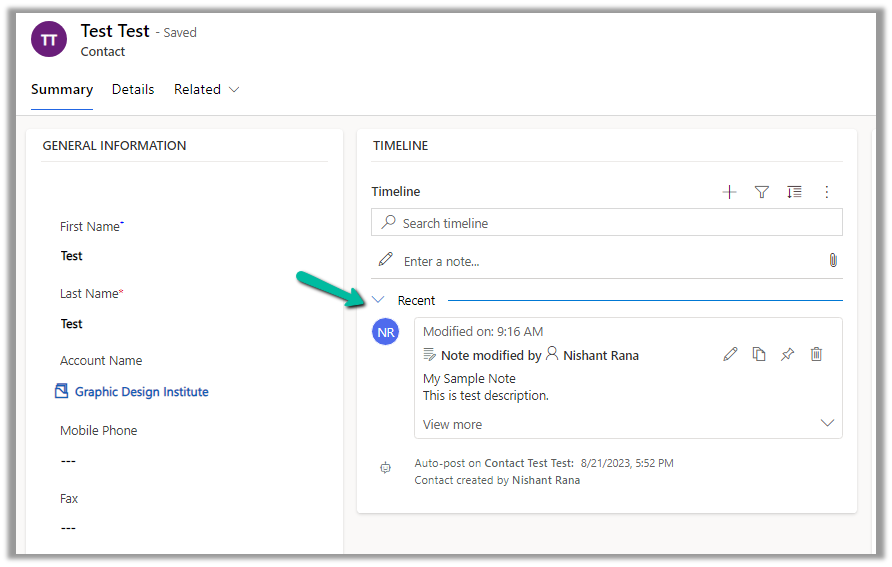
On Associating to an existing record, the notes get linked to the new record and unlinked to the current record.

We can see the notes record associated with the contact record and removed from the existing case record.

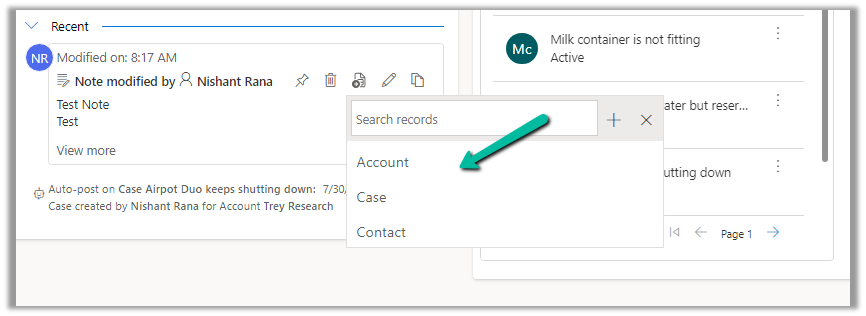
We can also use the plus + sign to create new records of the tables connected from the notes.

Account, Case, and Contact in this case.

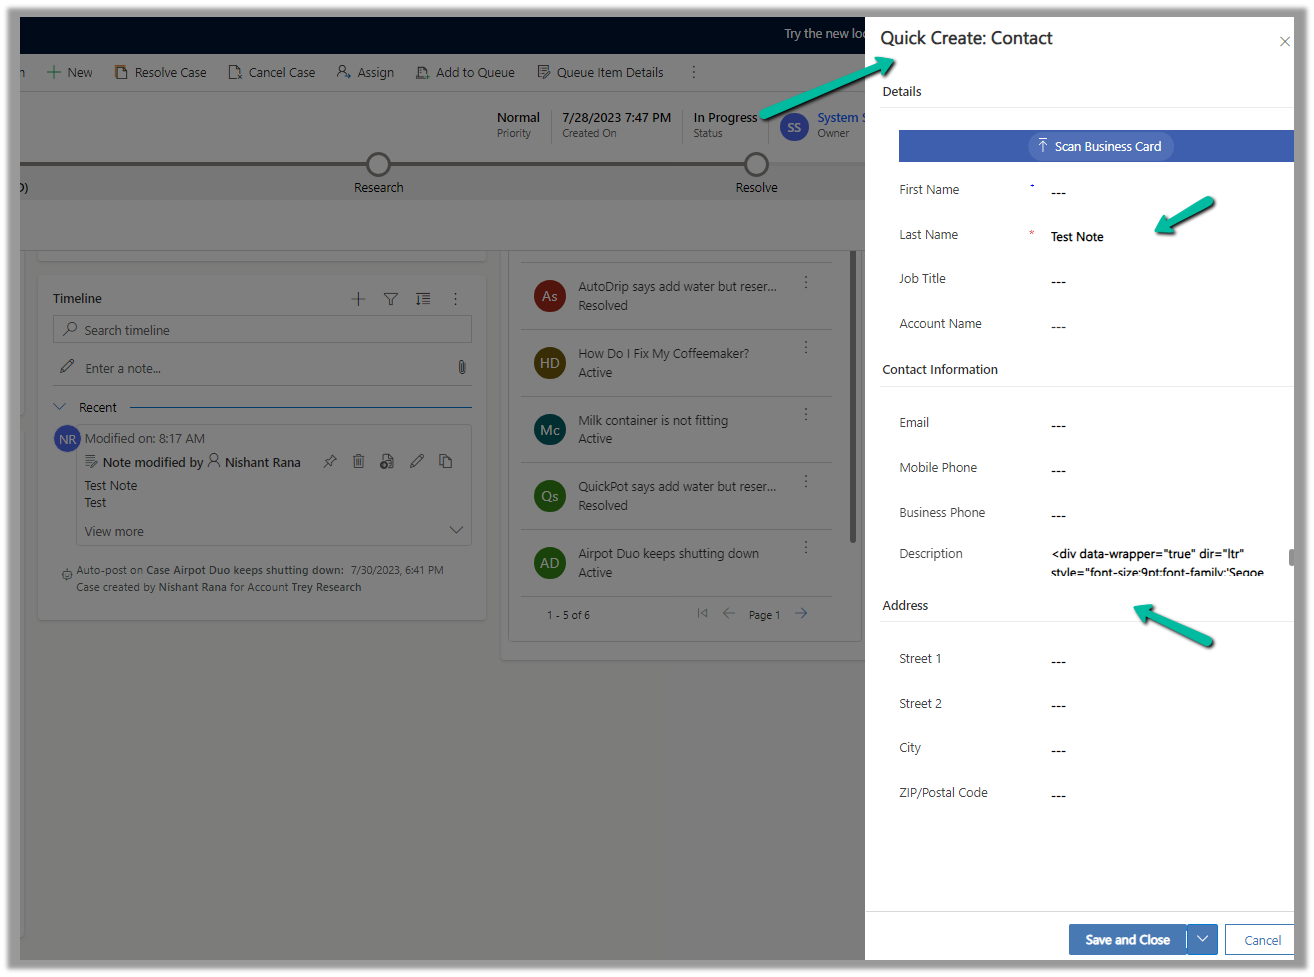
This opens the Quick Create form, with the title and description field of the notes mapped.

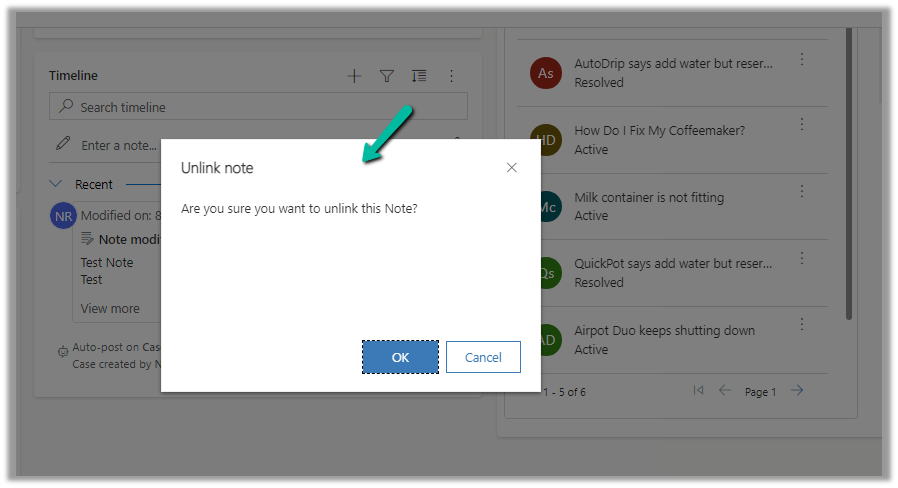
After the new record gets created, we are again presented with the option to Unlink that existing note from the current record.

Below we can see the new record with the note associated with it.

Get all the details here

Hope it helps..

Advertisements

Entity Id must be specified for Operation – Dataverse / Dynamics 365


We might get the below error while performing the update operation.

This could be if we have not specified the GUID of the record to be updated or if we are using an Alternate Key to update the record, we have not specified the KeyAttributes property.

We either need to specify the Id property or specify the KeyAttributes property

Or in the Entity’s Constructor.

Hope it helps..

Advertisements