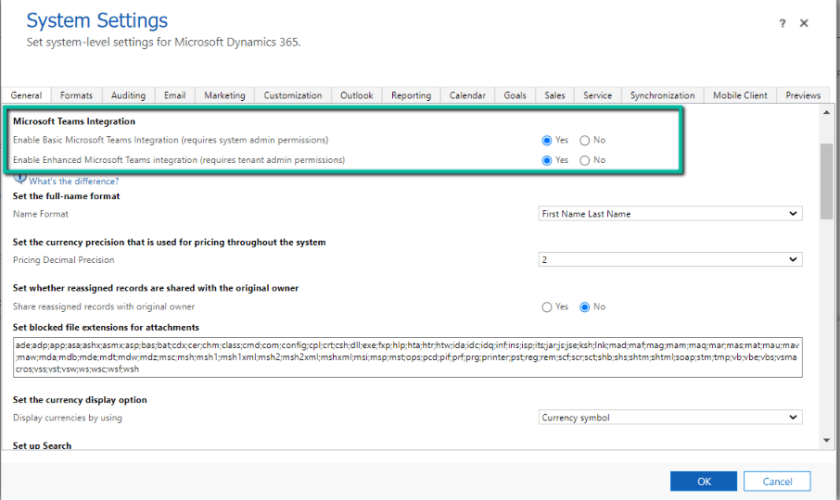
To enable Microsoft Teams in D365, Go to Settings –> Administration –> SystemSettings –> General Tab and flip the below highlighted options to Yes.
Once done, we’ll be able to see Collaborate button on the ribbon as shown below.

By default it’ll be enabled on several OOB entities as mentioned here: https://docs.microsoft.com/en-us/dynamics365/teams-integration/teams-collaboration#record-types-that-support-microsoft-teams-integration
However, we can also enable it on custom entity programmatically. Below is the screenshot of a custom entity “new_cidproduct” before enabling Teams integration on this entity.

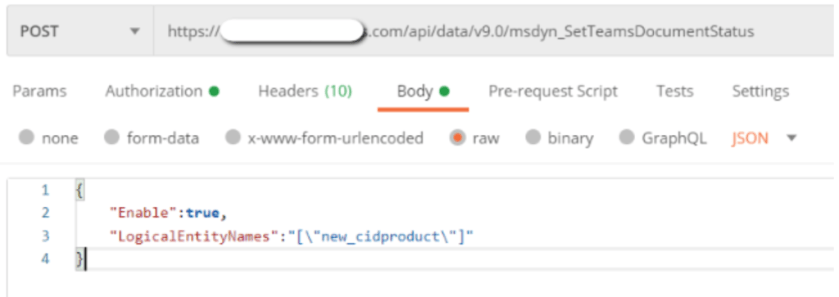
We can use msdyn_SetTeamsDocumentStatusWeb API action to enable/disable Teams integration on a specific entity or a set of entities. Here, I have used my favorite Postman for the demo. Below are the request details:
Method: POST
URL: https://org.crm.dynamics.com/api/data/v9.0/msdyn_SetTeamsDocumentStatus
Body:
{
“Enable”:true,
“LogicalEntityNames”:”[“new_cidproduct”]”
}
Authorization: Configure the token to be passed along with the request.
Below is the screenshot of the request using Postman.
Once done with building…
View original post 62 more words