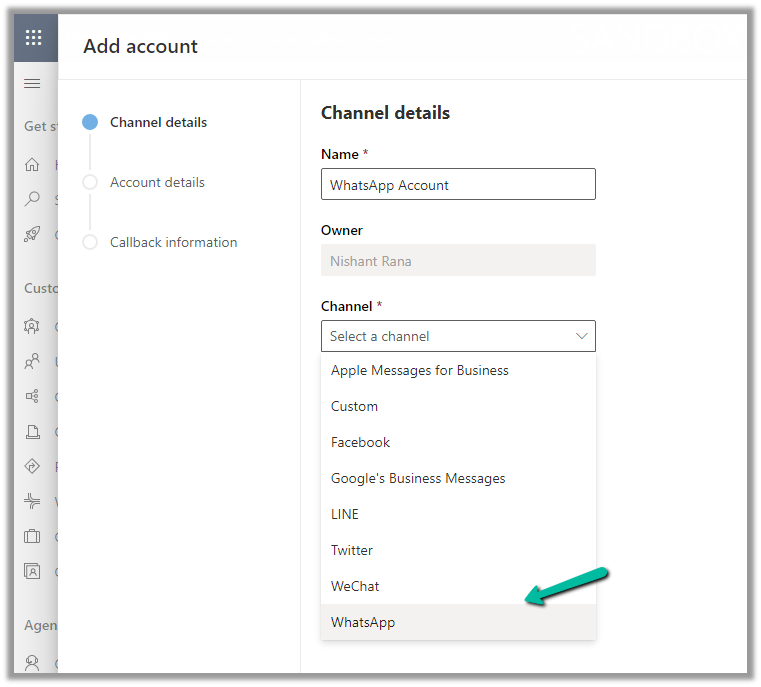
To configure the WhatsApp channel, we need to set up the account in the Customer Service Admin Center.
Navigate to Customer Support >> Channels >> Messaging Accounts (Manage)

Select the New Account option there

Select WhatsApp as the channel

Next, we need Account SID and Authentication token.

To get this information we need to create a Twilio Account.
https://www.twilio.com/try-twilio
Navigate to the console and copy the Account ID and Authentication token
https://www.twilio.com/console
Enter Account SID and Authentication token click on Next

Next, we need to add the WhatsApp Name and Phone number

Navigate to Messaging >> Try it out >> Send a WhatsApp message to activate the WhatsApp Sandbox.

Follow the steps there to configure the Sandbox account. (scan the QR code send the Message, and test the Business and User-Initiated message/conversation).

Click on Sandbox setting tab to get more information
Copy the number.

Add the number and click on Next

Copy the URL

Paste that URL in the When a message comes in and save.

We can see our WhatsApp account created, open the record.

We can see our number being shown as Active
With the account active time to now it is time to set up the channel/workstream / queue.
Navigate to Customer Support >> Channels >> Messaging (Manage)

Click on Add Channel and add the details

Enter channel details

We are creating a new workstream

Add the WhatsApp number added

Select the language

Specify the Behaviour (automated messages and approved templates)

Specify the user features (attachments)

Review and Finish and Create the channel.

Open the workstream and specify routing rule/fallback queue/work distribution/associate bots etc details

We will create a ruleset to route the message to the queue

We have the below route-to-queue rule created to route to the default queue which has all the omnichannel agents added to it. (In an actual scenario, we would add the conditions and create a specific Advanced Queue).

We are leaving the rest of the settings/configuration as default.
Now is the time to test.
Let us log in to the Customer Service Workspace as an agent and from the registered sandbox participant number added send a message.

We are done with our configuration.
Get all the details
Hope it helps..


Hi, Are you abe to send outbound messages with Whatsapp within the context of Dynamics 365 without the templates? In other words: as a user I would like to send an outbound message to a account/contact regarding an opportunity. Is that possible? Thanks, Robin
LikeLike