Enable Copilot for the Rich Text Control – Dataverse / Dynamics 365


To enable Copilot for a specific instance of a Rich Text editor field, we first need to create a Web Resource where we need to specify the property we want to update/override as specified in the RTEGlobalConfiguration_Readonly.json, the base read-only configuration file for the Rich Text editor control.

We have created a JavaScript Web Resource file named rtecustom.js.

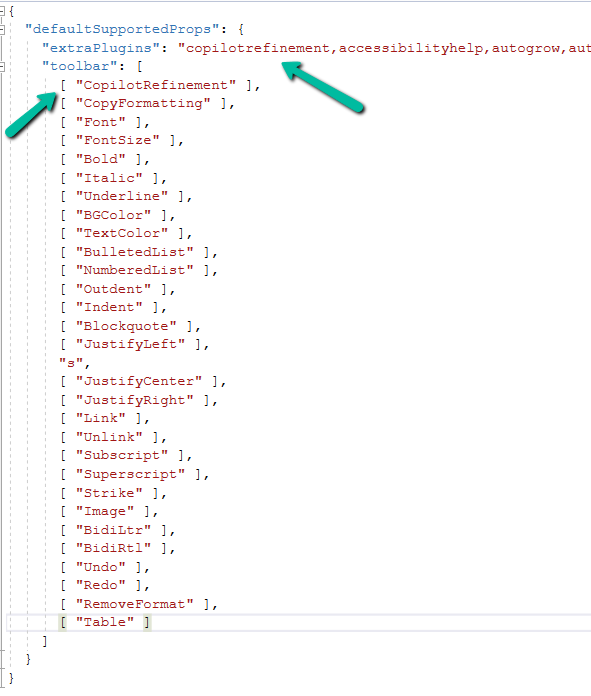
Added the copilitrefinement and CopilotRefinement values to the extraPlugins and toolbar properties existing values as shown to enable copilot.

Refer to the sample configuration file for all the properties and their corresponding values.
A screenshot of a computer program

Description automatically generated
{
  "defaultSupportedProps": {
    "extraPlugins": "copilotrefinement,accessibilityhelp,autogrow,autolink,basicstyles,bidi,blockquote,button,collapser,colorbutton,colordialog,confighelper,contextmenu,copyformatting,dialog,editorplaceholder,filebrowser,filetools,find,floatpanel,font,iframerestrictor,indentblock,justify,notification,panel,panelbutton,pastefromword,quicktable,selectall,stickystyles,superimage,tableresize,tableselection,tabletools,uploadfile,uploadimage,uploadwidget",
    "toolbar": [
      [ "CopilotRefinement" ],
      [ "CopyFormatting" ],
      [ "Font" ],
      [ "FontSize" ],
      [ "Bold" ],
      [ "Italic" ],
      [ "Underline" ],
      [ "BGColor" ],
      [ "TextColor" ],
      [ "BulletedList" ],
      [ "NumberedList" ],
      [ "Outdent" ],
      [ "Indent" ],
      [ "Blockquote" ],
      [ "JustifyLeft" ],
      [ "JustifyCenter" ],
      [ "JustifyRight" ],
      [ "Link" ],
      [ "Unlink" ],
      [ "Subscript" ],
      [ "Superscript" ],
      [ "Strike" ],
      [ "Image" ],
      [ "BidiLtr" ],
      [ "BidiRtl" ],
      [ "Undo" ],
      [ "Redo" ],
      [ "RemoveFormat" ],
      [ "Table" ]
    ]
  }
}

Note down the URL of the Web Resource created.

A screenshot of a computer

Description automatically generated

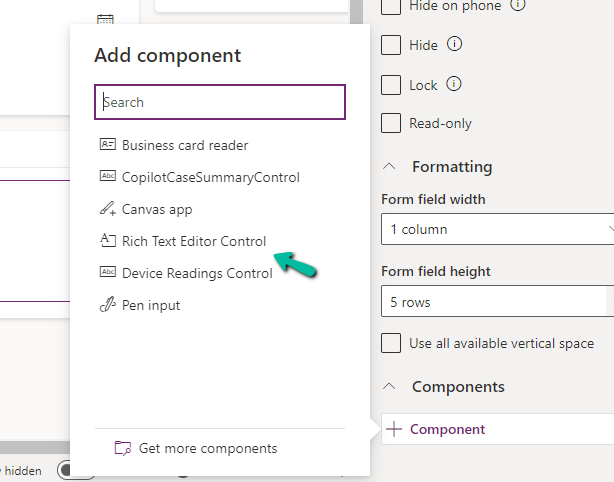
Next, we opened one of the Contact’s forms for Customization, selected the description field, and added the component – “Rich Text Editor Control” to it.

A screenshot of a computer

Description automatically generated
A screenshot of a computer

Description automatically generated

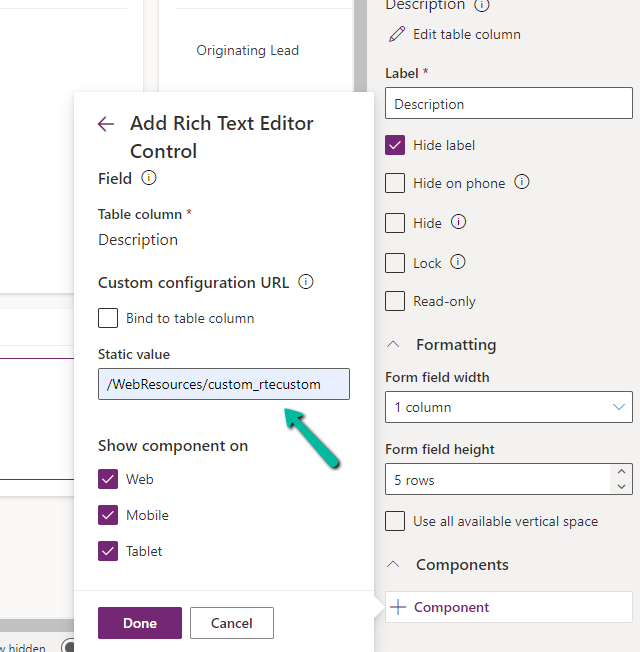
In the Static value property, we specified the relative URL of the Web Resource file. We can also specify the full path but then we would need to update it each time we move it to other environments.
A screenshot of a computer

Description automatically generated

Save and publish the changes.

We can see the option Adjust with Copilot added to the toolbar for the control.
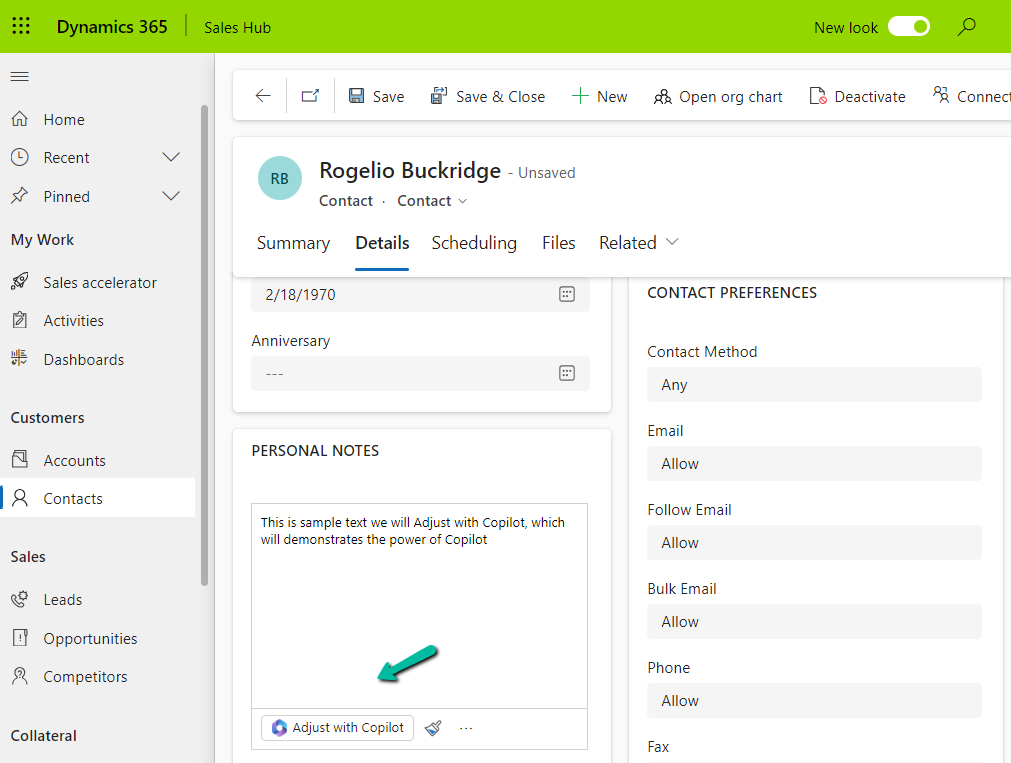
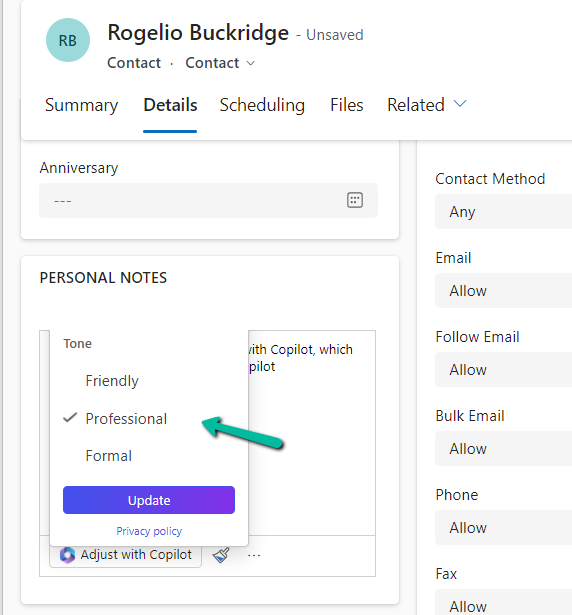
On selecting the text, and clicking on “Adjust with Copilot”, we get the option to update the Tone of the content.
A screenshot of a computer

Description automatically generated

On selecting a Professional tone, the text is updated in the control.

A screenshot of a computer

Description automatically generated

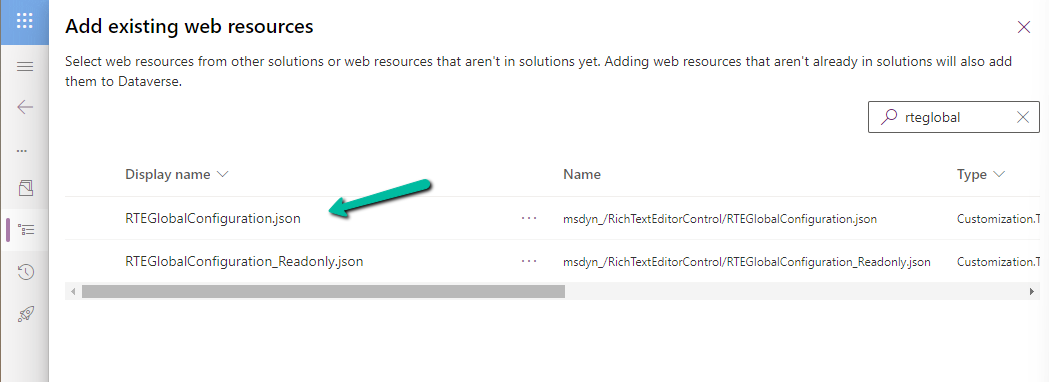
In case we want to apply to all the fields that are using Rich Text Editor Control instead of specifying it for individual fields, we need to update and add the same JSON to the existing RTEGlobalConfiguration.json file.
A screenshot of a computer

Description automatically generated

The file is blank by default, and we can specify properties to it that we want to override.

A green screen with black text

Description automatically generated

We updated the RTEGlobalConfiguration.json file, to use the same definition we used earlier for our custom web resource.

A screen shot of a computer

Description automatically generated

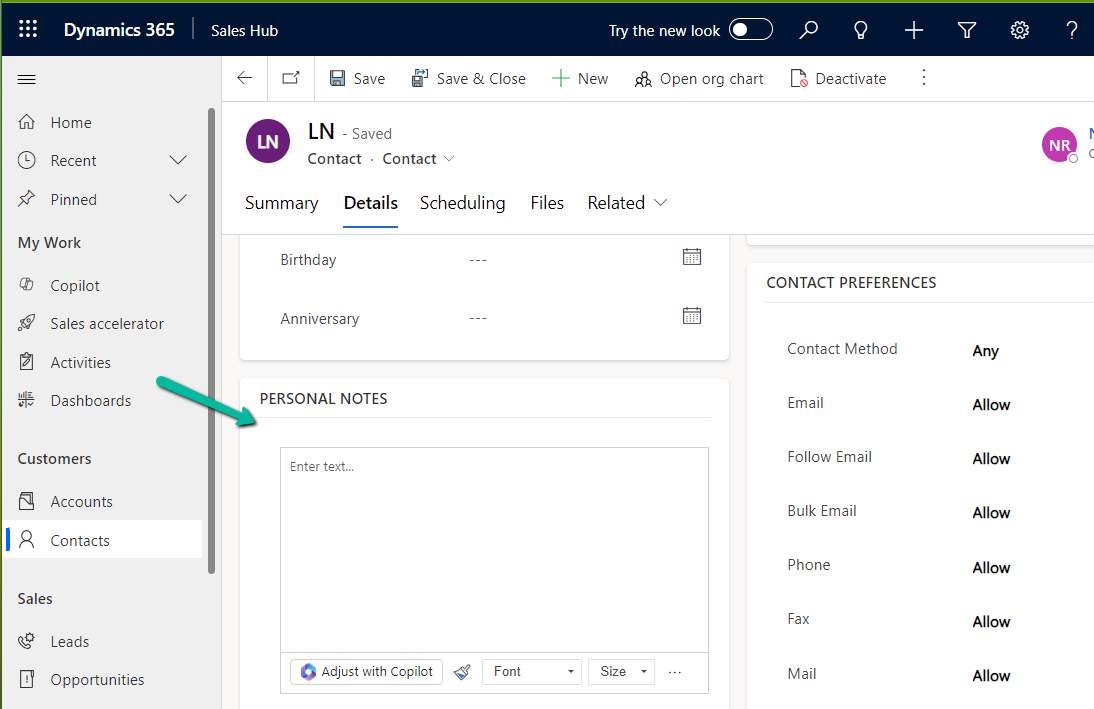
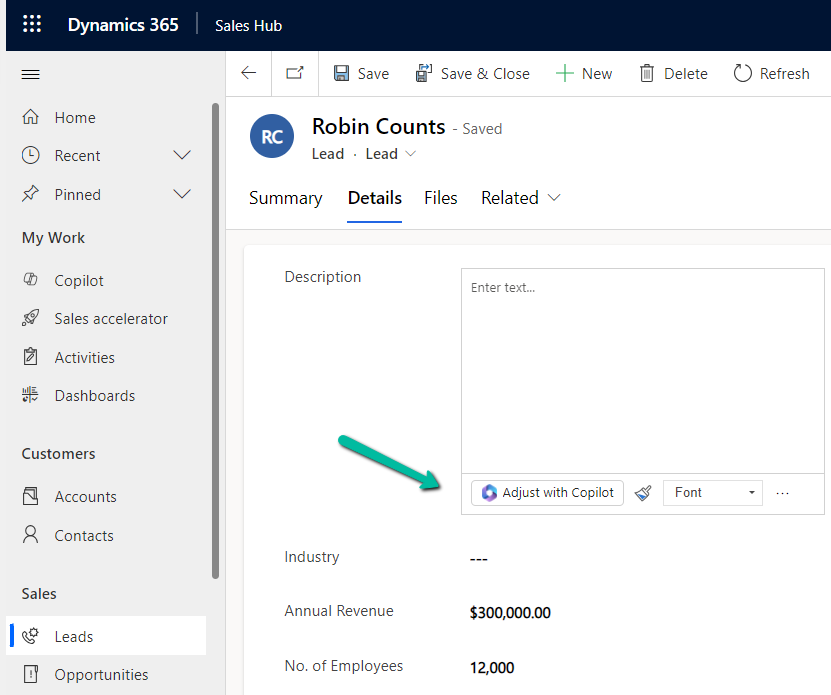
We can see the “Adjust with Copilot” added to the form even without specifying the URL in the static value while customizing the form.

On saving and publishing the changes, we can then see it rendered for all the Rich Text Editor fields.
A screenshot of a computer

Description automatically generated
A screenshot of a computer

Description automatically generated

Also, check – Copilot Control

Hope it helps..

Advertisements

Set an app (Model-driven or Canvas App) as a startup app – Power Apps Mobile


Microsoft has introduced a new feature, through which we can now specify a particular app as a start-up app, that will open up when we launch the Power Apps mobile, instead of waiting for the home page / or selecting it from favorites.

Below we can select the option Open at Startup to specify the Customer Service Hub app as the startup app as an example.

A screenshot of a phone

Description automatically generated

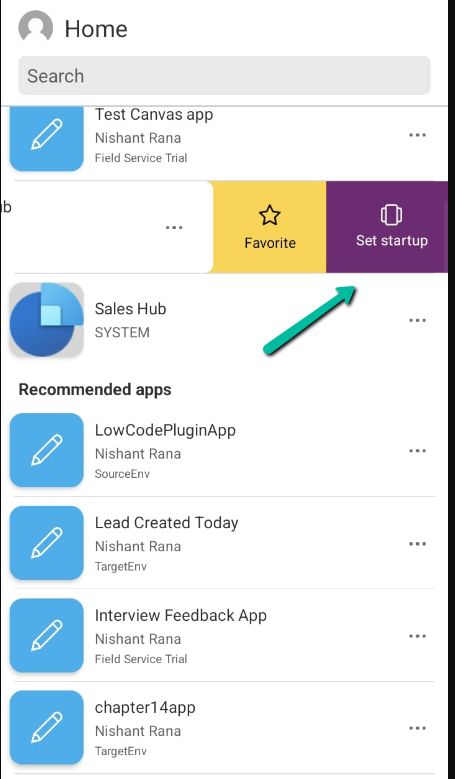
Or we can swipe left to mark an app as “Startup App”

A screenshot of a phone

Description automatically generated

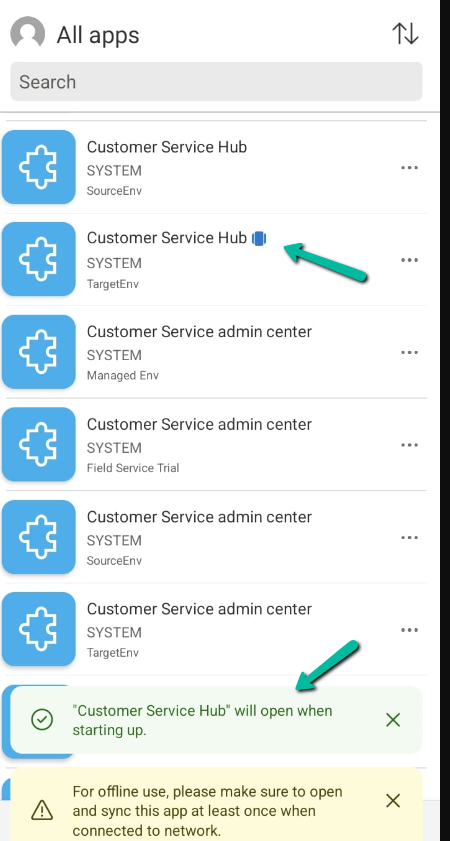
We can see an icon next to the app.

Now launching the Power Apps mobile app will directly open the Customer Service Hub app.

A screenshot of a phone

Description automatically generated

Using the Remove from startup option we can remove it as the startup app

A screenshot of a phone

Description automatically generated

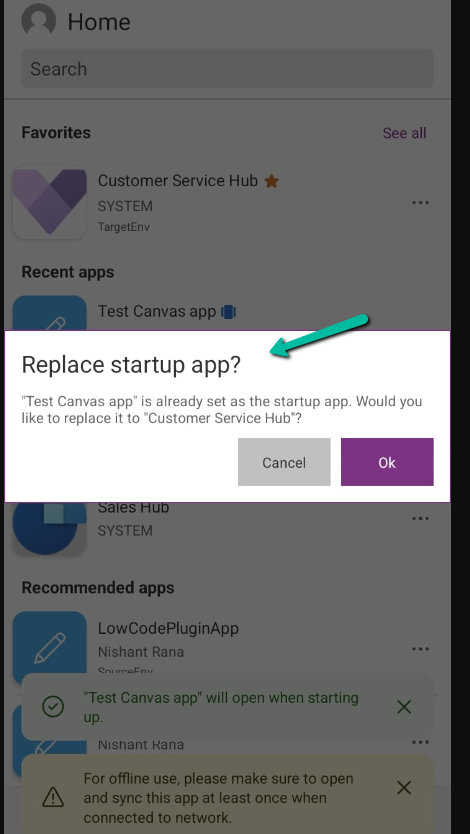
We can only have one app set as a startup app, if we try setting up another app as a startup we get the notification that it will replace the existing app.

A screenshot of a phone

Description automatically generated

Get all the details here

Hope it helps..

Advertisements

Perform Age calculation using Formula Columns in Dataverse / Dynamics 365


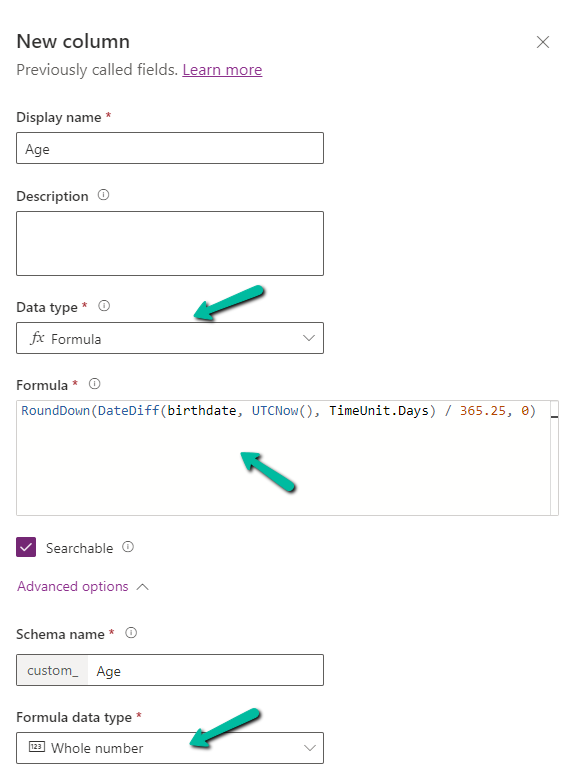
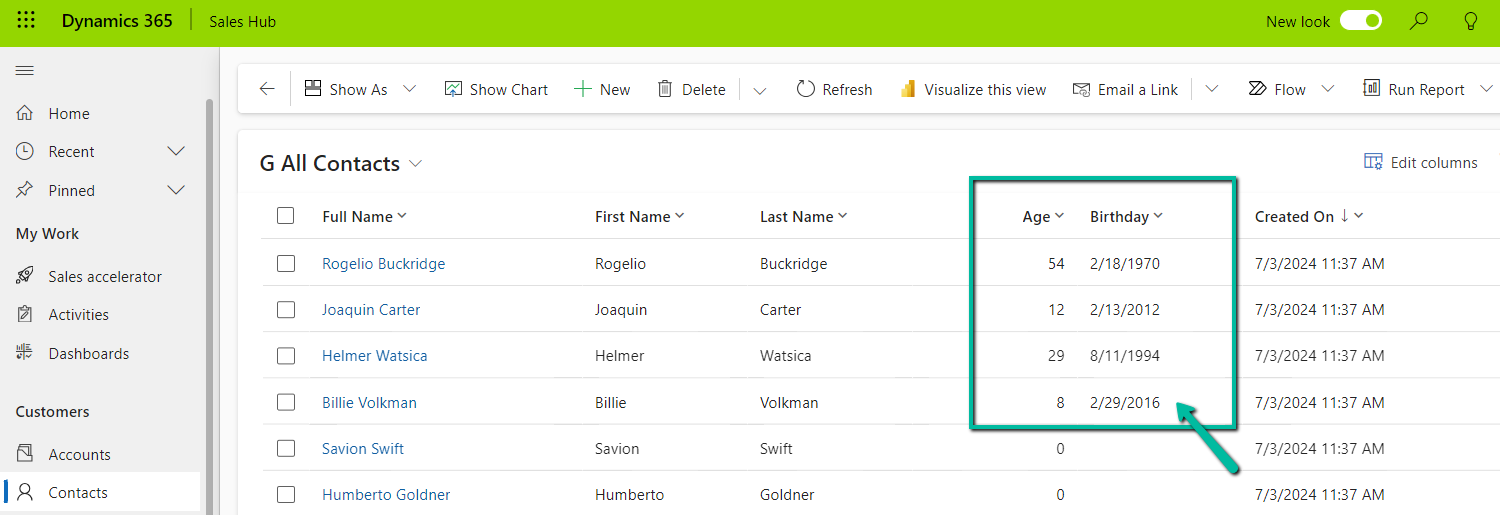
Below we have created a new field of Data Type Formula and Formula Data Type as Whole Number

A screenshot of a computer

Description automatically generated

Specify the following formula.

RoundDown(DateDiff(birthdate, UTCNow(), TimeUnit.Days) / 365.25, 0)

  • DateDiff calculates the difference in days between birthdate and current UTC Date.
  • Dividing by 365.25 takes care of converting the days to years, considering the leap year into account.
  • Roundown takes care of rounding the result to a nearest integer.

Below we see the field in action.

UTC current date is 10th Wednesday July 2024 for the below example.

A screenshot of a computer

Description automatically generated

Also checkout the helpful video –

and the forum – https://powerusers.microsoft.com/t5/Microsoft-Dataverse/Calculating-age-in-CDS-entity/td-p/495528

Hope it helps..

Advertisements

How to – enable/disable the timeline highlights generated by generative AI – Dataverse / Model-drive Apps


With the Timeline highlights (Generative AI) feature, agents can quickly view the critical information (summary) about the different activities in the timelines, without the need for clicking/reading through each of the activities.

We can enable and disable it at both the form level, app level and environment level.

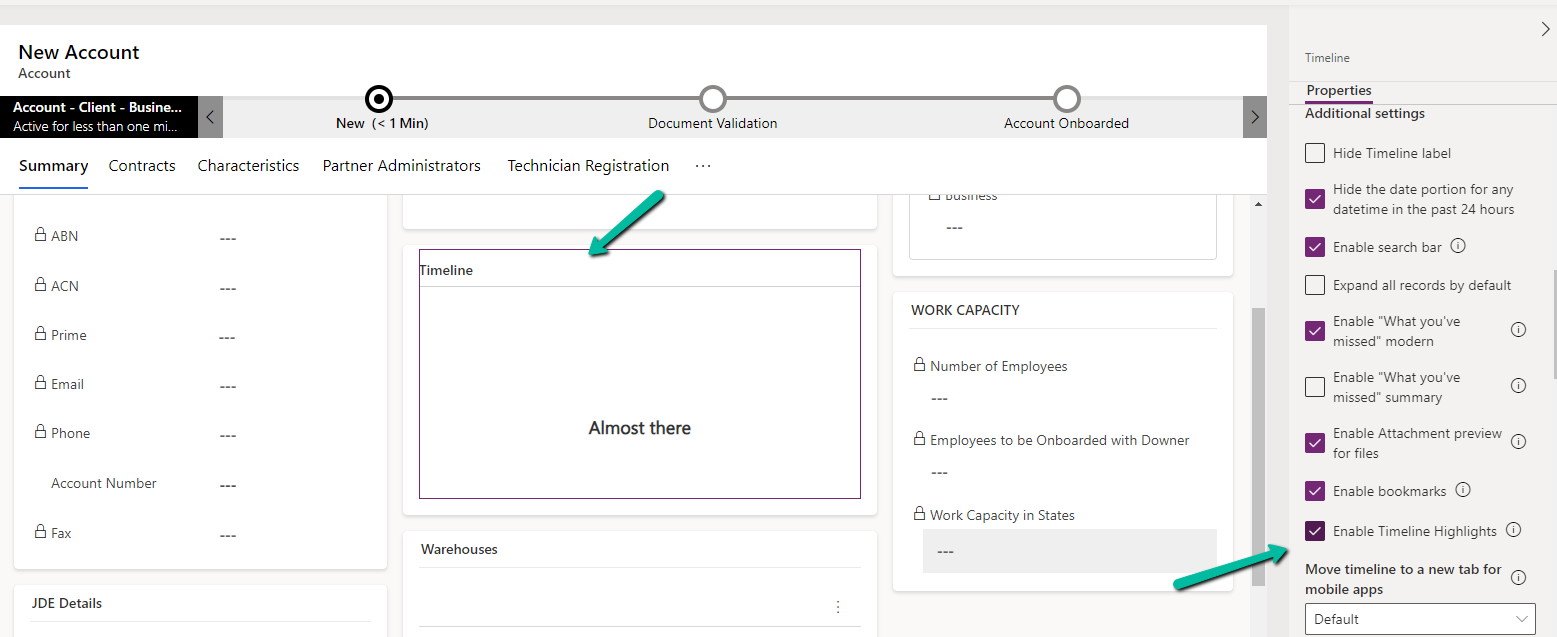
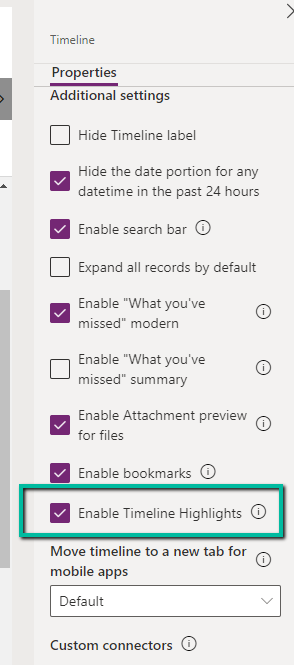
At the form level, we can check/uncheck the Enable Timeline Highlights checkbox for the timeline component.

A screenshot of a computer

Description automatically generated
A screenshot of a computer screen

Description automatically generated

At the App level, open the Settings >> Features for the corresponding App.

A screenshot of a computer

Description automatically generated

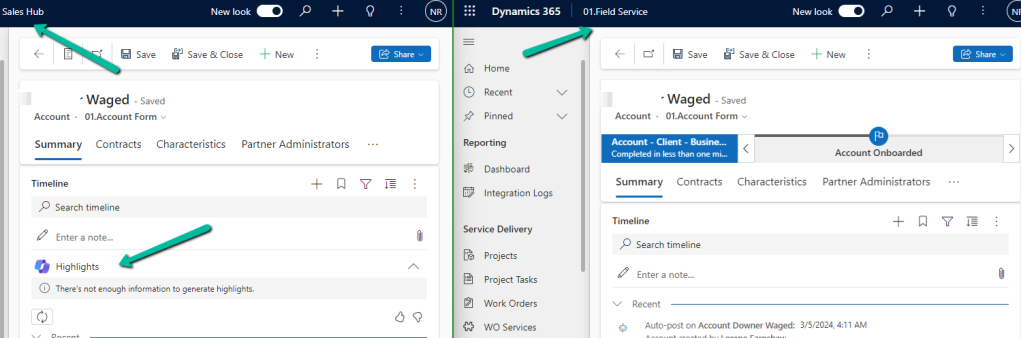
Here if we disable it at the App-level it won’t show up even if it is enabled for that particular form for that particular app.

For e.g. we see timeline highlights in the Sales Hub App but not in the Field Service app in which we had it disabled for the account form.

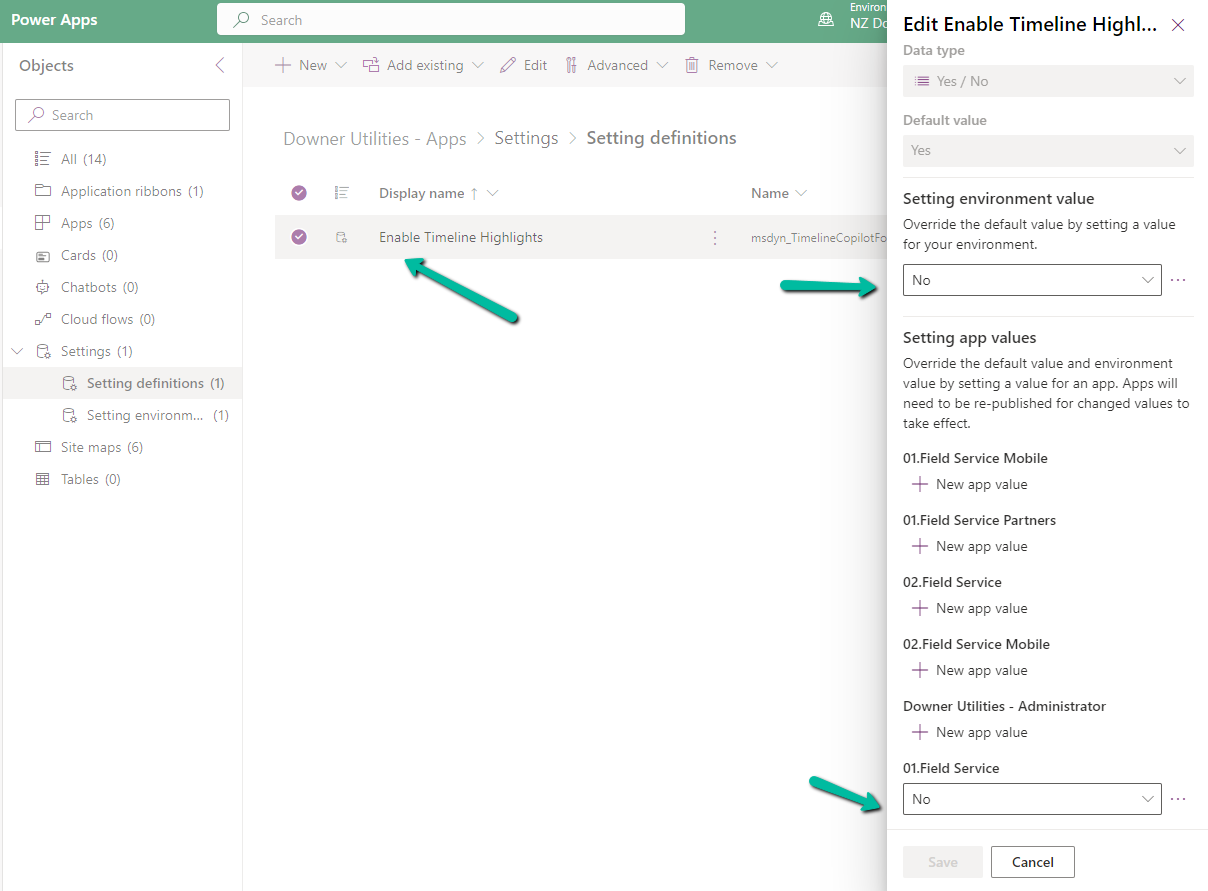
We can also specify it using the Setting Definitions and Environment values as shown below.

A screenshot of a computer

Description automatically generated

More details –

Use timeline highlights powered by generative AI

Timeline highlights help users quickly access actionable record updates

Hope it helps..
Flow Error – It hasn’t been triggered successfully in the last 28 days (Power Automate / Dataverse)


For one of our flows while testing we realized it was not getting triggered.

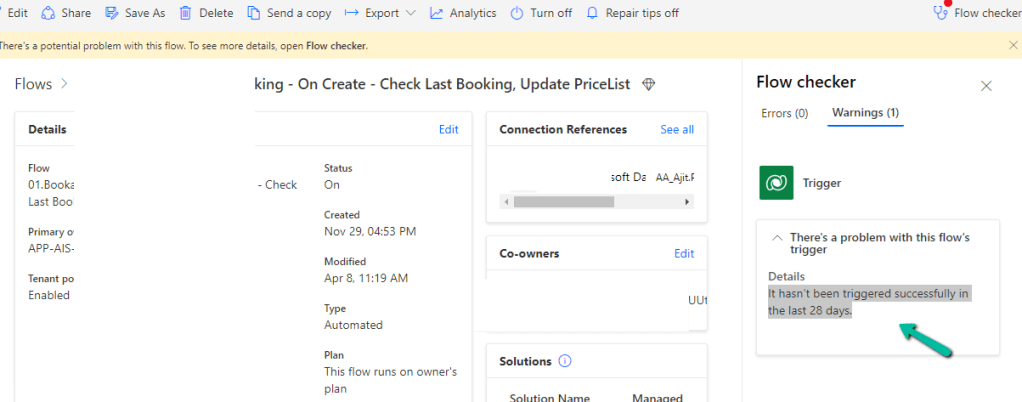
We could see it giving below error –

There’s a problem that needs to be fixed to trigger this flow – It hasn’t been triggered successfully in the last 28 days.

We tried a couple of things and I think either switching it on and off and/or updating the trigger condition and saving it temporarily seems to have fixed the issue. Either of these would have created the correct corresponding Callback registration records.

Also check – https://nishantrana.me/2023/08/08/fixed-power-automate-flow-not-getting-triggered/

https://powerusers.microsoft.com/t5/General-Power-Automate/There-s-a-problem-that-needs-to-be-fixed-to-trigger-this-flow-It/td-p/1128820

Hope it helps..

Advertisements

Portal does not load and displays “Server Error” or shows “Getting set up.. This might take a while” message -Portal Startup Issue (PowerApps Portal)


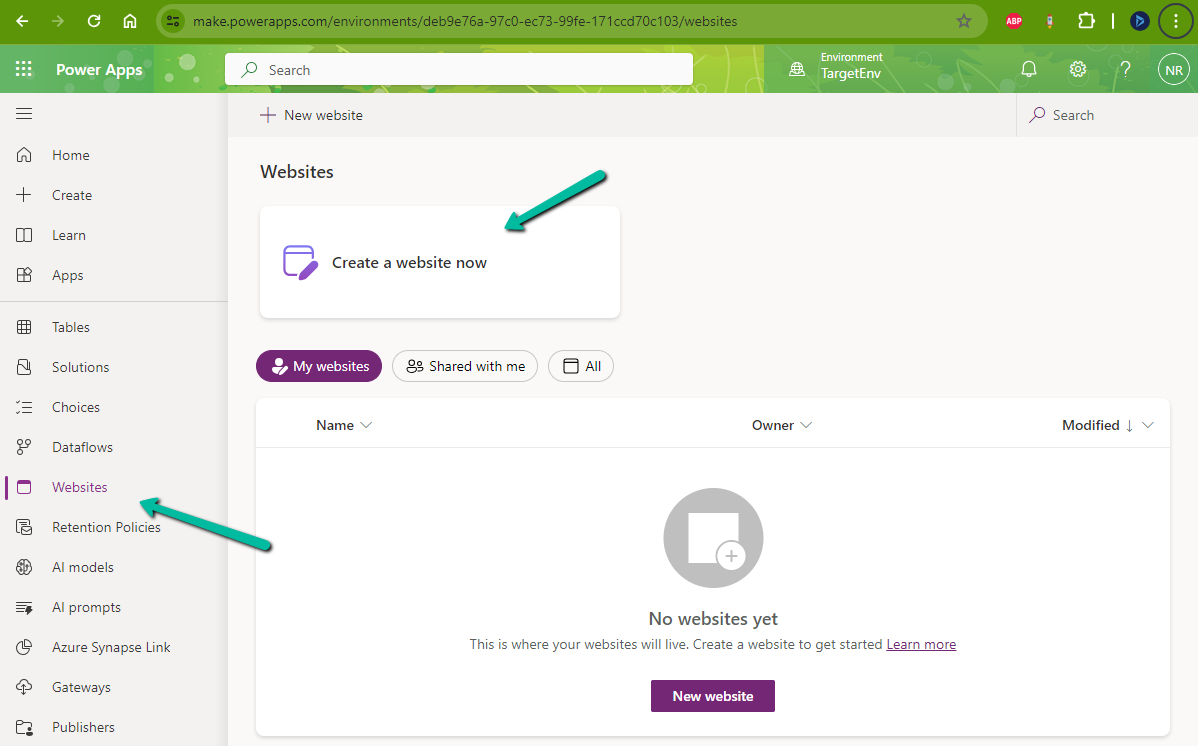
While trying to create a Website with Template – Partner Portal,

A screenshot of a computer

Description automatically generated
A screenshot of a computer

Description automatically generated

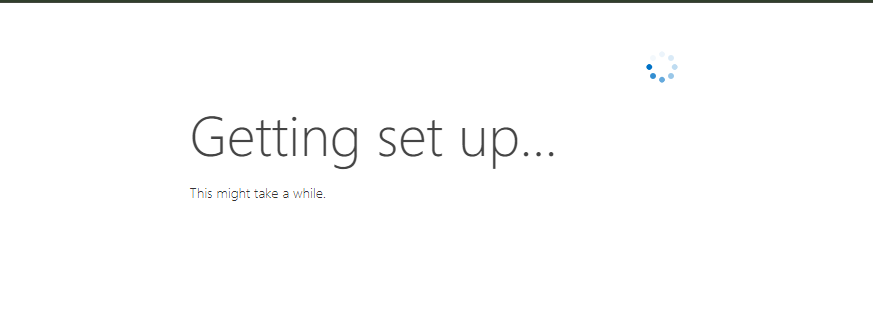
we observed the provisioning stuck at – Getting set up…

A white background with black text

Description automatically generated

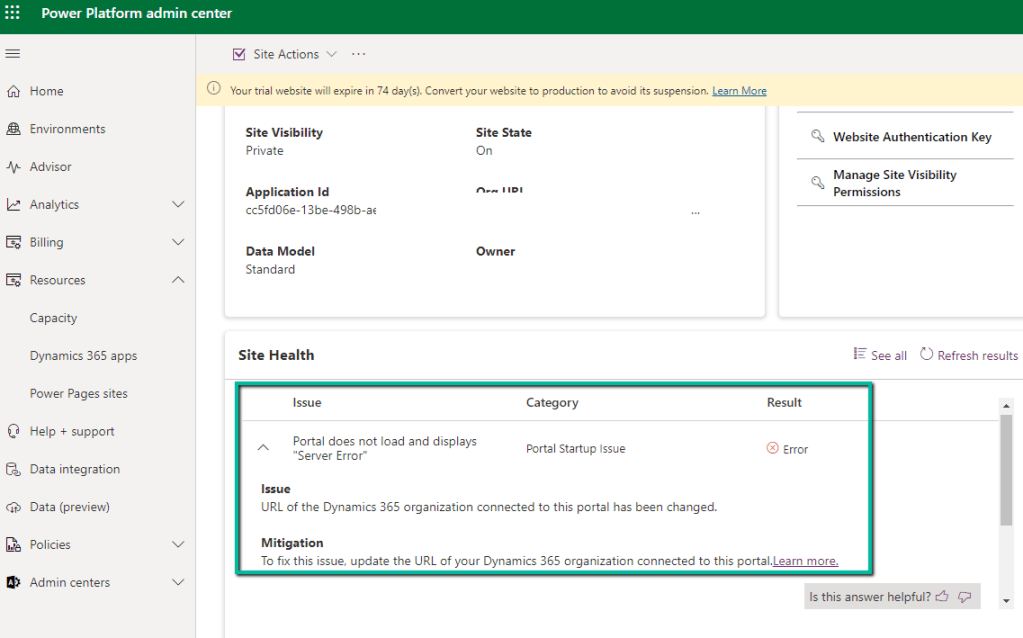
Also, it was showing the below error on checking the Site Health.

“URL of the Dynamics 365 organization connected to this portal has been changed.” Which wasn’t the case as the URL of the organization was correct.

Usually, the 1st Web Site takes time around an hour and then any new website is provisioned within 15-20 minutes (as the common / base solutions are already installed). This was the first website for that environment, however, when it was more than 24 hours, we then raised a Microsoft Support Ticket for it.

Microsoft acknowledged this as a bug and also got the fix ready, but there was a delay in deploying it because of dependencies internally.

In parallel, they also provided us with a workaround, which fixed the issue for us.

The steps are as follows –

  • Create Web Site with the Customer Self-Service Portal template.
  • Create Web Site with the Partner Portal template.

If Customer Self-Service Portal is not needed, the website can be deleted then, followed by deleting the below Managed solutions specific to Customer Self-Service.

  • CustomerPortal    (Dynamics 365 Portals – Customer Self-Service Portal)
  • MicrosoftPortalAutomate (Dynamics 365 Portals – Automate)
  • MicrosoftPortalEnhancedDMMigration  (Dynamics 365 Portals – Enhanced DM Migration)
  • PortalSitewide_RPServiceApp   (PortalSitewideRPServiceApp)

Also delete the website records created specific for Customer Self – Service Portal – https://www.youtube.com/watch?v=i9jeWaO93IM&ab_channel=EngineeredCode

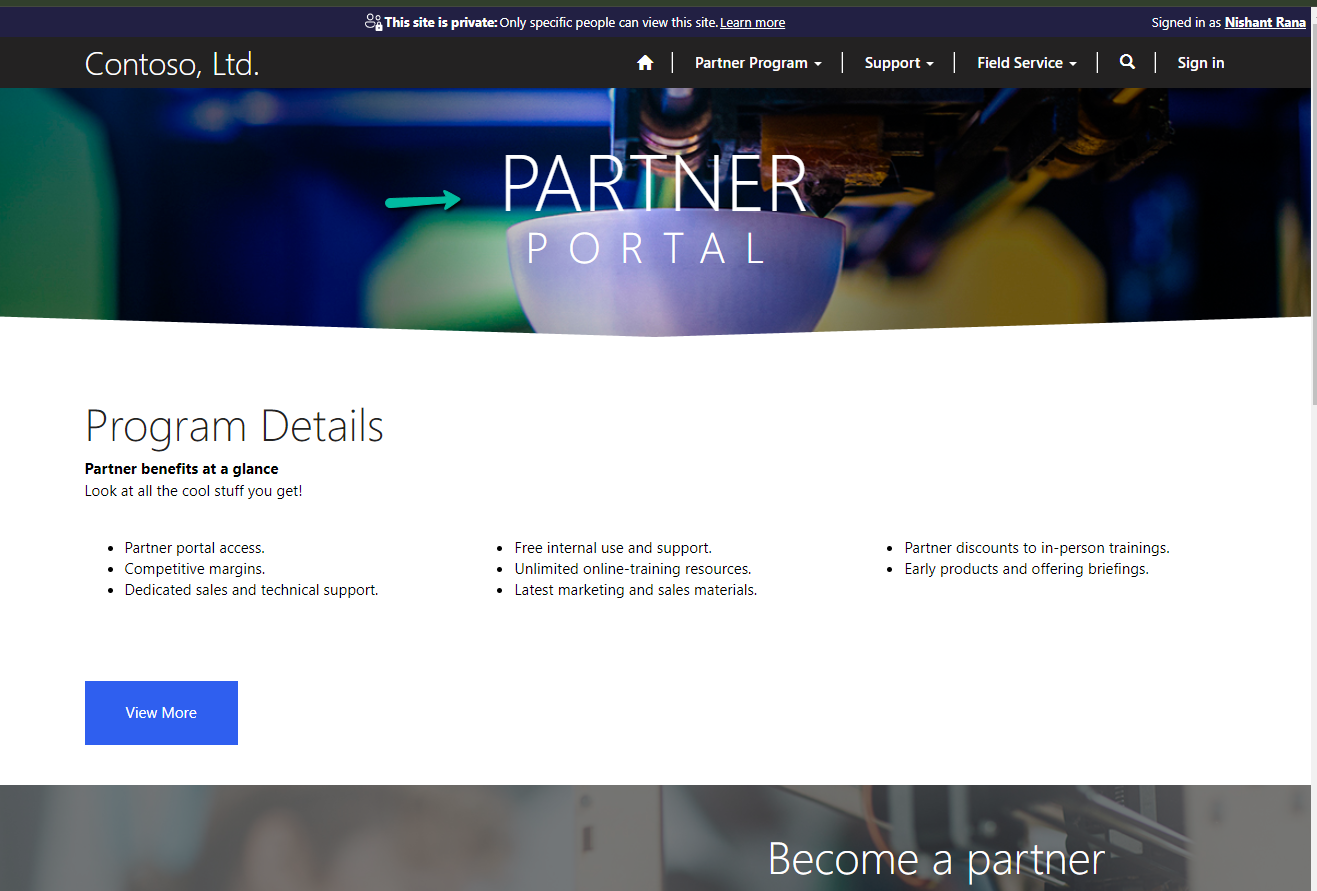
We followed the above steps and got the Website with the Partner Portal template created successfully.

A screenshot of a computer

Description automatically generated

Hope it helps..
Advertisements